There was a time when in every yard there was a snowman with a carrot for a nose. You can bring back this tradition, but make a paper snowman with your own hands and place it under the tree. A primary school child can make such a snowman only with the help of an adult, but older children can cope with this craft without much difficulty.
To work you will need:
— 4 thick white sheets of landscape format; - cardboard of any color for the stand; - colored paper; - glue; - scissors; - scotch; - thread with a needle.
First, make the base of the future snowman: three circles of different diameters in the form of a frill (or accordion).
To make the largest circle (the bottom one), take a sheet of white paper and fold it in half lengthwise. Cut along the fold.
Fold the resulting long rectangle in half, connecting the sides.
Fold in half again.
And fold it in half one last time.
Expand. You have a wide ribbon with eight sectors.
Now make an accordion, starting to fold the sheet from one edge. Fold the first section in half, turn the sheet over and bend along the already marked fold. Fold the second sector, turn the sheet over again.
When the first accordion is ready, make a second accordion from the second part of the sheet.
Bend each piece in half.
Place them back to back and glue them together, making sure that the last edge of each piece faces the same direction.
Apply glue to the concave side of the accordion and connect it along the fold. Do the same with the second side part. Secure the gluing areas with paper clips and do not remove them until the glue has dried.
Connect the sides of the accordion, making a circle, and secure them with thread and a needle, passing the thread through each edge. Tie a knot. Remove the staples.
To make the middle circle (the snowman's body), take a piece of paper and divide it horizontally into three parts. Cut it.
Set one part aside for now, and use two strips to make an accordion circle in the same way as you made a large circle.
For the third, smallest circle (snowman's head), take the remaining part of the leaf and fold the long side 1 cm.
Cut along the fold. Prepare another similar strip. Make a third circle in the shape of an accordion.
Cut a strip 1.5 cm wide and 26-28 cm long. Place the blanks in the form of a pyramid on the table, starting with a large circle and ending with a small one.
Spread the strip with glue and place it on the blanks, sticky side down, starting from the center of the small circle. Place a book on the craft and wait until the glue dries completely.
Bend the protruding part of the strip at an angle of 90°. To make the snowman stand steadily, you can make another accordion from one remaining part of the sheet and glue it to the strip (as in the photo).
To make a snowman's nose, cut out an orange square, roll it into a narrow ball and glue it together. Measure 5-5.5 cm from the top of the cone and evenly cut off the excess edge of the bag.
Make 4-5 small cuts, coat them with glue and bend them at right angles to the center, making the base of the cone.
Lubricate it with glue and glue it onto a small workpiece exactly in the center, hiding the threads. To ensure that the stand does not interfere with your work, place the snowman on the edge of the table.
When the snowman's nose is well glued, cut out two small circles from white paper. These will be the eyes. You can draw the pupils or make them out of black paper and glue them onto white circles. Lubricate them with glue and glue them on both sides of the nose, but slightly above the middle line of the circle. Cut out the mouth from red paper and glue it too. Make buttons from three identical circles cut out of paper.
Make the snowman a headdress - a “bucket”. Take any colored paper and roll it into a ball with a diameter larger than the snowman’s head. Cut the bottom of the bag enough so that it can stay on your head.
Cut the edge of the cone slightly in an arc at the front so that it does not cover your face. Bend the top of the cone back into a cap and glue it.
Cut a thin strip of the same color and glue it to both sides of the bucket.
Since the bucket is difficult to glue to the accordion circle, put it on the snowman’s head and secure it on the sides with small pieces of tape.
To make a broom, cut two long strips of cardboard, 0.5 mm wide, and glue them together so that they do not bend. Cut a strip of thin paper 12 cm long and 7 cm wide. Fold it in four (twist) and cut one edge in the form of a fringe, 1 cm short of the opposite edge.
Lubricate the entire edge with glue and screw it onto a cardboard strip. Let dry.
To make hands, roll thick black or brown paper into a thin tube and press it flat. Cut into two parts. Bend one piece down and the other up.
Determine the location of the snowman's arms on the body and glue the blanks from the wrong side with tape to the main fastening - a cardboard strip. Glue a broom to one hand. Hide the junction under a mitten (a piece of colored paper). Glue the snowman to the stand, and you can hide the accordion under pieces of cardboard.
It turned out to be such a funny snowman made of paper, and now you can make
The snowman is as recognizable a symbol of the New Year holidays as Father Frost and the Snow Maiden, so it should definitely be included in the program of children's creative activities, and the easiest way is to learn how to make a snowman out of paper
. There will be one material, but you need to remember a lot of techniques and interesting ideas in order to turn out especially well.
How to make a paper snowman with your own hands
The easiest way to make a paper snowman with your own hands
- this is, of course, an application. Paper parts connected to each other and glued to the base will be an excellent tool for very young children. Moreover, the image of a snowman can be an excellent tool in geometric appliqué, which, among other things, is intended for children to learn simple geometric shapes. Three circles, a triangle instead of a nose, a square bucket hat, all this will help you conduct a lesson that is both educational and entertaining. As for interesting examples of applications, you can see them in the photo.
To diversify the craft, you can make a fringe on the edges of the paper circles, as shown in the picture. Volumetric parts will work out great if you twist the paper into ropes, then roll them up and lay them on a sheet, securing them with glue. And the next funny snowman was made using a technique especially loved by kids - crosscutting. To work, you need to tear a white sheet into many small pieces, and then glue them onto the surface outlined with a pencil, slightly pressing the piece of paper with the tip of a pen or the back of a felt-tip pen. You can also twist each piece into a ball and stick the balls on, but then you won’t get such an interesting shaggy effect that looks very winter-like. No less beautiful applications will be obtained if you want to make a figurine using the vytynanka technique, for which all unnecessary details are cut out on a sheet with a knife, leaving only an openwork silhouette. To learn this technique, how to make a snowman out of paper, video
-the lessons will be useful to study, and do not forget that you need to work with a sharp knife carefully.
Appliqués using the ancient quilling technique always look especially skillful, when the pattern is made up of twisted colored strips. In the photo above you can see excellent examples; this technique is simultaneously reminiscent of drawing a picture and putting together a puzzle. The drawing is thought out in advance, the details are drawn, what they should be, what size, and only then they move on to twisting. In addition to appliques, as you can see, it is quite possible to create three-dimensional figures; in them you need to carefully push the already fixed strips apart with your fingers so that they turn from a flat roll into three-dimensional ones. On the question of how to make a paper snowman's nose
in this case, they also approach it in a non-standard way - they roll up a ring of orange or red paper quite tightly, and then push it forward as much as possible, pushing it from the back with a toothpick or skewer.
Using an example of how to make a paper snowman step by step
, you can see the use of the same quilling technique to make a cute three-dimensional figurine, and two snowmen come with a cute Christmas tree made in the same manner. Note that if you want, you can use strips of corrugated cardboard as the material, so the work will take less time and material, since the cardboard itself is more voluminous.
How to make a snowman out of 3D paper
We've sorted out the option, now it's time to move on to the task of how to make a snowman out of 3D paper
. For this purpose, you can use numerous schemes that are used in so-called craft crafts. This is cutting out layout patterns, which are then folded, all the necessary edges and corners are smoothed out and everything is secured with glue, resulting in a three-dimensional paper figure.
In the photo you see examples of how such crafts can look. It is worth saying that it is better to apply a drawing, for example, a face or details of clothing, to the layout at the stage of drawing and cutting, since after assembling and gluing it will be much more difficult to do this carefully, without denting the figure.
A great craft idea is to beautifully package a chocolate bar by making an additional package for it that depicts a snowman. To do this, wrap white paper around the tile and secure it at the back with a drop of hot glue so that the gluing area is invisible. On the front part you draw a face (or print it out on a piece of paper initially if you are not very good at drawing). You can even knit a hat and scarf specially, but you can also take unnecessary baby socks for this purpose.
The candies in the bag can be placed inside a white paper cylinder on which such a snowman is drawn. It is also very easy to make a snowman, which consists of three large cylinders glued together horizontally; it can be recommended for a creative task in kindergarten groups, it is so simple. What makes such crafts so convenient is that you can draw absolutely any emotions on the figurine’s face, give it recognizable features, and so on, within the limits of your artistic skill.
An excellent New Year's decoration for the Christmas tree is a three-dimensional snowman made of paper. It is beautiful, funny, the child will love making it, and then playing with it and proudly showing it off to all the guests.
The work itself is very easy, especially if you have a special composter with which you can quickly cut out many circles. But even without it there is nothing complicated, since this craft is made of paper, not cardboard, it can be folded in several layers and many circles can be cut out at once.
How to make a snowman out of paper?
First you need to draw a snowman on a sheet of white paper. That is, one lower circle is larger, and the one on top is smaller. To do this, you can use a glass: its top and bottom.
Fold the paper in half and cut out two snowmen according to your own design. Glue a thin strip of paper bent into a loop onto one of them. An even better option is a white ribbon, braid, thick thread or decorative shiny one.
Glue two snowmen into one. Cut out 18 circles from white paper, exactly the same size as the bottom of the snowman you drew.
Fold each circle in half, count and set aside half of the circles, that is 9.
Glue 9 circles together, half to half.
And then separately glue 9 more. You will get two rounded resemblances of an accordion.
Glue to the bottom of the snowman. One “accordion” in front of the circle, and the second in the back. Draw the eyes, cut out a circle from orange paper and glue on the nose. It turns out funny if you replace the paper spout with a round piece of foam rubber or a small orange pompom.
Cut a thin strip of blue paper to serve as a scarf. Tie it around the snowman's neck.
Alternatively, the scarf can be made of thick thread or suitable fabric. I found my daughter's hair tie, cut it and made a scarf. It seemed more natural and more stable to me.
The voluminous paper snowman is completely ready; it can be used to decorate not only a Christmas tree, but also your home, for example, hang it on a cabinet door or a large flower in the house. And if you do not add a loop, then all horizontal surfaces, since the snowman holds perfectly in a vertical position.
Another option for crafts for the Christmas tree is.
To make such a funny character, you can use socks that are out of fashion or that have become too small for your child. To work you will need:
- light sock;
- colored sock;
- padding polyester;
- rubber bands;
- white yarn;
- buttons;
- needle with thread.
The size of the socks depends on how big you want your snowman toy to be.
You can use small or large. Take a sock and fill the bottom 3cm with rice. White grains are not visible through the fabric. This filler will help the structure to be stable. If you don’t have rice and the sock is thick, you can pour another light grain into it, for example, millet.
Place padding polyester on top of the cereal, thus filling the sock to the heel. Make small balls on the right and left by pulling the sock with pieces of padding polyester with an elastic band - you get blanks for handles. Just above this place, in the middle, also tie the sock with an elastic band. This is a snowman's throat made from a sock. Now we need to make his head. To do this, fill part of the sock with padding polyester above the neck, round it, and tie it on top with an elastic band. Shows how to make a snowman with your own hands photo above. Looking at it, you will understand that at this stage you need to replace the elastic bands with white yarn.
Next, we make a cap for a funny character. A colorful sock will go with it. Put it on the head of this assistant of Santa Claus and tie it at the back of the head with a thin elastic band. The length of the hat can be any, cut off the excess, tie yarn instead of an elastic band. Decorate the tip of the cap as you wish by cutting its edge, or leave it as is.
Now let's start creating the face. The blue buttons will serve as the eyes, and the brown buttons will serve as the nose. Sew three black buttons onto his belly, use scraps of a sock to make a scarf with fluffy ends and hang it around the snowman’s neck.
The next craft is no less interesting - the idea will tell you how to use used plastic cups. If you have a lot of them, then you will get a big snowman. It can be placed in the office, on the street, next to any institution. It will decorate the building and attract the attention of passersby.
Snowman made from a sock
A simple way to make a snowman craft with your own hands is to sew a toy from white socks. For this you will need the following materials:
- white sock;
- cotton wool, padding polyester, rice, etc. for filling;
- strong threads;
- decorative materials: beads or pins with colored caps for making eyes and nose, buttons for clothes, colored fabric or ribbon for a scarf;
- glue or thread with a needle for attaching buttons and hats;
- scissors.
So, let’s make a Snowman with our own hands at home:
Divide the sock into 2 parts behind the heel (so that the heel remains completely on the top part). From the bottom (foot) you will get a cap, from the top - a body.
Turn the top of the sock inside out. In the heel area, tie the workpiece with thread and turn the sock inside out again. You need to make something like a small bag.
Place the filler in the bag, giving the workpiece the desired shape. Tie a hole at the top and cut off any excess thread. In the neck area, make another ligation of the thread.
Eyes and a nose can be easily created by inserting pins or gluing beads. You can also draw them with markers.
We recommend you look here
How to make a paper ball - simple step-by-step instructions with photos and diagrams on how to make a paper ball (120 photos)
- How to make a pom-pom: step-by-step description of how to sew a beautiful pom-pom from yarn with your own hands (75 photos)
How to make a notebook with your own hands - a step-by-step master class on how to make a stylish and beautiful notebook (video and 120 photos)
These snowmen can be made in different shapes and sizes. From a photo of a snowman made by yourself, you can get ideas for decorating and making such crafts. You can make several toys, creating an original New Year's composition.
DIY snowman made from plastic cups
For this craft, in addition to empty containers, you will need a stapler. For decoration you will need:
- carrot;
- colored paper;
- cardboard;
- textile.
Start by making the top ball. To do this, fasten the cups together with a stapler, placing them evenly to each other, with the bottom in one direction. Soon they themselves will take the desired circle shape. In the same way you will make the second half of the snowman. The top ball should be smaller than the bottom one.
Both of these figures are circles; they do not need to be completed to the end; the bottom must remain free so that the snowman made from plastic cups is stable.
Connect his head to his body using a stapler, and tie this place with a scarf made of corrugated paper. From it, or from ordinary colored paper, you will make buttons and eyes of the figure. For the nose, you can put a carrot in a glass, cutting a circle of small diameter in it, as shown in the photo, or make it out of cardboard. How to make a cylinder headdress can also be seen in the figure. Cut out a rectangle and a circle from cardboard. The length of the larger side of the rectangle should be equal to the diameter of the circle. You will also need a rim for the cylinder, indicated in the figure as number 3. Cut out blanks from colored or white cardboard, painting them in the desired color. You can cut the same blanks onto fabric, cut them out and paste them onto cardboard. Now all the parts need to be glued together, as shown in the figure, and you can place the cylinder on the head of the New Year's snowman you created with your own hands.
There are many ideas for such creativity. As a result of the implementation of the following, the craft will turn out to be openwork and airy. Using this technique you can also make a new lampshade.
In addition to the materials listed, you will need:
- 5 balloons of different sizes, large for the body, smaller for the head, even smaller for the arms;
- white threads;
- PVA glue;
- brush;
- for eyes 2 black buttons;
- for the nose a little orange polymer clay;
- big needle.
The exciting process begins with inflating balloons.
You can involve the whole family in this. Now you need to wrap each ball with threads. To prevent the balls from bursting, this is done carefully, without stretching the threads too much. Now generously coat the windings of the balls with PVA glue. It should cover all sections of the thread well. Hang the balls by the ropes that tie them at the top and let them dry thoroughly. To do this, it is better to leave the blanks overnight, then your morning will start very happily, since now you need to burst all the balls with a needle. After that, remove them through the holes between the threads. Now place the largest piece on the floor or some kind of base. Attach a slightly smaller ball to this large ball, and on top - a snowman’s head made of threads. Glue its handles in the same way and let the pieces dry.
The finishing touches remain. A beautiful nose is made from polymer clay or cardboard. For the latter, it is cut out in the shape of a triangle, then one side is placed on the other and the joint is glued. Sew the button eyes in place, make a headdress as in the previous case, and the thread snowman is ready.
To make your polymer clay nose strong, mold it in the shape of a carrot, and then put it in boiling water for 8-10 minutes. Then the workpiece will become hard and at first glance it will be difficult to distinguish it from a real carrot.
Craft a snowman for a competition in kindergarten
Not only at home, but also in kindergartens, rooms are actively decorated. To help teachers, children and their parents make crafts. A variety of materials are suitable for making your own snowman. First of all, paper. The easiest way for children to create their first masterpieces is applique from white and multi-colored paper and cardboard.
Small rolls of flexible cardboard will make a large figurine.
Invite the little ones to cut out the applique details. All that remains is to stick it on colored cardboard.
You can make paper magic three-dimensional. Just glue small lumps of cotton wool or felt between the main parts.
Another option for a quick, easy craft. Have your baby wrap a white paper ribbon around his finger. Glue it together with a cylinder. Make a hat and scarf from soft paper. Draw the face with paints.
Unusually simple crafts made from carved snowflakes. It turns out original and cute.
Plasticine is a material that never goes out of fashion. It is easy to model a variety of figures from plasticine.
Cotton pads are a handy material for crafts in kindergarten. All that remains is to paint on the festive tree or make a New Year's tree from plasticine.
Do you want to help your child make an original craft for kindergarten? Take medical cotton wool. Roll it into balls of different sizes. Paint them with PVA glue. Connect the head, torso, arms and legs of the snowman. Leave until completely dry. Draw a muzzle or glue eyes, nose, and mouth from small beads. Don't forget to wear a cap. Handicraft mothers can easily knit a hat for a snowman using knitting needles or crochet. But the simplest option is a small cone made of colored paper.
A larger snowman is made from thread balls. The craft is easy to make.
You will need:
- air balloons;
- a lot of threads;
- PVA glue;
- paints;
- a small piece of fabric for a scarf.
Inflate the balloons and wrap them with thread. Coat the threads well with glue. Leave until dry. Deflate the balloons and carefully remove them. Use patterned spheres to model crafts.
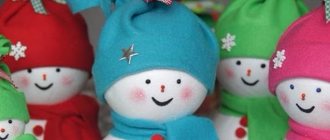
Soft snow men are a great option for decorating a Christmas tree in a kindergarten. Make magical creatures from wool pom poms. And let your products be not only white. Make several colorful things.
Does mom like to teach kids math and geometry? It's time to make a snow man from unwrappings for three-dimensional figures. The baby will definitely need your help.
Knitted snowman
You can decorate a sweater, potholder, or decorative pillow with this figurine. The patterns clearly demonstrate how such knitted snowmen are created. This one shows that you will need eight colors of thread.
Color number:
- - white;
- - yellow;
- - violet;
- - red;
- - blue;
- - sea wave;
- - blue;
- - green.
If you don't have yarn of a certain shade, you can replace it with another.
So, the character’s hat, scarf, and legs may be of a different color. This knitted snowman is made using the stockinette stitch technique. That is, on the front side you will knit with knit stitches, and on the reverse side with purl stitches.
To change the color to another, twist the thread of the desired shade with the one you finished knitting the last stitch with. Then the junction of different yarns will be invisible and done neatly.
A knitted snowman is created with knitting needles from the first loop of the bottom row. In the diagram it is the lower right corner. As you can see in the figure, 10 loops are knitted from right to left up to the number 20, and then another 7 loops with blue thread. Next, the snowman's leg begins. Twist the yellow and blue thread, knit 6 knit stitches with yellow. Also knit until the end of the row, but with blue yarn.
Turn the work inside out, knit 39 stitches using blue yarn according to the pattern, then 8 with yellow yarn and the remaining 16 with blue yarn. In the same way, focusing on the snowman knitting pattern, create the entire fabric. It consists of 92 rows, and 60 loops are used horizontally. In the diagram, cell 1 is one loop.
When you need to finish knitting a piece of a certain color, cut and tie the end of the thread so that it does not unravel. When alternating colors, your threads should be on the wrong side.
To make the design look good, after completing the work, place a knitted snowman on the front side, damp gauze or cloth on it and iron it. If your knit item uses a ribbed pattern, you do not need to iron it, otherwise it will stretch.
Snowman on the street and his nose
When choosing a nose for a snow character, you should start from what it is made of. The simplest thing is to make a snowman’s nose out of snow; here the figure itself is quite easy to sculpt, and you can use anything for the nose. As we have already noted, first of all, this is the classic option:
- Carrot.
It is not necessary to take a large and thick carrot; it can be a very small carrot, or part of a whole carrot. What should you pay attention to? Choose a healthy fruit with a rich color, preferably even, without squiggles, etc. What is important here is the part of the root vegetable that has a cone-shaped end. This allows us to compare a snowman's nose to a human's, where the tip is also smaller and thinner than its base.
- Branch.
Surely, if you look around you, you can find a dry branch under a tree. It will come in handy now if you don’t want to use carrots or simply don’t have them at hand. You can choose any branch, be it thick or thin. However, too long will be inappropriate, this is not Pinocchio, but the Snowman. Let it be a short branch; to do this, simply break the branch in the right place along a sufficient length, taking into account the fact that part of it will go into the snowball in order to stay in the canopy. If a branch has extra branches, simply break them off the branch.
- Snow.
Rarely used, because Doesn't stand out much from the general background. Make a small snowball and stick it to the top snow globe. The result will be a potato nose, but it will be more noticeable from the side of the snowman. But you can take spray paint (in a small can) and paint it red before attaching the “nose” to the “head.”
- Pebbles.
If you can find small stones, for example, near a sandbox, then feel free to use them. They can be useful for both creating the snowman's eyes and his nose. Your efforts will be noticeable, the snow is perfectly white, and the stones are dark gray.
- Marker or felt-tip pen.
The main thing is that the stationery tool is thicker. Just drag the marker where you want it. This could be a designated point at the site of the nose, or a “corner” figure, but the latter option will be less realistic. If you have absolutely no choice, leave the snowman without a nose, most likely he will not be offended!
Snowman for kindergarten made from a plastic yogurt bottle
If your beloved child was asked to make such a New Year's attribute, use available materials for this. Even a small child can make a toy using an empty Rastishka container.
A bottle snowman is easy to make; in addition to this, you will need:
- green corrugated paper;
- glue stick;
- scissors;
- soldering iron;
- a piece of red plasticine or cardboard of the same color.
Remove the label from the bottle.
Fold a rectangular sheet of paper to make a narrow strip, start wrapping it around the neck of the bottle, not forgetting to shape the neck. This way you will simultaneously close the hole and make a snowman hat with your own hands. Now use a soldering iron to make a hole in the bottle. If you are creating a craft with your child, take on this part of the work yourself. Meanwhile, let the baby roll a piece of plasticine in the shape of a snowman’s nose between his palms. Attach it to the resulting hole; you can also use a folded piece of colored paper or cardboard for the nose.
To help the paper stick better, use glue. Use it to attach sparkles or circles in the middle of the snowman's body, these are improvised buttons on his clothes. Make eyes for a new toy using colored paper. After the glue has dried, the New Year's craft for kindergarten and school is ready.
Video tutorials on how to make a fabric snowman with your own hands and other photos:
Creating a festive atmosphere is not easy, especially if the long-awaited New Year holiday is ahead. Buying a lot of decorations today is not difficult, but it’s more pleasant to create all the necessary elements of a festive mood yourself. One of these is the snowman.
The simplest thing you can make it from is paper. Let's look at the most common methods for creating it.
Instructions
- Very often a snowman's
is replaced by an ordinary carrot. It can be small or large, long or short. It is not at all necessary that the carrot for the snowman’s nose be even and smooth. A crooked, irregularly shaped carrot will look very unusual. - You can make a snowman's
at home. To do this, make a cone out of cardboard or thick paper. This will be the nose of the snow creature. The cone can be painted orange, red, yellow, and, in principle, any color. The snowman is a fairy-tale hero, so his nose can be of any color, even multi-colored. - A snowman's
nose can be made from an orange or tangerine peel, rolled into a tube and secured with tape or a thin thread. - An old unnecessary bomb, from a hat or scarf, is also perfect for the role of the nose of a cheerful snowman.
Even a delicious candy wrapped in a bright candy wrapper can replace a snowman’s- And a large beautiful button, instead of a snowman’s nose, will give the snow hero originality.
- The nose of a snowman, made in the form of an ordinary tablespoon, will look unique. Depending on the size of the snowman, the spoon can be large or small.
- A snowman with a nose in the shape of a seashell will look very modern and unusual. At the first glance at such a fairy-tale hero, you will get the impression that the snowman has recently visited the beaches of hot countries.
- a snowman’s
nose, you can make a walnut, a sausage, a green cucumber, a small ball, a piece from a children’s construction set, a straw for cocktails, and even an old dry felt-tip pen. In general, everything that a rich imagination and wild imagination suggest.
What can you make a snowman from with your own hands? Hello, needlewomen! A wonderful holiday is approaching - New Year! And each of us prepares for it in our own way.
Some people are busy preparing their outfits, others are thinking through the New Year's menu, but we all want to celebrate a wonderful event among a beautiful Christmas tree with garlands and the eternal heroes of the holiday - Father Frost, the Snow Maiden and the snowman.
Paper snowman shapes
The easiest way to make a snowman is from plain white or corrugated paper. The technology is quite simple, but the size and technique of decoration will depend on the artist himself.
There are several types of snowman models depending on its shape:
Flat. They are created from paper and decorated with tinsel, beads, seed beads, or simply coated with special paints. This is the most suitable option for decorating wall surfaces, mirrors or doors.
Volumetric. They are made by filling in the form of cotton wool or synthetic padding; an option is available from strips of corrugated paper.
Origami. The technique is especially popular, since the process of creation develops the horizons and imaginative thinking of not only adults, but also children, despite the fact that we make a paper snowman with our own hands.
Openwork welt. It is made on the basis of a pre-prepared pattern, and it can serve as a decoration not only for the New Year’s beauty, but also for your table.
There are a considerable number of methods and ideas for creating paper snowmen, but each of them requires imagination. The completed figure requires decoration, and you can safely use various materials: beads, shiny paper, paints, pencils, felt-tip pens, fur, fabrics of various textures, ribbons and even yarn.
A master class on how to make a snowman out of paper can be an excellent assistant in creating a real work of art.
Paper snowman with nose
It's hard enough to come up with variety on paper. Even in the matter of drawing, we do not think twice about depicting the nose as an orange cone. Thus, subconsciously, the nose of a paper snowman always remains a carrot for us! How then should you draw a nose for a paper snowman?
- Paper nose. To do this you will need to make a cone out of paper. You can use colored paper or paint a piece of white paper orange. Roll a “ball” out of a small piece of paper and glue it along the edge so that it holds. To work with paper, use simple PVA glue. To glue the nose to the paper snowman, slightly bend the edges of the “nose” along the diameter and glue with glue. To prevent the figure’s nose from becoming crooked, the bent edges should be cut, this will make the procedure easier.
- Illusion - a painted nose. The easiest way for children is to draw a nose for a snowman, although it will look very unnatural. If you want more realism, take a couple of drawing lessons. Thanks to this, you will learn how to draw a “dot” so that it creates the effect of volume and convexity.
- Button. Moreover, it can be either red or black. In fact, it will only symbolically appear as a nose, because... It doesn’t give any special volume and, moreover, it doesn’t in any way resemble a real spout or a carrot.
Much depends on how exactly you will make your paper snowman:
- Draw on paper, i.e. draw,
- In quilling style,
- In origami style,
- In 3D volume,
- Cut out a flat pendant shape,
- In the style of a garland - from glued cylinders.
Use your imagination to make it look most harmonious on your snowman. It can be a small or even flat nose, a voluminous “potato” without a cone-shaped point, a simple and modest dot drawn with a felt-tip pen, a light figure made of foam rubber or fiber, etc. However, keep in mind that the materials of the toy or decoration should have something in common with each other! For this reason, when creating a paper snowman’s nose from another material, try to use this material in the character’s accessories, for example, make a scarf out of it.
Snowman made of corrugated paper
One option could be a snowman made of corrugated paper. The technique is simple and does not take much time. Let's look at step-by-step instructions on how to make a snowman.
First of all, you need to prepare strips of prepared material measuring 15 by 17. The paper is carefully stretched and on one side the familiar delicacy “Chupa Chups” is wrapped in it. It is better if the candy is packed in two layers.
The long sides are fixed with glue. On the other side you need to wrap a smaller but round candy, which will serve as the snowman's head. The edges are also glued together at the top of the craft.
It is better to make hands for a snowman from wire, which is also recommended to be wrapped in paper. You can use a satin ribbon for a scarf, and the width of the decoration depends entirely on your desire.
Beads or buttons of the appropriate size are perfect for decorating the body. It is better to make the nose out of thick cardboard; it can be covered with tape or decorated with paints. All elements are attached to the figure using PVA glue as shown in the photo of a paper snowman.
What to make an outdoor snowman from
Do you want to decorate the street? An excellent solution to place a large snowman near the house. But what to make a craft from? Start with bottles. Fill used plastic bottles with cotton wool and glue buttons on the nose. Be sure to wear a scarf to prevent the snowman from catching a cold.
Larger figures will require larger bottles. Paint them with white paint. Gradually glue one to another.
Polyurethane foam is an unusual material for the figure of a fairy-tale creature. Such a snowman will definitely not melt with the arrival of spring. Make a frame out of stiff wire. Cover it with foam. Remember to use long rubber gloves.
Great news for mechanics and car mechanics. Now there is a place to use used tires. Decorate your garage, street or veranda near your home with rubber snowmen.
Snowman made from children's hands
An equally creative option could be a snowman made from figurines of children’s hands. We prepare in advance the figures of palms and three circles (contours) of the future craft. Glue the elements from the center to the outside (it’s better if they are different colors).
A hat and scarf can be made from a suitable material and glued to the workpiece. The buttons on the snowman's body can be replaced with multi-colored paper snowflakes.
Making a paper snowman can be done using various techniques. They will fit perfectly into any interior and will help you create a real atmosphere of magic and celebration, while you can use diagrams and templates to create snowmen.
Even the smallest family members can take part in the manufacturing process. In addition, this is not an expensive activity at all, which can unite the whole family behind one useful task.
