Print Thanks, great lesson +62
The boys are ready to sculpt all kinds of tanks from plasticine every day, because they are interested in this kind of technology.
And girls, most likely, can be persuaded to make such a craft only on the occasion of congratulating their father or grandfather on February 23 or May 9. In any case, working with plasticine is always interesting and useful. Regardless of whether you need a plasticine craft for a game or for congratulations, or maybe for a school exhibition, the theme of which is dedicated to Defender of the Fatherland Day, you can safely start sculpting a tank from plasticine. This lesson will tell you how to do this. Here is a diagram of the modeling of the T-44 military unit. Other lessons on tanks:
Water temperature and its effect on the dough
It is necessary to take into account the effect of water temperature on dough particles. The best swelling of flour and dissolution of crystalline raw materials occurs at elevated temperatures. The higher the dough temperature, the faster the process of dehydration of sugars occurs, and the frequency of interaction between protein, starch and water molecules increases.
The plasticity of salt dough can be achieved at a raw material temperature of 18 to 25 ° C. Elastic-plastic dough is obtained as a result of complete swelling of flour proteins at a water temperature of 38-40°C. To create a homogeneous mass, the mixing process is important. The better the quality of flour and the higher the gluten content, the longer the kneading.
When mixing flour, water and salt into a homogeneous mass, the process of dissolution of crystalline raw materials and swelling of flour colloids is accelerated. Stirring accelerates the process of gluten formation in the dough, so kneading the dough for a long time until a plastic and elastic mass is obtained.
Step-by-step instructions for preparing the dough
If you have flour, salt and water, you can create a variety of crafts from salt dough with your own hands. Master classes will help you choose a craft of any complexity. Making play dough requires simple, inexpensive ingredients. There are various recipes for salted plastic mass, which can be used to prepare dough with different properties.
Different types of dough allow you to sculpt simple and complex elements
, small details or real masterpieces. When adding different ingredients, the properties of the plastic dough may change.
Thick dough
For a dense dough you will need:
- 200 g flour;
- 200 g fine salt;
- 125 ml cold water.
The density of salt is higher than the density of flour, therefore, salt takes up 2 times less volume than flour. When creating dough without using scales, take, for example, 1 tbsp salt and 2 tbsp flour.
Recipe:
- Mix fine salt and flour.
- Gradually pour water into the dry mass.
- Knead the dough until a homogeneous dense mass is formed.
This type of salt dough is suitable for sculpting simple figures without small details. This dough is used for activities with young children who do not know how to create complex crafts. Geometric shapes, simple details, for example, a snowman, fish, heart can be easily created with a child from dense dough.
Second option:
- 200 g flour;
- 400 g salt;
- 125 ml cold water.
Also combine the ingredients and knead the dough. The modeling mass should be elastic, plastic and should not stick to your hands. Strong dough is used for sculpting large figures.
With the help of dense dough, you can sculpt and at the same time study figures and shapes with your child, and by adding dyes to the mass, you can get acquainted with the color scheme.
Medium density dough
Ingredients:
- flour 400 g;
- salt 200 g;
- warm water 125 ml;
- PVA glue 50 ml.
Performance:
- Using a mixer, combine flour with warm water and salt.
- Add glue to the resulting mass.
- Knead the dough until smooth.
- Roll into a ball, cover with plastic and place in the refrigerator.
Second version of plastic salt dough:
- flour 200 g;
- salt 200 g;
- water 125 ml;
- starch 1 tbsp.
Performance:
From medium-density salted dough you can create crafts with small details, for example, flowers, animal figures, cartoon characters. You can make crafts for a themed exhibition or decor for a New Year tree. Products will become brighter if you add dye, liquid or powder, to the dough. Playing and sculpting with colored dough is much more interesting for children.
Soft dough
Required Products:
- flour 200 g;
- salt 150 g;
- warm water 50 ml;
- vegetable oil 5 tbsp.
Performance:
- Dissolve salt in warm water.
- Add remaining ingredients.
- Knead into a homogeneous dough.
Soft dough without salt:
- flour 200 g;
- water 200 ml;
- vegetable oil 1 tbsp.
Performance:
- Add water and oil to the flour in small portions.
- Knead the resulting dough thoroughly.
A soft mass without salt is used for activities with children aged one year and older.
The dough can be used to make large and small shapes for various crafts. For salt dough, it is better to choose salt consisting of small particles; iodized salt is not suitable, its large particles do not dissolve well, and the mass turns out to be heterogeneous. Store the dough in a bag or container. When the moisture evaporates, the dough becomes covered with a crust, which can spoil the appearance of the product when creating crafts.
The main principles of sculpting three-dimensional figures
You can make a variety of crafts from salt dough with your own hands; master classes will help you learn how to sculpt correctly and come up with your own masterpiece.
Basic principles of sculpting:
- Roll out the prepared salt dough to the required thickness.
- Cut out the necessary shapes.
- Depending on what kind of craft you need to make, connect the parts. To make the parts fit together better, you can moisten them with water.
- The resulting craft can be decorated with beads, rhinestones, sequins, and painted in the desired color.
- You can dry the craft in the oven or let the product dry on its own.
- After drying the product, it can be painted or varnished.
Salt dough recipe for crafts - video
Red Star
One of the main symbols of victory is the red star of the Soviet army. Compositions with it are very easy to make from salt dough; even children 2–3 years old can cope with this task. All you need:
- Flour and fine salt (2:1).
- Vegetable oil (optional).
- Paints (gouache or acrylic).
- Brush.
- Rolling pin.
The process itself is extremely simple:
Eternal flame
- Cut out 2-3 stars of different sizes from the rolled out dough, place them on top of each other, making a depression in the last one.
- Roll several thin sausages, bend them slightly and secure them in the recess.
- Dry the craft in the oven and then paint it. It is advisable to cover the base with silver or golden paint, and the flames with yellow, orange, red.
Dough medals
If you dry such a blank in the air, and not in the oven, then before gluing the sausage to the round base, you can place a cut out circle of paper with a pre-printed congratulation or thematic image between them.
Therefore, 4 new master classes on making plasticine will certainly be useful for you when working with children. Using these step-by-step descriptions with photographs, even a child can do the following:
Modeling master classes with children
Heart sculpting for children
Making a heart-shaped craft from salt dough with your own hands is quite simple;
the master class describes the sequence of actions:
Making a snowman for children
Performance:
The snowman is suitable for a New Year themed craft for kindergarten.
Modeling a cheerful man for children
Using this principle, you can sculpt a person or an animal:
This will make a pretty fun souvenir or toy.
This craft can be given as a gift or presented at an exhibition.
Modeling a butterfly for children
Performance:
How to decorate a craft
For handmade salt dough crafts, you can use various products that are available in every home; you can see this in the example of master classes. Modeling from salt dough is one of the most accessible and inexpensive types of creativity.
Any items are suitable for decorating crafts made from salt dough:
- beads, beads, rhinestones, buttons, cereals, grains, they need to be pressed into the dough or glued;
- coffee beans;
- matches and skewers;
- small figures and details made of salt mass;
- threads, they can be used to wrap the product;
- tree branches.
Put everything you need to create crafts in a box. Do not throw away broken small parts from toys and jewelry; all this will be useful for creating crafts.
Drying crafts
DIY salt dough crafts should have a finished look; the master class will help you learn how to dry the finished product.
There are two ways to dry the product:
- Natural drying at room temperature
. The time it takes to dry depends on the thickness of the product; the thinner the craft, the faster it will dry. You need to dry the craft in a dry place. When drying naturally, indentations appear at the point where the craft comes into contact with the surface of the table; therefore, with this method of drying, the product can be periodically turned over. It takes one day of drying to dry a 1 mm thick craft. It is better to place the product in a lighted place. - Drying in the oven
. It is difficult to accurately determine the drying time of a craft in the oven; much depends on the individual characteristics of the equipment and the selected mode. For example, in some types of ovens, drying a product may take 1 hour at 100 degrees. Drying a product in an electric oven takes 2 times longer than in a gas stove oven. Dry the craft for 30 minutes, then let cool for about 3 hours. If the product is partially dry, send it to dry for another 30 minutes, and so on until the craft is completely dry.
Coloring salt dough figures
The craft can be painted completely or individual parts of the product can be painted. Acrylic paints are suitable for this, as they do not spread after drying. Mix watercolor paints with a small amount of water; after drying, they can be sealed with a varnish coating. This will add shine to the product. You can use clear polish, glitter polish, or another one.
Nail polish is also suitable for painting crafts.
. When painting with gouache, you need to mix the paint with PVA glue. You can apply a clear varnish to the finished craft to add shine. Salt dough can be easily colored by adding food coloring.
Make a well in a piece of dough, add liquid coloring, then knead the dough until the color is uniform. When using powder dyes, first dissolve it in a drop of vegetable oil. You can paint a dried and completely cooled product.
Colored salt dough is not inferior in quality to modeling dough that you can buy in a store.
Making crafts from salt dough with your own hands will help you pass the time in an interesting way, and master classes will tell you what kind of figure to make from the dough. During such activities you can learn, develop imagination, motor skills, thinking, but the most valuable thing is the time spent with the child.
Children love to sculpt and tinker with dough; the craft may not work out right away, but practicing with salt dough will help improve their skills and achieve good results.
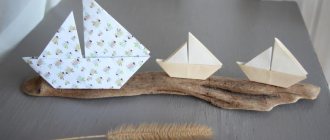
Children's crafts for May 9 made from paper
This is a universal material; paper crafts for May 9 can be created by children of any age at home, in kindergarten or elementary school. It is better to master more complex techniques such as origami or quilling together with adults, using ready-made templates, diagrams, and master classes.
From paper you can make:
When making three-dimensional compositions, it is better to use ready-made templates that are printed in advance, and the kids just have to cut out the shape, fold it, glue it, and paint it.
It is best to use colored paper, double-sided, corrugated, designer cardboard, and ordinary napkins. Even old matchboxes and toilet paper rolls will come in handy to make tanks or airplanes.
Paper crafts are bright, can be stored for a long time, and do not require large expenses or special skills.
This method of working with paper is suitable not only for making holiday panels or voluminous cards. You can make absolutely any figures, for example, an airplane or a tank. To do the latter, you need:
Children's crafts for May 9 have the right to be simple, unpretentious, but the soul is put into them, and this is already worth a lot. To make figures of a soldier and a nurse, you will need the remaining cardboard rolls from toilet paper. These figures can be used to complement the festive compositions used to decorate a group in a kindergarten.
Children over 3 years old can handle the work. The process itself is very simple:
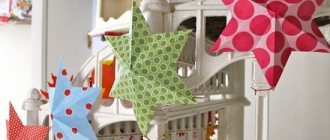
Application "Festive fireworks"
Children of almost any age can master the voluminous application. The finished painting with fireworks can be placed in a cardboard frame and presented to veterans along with congratulations.
For production you need:
- Colored corrugated paper.
- Colored paper and cardboard.
- PVA glue.
- Scissors, pencil, ruler, stapler.
The process itself will not cause difficulties:
The more colors of crepe paper used, the brighter the fireworks. The size of the circles can also be changed, giving the composition volume and perspective.
Salt salute
- Fireworks lights can be made not from paper, but by drawing outlines using a glue stick.
- Immediately sprinkle the picture with regular salt, wait for the glue to dry and shake off the remaining residue.
- Drop paints diluted in water onto the salt (using a brush), giving it different shades.
Paper carnations
Artificial flowers will preserve the memory of the holiday for a long time; you can use them to decorate cards, compositions, and bouquets. The symbol of May 9 is a red carnation. It's quite easy to do, you'll need:
- Red and green corrugated paper.
- Floral wire (green).
- Scissors and PVA glue.
The process itself is as follows:
- Cut the red paper into equal rectangles - 6 per flower. Place the blanks for each in a pile.
- Collect a stack of paper with an accordion (short side), wrapping them in the middle with wire, without overtightening.
- On each side of the paper accordion, cut off the corners to create pointed edges.
- Lift each layer of petals one by one, giving them volume. Fluff all the flowers in this way.
- Cut out leaves from green paper and glue them to a wire stem.
Not only red, but also pink carnations, as well as white flowers, the edges of the petals painted with a blue, pink or yellow felt-tip pen, look impressive. In the latter case, carnation petals can be made from a regular napkin. If you don’t have floral wire, you can replace it with regular wire by covering it with green paper.
Dove - a symbol of peace
Volumetric paper doves are a symbol of peace.
Video: DIY salt dough crafts. Master classes
How to make a flower from salt dough, watch the video:
Find out how to make crafts from dough in the video:
Soon May 9th - Victory Day
.
It is important for me to develop a sense of healthy patriotism in my child. So that he remembers the feat of the people and knows at what cost the victory
.
We read stories about the war, and every year on May 9th we watch the film “Officers” with the whole family. There is such a profession - to defend the Motherland
.
When my boy went to kindergarten, he always brought home crafts for this holiday. Now we are in first grade, but I don’t want to interrupt this tradition. Therefore, we decided to prepare a military souvenir ourselves. This will be the T-34 victory tank made from salt dough
.
We will need 1 cup of flour, ? cups salt, 1 tbsp. a spoonful of vegetable oil and a little water. The dough should be thick and plastic.
Then we sculpt the product itself - the tank. You can help the child a little, tell him in what order and what to do. But, in principle, children can easily cope on their own.
Dry in an open oven at a temperature of 75 degrees.
When the dried product has cooled, it needs to be covered with PVA glue so that the paint lies evenly.
The most interesting thing remains: decorating our tank. Here you can give free rein to your imagination. Usually this is the moment that children enjoy the most. We used gamut gouache paints, but others will work.
And the final touch remains. When the paint has dried, coat the tank with my mother's colorless nail polish or spray hairspray in several layers.
Our tank is ready! Now we can congratulate you on Victory Day
beloved great-grandfather! We will definitely gather at a common table with the whole family. Let's bake a cake and give flowers. In conclusion, I want to say: dear readers of this site, I congratulate you with all my heart on the great holiday of the Great Victory. Take care of the veterans, and let our children know to whom we should thank, and thanks to whom we have a peaceful sky above our heads. We must not forget the war; when you forget a war, a new one begins. This is what history textbooks say, and so will we—fathers and mothers, grandchildren and great-grandchildren.
0 82 825
Modeling is one of the most useful activities for kids. With its help, not only fine motor skills of the hands develop, but also perseverance, creative thinking and coordination of movements are developed.
One of the best materials for modeling with your child is salt dough. It is absolutely safe, does not contain harmful additives and is easy to use. DIY salt dough crafts will become wonderful souvenirs for your relatives and friends.
Plasticine tank
A tank is a powerful military weapon. The bulky structure looks terrifying and causes great destruction, like everything else associated with war. However, a tank is a defender if it operates on the side of its soldiers. It is difficult to imagine how difficult it would have been for the soldiers of the Red Army to win back in 1945 if the famous tanks had not been in the arsenal of the brave military. As a result of the selfless work of ordinary soldiers and people working in the rear, we won victory and today we live in peace.
The winning tanks that have survived from those times can be found on pedestals in many cities; they represent peace, the strength of the army, and victory over the fascist invaders. We will also make a small figurine of a tank from plasticine, and it will be an excellent craft for Victory Day.
To create a children's craft, you need to prepare:
- green, brown, black and gray colors of plasticine from the set;
- pen rod;
- stack;
- a long thin stick skewer.
How to make a tank from plasticine - step-by-step instructions
- To create a large combat vehicle, you need to make your own mixture of colors of green, brown, black and others. This will be an ideal option for simulating the nondescript color of a tank. Take soft pieces and mix them well, you don’t need to achieve homogeneity.
- Make a center block. Start pressing soft plasticine onto a hard surface with your palm, turning it over on all sides. You need to get a blank that resembles a matchbox. Press down the narrower side on one side with your finger, simulating a tilt. Smooth the surface of the plasticine with your fingers.
- Prepare another piece of clay to create the top as well as the side track structures.
- Create small black wheels that resemble activated carbon tablets. Make long gray ribbons, as well as flat bars for the wings, from the plasticine mixture obtained earlier. You can use not only your hands, but also your stack.
- Press 6 (or so) wheels onto the side of the case. Push the central part of each of them with a rod. Glue gray ribbons to the sides and bottom. Make notches with a stack. The resulting 2 running gears should be symmetrically located on both sides of the body.
- Mask the wheels with prepared wings on top. Lower the front of the pieces down and round them.
- Continue working on creating the tank turret and additional parts. The tank's turret may be shaped like half a walnut. Also make cylinders and thin bars for additional details.
- At the front of the turret, fix the long barrel. To do this, use a thin skewer and a small portion of plasticine. Glue the lid, machine and additional small parts on top.
- Assemble the structure. Place a turret on top, and add special parts on the sides and back in the form of fuel tanks and boxes of ammunition.
- A formidable powerful plasticine tank is ready. We received the craft by May 9th with our own hands. Now you can place your tank on a makeshift pedestal.
Universal recipes
You can find a great variety of salt dough recipes.
Each master adds his own additives to them, selecting the desired consistency. The main ingredients for kneading dough are salt, flour and water. Depending on its purpose, its thickness may vary:
- dense dough - for large parts and creating massive panels;
- universal dough of medium consistency - it is convenient to make small pictures and figures from it;
- soft dough - tender and pliable, it is suitable for small elements, exquisite flowers and figurines.
Some needlewomen measure ingredients in grams, others prefer to use proportions in parts.
Thick dough
To work you will need:
- wheat flour - 1 part;
- table salt - 1 part;
- water - 0.7 parts.
That is, to knead this type of dough you need to take one identical measure (glass, cup, tablespoon) of salt and flour and 0.7 of the same measure of water.
Combine the dry ingredients in a deep bowl and add cold water little by little. The dough should be homogeneous and very dense. There will be grains of salt in it - this is normal, don’t worry. Depending on the humidity and quality of the flour and salt, you may need a little more or less water. Therefore, you can’t pour it into the dough all at once.
Medium consistency dough (all-purpose)
To work you will need:
- wheat flour - 1 part;
- water - 1 part;
- table salt - ½ part;
- finely ground salt (extra) - ½ part.
By replacing half of the coarse salt with fine salt, this type of dough becomes more plastic and pliable. It is convenient even for a child to sculpt from such an obedient mass. But this dough is also not suitable for the smallest details and realistic crafts.
Soft dough
To work you will need:
- wheat flour - 1 part;
- hot water - 1/4 part;
- finely ground salt (extra) - 1 part;
- PVA glue - ¾ parts.
Combine salt and flour, then add thick PVA glue and mix.
Add hot water little by little and knead into a soft dough. It needs to be wrapped in cling film, allowed to rest and cool. This dough is ideal for complex work. It holds its shape perfectly, preserving the prints and texture created on it. Its quality directly depends on the quality of the chosen glue.
Figures made from salt dough with glue are particularly durable.
They will delight their owner for many years.
- If you plan to color finished products, it is better to use wheat flour, although you can also use rye flour for salt dough.
- You cannot use iodized salt - the finished figures may crack when drying.
- The dough can be tinted while kneading. For this, food coloring or watercolors are used.
- The finished dough must be wrapped in cling film or a plastic bag to prevent it from drying out.
- A failed dough can be revived. If the dough is too liquid, you need to add a little more flour and knead again; if the dough is too tight, moisten it with water and knead, achieving the desired consistency.
- Do not add fat or hand cream to the dough from which you plan to paint the products - the paint will apply unevenly.
- The finished dough should be stored in the refrigerator for no more than 2 days. It loses its qualities and it will be inconvenient to work with it.
- It is best to sculpt volumetric products on wire or cardboard frames so that they do not fall apart.
- Crafts can be dried naturally, leaving them for a couple of days, baked in a warm oven, or left next to the radiator. It is strictly not recommended to place figurines on the battery itself to avoid cracking.
- It is best to paint crafts with acrylic paint or gouache. Watercolors should not be used: there is a risk of getting wet and ruining the product.
- The junction of the parts must be moistened with water using a brush. This way they will connect firmly and quickly.
- The finished souvenir can be coated with clear nail polish or acrylic varnish. This will protect it from moisture and the paint from fading.
Armed with new knowledge, try to put it into practice.
Modeling a magnet cat
To make a cat magnet with your own hands, you will need salt dough, paints, glue, cardboard and a flat magnet.
All parts should be voluminous, but slightly flattened. It will be easier if you start from the base and attach individual pieces to it.
When the figurine is ready and painted, you can cover it with colorless varnish when the dye dries.
Hello, dear admirers and dear guests of the Casket website! I would like to offer you a master class on making a red cat from a light bulb and salt dough.
I advise you to involve your child in this work, since modeling develops imagination and fine motor skills, which in turn has a positive effect on speech development. You can make a kitten out of a small light bulb, and a child can make a mother cat or father cat out of a big one. Also, don’t give up modeling if your child is under three years old; let him roll the dough with his hands and sculpt what he comes up with. Necessary materials: flour, extra salt, dyes, water, light bulb, sewing thread, knitting thread, beads.
In order to knead the dough for sculpting a red cat, you need to mix 4 tbsp. spoons of salt, 4 tbsp. spoons of flour, 2 tbsp. spoons of water and orange dye diluted with a small amount of water.
The dough should be stiff and not stick to your hands.
Divide the dough into three almost equal parts. We take one of them and roll it out to wrap the light bulb.
We distribute the dough with our hands over the light bulb up to the base, cut off the excess, this is the future body of our cat.
Take the second part of the dough and form it into a ball. Using your thumb, we make a depression in the ball; this is the future head.
We put the ball on the base and connect the head and body, smoothing the resulting seam with a finger dipped in water.
If your child wants to sculpt another animal, then you need to choose at this stage. From the resulting blank you can form any animal, such as a bear or a mouse. Let's start shaping the cat's face. To do this, we tear off two small pieces from the third part of the dough and form triangles from them. Using a stick, make indentations in the triangles.
We attach the ears to the cat’s head, having previously lubricated the gluing areas with water.
In order to make a mustache for a cat, you need to take sewing threads; in this master class, threads are blue and pink. Place them together several times. Roll two small balls. Use a kebab stick or toothpick to make holes in the balls. We thread the thread through the hole.
We attach balls with mustaches to the muzzle and poke holes, as if mustaches are growing out of them. Using water, glue a burgundy bead onto the nose. Using a kebab skewer, we make a depression in place of the cat’s eyes, and glue two small black beads into them.
To make the cat's front paws, roll two sausages. We attach them to the body. Use a toothpick to imitate claws.
For the hind legs we sculpt figures resembling rounded crescents.
It is necessary to make a tail. To do this, roll the sausage into a wavy shape and glue it to the back of the cat.
Let's start decorating the cat. Knead the dough from 1 tbsp. spoons of salt, 1 tbsp. spoons of flour and water. Let's paint a small amount of dough red to make a bow tie and tongue for our cat. Make a fish skeleton from white dough. To do this, we will sculpt a triangle (the head of the skeleton) and two flattened rectangles. We will stick one rectangle to the head of the skeleton, divide the second into equal parts and place them under the first rectangle.
Master class “Hospitable cat” using the salt dough modeling technique.
Author: Nazarova Tatyana Nikolaevna.
Additional education teacher at the House of Childhood and Youth in Millerovo. The master class is intended for additional education teachers, technology teachers, primary school students, and primary school teachers. Purpose: souvenir, gift. Target:
make a souvenir from salt dough.
Objectives: Educational:
master the technique of working with salt dough;
Educational:
encourage the desire to give gifts, make surprises.
Developmental:
instill a love of working with salt dough and modeling.
Necessary materials: “Extra” salt, premium flour, a glass of water, a brush, a glass, a simple pencil, a paper napkin, a rolling pin, a “wavy circle” dough cutter. Salt dough recipe: In a deep bowl, combine 2 tbsp. flour, + 1 tbsp. salt, stir well. Make a well and pour in 1 tbsp. cold. Knead into a tight, elastic dough. Store the finished dough in a cellophane bag.
Progress:
Roll out the dough to a thickness of 5-6 mm. Use a pastry cutter to cut out a wavy circle and place it on a paper towel. Use a cocktail straw to cut two holes in the top of the circle. Take a lump of dough the size of a large plum. Using your palms, pressing slightly, roll into an even “bun”, without veins or cracks. Form a large “drop”. Moisten the center of the wavy circle with water using a brush. And put the “drop” there, pressing lightly. Water firmly glues the dough to the dough. Roll a ball of dough the size of a large cherry and glue the kitten's head on. Wet your head with water and glue on the ears. Glue two small cakes and push the tendrils with a stack. Glue small peas - dough eyes. Use a sharp pencil to push the pupils into each eye. Glue a tongue below the antennae. Now glue on the nose. Roll small sausages and glue the kitten's arms. Push the claws with a stack. Glue a tail from the same sausage. Do not forget to moisten the junction of the dough with water. Water instead of glue. Roll two lumps and glue the paws, slightly pressing them in a stack towards the kitten’s body. Roll small lumps into sausages and glue them onto the kitten’s belly. Our gift is ready. The craft needs to be dried well in a dry, ventilated place. It will dry for about two weeks. After our gift has dried, paint it with paints and write the inscription “I’m looking forward to your visit.” After the paint has dried, coat it with glossy varnish. Varnish will add shine to the craft and make it more durable. Thread ribbon through the holes. Here is our hospitable cat and cats. I wish you creative success.
We offer you a master class on modeling from salt dough: we will make a funny cat toy. This is one of the most popular flour salts. In this article you will find a recipe for salt dough, a template for creating the craft, step-by-step instructions for making it and tips for painting it.
The finished animal can either be laid out on canvas and left in a frame, hung as an independent decoration, or placed on a shelf as a souvenir toy. The cat is also often used as the basis for refrigerator magnets. Such a funny toy is nice to give and receive as a gift. And of course, it is impossible to remain indifferent to it: this cute craft made from salt dough is invariably liked by both small children and even older men.
What do we need?
- half a glass of salt
- a glass of flour
- half a glass of water
- teaspoon PVA glue
- cardboard
- paints (acrylic, gouache, oil)
- craft varnish
- frame-panel
- Super glue
Cute hedgehog - a toy for kids
Do you want to know what you can make with your child using salt dough? Start with the simplest crafts. The younger your baby, the simpler the products for joint creativity should be. Try to make a prickly hedgehog, and a detailed description of the process in this tutorial will guarantee an excellent result and a good mood from a useful activity. First of all, prepare universal salt dough and nail scissors. Roll a piece of dough into a drop-shaped piece. The hedgehog's eyes and nose can be made from beads, black peppercorns, or pre-colored dough. The needles are made using cuts. Use the tips of the scissors to make small cuts, lifting the needles up. Perform the next row in a checkerboard pattern - with an offset. Row by row, make cuts until the entire back of the hedgehog is covered with needles. Dry the finished toy in the oven or simply in a warm and dry room. If you wish, you can color it or entrust this important task to your child.
Original souvenir - funny dachshund
You can start preparing for the upcoming New Year holidays in advance and make a funny dachshund as a gift for your friends. To work you will need:
- universal salt dough (see recipe above);
- cardboard, pencil, scissors;
- paints and brush;
- a piece of rope;
- clear nail polish;
- toothpick;
- foam sponge;
- glue "Dragon".
Prepare a drawing of a dachshund.
You can sketch it by hand or print it out. Cut out the image of the dog along the outline. Transfer the template to a piece of cardboard and cut it.
Roll out the dough to approximately 5mm thickness on baking paper. Attach the template and cut out the outline of the dachshund along it. Carefully remove the trimmings so as not to deform the workpiece. Roll two balls and form them into oblong dachshund eyes. Glue them with a drop of water to the head of the workpiece. Moisten all sections of the dog with water and smooth it with your fingers to remove all irregularities. Use two small pieces of dough to make eyelids and glue them above the eyes. Use a toothpick to outline the ear, paws, mouth, nose and body contours. Now you need to add volume to the workpiece. Roll the dough into an oval, glue it onto the ear and smooth the joint with a wet finger. Add volume to the dachshund's back and tail in the same way. Use a toothpick to press oblong dents around the perimeter of the figure. Make them randomly of different lengths from the edges of the body to the center. It's time to dry the workpiece in a warm oven. Bake it until it is completely firm.
The dry figurine needs to be painted. Cover all areas where there are bulges and dents with black gouache.
After the first coat of paint has dried, paint the dachshund yellow. Place a little paint on a foam sponge and tint the entire body, but the dents should remain black - do not overdo it. Draw the eyes of the dried dachshund in white. Make any inscription you wish.
Glue a piece of rope to the back of the craft.
Cover the product with clear varnish and let it dry. The result of the work done is impressive - the mischievous puppy is ready. Dog with original coloring:
Plasticine fighter plane
Fighters
played a very important role during the Second World War. It was these machines that shot down enemy warplanes and destroyed their bases on the ground. On the eve of the great holiday, we suggest making a fighter plane from plasticine. Master class by Maria Klimova.
Materials and tools:
- Plasticine green, blue and gray;
- Knife for modeling from plasticine.
How to make an airplane, step by step
First you need to sculpt the body
for an airplane.
Typically, fighter jets have a color that helps them camouflage themselves in the air. Therefore, most often they are not monochromatic, but have spots that look like stains. To achieve this effect, you need to mix green (dark) plasticine with blue or blue
. But there is no need to mix completely. We need to get an uneven color. Now roll the resulting plasticine into a sausage, sharpening it at one end. This will be the nose of the plane. Photo 1
Now we need blue plasticine. We will make cockpit glass
. To do this, you need to make an oval and cut it in half. One of the halves needs to be stuck closer to the sharp end. Photo 2
Now we need to make wings
. They have the shape of a triangle with one acute corner. You need to try to keep the details as similar as possible. The wings must be glued strictly symmetrically. Photo 3
Now let's design the tail of the plane
. The tail parts need to be made in the appropriate shape. They are similar to a trapezoid, but without one side. The back of the plane needs to be slightly flattened. Photo 4
Now let's mold the upper parts of the tail, which help the car when flying. Photo 5, 6
Fighter
- an aircraft primarily aimed at destroying enemy air vehicles, so each of them has
shells for combat
. To make shells, you need to take gray plasticine and roll it into 3 small sausages, slightly pointed at the end. Photo 7
Next, we glue these shells under the wings of the aircraft. On the second side we do exactly the same. Now you need to make 2 more shells and glue them under the tail. These parts do not need to be sharpened; we will make them in the shape of a cylinder. We wrap the nose of the fighter aircraft with gray plasticine. Now you need to inspect the fighter again and smooth out all the bumps and cracks so that the resulting product is smooth and beautiful. Photo 8
The military plane is ready!
Spectacular fish - step-by-step master class
Try making a beautiful fish with your child. Just follow the detailed instructions - and even your little helper will be able to master this sculpting technique. To work you will need:
- universal salt dough;
- brush;
- corrugated felt-tip pen cap;
- ruler.
On baking paper or foil, roll out the salt dough into a layer 3-4 mm thick.
Cut out a circle using a special die or just a round glass of a suitable diameter. Pinch the dough on one side of the circle with two fingers, forming a tail. Correct it and smooth out any rough edges. On the opposite side, make a mouth for the fish using the handle of a brush. Use the edge of a ruler or the blunt side of a knife to press the marks on the tail and fins. Roll small balls and glue them onto the fish's head. These will be the eyes. Make pupils from smaller balls and press them onto the eyes with the handle of a brush. It's time to decorate the blank. Use the cap of a felt-tip pen to press down the first row of scales. Roll a lot of small balls. Glue them with a drop of water to the body of the fish immediately behind the cap imprints and flatten them with the back of the brush. If you have a suitable print, make prints in the shape of a starfish; if not, use a familiar cap or take another template. Then push two more rows of cap impressions. Roll into a thin sausage to form a tail. Glue it to the blank on the edge of the tail. Fill the entire tail in the same way. Next, chaotically stick and push a few more small balls. Dry the resulting workpiece in a warm oven.
Color the fish, guided by your ideas of beauty and the colors available. If you glue a magnet to the back of it, it will proudly take its place on the refrigerator, decorating the kitchen of its happy owner. Here are some more ideas with fish:
Plasticine soldier
Soon, all of Russia will gather in the main squares of its vast country to pay tribute to veterans and honor the memory of those who gave their lives for the victory. Victory Day is one of the most respected and revered days of the calendar. And today we are blinding in plasticine overcoats
.
Materials and tools:
- Plasticine is gray, as well as white, yellow, beige, brown, reddish brown and black;
- Stationery knife.
First, let's prepare gray plasticine. From it you need to form two large pieces and two small ones. Photo 1
Now we take a larger piece and form a body from it. That is, the hem of the overcoat. Photo 2
From a smaller piece we mold exactly the same part, only smaller in size. These parts need to be connected. Photo 3
Next we will make the sleeves. Use gray plasticine to roll two identical sausages and glue them to the sides of the overcoat. Photo 4
Now let's prepare plasticine for other parts. Roll out a long flat strip from gray plasticine. Roll out a flagellum from dark brown plasticine. And we also need reddish-brown plasticine. Roll it into a small ball. You will need it to make a plaque for the belt. Photo 5
From the gray strip you need to form a collar. Photo 6
We wrap the overcoat with a brown flagellum, forming a belt. We cut out a rectangle from a reddish-brown ball and glue it in place of the belt plaque. Photo 7
We roll two identical sausages from black plasticine and bend them at the bottom. These are boots. Photo 8
We will make shoulder straps from brown plasticine. Just cut out two rectangles. Photo 9
Glue the yellow balls. They will imitate stars. We will also glue the stripes. Photo 10
The plastic material, accessible to everyone, allows you to create unique items for the interior. Salt dough has long been used to make beautiful crafts. Together with your child, you can sculpt animal figurines, New Year’s compositions, and even entire thematic pictures from the pliable mass.
Cheerful boletus mushroom
The initial stage of learning how to model is already behind you - you can start making more complex products from universal salt dough. Try to master the lesson of making a funny big-eyed boletus. Such an interesting mushroom will be appreciated not only by children, but also by adults. To work you will need:
- universal salt dough;
- burnt out light bulb (classic pear-shaped);
- cardboard;
- acrylic paint or gouache;
- foil;
- paper napkins;
- masking tape;
- Super glue.
Cover the light bulb with tape and cover it with dough. Allow the piece to dry completely at room temperature or in a warm oven. Cut a ring out of cardboard and put it on a light bulb - this is the basis of the future mushroom cap. Form a hat of the desired size from crumpled paper napkins. Secure the structure with tape. The result is something like this. Wrap the hat in foil for added strength. For the hat you can use dough of any color; later the whole toy will be painted. Roll out a piece of dough into a circle at least 3 mm thick and stick around the top of the mushroom cap. Remove the hat and seal the bottom. Use the blunt side of a knife to press the strips. Secure the cap to the mushroom stem using superglue or Moment. It should be slightly tilted towards the back. Get started with the design. Blind and attach the arms, legs and nose to the fungus. You can decorate the figurine with a funny caterpillar or make another decorative element, such as a ladybug. Dry the finished piece. Paint the figurine, draw eyes and a nose and varnish. The amazing fungus is ready. You won’t be able to pickle it and eat it, but you can easily decorate a shelf with it.
Funny pig pendants
Such funny pendants are an idea for an unusual Christmas tree decoration or a cute souvenir for people dear to you.
To work you will need:
- universal salt dough;
- toothpick;
- thin rope;
- paints and brush;
- foam sponge;
- black gel pen;
- Super glue.
Form a flattened circle - a pig's body.
Glue a smaller circle - a patch - into its center. Use a toothpick to press down the nostrils. The origins of dough modeling go back a long way. There is a legend that it was invented by Slavic cooks who were bored and had fun by creating interesting, edible figures from dough. In addition, this material is one of the cheapest and available to everyone. That’s why this type of creativity is popular in our time; everyone has flour, water and salt in their home. So, here are some interesting DIY salt dough crafts, with photos and step-by-step instructions.
Send your photos
Do you also make beautiful crafts?
Send photos of your work. We will publish the best photos and send you a certificate of participation in the competition. Dough modeling is a fun way to spend time with children. After all, they not only sculpt, but also cook: they can experiment with the flour mixture in the process of measuring and mixing ingredients, and then observe the metamorphoses that occur with the finished product when temperatures change during the drying process.
In addition, crafts made from salt dough are harmless to children, they do not contain allergens and can be safely tasted.
Figures made from homemade flour mixture are harder and preserve better than plasticine.
Crafts made from salt dough
If you decide to touch this art, and testoplasty really is such, you need to learn in detail about the material from which you will sculpt. For beginners who like to make dough, it is worth noting that the recipe is very simple.
- Flour - one glass
- Salt - half a glass
- Water – 125 ml
It is worth remembering that salt is heavier than flour, so you need to use half as much of it!
To sculpt thin relief figures, you need to add PVA glue, or starch, or wallpaper glue to the dough. Optionally, one tablespoon at a time, pre-mix wallpaper glue with water. To make the kneading process easier, use a mixer; it will make it better and make it easier to work with your hands. For modeling from colored dough, food coloring is used; if there is none, you can use regular paint. If you want a rich chocolate color, add a small amount of cocoa. Remember that when the dough dries, it loses its color saturation. Therefore, it is better to transfer the dye than not to transfer it. Coating the finished dough craft with varnish will make it brighter and more practical.
Advantages
- It is one of the cheapest and environmentally friendly materials.
- Doesn't get your hands dirty (although this is a relative statement)
- It is easy to work with, very flexible and allows you to make parts of any complexity.
"Piglet"
Let's look at the easiest way to sculpt.
To work you need:
- Salty dough
- Brush
- Stack
- Paints
- Toothpicks
How to do it
- Roll the dough into a ball and give it an oval shape, this will be the body of the pig.
- Make a second ball (head) and place it on the body using a toothpick.
- Make a small heel for the pig, a flattened ball with holes, you can make holes with the back of a pencil.
- Making ears is also not difficult; moisten the triangles with water and carefully attach them to the head.
- Do the legs like this, roll two sausages, make a small cut at one end, and attach the legs to the body with the other end.
- Our piglet will sit in a basin, to do this, roll out a ball of dough and give it the appearance of a basin.
- Place the piglet in a basin and paint your craft.
- Let your masterpiece dry.
Master class on how to make a pig from dough step by step video instructions
Little secrets
Everyone has a garlic squeezer in their house. It can be used in work by passing the dough through it to create long curls. They can be used in the form of hair, wool for your crafts. Having a tea sieve at home will produce thinner vermicelli, for finer details of the craft. A comb can also be used when sculpting; it will perfectly imprint a ribbed pattern on it.
"Candlestick"
Ingredients
- puff pastry
- eggs (for brushing)
- prunes
- chocolate
Cooking method
- Roll out the dough on the table. The thickness should not exceed 0.5 cm. Using a glass, cut out circles.
- Place the filling in the middle of the prepared circles. It can be prunes, dried apricots, jam, the main thing is that the filling is not liquid.
- From each circle we form a star (gathering it up like a bag)
- Cut the edges with pastry scissors. And we bend each strip, turning them to the center.
- We form a flower and coat it with egg.
- Bake in the oven at 180 degrees.
- Decorating our flowers. You can put a little jam in the middle.
- We take a flat dish and, using melted chocolate, draw a stem and leaves for our delicious craft. We distribute the finished flowers in the right places on the plate and our unusual flower is ready.
"Delicious squirrel"
To prepare this craft you need to take:
How to make a T-72B tank from plasticine
It is the green color that makes any military object invisible, so all equipment is painted in this shade (or spotted camouflage), and the soldiers’ uniforms are also made in such camouflage colors. Make a part that resembles a matchbox in shape and size - this will be the body of the tank. Glue a strip about 1 cm wide and 0.5 cm high to the bottom of the part. It is better to round the corners to make the shape more streamlined. Tracks are a very important chassis of a tank, and our chosen model is no exception. To make a massive structure (measured by the center piece), make six cylinders for each side. From the side, press each cylinder with a stack in the center and around the circumference several times. Pull out two more ribbons and press down with the flat side of a toothpick. Glue the six prepared wheels on one side of the body, then press down along the entire length with ribbed tape. And also make absolutely the same caterpillar structure with a track on the opposite side. When the main part of the tank is ready, stick green tape on top of the tracks. Make a tower of an unusual shape - round, flat, with notches around the circumference. Stick a soft mass onto the match to create a barrel. Glue small parts on top of the tower, a cover through which the crew will get in and out of the vehicle. Make small green squares - they will play the role of armor protection in the future. There is no need to imagine here - look at the technical characteristics in the drawing, and then create similar parts. Completely assemble the T-72B. Press down the tower on top. Glue the armor fragments on the sides. Add bolsters on top, lanterns, hooks, and grilles in front. And the most important attribute of the copied combat vehicle can be considered the Red Banner. Make a flag from a red cake and glue it to a match. Next, insert the match into the body. The tank is ready. This craft can be done in preparation for May 9th. Surely the boys will be delighted with this idea. At the Victory Parade we will see many modern units, including aircraft. This model can be considered rather classic. This is a great keepsake for a veteran or beloved grandfather.
Elena Nikolaeva Сhudesenka.ru
You can make a huge number of crafts from salt dough, for example: flowers, animals, various figures, inscriptions, numbers, toys, paintings and whatever you want! Modeling from salt dough is called bioceramics. The advantage of salt dough is that it is convenient to work with, this material is absolutely harmless and crafts made from it will delight you for several years. In this article we will look at how to make crafts from salt dough with your own hands.
You will need:
a glass of wheat flour, a glass of extra salt, half a glass of cold water, a bowl.
Recipe
The finished salted dough should not stick to your hands or crumble. It should be cool and easy to sculpt. I recommend watching the video master class!
There are two most common ways to dry salt dough. The first method: the finished craft will dry on its own. The main thing is that it should not be exposed to direct sunlight, otherwise it will crack. The craft can be placed on a flat surface and wait a few days. Second method: dry the finished craft in the oven for 3 to 6 hours (depending on the size of the craft). Drying occurs in batches with breaks. One approach is 1-2 hours. For quick drying in one go, set the oven to 75-100 degrees, and then the craft will dry in an hour. At a temperature of 120 degrees, the craft will dry in 30 minutes, but it is better to dry it naturally.
There are two most common ways to color salt dough. The first method: after drying, paint the finished craft with acrylic paints or gouache using a brush. Second method: food coloring is diluted in water, then added while preparing the dough. When the craft is completely painted and dried, it must be coated with transparent manicure or furniture varnish in 2-3 layers. Each layer must dry before applying the next. This way the craft will last for a long time.
You will need:
colored salt dough, stack, clear manicure polish, toothpick.
Master Class
The salt dough star is ready!