Master's cap, confederate cap, bonnet; how to sew
To make it you will need: a 5 liter plastic bottle and red fabric (50 x 150cm), cardboard.
1. Cut a strip 10 cm wide from a plastic bottle, roll it into a ring, and secure it with a paper clip. Place the ring on the child’s head and select the diameter so that it fits well on the head.
2. Trim the excess plastic, adding an allowance of 1 cm to the resulting diameter for overlapping fastening.
3. Measure the length of the resulting strip (L).
Part A - band. Fold the piece of fabric in half lengthwise with the right side facing inward. Cut, leaving an allowance on the transverse sections of 1 cm and an allowance on the longitudinal section of 10 cm. Stitch the cross sections to make a ring. Press the seams. Place a strip of plastic into the band, select the exact size of the ring, and fasten it with a stapler. Try on the band, pull the fabric at the top to make a hat. Trim off excess fabric.
Part B - upper part. Cut out a rhombus from cardboard, cut out two pieces of red fabric according to the pattern, fold them right sides inward, sew the seams, leaving one side free. Insert cardboard, fold seam allowances and sew by hand.
Brush Description of work, see here
Sew the tassel to the top of the hat. Sew the upper part to the band by hand.
The material was prepared by Lyudmila Orlova, especially for the children's portal "Sun" Published on December 20, 2007
For personal use only! Republication in other publications is prohibited!
How to make a square graduation cap out of paper?
In Europe, this headdress is called The square academic cap, graduate cap. A graduate cap with a square top and tassel (some called a "confederate cap") and a "master's cap".
We don’t wear them and are usually used for staged events - mainly at proms. It is clear that sewing such hats for an entire class for the sake of a few minutes on stage is irrational. You can also glue them from black cardboard. Therefore, let’s formulate the topic of today’s post as follows: How to make a square graduate cap from cardboard (or paper) with your own hands.
I will make such a hat for you from thick wrapping paper, I will come up with a method right along the way. My “graduate” is Manyasha (that’s what I called my mannequin of a human head))). We need to adjust the hat to the size of her head. For me, for example, hats are needed much more, and, in addition, the hairstyle must be taken into account. This is all to ensure that you do not automatically copy the sizes.
Let's start with the walls (crown). I take a strip of paper about 60 centimeters long and about 15 centimeters wide. Here the question may arise - why is it so wide? But because if we need the hat not to lie on the crown of the head like a pancake, but to be held by the fact that it is pulled over the head, then - yes - the height of the crown should be quite considerable.
I bend one edge - about 2 centimeters, cut it quite often and glue it - it turns out to be a two-layer bottom edge of the cap. Why was it cut? – And then, because you have to give the head an oval shape, it’s better if the inner layer is not rigid.
How to make a hat blank with your own hands in a photo
As we all know, hat blanks are not cheap. Even if you buy yourself a blank, after a while you begin to realize that you need blanks in different sizes.
When I started felting hats and caps for myself, I thought that I needed a lot of different blanks. But then my students (not felters) gave me something, and I bought something cheap from my other students. However, it turned out that I only use a blank, which is called a “stand”. And when they once ordered me a large hat with a round crown, I figured out how to make the blank myself.
So, let's begin.
Inflate a rubber ball. Its circumference should be 4 cm smaller than the circumference of your blank. If, for example, you need a blank for size 56 (head circumference), then the ball must be inflated to 52 cm.
111
From a sheet of whatman paper we cut out a strip 2 cm long longer than the circumference, that is, in this case, 54 cm. 12-15 cm wide. Not more. Stepping back 2 cm from the edge, draw a line with a pencil. We combine the second edge of the paper strip with a pencil line and glue it.
Place our ball on top of the resulting cylinder with a circumference of 52 cm. We press it into the paper cylinder until we get the blank shape we need.
Inside the cylinder you need to place a jar into which the ball will rest. This is necessary so that later, under the weight of plaster bandages, the ball does not fall inside the cylinder.
Cover it all with a plastic bag.
Soak the plaster bandage in warm water for a few seconds, squeeze it lightly, and begin to cover our structure made of a jar, paper and ball with it. First, vertically, straightening out all the folds with your hands so that the bandage fits our structure evenly and tightly.
This is where scissors come in handy to cut the strips. Everything was covered vertically with a bandage. We start wrapping horizontally from the bottom.
The bandage overlaps. We reach the top. Smooth everything thoroughly with wet hands. The bandage dries very quickly. And if you don’t smooth out the plaster, your blank will be rough. That is why it is not recommended to squeeze the bandage very hard.
Place three short strips of plaster on top of the blank. Smooth it well with wet hands.
At this stage you can measure the circumference of the blank. Most likely, it will already be 54 cm. We begin to apply the next layer of bandage around the circumference of the blank. Down up. Try not to see the transition seams so that the blank is as even as possible.
Here you go. The bandage is almost gone. Again, properly iron the entire blank with wet hands and leave it to dry.
And now the blank has dried. We turn it upside down, take out a paper ring, a ball and a plastic bag. To keep the blank stable, place it on a tape base or something similar. We spray the blank inside with water and begin to fill it with polyurethane foam. I want to warn you right away: foam has the ability to expand. Therefore, fill the blank to half or a little more and leave it for a couple of hours.
If the foam starts to come out of the blank, simply knead it inward. Do not do this with your bare hands, otherwise you will have to clean and wash them for a long time.
And of course, do not allow the foam to start sliding down the sides of the blank. It will be very difficult to remove it from the surface and traces of the foam will remain forever.
After a day the foam hardens. Using a utility knife, trim the edge evenly so that the bottom of the blank is even. Using a gun, squeeze out silicone sealant piece by piece onto the surface of the blank and spread it thinly and evenly over all surfaces of the blank. Be sure to coat the lower edges of the blank as well.
Use gloves. Sealant is a very caustic substance and smells very strongly of vinegar, so cover the blank with silicone either on the balcony or next to the hood.
After the blank is completely covered with silicone, it must be taken out to dry on the balcony or outside.
And here you go! Blank "stand". It is good because you can make a crown of any height on it.
Here you go. Now you can make such a blank of any size. I’ll tell you how to make a more complex blank next time.
Components of a cap
The simplest version of the product includes the following elements:
- a headband that is worn on the head. May be rectangular in shape or with a triangular bend on the forehead;
- square top surface;
- a tassel made of yellow or red yarn;
- a thin ribbon to which, in fact, the tassel is attached to a square base.
Making an academic cap with your own hands consists of cutting out elements and joining them together.
What types of hats are there?
Initially, the square academic cap had two colors: red and black. As we have already said, the scarlet headdress was intended for noble gentlemen and priests, and the black one for persons who occupy an honorable place in society, but do not have any title. For example, black birettas were worn by doctors, professors, musicians, sculptors or artists. Now there is also a certain shade classification of these square headdresses, but more expanded .
Confederate cards vary in color depending on the area the student is mastering:
- white color – history, art, literature;
- gray – veterinary medicine;
- blue – jurisprudence, philosophy, politics;
- yellow – mathematics, physics;
- bright yellow shade – agriculture;
- dark green color – foreign languages;
- light green – pharmaceuticals;
- red – economy; business administration, business;
- purple color – architecture;
- blue tint – pedagogy, theology;
- pink color - music;
- orange – military science, tactics;
- brown – theatrical art.
Not only a certain shade of the cap could be responsible for the area being studied. Sometimes all the vestments were made in the same color scheme. But more often the cap and gown are made of black fabric, and the tassel on the robes and the scarf are made in the color that corresponds to the education being received.
How to make a headband
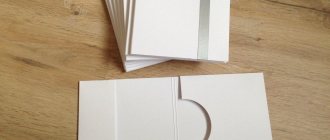
The first option for making the rim of an academic cap is to cut out a black rectangle. It is better to take thick cardboard. If you don’t find exactly a black sheet, then you can take any other one and then paint it black. This option for making the rim, in addition to the rectangle itself, also has an additional height for cutting fasteners. This is a strip 2 cm high, which is cut into separate segments, the corners of each of them are cut off.
This is necessary so that it is convenient to attach the square base of the academic cap. Before cutting, use a flexible meter to measure the circumference of the head and add a couple of centimeters to the fold of the paper. You can fasten the ends either with PVA glue or with a paper clip using a stapler.
How to make a hat blank with your own hands
As we all know, hat blanks are not cheap. Even if you bought yourself a blank, after a while you begin to understand that you need blanks of different sizes.
When I started felting hats and caps for myself, I thought that I needed a lot of different blanks. But then my students (not felters) gave me something, and I bought something cheap from my other students. However, it turned out that I only use a blank, which is called a “stand”. And when they once ordered me a large hat with a round crown, I figured out how to make the blank myself.
So, let's begin.
You will need :
- a sheet of whatman paper long,
- rubber inflatable ball,
- plaster bandage 3 pieces,
- installation silicone sealant, preferably moisture-resistant,
- polyurethane foam.
- silicone sealant gun (foam is usually sold with a nozzle),
- latex gloves,
- stationery knife,
- scissors,
- a small container for wetting the bandage.
From the tools:
Inflate a rubber ball. Its circumference should be 4 cm smaller than the circumference of your blank.
If, for example, you need a blank for size 56 (head circumference), then the ball must be inflated to 52 cm.
From a sheet of whatman paper we cut out a strip 2 cm long longer than the circumference, that is, in this case 54 cm.
Width cm 12-15. Not more.
Stepping back 2 cm from the edge, draw a line with a pencil. We combine the second edge of the paper strip with a pencil line and glue it.
Place our ball on top of the resulting cylinder with a circumference of 52 cm. We press it into the paper cylinder until we get the blank shape we need.
Inside the cylinder you need to place a jar into which the ball will rest.
This is necessary so that later, under the weight of the plaster bandages, the ball does not fall inside the cylinder.
Cover it all with a plastic bag.
Soak the plaster bandage in warm water for a few seconds, squeeze it lightly, and begin to cover our structure made of a jar, paper and ball with it.
First, vertically, straightening out all the folds with your hands so that the bandage fits our structure evenly and tightly.
This is where scissors come in handy to cut the strips.
Everything was covered vertically with a bandage. We start wrapping horizontally from the bottom.
The bandage overlaps. We reach the top. Smooth everything thoroughly with wet hands.
The bandage dries very quickly. And if you don’t smooth out the plaster, your blank will be rough. That is why it is not recommended to squeeze the bandage very hard.
Place three short strips of plaster on top of the blank.
Smooth it well with wet hands.
At this stage you can measure the circumference of the blank. Most likely, she will already be 54 cm.
We begin to apply the next layer of bandage around the circumference of the blank. Down up.
Try not to see the transition seams so that the blank is as even as possible.
Here you go. The bandage is almost gone. Again, properly iron the entire blank with wet hands and leave it to dry.
And now the blank has dried. We turn it upside down, take out a paper ring, a ball and a plastic bag.
To keep the blank stable, place it on a tape base or something similar.
We spray the blank inside with water and begin to fill it with polyurethane foam.
I want to warn you right away: foam has the ability to expand. Therefore, fill the blank to half or a little more and leave it for a couple of hours.
If the foam starts to come out of the blank, simply knead it inward. Do not do this with your bare hands, otherwise you will have to clean and wash them for a long time.
And of course, do not allow the foam to start sliding down the sides of the blank. It will be very difficult to remove it from the surface and traces of the foam will remain forever.
After a day the foam hardens. Using a utility knife, trim the edge evenly so that the bottom of the blank is even.
Using a gun, squeeze out silicone sealant piece by piece onto the surface of the blank and spread it thinly and evenly over all surfaces of the blank. Be sure to coat the lower edges of the blank as well.
Use gloves. Sealant is a very caustic substance and smells very strongly of vinegar, so cover the blank with silicone either on the balcony or next to the hood.
After the blank is completely covered with silicone, it must be taken out to dry on the balcony or outside.
And here you go! Blank "stand". It is good because you can make a crown of any height on it.
Here you go. Now you can make such a blank of any size.
I’ll tell you how to make a more complex blank next time.
How to Create a Tight Square Base
It is best to make it from two parts. The lower part is a square in which a hole is cut with the diameter of the prepared rim. It needs to be further reduced by about 1.5 cm. This circle is first cut out with scissors, then cut into separate segments and the corners of each are cut out on one side and the other. Then all the parts are bent inward.
To connect the rim and the square base, you need to smear these inwardly curved strips with PVA glue and attach them to the inside of the rim. Then a second similar square warp is cut out and attached to the first one with a hole. As a result, not a single fastener will be visible and the square base will be firmly attached to the rim.
Making a brush
An academic cap must have a tassel. It is mainly made from threads of yellow or red yarn. How to make a brush can be clearly seen in the photo below.
You need to cut a piece of cardboard to the desired size. Then tightly wind many turns around this base. From above, the end of the thread is threaded with a needle under the turns of yarn and a strong double knot is tied. The cardboard is removed and the upper part is wrapped with thread several times. After tying, the knot with the end of the thread is pulled through the inside of the tassel from top to outside. You can then attach the product to the academic cap directly at this end.
Scissors are inserted into the inside of the turns of yarn and a cut is made with the tension of the threads downwards. If the edges are not quite even, then use scissors to carefully cut off the irregularities.
How to attach a tassel to a square base
When cutting out a square for a hat, before gluing it on, it is advisable to immediately determine and indicate the center point. To do this, draw diagonals under the ruler, connecting opposite corners with a simple pencil. The center of the square will be located at the intersection of these two lines.
To attach the tassel, you need to use an awl to make a hole in the marked center. Crafts made from threads can be attached either to the end of the yarn or to a thin satin ribbon. It is threaded through the hole from the inside and a knot is tied. It’s better to make it double so that the tape doesn’t come out through the hole. From the outside, the ribbon is pushed inside the tassel with a needle with a wide eye and a knot is tied.
If the tassel is simply attached to the end of the thread, then it can be strengthened by making turns in several layers of yarn. A braided braid made of threads will look beautiful.
As you can see, making an academic cap is not at all difficult. If desired, all elements can be sheathed with black fabric on both sides. Then the parts are simply sewn together with a needle and thread.


