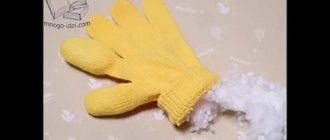
On a gloomy autumn day you just want to please yourself with something bright and unusual. You will be surprised, but sometimes colored paper can work wonders if you approach it creatively. So, let's begin. For the rainbow you will need seven colors of paper, scissors, cotton wool (it will make two cute clouds), a stapler, glue, silver beads and thread or fishing line.
First you need to cut seven strips of the same width, but slightly different in length (approximately 6-7 mm).
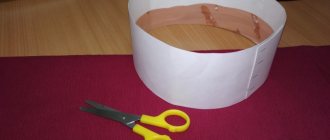
We fasten the strips with a stapler on one side.
Then we align the edges on the other side and get a rainbow blank.
Now you need to make clouds from cotton wool. The secret is to lightly wet your fingers with water and form two clouds that you glue to the ends of the rainbow.
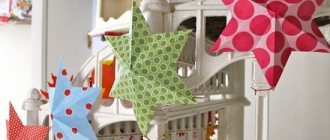
Now it's the droplets' turn. We will cut them out of blue paper as shown in the photo. We will need three droplets.
At the bottom of the thread we attach a silver bead. Glue the three cut out droplets together, not forgetting to glue a thread in the middle.
That's it, our rainbow is ready. You can give it to someone, or you can just hang it on a chandelier or on a window and enjoy.
Bright colors not only appeal to children, but they are also good for their psyche. And the rainbow, like a mix of colors, will ensure harmonious development. It is not for nothing that rainbows are used in the decoration of many children’s rooms. Do it with your kids and cheer yourself up! It’s nice to look at these crafts even in pictures!
RAINBOW 1 Made with paints on thick cardboard, decorated with cotton balls. You need to make 2 cardboard holder sticks behind the rainbow so that the rainbow can stand on the baby’s table or above the bed. The holders are simply cut out of cardboard and glued to the main rainbow with glue or tape.
RAINBOW 2 Plasticine
RAINBOW 3 You need to cut out long strips of colored cardboard or simply paint a white sheet with rainbow colors and cut out the strips. The cloud is made from white paper: you need to make either thick cardboard (so that the places where the rainbow stripes are attached are not visible), or fasten circles cut out of cardboard in several rows.
RAINBOW 4 Strips of thick cardboard of different lengths (those below are shorter) are fastened at the ends, as in the figure, the ends are glued together and decorated on one side with cotton wool, and on the other side in any other way - you can also use cotton wool. It is important to make a small hole in the middle of each strip through which a thread will be passed in order to bring the rainbow, for example, to a cornice.
RAINBOW 5 Different buttons
RAINBOW 6 Finger painting with baby's palms
RAINBOW 7 Finger paints, pad prints
RAINBOW 8 A sheet of paper is painted with stripes of rainbow colors, then drops are cut out from this sheet. The cloud can be made in the same way as in Rainbow 3. Glue colored threads to the drops with tape and glue the threads to the cloud with tape. The craft needs to be hung on the wall. If you make the rainbow rays long, you can get a good height meter for a baby.
RAINBOW 9 Corrugated paper is glued to a cardboard base and decorated with cotton wool
RAINBOW 10 Sort everything you have - beads, beads, buttons, stickers, etc. by color and glue it onto thick paper.
Do you want a dose of good mood, color therapy :)! Then let's dive into the cut, because today we will talk about the rainbow! Children's experiences and experiments, sensory and motor skills, drawing and modeling, and even goodies, in a rainbow style!
Several ideas of mine and Andrew, and many interesting finds that just beg to be brought to life! :)
IDEA No. 1. PAPER PLATE RAINBOW
As you know, in Irish mythology, the leprechaun hides a pot of gold in the place where the rainbow touched the ground. This is an interesting craft that can be made from an ordinary paper plate - a rainbow and at the end, a pot of coins!
Plus, you can use a paper plate to make a bright rainbow hat!
IDEA #2. RAINBOW RAIN EXPERIENCE FOR CHILDREN
For this experience, you will need:
- glass of water,
- shaving foam,
- food coloring (dry food coloring, can be diluted with water and added using a pipette).
How to do:
Pour water into a glass and add plenty of shaving foam on top. And then, add multi-colored drops to the “cloud”, you get “rainbow rain”.
IDEA #3: EXPERIENCE FOR CHILDREN WITH SUGAR AND FOOD COLORING
This experiment is to study density. You can see how this experiment is carried out
IDEA No. 4. COLOR EXPERIMENT
And this interesting experiment with primary colors can be found in.
IDEA No. 5. ICE RAINBOW
An ice rainbow is very easy to make - just dilute food colors of different colors in water (in different containers), pour into molds (for ice, for baking or fill balloons), leave in the freezer until the water turns into ice. You can also draw on paper with colored ice cubes (to make them easier to hold when freezing, add toothpicks or sticks to the container).
IDEA No. 6. RAINBOW TOUCH BOX
We select a suitable wide container and fill it with rainbow rice! How to color rice and other cereals with food coloring, you can see the recipes. And when the “rainbow” is mixed, it turns out beautiful like this :)!
IDEA No. 7. RAINBOW IN A BOTTLE
With colored rice, you can fill not only sensory boxes, but also transparent bottles.
To do this, you will need a funnel and a spoon (or spatula), with the help of which the baby can pour rice in layers into a bottle (it is better to take a plastic bottle with a wide neck).
IDEA No. 8. HYDROGEL BALLS
Aqua soil
(hydrogel balls) - can also be used as a filler for sensory boxes. And also for its intended purpose - you can plant a flower in these colorful balls with your baby in the spring!
IDEA No. 9. RAINBOW MANKOGRAPHY
Mancography
- this is drawing using semolina. In order to make a “surprise” for the baby, you need to glue multi-colored stripes to the bottom of the box, pour semolina on top and, using a brush, you can look for a rainbow and draw!
IDEA No. 19. RAINBOW FROM PLASTICINE
You can make it from store-bought plasticine or make it yourself from salt dough and food coloring.
IDEA No. 20. FOAM RAINBOW
Great idea for games in the bathroom or in the country house!
To make a foam rainbow, you need:
liquid soap (or baby shampoo), water (200 ml.), food coloring, mixer.
How to do:
add water to the container, pour in liquid soap (2 tablespoons) and food coloring. You need to whip the foam for 1-2 minutes. The same thing needs to be done for each color. Place the foam in rows in a tub or large container so your child can play with the foam.
IDEA No. 21. RAINBOW XYLOPHONE
To make a “rainbow” xylophone out of water, you need to pour different amounts of water into identical bottles and add food coloring. You can knock on bottles or glasses with wooden sticks, lollipop candies and any suitable objects.
IDEA No. 22. DRAWING WITH A SPONGE
Using an elastic band, you can attach household items to a regular kitchen spatula. sponge, dampen it a little and draw a rainbow on paper.
IDEA No. 23. CARDBOARD RAINBOW
In order to make a three-dimensional rainbow, you need to cut cardboard into strips of different lengths.
IDEA No. 24. CONFETTI RAINBOW APPLIQUE
Even kids can handle this applique - just spread glue on the cardboard, and take turns giving the child confetti of a certain color so that he can sprinkle the cardboard on top. And clouds can be made from ordinary white napkins.
IDEA No. 25. RAINBOW FROM FRUIT
A beautiful idea for decorating a children’s party, and if you make a mini-portion, then it’s an option for a full meal)!
IDEA No. 26. APPLICATION FROM CUPcake MINS
White paper cupcake liners can be used to create applique - just paint them rainbow colors, and a few of them are suitable for creating clouds.
IDEA No. 27. DRAWING USING STAMPING TECHNIQUE
We always want our little ones to be comfortable in their room, even in rainy autumn weather. Therefore, we try to decorate their comfortable corner as interesting as possible. Today we will make a rainbow and an umbrella out of paper together.
Step-by-step descriptions with photos will be clear even to children.
Paper rainbow: three-dimensional craft step by step
A bright and beautiful paper rainbow is an excellent spring-summer craft for children.
There are many ways to create it, two of which are presented in this master class. To work you will need:
- Double-sided colored cardboard in red, orange, yellow, green, blue, indigo, violet;
- Ruler, pencil, scissors, glue;
- For the second method - also cotton wool.
Do you want to play with your child easily and with pleasure?
For the cores, we used the remains of rhinestones that I once used to embroider a picture, and a glue gun. The stems are made from cocktail tubes and complemented with leaves of colored paper. We decorated the jar with material from flower packaging and our little bouquet is ready.
Svetlana Radionova and son Mikhail, 7 years old. Saint Petersburg.
For this bouquet you will need double-sided colored paper, scissors and glue. Take a green sheet of paper, fold it in half and cut the “noodles” with scissors, leaving about 2 cm at the bottom edge. Then we roll up the sheet, glue it together and straighten the resulting “grass”.
Then we cut out flowers from multi-colored double-sided colored paper, draw hearts with them and glue them onto our grass in any order. That's all. The bouquet is ready, you can give it to your mother!
Jaromir 4.5 years old and mother Anastasia Kalinkova, St. Petersburg.
Carnations
We made a bouquet of carnations. To make flowers we needed:
- napkins (white and green);
- markers;
- wire.
We take several white napkins, fasten them with a clothespin so that they don’t move apart, draw a circle and cut them out. Next, use a felt-tip pen to carefully color the edges. We insert a wire into the center of the flower and secure it. For flowers, my husband gave us braided copper wire. You need to clean the tip so that it is sharper, pierce the napkins and bend it with pliers. It is enough to make a small hook. Since the napkins are folded in several layers, they seem to hold this hook themselves, and you don’t have to be particularly sophisticated.
Oksana Shmakova
Construction from colored paper
«
RAINBOW
«
Riddle: " Colorful"
the miracle bridge grew into the ground for a minute.”
For work we will need:
Sheet of thick paper
or green
cardboard
. Format – A-5;
- colored paper
(preferably double-sided)
;
Glue, scissors, pencil, ruler.
1.
a “stream”
paper and paste it across the green sheet.
2. Along the “stream”
draw two lines - along them we will stick
rainbow stripes
.
3. From colored paper
cut out 7 long strips no more than 1cm wide.
4. Glue the strips one by one, guided by the pencil lines. Let me remind you the order of colors
: red, orange, yellow, green, blue, indigo, violet.
5. Outside, the rainbow
in cotton clouds
.
6. To complete the work, you can float a paper boat
.
Happy creativity!
Publications on the topic:
Probably many people would like to receive a bouquet of wonderful flowers as a gift. And we will be able to please our family and friends by making for.
I would like to present to you a master class on making a flower from colored paper, which you can do with your preparatory children.
Spring has come and nature comes to life around us, including insects: and the children and I decided to make caterpillars - beautiful, bright and unusual.
Probably every woman is looking forward to the approach of one of the most wonderful and tender holidays - March 8th. Ladies will appreciate the attention.
There are a huge number of applique options: overhead appliques, modular appliques, cereal appliques, sand appliques.
Master Class. "Penguin". Application made of colored paper. In the afternoon, the guys and I were learning physical education.
Master class in the senior group “Volume butterflies made of colored paper and flowers made of crepe paper.” Municipal Preschool Educational Budgetary Institution kindergarten No. 20 “Beryozka” x. Kirov Municipal Formation of Novokubansky.
Admit it, when you see a rainbow, you also can’t take your eyes off and go about your business? This natural phenomenon not only brightens (and in the literal sense of the word too) our lives, it imperceptibly gives a complete feeling of happiness, generously shares joy, and gives a feeling of involvement in magic. Isn't this a reason to think about surrounding yourself with as much rainbow as possible in your daily life? It is clear that painting the house inside and out completely with stripes of seven colors is overkill, but filling the space with crafts, handicrafts and other beauties with a rainbow with your own hands
- why not?
If you have neither the time nor the mood for such feats, involve children in the task, they will quickly provide you with everything you need! Yes, just don’t forget to give them the necessary materials, and the deal is in the bag: have a rainbow with your own hands
, that is, with the hands of children, ready!
DIY rainbow - 5 crafts with children:
1. Drawing
All children love to draw! Of course, if you offer them strictly 7 faded pencils and a piece of paper, it is unlikely that anyone will be seriously inspired by the rainbow theme, but you can move away from the templates. Have you tried drawing with dad's shaving foam? Or mom's eye shadow? And if instead of a brush you take something non-standard, it will be a million times more interesting!
2. Application
For small children - something primitive, for older ones - something more complex. But the essence is the same: take multi-colored material (paper, felt, hand-dyed cotton wool, beads, ribbons, fabrics) and fold a rainbow with your own hands. Brighter, richer, more fun. It could be a picture on the wall, a poster on the door, a postcard for grandma - anything, as long as it’s with the seven-colored beauty who brings joy to everyone!
3. Rainbow Balloon Balls
Yes, you will have to tinker a little here - most likely, the children will not be able to cope with this craft on their own, however, just think about how much positive benefit and joy such creativity will bring, and you will no longer have any doubts about the feasibility of the project. Go to the store, buy the smallest balls and be sure to entertain the children with such rainbow beauty. It's worth it.
4. Rainbow garland
Decorate your home with a homemade garland the kids make? Why not? It will be bright and beautiful, soulful and very warm. Well, and besides everything else, it’s also rosy! Choose a base (thread, rope, tape or just paper) and create what you like.
Bright colors not only appeal to children, but they are also good for their psyche. And the rainbow, like a mix of colors, will ensure harmonious development. It is not for nothing that rainbows are used in the decoration of many children’s rooms. Do it with your kids and cheer yourself up! It’s nice to look at these crafts even in pictures!
RAINBOW 1 Made with paints on thick cardboard, decorated with cotton balls. You need to make 2 cardboard holder sticks behind the rainbow so that the rainbow can stand on the baby’s table or above the bed. The holders are simply cut out of cardboard and glued to the main rainbow with glue or tape.
RAINBOW 2 Plasticine
RAINBOW 3 You need to cut out long strips of colored cardboard or simply paint a white sheet with rainbow colors and cut out the strips. The cloud is made from white paper: you need to make either thick cardboard (so that the places where the rainbow stripes are attached are not visible), or fasten circles cut out of cardboard in several rows.
RAINBOW 4 Strips of thick cardboard of different lengths (those below are shorter) are fastened at the ends, as in the figure, the ends are glued together and decorated on one side with cotton wool, and on the other side in any other way - you can also use cotton wool. It is important to make a small hole in the middle of each strip through which a thread will be passed in order to bring the rainbow, for example, to a cornice.
RAINBOW 5 Different buttons
RAINBOW 6 Finger painting with baby's palms
RAINBOW 7 Finger paints, pad prints
RAINBOW 8 A sheet of paper is painted with stripes of rainbow colors, then drops are cut out from this sheet. The cloud can be made in the same way as in Rainbow 3. Glue colored threads to the drops with tape and glue the threads to the cloud with tape. The craft needs to be hung on the wall. If you make the rainbow rays long, you can get a good height meter for a baby.
RAINBOW 9 Corrugated paper is glued to a cardboard base and decorated with cotton wool
RAINBOW 10 Sort everything you have - beads, beads, buttons, stickers, etc. by color and glue it onto thick paper.
A bright and beautiful paper rainbow is an excellent spring-summer craft for children. There are many ways to create it, two of which are presented in this master class.
To work you will need:
- Double-sided colored cardboard in red, orange, yellow, green, blue, indigo, violet;
- Ruler, pencil, scissors, glue;
- For the second method - also cotton wool.
Paper rainbow step by step
Cut out 7 stripes from colored cardboard, matching the color of the rainbow. Any size, but you need to take into account that the 6 strips will overlap slightly, which means you need to add a few millimeters to the desired width. For example, the rainbow presented in this review consists of stripes whose length is equal to the narrow side of A4 paper. The width of 6 stripes is 1.5 cm, purple stripes are 1 cm.
Glue all the strips together, gluing each subsequent one onto the previous one. The sides can be trimmed, but this is not necessary; later they will not be visible.
Draw a cloud of any shape and cut out 4 identical ones. The clouds can be made of white cardboard, perhaps even more beautiful in their snow-white state.
At this stage, you can immediately glue two clouds on different sides to the ends of the rainbow, but it is better to make the rainbow arched, as it should be, before adding clouds. Due to the fact that the strips are made of cardboard, the curved position will be held much better than if it were paper. To bend the strips glued together, draw a simple pencil across their entire area, while slightly bending the rainbow down. Usually, leaves for flowers are created in this way, beautifully wrapping them in any direction. Draw a pencil under the rainbow several times, help a little with your hands, gently pressing the ends together and thereby creating an arc. But don’t overdo it, the rainbow doesn’t need sharp angles.
If you haven't glued the clouds yet, do it now. You will get such a simple and cute rainbow made of paper.
Depending on the thickness of the paper, it is not always possible to give the rainbow an arched position. In this case, there are two solutions to the problem:
- Glue the clouds to the paper, fixing the position.
- Cut a thin strip of paper, bend a rainbow and glue this strip inside on the sides, having previously decided on the height of the arc.
Rainbow as a frame for a mirror
For a rainbow to appear in the sky, several conditions are necessary. First, a raindrop. Secondly, the angle of incidence of the sun's ray is approximately 42 degrees, which automatically reduces the possibility of a rainbow occurring either in the morning or in the late afternoon. Well, there is another option: take self-hardening plastics in your hands and create a rainbow with your own hands, without being tied to the time and angle of the sun's rays.
How to make a frame for a mirror with your own hands - an idea from Akailochiclife
DIY paper rainbow
Red, orange, yellow, green, blue, blue, purple! It is these colors that are present in the amazing natural phenomenon - the rainbow. Each of us always associates a rainbow with a good mood and weather.
And in this article we would like to offer you several simple master classes on making children's crafts on the theme of Rainbow. With their help, you can introduce your children to flowers and talk about how such a miracle in nature as a rainbow is created.
Rainbow as a hair clip
Have you ever seen an upside down rainbow? To be able to admire such a natural phenomenon, a thin layer of clouds, consisting of millions of ice crystals, must appear in the air at an altitude of 8 km. The sun's rays must also fall at a strictly defined angle, which will form a division of the beam into spectra that will be reflected in a. In general, everything is complicated. But if you decide to make a rainbow with your own hands, it will be much easier to get an inverted phenomenon.
How to make a hair clip with your own hands - master class from Briteandbubbly
Rainbow themed crafts
To create such a rainbow and positive volumetric applique, you will need the following materials: a sheet of colored cardboard, colored double-sided paper, glue, tape and scissors.
From double-sided colored paper, cut out seven strips of different colors that correspond to the colors in the rainbow - red, orange, yellow, green, blue, indigo, violet.
Gather all the strips together and tape them to the top left corner of a piece of cardboard.
Glue the opposite side of the strips in the lower right corner, but with the strips already straightened.
Cover the place where the stripes are glued with a yellow sun and a snow-white cloud, which are glued with glue or double-sided tape.
Flower pot with rainbow
Since childhood, we have taught and continue to teach children that there are seven colors in the rainbow. In fact, there are many more of them! Scientists believe that the spectrum includes at least one million colors that the human eye cannot detect. A DIY rainbow is a great opportunity to implement a project, implementing it with the number of colors that you personally want!
How to make a flower pot with homemade decor - master class from Аbeautifulmess
Application on the theme Rainbow
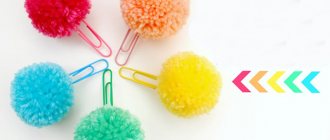
To create such a bright applique, you will need a ready-made template, multi-colored miniature pompoms (can be replaced with lumps of colored paper) and glue.
Glue colorful pompoms to the rainbow, following the color sequence.
Rainbow themed crafts
To create this cool rainbow craft, you will need the following materials: a toilet paper roll, glue, double-sided colored paper, a white sheet of paper, scissors and a black marker.
From colored paper, cut out colored strips of equal width and length. Glue them to the cardboard sleeve, following the sequence of colors in the rainbow.
Then draw a snow-white cloud on a sheet of white paper. Cut it out and glue it to the cardboard sleeve on top of the colored strips.
Twist each strip to create voluminous paper curls.
Large craft using different techniques
In order to make a large craft, prepare the following materials:
- Paints;
- Cardboard;
- Foil;
- Bright pieces of fabric and paper;
- Ribbons;
- Beautiful buttons;
- Beads or seed beads;
- A small piece of foam.
Note!
Here is our master class on how to make a rainbow:
Cut a semicircle out of cardboard and color it to make a rainbow. After the paint has dried, apply glue to the rainbow. Don't skimp: there should be a lot of glue.
Carefully arrange beautiful beads, pieces of paper or fabric, buttons on the rainbow. Follow the color scheme: for example, the red stripe should have fabric with a red pattern, and the purple stripe should have a purple pattern.
Hang the resulting applique on the wall. The craft will delight you every time you look at it.
Rainbow with droplets
Have you ever wanted to bring back the warm summer days during the winter frosts and tame an amazing natural phenomenon - the rainbow? If yes, then today seven-year-old Styopa Krasilnikov and his four-year-old brother Maxim will tell and show how to do it.
- cardboard of all colors of the rainbow;
- blue colored paper;
- cotton wool;
- threads;
- silver beads;
- PVA glue;
- scissors;
- stapler;
- pencil;
- ruler;
- needle.
1. We measure strips 4 cm wide on each sheet of colored cardboard (we place the cardboard sheet lengthwise) and cut them off.
2. Starting with the second color, shorten each subsequent strip by 1.5 cm in the sequence of colors in the rainbow.
3. Then we fasten the edges of the strips with a stapler. It turned out to be a rainbow.
4. We take several pieces of cotton wool and make clouds out of them, gluing them to the edges of the rainbow.
5. To make droplets, cut 9 squares (7x7 cm) from blue paper and fold them in half
6. On the folded squares we draw droplet blanks and cut them out.
7. Then we glue together three blanks of droplets, laying a thread in the middle of each on which it will be attached to the rainbow. We repeat the same steps with the remaining blanks and get three drops.
8. We attach 1 bead to the lower end of each thread.