The main symbols of Easter Sunday are Easter cakes and eggs. Naturally, you can use real chicken or quail eggs in home decor, but if you want your decorations to last longer, it’s better to go a different route. We will make decorative eggs with our own hands. They will fit perfectly into the composition with a homemade nest and will not deteriorate over time.
How to make eggs with your own hands (step-by-step master class)
WHAT YOU WILL NEED FOR WORK:
- Children's modeling mass hardens in air (you can make salt dough);
- Acrylic paints (white, blue, black);
- Water;
- Palette for mixing paints (you can use a piece of cardboard or a plate).
- Brush;
- A piece of foam rubber (can be cut from a dishwashing sponge).
How to make an egg for home decor
Separate a small piece from the modeling mass.
From this piece of mass we form a ball.
Next we make the ball more elongated.
After that, we narrow one of the sides of the product towards the top, and with our fingers we walk along the perimeter so that the product acquires smooth outlines. Leave to air dry for about 12-24 hours.
How to paint an egg to match a clutch of wild birds
After the eggs have completely dried, mix white acrylic paint with a drop of blue in the palette, you get a subtle blue tint. We dip a piece of foam rubber into the paint and use it to paint one side of the egg.
After 5-10 minutes, when the paint has dried, turn the egg over and paint it on the reverse side.
Next, mix black acrylic paint with a drop of water, dip the brush here, hold it over the eggs and tap the brush with the finger of your other hand. As a result, drops of paint will fall from it onto the surface of the decorative eggs. We wait for the paint on the craft to dry, turn the eggs over and also create droplets on the other side.
After which you can put the finished jewelry into use, for example, put it in a decorative nest, which we made in the previous master class, we recommend studying it! In addition, such eggs can be complemented with a very beautiful topiary from this review.
Well, in order not to lose sight of the idea, save it on your social network or add the picture below to Pinterest.
If you want even more ideas for Easter, go to this review or visit this section of our website. See you again in the next reviews!
WE RECOMMEND WATCHING:
In the world of childhood and carelessness, fantasies are highly valued, which open up a world of amazing possibilities for us.
It is in childhood that creativity is taken and given. And we, adults, do everything possible to develop the skill and give it the opportunity to grow further.
These days, there are many events that value hand-made exhibits. The work is done not only by adult hands, but also by children. The subject matter can be completely different. You can consider one of the directions: crafts made from eggs and eggshells.
Simple decorative pattern with rubber bands
If you don’t have time for artistic creativity, but are extremely bored with plain designs, use the rubber band pattern technique. Just a few minutes and beautiful DIY Easter eggs will be ready.
Required:
- Chicken eggs – 10 pcs. or more;
- Regular thin elastic bands - packaging;
- Food dyes in an assortment of colors;
- Table vinegar 9%.
Simple decorative pattern with rubber bands
Preparation:
- Boil the eggs hard, drain the water, and cool.
- Place on the table as many glasses or half-liter jars as the number of colors of dyes you plan to use.
- Pour into each individual color, add 0.5 tbsp. l. vinegar 9%.
- Boil water, pour boiling water (about 150 ml) over the dyes, stir until the paint dissolves.
- Place several rubber bands in random shapes on each egg.
- Dip into a container of dye until the water completely covers it.
- Leave for 2-5 minutes, remove to paper.
- After complete drying, remove the rubber bands - beautiful Easter eggs, made with your own hands, can impress family and guests at the table.
Before the beginning
It is important to understand what craft needs to be done. If it is planned from a whole egg, then difficulties in work must be avoided. To do this, you need to carefully remove the contents from the egg before starting. This cannot be done without the help of an adult. Why? The answer is simple. The object with which the egg cocoon will be pierced is sharp. And eggshells are so fragile that the shell can be damaged.
Using a sharp awl or gypsy needle, pierce the egg on both sides - top and bottom. The top hole should be smaller than the bottom. This is necessary so that the contents can easily pour out of the bottom hole using blowing. This method involves using a medical syringe, with which you can blow out the white and yolk in a matter of seconds.
Clue! The egg white and yolk do not have to be thrown away. It can be used for a variety of purposes, from cooking to a hair facial mask.
The shells must be washed well and dried for further use. This will take some time. Therefore, such preparations must be made in advance. Once you are sure that the egg is dry, let's get to work.
Easter eggs with lace pattern
The lace pattern adds tenderness and sophistication. But drawing it by hand is not an easy task. A simple life hack will help you cope with it brilliantly and not waste a lot of time. Now you will learn how to cook unusual Easter eggs with a lace pattern in just 15 minutes.
Required:
- White lace ribbon – 1 m;
- Regular rubber bands – 20 pcs.;
- Chicken eggs – 10 pcs.;
- Food dyes – in assortment;
- Table vinegar 9%.
Easter eggs with lace pattern
Preparation:
- Use pre-boiled and cooled chicken eggs.
- Cut the lace ribbon into 10 cm pieces.
- Wrap a ribbon around the center of each egg. Connect the edges of the ribbon with an elastic band.
- Place the water in a saucepan on the fire to boil.
- While the water is heating, prepare containers for dyes.
- Pour a bag of a separate color into each glass, add 0.5 tbsp. l. vinegar.
- As soon as the water boils, pour in 100-150 ml. boiling water into each container.
- Stir the contents until the dye is completely dissolved.
- Place 1 egg in each glass and leave for 3-5 minutes.
- Remove the eggs by the edges of the ribbons and place them on paper.
- Leave the eggs to dry. After complete drying, remove the tape - very beautiful, unusual eggs for Easter are ready!
Simple masterpieces
It has long been no secret that eggs and shells can be used to create not only various fairy-tale characters, but also beautiful mosaic paintings. And what beautiful flowers come from whole eggs! As soon as you want to make a craft, various tailed birds, wild and domestic animals are born. The embodiment of fantasy is limitless.
To make crafts you will need a standard set:
- empty egg (quantity as desired),
- paints (gouache or watercolor),
- watercolor brush,
- craft paper (multi-colored),
- PVA glue,
- glue brush,
- good lighting,
- stand and place for drying,
- colored plasticine.
Mosaic painting
There are many variations of eggs and shells. If you can create masterpieces from whole eggs, then why can’t you make a beautiful thing from a broken egg? Of course you can!
- eggshell,
- PVA glue,
- patterned napkin (decoration at your discretion),
- glue brush,
- cardboard,
- frame (optional).
Glue the broken shell onto the cardboard. Then, after drying, apply a thin layer of PVA glue to the shell with a brush and lay a single-layer napkin with a pattern on it. Apply glue to the surface of the napkin with a brush to completely secure it. Our picture should dry well. The finished product awaits us with a mosaic picture in the decoupage style. It will perfectly decorate the most modest corner in any room.
But for complete harmony, you can create another interior item. Carefully cut off the top of a plastic bottle and treat the entire surface from the outside with plasticine. Next, carefully lay out the broken shells at an equal distance from each other. You will get an extraordinary flower vase. Or a stand for pens and pencils. Next to the mosaic picture they will harmoniously complement the interior.
Crafts made from eggs and shells can be used not only as exhibits for an exhibition. They can decorate holiday tables, they can be given to each other for the holidays, they can be used to decorate a room and even a New Year’s tree! And there is nothing better than homemade decorations and gifts.
One of the most important Christian holidays, Easter, is coming very soon, and I want to somehow decorate the interior. What crafts can you come up with for Easter? As you know, the main attributes of Easter are eggs, symbolizing purification. Therefore, we will start with them.
In this master class I will show 10 options - how to make an Easter egg with your own hands with step-by-step photographs in a variety of styles - decoupage, shabby chic, papier-mâché, from beads, plasticine, decor with napkins, etc.
All families prepare for the Easter holidays on a special scale. It is necessary not only to put your home in order, but also to provide a luxurious table, prepare a wide variety of dishes in order to take a break from strict fasting. And there will definitely be lush Easter cakes and eggs on the table.
Coloring with food coloring
Eggs painted in halftones of the same color look impressive. At the same time, this technique is performed extremely simply. Even a child can cope with the task.
Required:
- Food coloring – 5 colors, 1 sachet;
- Chicken eggs with white shell – 10 pcs.;
- Glass glass 200 gr. - 5 pieces.;
- Table vinegar 9%;
- Boiling water – 1 l.
Coloring with food coloring
Preparation:
- Boil the eggs hard. Drain the water and leave to cool slightly to make it easier to paint eggs for Easter. You can make paints with your own hands quite quickly.
- Boil the water.
- Arrange the glasses. Pour one color of dye into each and add 0.5 tbsp. l. vinegar.
- Fill the glasses approximately ½ full with boiling water.
- Stir each color with a separate spoon so that the dyes dissolve in the water.
- Take an egg and dip it in the dye until it covers the top.
- Hold for 30 seconds, lift slightly.
- Another 30 seconds and lift again.
- In this way, stripes of different shades will be obtained.
- Do a similar technique with each other color.
How to make Easter eggs
Children always want to take part in the process of preparing for the holiday, and they are especially attracted by the prospect of decorating eggs. However, this work can be dangerous, because it involves the use of dyes and boiling water.
Another thing is crafts. The same Easter egg can be made from a variety of materials and then decorated as you wish. This is no less exciting work; it can also be called an Easter sacrament, because for Easter they do not necessarily prepare edible eggs, but also souvenir figurines.
Easter eggs in vintage style
You can suggest decorating the eggs using twine and lace. Starting from the top of the head, coat the workpiece with glue and carefully apply the twine onto the adhesive base, turn by turn. After braiding the entire egg, secure the thread. Decorate the souvenir with crocheted flowers and lace bows.
Easter eggs from threads can be made in another way: take multi-colored threads of the same type (on sale you can find multi-colored jute twine, wool or acrylic yarn). Eggs can be made plain or striped, and then decorated with beads, lace, sequins, and artificial flowers.
Decoupage is another way to create an original craft. Cover the workpiece (wooden or foam) with several layers of primer. Separate the top layer from the paper napkin and tear out the motifs you like from it.
Carefully coat the workpiece with PVA glue, attach the torn pattern, iron it through polyethylene, removing all the air. Finish the background with acrylic paints and cover it with several layers of glossy varnish.
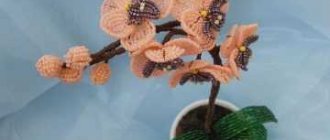
Easter eggs from beads are also made using blanks. You can paint the blank, then braid it, making openwork patterns. Wooden blanks completely braided with beads look original. A variety of patterns will help you create an original souvenir that is as beautiful as Faberge eggs.
It’s not difficult to create an Easter souvenir with your own hands. Make them using different techniques, decorate a small wicker basket with spring flowers and ribbons, put eggs in it and decorate your home.