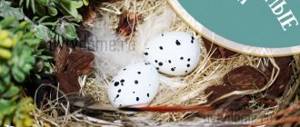
Festive decor creates a special joyful mood for Easter. We invite you to make an original craft with your children - an Easter egg made of felt on a skewer. Such an attribute, made with your own hands, can be installed in the ground with a flower or you can create a bouquet of several eggs of different colors, and it will delight your eye. We offer a detailed master class on making Easter eggs on skewers with step-by-step photographs.
See other Easter-themed master classes.
Tools and materials Time: 1 day Difficulty: 6/10
- a sheet of wool felt of the desired shade;
- floss;
- embroidery needles No. 5 or No. 8;
- pencil;
- scissors;
- self-adhesive non-woven lining (Fabry or another brand);
- template for embroidering an egg (see text below).
Felt Easter eggs are an original and stylish decoration for the Easter table that you can make with your own hands!
These eggs are also a wonderful gift for friends and relatives! Give your closest people one woolen egg each - and, undoubtedly, they will appreciate such a gift!
If you still doubt your capabilities, we hasten to reassure you. Anyone who is at least a little familiar with a sewing needle and thread can make such eggs! And our small recommendations on choosing materials and tools will help you.
So, what do you need to make beautiful felt Easter eggs?
First, you'll need felt. Wool felt is preferable. It sews well, looks cozy, and you can find great colors in their range. You will also need embroidery floss. Use any colors you like (like we used in the first egg, the photo of which you can see above). Or use just one color for a simple, classic egg.
You also need a needle. We used 3 strand floss, so we recommend size 5 or size 8 needles. Plus you will need some soft filler. A bunch of cotton balls will work great in this case. And finally, you will need a template, which you can download below. This template is full-size, so you don't have to do any expansion.
There are also a few extras to help you stitch the best stitches of your life! Fabry's self-adhesive non-woven fabric is great for transferring patterns onto felt (as you will see below), it's easy to use, and the stitches on it are even and beautiful! Such non-woven fabric can be easily purchased at a craft store.
LiveInternetLiveInternet
The current calendar week will end with a wonderful holiday - Happy Easter! And to go with it, I suggest you create wonderful, cute gifts for your family and friends in the form of bright felt eggs.
They can be used to decorate a holiday table or a beautiful Easter wreath made of branches. Well, kids will probably love making these eggs as gifts for their grandparents. After all, the process of creating them is quite easy, interesting and very creative!
So, in order to sew bright felt magnet eggs, you will need:
- pattern;
- felt (both plain and with a pattern);
- scissors;
- ordinary threads;
- floss threads to match the felt and in a contrasting color;
- vinyl magnetic sheet;
- needle;
- glue moment crystal;
- a little synthetic fluff;
- a simple pencil or tailor's chalk;
- various decorative elements for decorating eggs (buttons, beads, lace, half beads).
When all the materials are ready, let's get to the fun part - creativity!
1. We transfer the egg pattern to a blank sheet of paper and cut it out along the contour.
2. We choose felt for the base of our decorative egg and, applying the pattern to it twice, trace it along the contour with a simple pencil or chalk.
3. Carefully cut out.
4. Now we cut out the middle part from the pattern with the inscription “XV” (Christ is Risen). This part will be decorative, it will decorate the egg. And so we cut it out from felt of a different color or from felt with a pattern.
5. Well, we have prepared three main parts for creating our future felt Easter egg.
6. Now we put the back part aside for a while and start decorating the front part.
To do this, first we chop off the base with the middle colored insert and sew them with a regular seam forward of the needle using small stitches in one thread. We lay the seam at the top and bottom, retreating 2mm from the edge.
7. Now we will close the seam with beautiful lace, sewing it also in one thread with very small stitches with the seam forward of the needle. Such lace, as shown in the photo, can be sewn both behind its base and behind the “pattern”, so that in the end the lace ribbon fits tightly to the felt base. Carefully trim off the excess to the shape of an egg.
8. Visually focusing on the inscription “ХВ” (Christ is Risen) on the pattern, we transfer it to our testicle using a simple pencil or chalk.
Don't make the line too thick. Otherwise, you may tear the felt or the line itself may be visible after embroidering.
9. Using a needle back stitch and three strands of floss, we embroider the letters using neat and even stitches.
10. Now we add a little more decor, using bright buttons, beads, and half-beads.
11. And now we can sew the two parts of our testicle together. We put them on top of each other and pin them together with a couple of pins. Make sure that those sides on which the pencil line of the egg outline may be visible are on the inside of the product and not on the outside.
12. We sew the two parts of the egg together with a decorative overcast stitch using six strands of floss. To begin with, we hide the knot inside the product and then “go around” it around the entire perimeter, trying to lay the stitches at the same distance from the edge and between each other.
13. When almost the entire egg is sewn together, we stop and leave a small (2-3cm) hole for stuffing. We don't cut the thread!
14. Using padding polyester (holofiber), carefully and evenly stuff the egg. You shouldn’t make a pillow for them, it will be a magnet. This means it must be quite flat.
15. When you think there is enough stuffing, we finish decorating the egg by sewing up the hole with the same overcast stitch.
16. Our felt Easter egg is almost ready!
At this point you need to decide how you will use it.
If you hang a willow bouquet as a toy, for example, then simply thread a needle and thread through the top of the product and tie a knot. This will create a pendant.
If you just put an egg on everyone's plate as a napkin decoration, for example, then leave it that way.
You can make an egg with a bright holiday magnet
17. To do this, cut out a small oval from a sheet of vinyl magnet and use Moment Crystal universal glue to glue it to the back of the egg. Press firmly so that the glue sets.
These are the colorful Easter egg magnets we ended up with!
I really hope that my master class will help you create a festive Easter mood and on the brightest holiday of the year you will please your loved ones with warm hand-made gifts!
https://www.livemaster.ru/topic/1176199-shem-yarkie-pashalnye-yajtsa-iz-fetra
Step-by-step instructions with photos
So let's start sewing felt Easter eggs.
Step 1: Download the pattern
Download the template below with patterns and embroidery for the egg.
Felt Easter eggs - pattern
Step 2: translate patterns
Trace the patterns carefully along all the lines with a pencil on self-adhesive non-woven material.
Cut each piece with a gap of approximately 3-4 mm. Glue the interlining onto the felt.
Step 3: Embroider the design
Next you need to embroider the design. You will sew directly through the stabilizer and felt. We used a combination of the following stitches: back igloo, running stitch, lazy daisy, and French knot. Below we will show you how to make them if you are new to embroidery and these stitches are not familiar to you.
Back stitch
To form this stitch, insert the needle into the fabric from the underside about 0.5 cm from where you want to start sewing. Then insert the needle from the front side to the starting point of sewing and move it from the bottom 1 cm forward. Bring the needle up from the bottom (see picture below).
Running stitch
This is the simplest stitch. Simply insert the needle and thread into the fabric from bottom to top and top to bottom at equal intervals.
Stitch “Lazy daisy”
To form this seam, bring the needle out from the bottom up and immediately insert the needle back into the same place from top to bottom. You should have a loop formed. At some distance, bring the needle up from the bottom, pick up this loop and bring the needle back to the same place.
French knot
Bring the needle up from the bottom. Wind 2 turns of thread onto the needle, then pass the needle to the same place from top to bottom.
For all seams we used 3 strand floss. For this egg we embroidered with white thread using Norwegian blue felt. For the sample above we used straw colored felt.
Repeat the embroidery for all four wedge shapes.
Step 4: Trim along the outline
Once you are done with the embroidery, trim all four pieces neatly along the lines.
Step 5: Remove the interlining
Now you need to soak the stabilizer. To do this, place all the pieces face down in a bowl of cold water and let them sit there for about an hour. The stabilizer will become viscous and soft. Rinse it under cold running water. If any pieces are difficult to separate, simply run them under a strong stream of water and they will come off. Don't rub the surface of the felt - just let the water do its job.
Set the pieces on a towel and let them dry. Do not wring or twist them, even slightly. Just place them wet on a towel and let them dry.
Step 6: Sew the Pieces
Place the two egg pieces together with the embroidery facing up and sew them together along one edge. We used a running stitch with small stitches, which leaves a nice ridge along the seams of the egg. If you want a smoother finish, you can use a finishing stitch to stitch the edges.
Attention: be careful not to mix up the ends of the parts! The front of each piece is longer and thinner, while the back end is shorter and not as sharp.
Repeat for the second pair of pieces.
Step 7: Sew the Egg
Sew both pieces together, making sure the ends are positioned correctly. Leave 4-5 cm of the last seam open for stuffing.
The easiest way to sew an egg is if you roll it into the shape of a deflated football.
Add soft stuffing to the craft, then carefully sew up the hole.
Hand-sewn soft Easter eggs made of felt! We hope you enjoyed this tutorial? Check out our website for other Easter-themed master classes.
Our bonus video will also give you some ideas on how to make and decorate felt Easter eggs.
At Easter there is a tradition of giving each other eggs as a symbol of the miraculous resurrection of Jesus Christ. Author Nadezhda Bogomolova invites you to sew an egg from felt, which can decorate a holiday table or become an excellent holiday gift.
A felt Easter egg can be decorated with beautiful felt flowers. You can see more ideas for creating Easter eggs from felt.
So, for work you will need:
- felt in yellow, pink, green and purple colors
- needle and thin thread
- stuffing material
Felt souvenirs: Easter eggs
If desired, it is easy to add braid, feathers, sparkles to the craft, and instead of buttons you can use pistachio halves, painting them with regular watercolors in bright colors - they resemble Easter eggs.
To work you will need:
- workpiece for creativity - egg;
- PVA glue;
- ruler;
- brush;
- scissors;
- wide white lace;
- magnet;
- glue gun;
- floss threads;
- sequins, beads, buttons.
Sequence of work:
1. Instead of a plywood egg blank, you can use one you made yourself from thick cardboard, then the choice of the size of the craft will be left to the needlewoman. If necessary, cover the workpiece with white or brown wrapping paper.
2. Approximately slightly above the middle of the workpiece, apply PVA glue in a strip equal to the width of the lace.
3. Glue the lace, smooth it tightly and press, for example, with a heavy book. After gluing, cut off the excess lace around the edges with sharp scissors.
4. Print the scanned pattern, cut out all parts of the applique along the contour.
5. Cut out a chicken body, wing, comb and beard from felt of different colors.
6. Embroider an eye on the pattern of the body (beads and glitter were used for the sample), and use small beads in the same color to mark the tail. Use white thread to make small stitches along the edge of the pattern. The number and arrangement of decorations and embroidery can be varied.
7. Embroider the wing along the contour and with a curl using floss stitches of a suitable color. Add a bead from the center of the curl.
8. Also decorate the chicken’s comb and beard with stitches along the contour.
9. Using a glue gun, glue the body to the workpiece, placing it just below the lace. Apply glue pointwise along the outline of the pattern.
10. Glue the beard and comb tightly to the body, aligning the sections of the parts.
11. Glue the wing.
12. Select buttons that match the color of the felt used for the applique. Glue the buttons along the bottom edge of the chicken's body using a glue gun, alternating them by color.
13. Glue a magnet to the back of the workpiece to attach the decoration to the refrigerator or hood. To keep the workpiece firmly on the metal surface, use a magnet of at least 5 square meters. cm.
Instead of attaching a magnet, you can make a hole in the narrow part of the egg and stretch a loop of braid or ribbon. In this version, the product can be hung and used, for example, as a decoration on a door.