Anzhelika Romanyuk
Abstract of GCD on technology in GKP. Application "Dahlia"
Summary of GCD in the short-stay group
Teacher: Romanyuk Anzhelika Mikhailovna MBOU Secondary School No. 19, Michurinsk, Tambov Region
Topic: Working with paper. Application " Dahlia "
Target:
remember the signs of autumn, consolidate skills in working with templates and scissors;
learn to lay out ready-made forms with a slight overlap, place the applique in the center of the sheet , carefully apply glue, and reinforce the rules for working with scissors.
develop eye and fine motor skills
cultivate a love for nature and respect for it
Equipment: flowers (photo or live, product sample, cardboard, colored paper, templates, pencil, glue, scissors, colored pencils
Corrugated paper dahlia
This flower is made of corrugated paper. It is very easy and quick to make. It will be a great addition to the interior of your home or a wonderful gift for friends and family.
For work we will need: - corrugated paper of 2 colors. - threads. - glue gun. - cotton wool. - skewer. - scissors.
In order to start working with a flower, you need to make a base. Let's create the middle of the flower. Take red corrugated paper and cut a 4x4 cm square. In the middle of the square, make a depression with your thumbs.
Take a piece of cotton wool and roll it into a ball. This ball will be the core of the flower.
Take the prepared square and place cotton wool in the middle of the recess. We connect the corners of the square and twist them so that the shaft remains inside. Under a ball of cotton wool and paper, we tie the corners with thread. We tie everything tightly and tie it in a knot so that the thread does not get tied. Take a skewer and glue the base to the skewer. Let the glue dry.
We will have flower petals in two sizes. The first one will be 1x10cm in size, and the second 2x10cm.
We begin to prepare the petals. To do this, we will take one petal and twist it exactly in the middle. Making only 1 revolution.
Take the twisted petal and fold it in half, at the point where it is twisted. At the same time, use your fingers to make a depression in the middle of the petal. Thus, to create a petal with a recess inward.
We process all prepared petals in the same way. For our flower you will need eight petals of 2 sizes. In total, we will have 16 petals and a base.
Let's start assembling the flower. We take two smaller petals and place them opposite each other. We tie them tightly with thread.
In the same way we tie the remaining small petals. There will be 8 of them.
Now let's move on to petals of a different size, they are larger than the previous one. But there will also be eight of them. Attach the first four petals. We wrap them well with thread.
We attach the last petals to the flower. We tie it with thread and secure it. Correcting the petals.
Now let's process the flower stem. Take scissors and cut off unnecessary parts from the petals below. We cut it so that it is easier to glue the stem.
Let's start making leaves. To do this, take green paper. We cut a strip measuring 6x12 cm. We cut the leaves so that we get five oval leaves with pointed ends. Using your fingers, stretch the middle of each leaf a little, making a small indentation in the middle of the leaf.
Using a glue gun, glue the sheets to the flower.
For the stem, take a green strip measuring 1x10 cm. Stretch it to the limit.
Let's start gluing the stem. Let's start from the base of the flower. Carefully and neatly glue the base of the flower. Press the green strip firmly onto the skewer. Let the glue dry on the base and proceed to the subsequent gluing.
Now we glue the stem itself. At the same time, glue the skewer with glue. We wrap it tightly with paper.
Beautiful dahlia made of paper
In winter, you really want to feel a piece of summer or spring.
I would like to decorate the interior with something bright and sunny. Today I will help you make your wish come true and teach you how to create beautiful bright flowers to decorate your interior. What you will need:
Colored paper. Ruler, scissors, pencil. PVA glue or any other reliable glue for paper.
First we need to cut out a circle for the base of our flower. We cut it out of any paper, it will not be visible, and put it aside for a while.
Now we take a new sheet of colored paper and begin to draw it. We need 7 by 7 cm squares.
Cut out all the marked squares. This can be done with scissors or a stationery knife, whichever is more convenient for you. For the flower we will need squares from one whole and one half of an A4 sheet.
Now the most time-consuming, but quite interesting work begins. We begin to roll our squares into small envelopes, such as those in which grandmothers used to sell seeds.
When all the squares have been twisted, we take the circle that was previously set aside for the base and begin to collect the dahlia. We glue the first row of petals and let it dry.
How to make dahlias from corrugated paper
A needle-shaped dahlia made of corrugated paper looks very interesting, and if you make a flower bouquet from different shades of such a flower, you will get a wonderful bright addition to the interior of any room.
Needle dahlias are slightly different from other varieties in that they have thin petals that are rolled into a tight tube. Therefore, to make these flowers, we took corrugated paper, from which we cut out a lot of petals, distributed them into bunches and combined them into one bud. This is how we came up with a beautiful dahlia made from corrugated paper.
How to make Giant Dahlias from paper + Printable template
As you can see in the photo, the flowers turn out very beautiful if you use paper of different shades. This decoration is suitable for any holiday, and children will squeal with delight if you show them how simple it is.
Here's what you'll need:
- Colored paper
- Cardboard or thick paper (for the base)
- Ruler
- Pencil
- Scissors
- Compass or Printer (if you are too lazy to draw circles with a compass, then at the end of the article there are links to ready-made files for printing on a printer).
Each giant dahlia consists of 2 main geometric shapes: a large circle with a diameter of 20 cm - as a base and several squares with a side of 10 cm and 11.5 cm, rolled into the shape of cones.
Credit: www.mamasgonecrafty.com
Credit: www.mamasgonecrafty.com
Start by cutting out 40 11.5cm squares and 15 10cm squares. It's important to note that the final number of squares is variable, but the values above are a good starting point.
To roll the square into a cone, use PVA or hot glue.
Step-by-step photo lesson:
We bend the cut strip of corrugated paper several times. Draw one petal of the future flower with a simple pencil.
We cut out a lot of these petals.
We wrap the ends of each petal.
We group the petals into bunches of 15-20 pieces. We tie it with threads.
Now the end can be tied with adhesive paper tape.
Let's make 3-4 more bunches of petals.
We collect all the bunches of petals and place them around the stem at the base of the flower. Secure with tape.
On green corrugated paper, outline the leaves of the flower.
Glue the green leaf to the stem with the flower.
Our needle-shaped dahlia made of corrugated paper is ready.
Corrugated paper rose
This time we will try to make a rose from corrugated paper. The tools are the same as for creating an aster.
We take a piece of corrugated paper and fold it in the same way as for the aster.
We cut off the edges of the paper as shown in the figure, the main thing is that the edges still remain connected. Unfold the piece of paper, it should look like this:
This is a row of our future petals. We begin to work with each of them. The longer edge of each petal must be turned (crumpled and turned):
Next we work with the other end of each petal. To do this, take a toothpick and twist the end of the petal onto it (the convex part of the petal “looks” at you):
Once you have twisted the entire end of the petal, you need to use both hands on a toothpick to squeeze the paper towards the middle:
We do this with each petal, this is what should happen:
Now we need to make the petals beautiful. To do this, use two thumbs to pull each petal inward (don’t be afraid to tear it):
Now let’s cut out the lower rose petals (3-4) and leaves from green paper, and make legs for each petal and leaf, twisting them as usual:
Now, holding the petals by the legs, we begin to fold them in a circle:
Hold the stems firmly to prevent the flower from breaking. After twisting the rose petals, attach 3-4 lower green petals:
Now you need to clamp the stems of the petals with an iron rod (see here).
Just like we did with the aster, you need to wrap the stem with a narrow strip of green paper, adding leaves when wrapping the twig:
The rosette is ready, everything is not so difficult, you will definitely succeed.
DIY paper dahlias: step-by-step master classes and ideas for creativity
Dear readers of the site “Native Path”! In this article, I have prepared for you five ideas on how you can make a dahlia out of paper with your own hands. All the flowers - dahlias from this article are very different: very small - on a postcard, and huge - for decorating rooms, different in the technique of execution (from corrugated paper, colored paper, using the origami technique and others). Master classes will be interesting for both children and adults.
In the article you will find five master classes on making paper dahlias with your own hands:
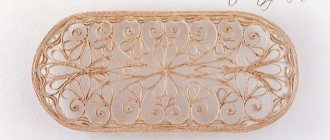
— Master class 1. Postcard with a dahlia: a paper dahlia with children with step-by-step photos and examples of children's work.
— Master class 2. Large paper dahlia for decorating a home or kindergarten for the holidays.
— Master class 3. How to make dahlias from sweets and corrugated paper: video.
— Master class 4. Dahlias made from a hexagonal sheet of paper using the origami technique. Star flower.
— Master class 5. Dahlia from a circle using the origami technique with children.
Preview:
Workshop on artistic processing of materials and fine arts
Development of a lesson plan for making paper appliqué in the preparatory group on the topic: “Our flowerbed. Autumn dahlias"
Dunaeva Victoria Viktorovna
Goal: development of creative abilities in children.
- Formation of children's knowledge about the autumn flower dahlia.
- An exercise in folding and gluing a cone from a square shape, creating the image of a flower (dahlia).
- Teamwork Skills Training
- Development of memory, vocabulary, fine motor skills.
- Development of a sense of color and artistic taste.
Age of students: preparatory group.
Materials: Subject pictures of flowers: roses, asters, gladioli, marigolds, dahlias; image of flower beds of dahlias; sample application; plates, squares, 4 cm by 4 cm in size, orange, raspberry, burgundy, white; glue – pencil, oilcloths and rags for working with glue, base for applique
Preliminary work: looking at the flowers in the kindergarten flowerbed, talking about autumn flowers; an exercise in folding and gluing a cone from a square shape.
1. Psycho-gymnastics “Flowers in the meadow”
– Let’s imagine that you are all different flowers (plants) in a clearing. The gentle sun is shining. How do your heads turn to follow the sun? And now a light breeze blew. How do your stems sway? The wind picks up and clouds appear in the sky. A thunderstorm is approaching, the first drops of rain have fallen. What happens to the flowers? Show. But then the clouds clear, the storm subsides, and the sun appears. The last drops are flowing from your petals. Washed and fresh, the flowers stand in the clearing and smile at the sun.
2. Didactic exercise “Gardener – accountant”
Our girls grew their favorite flowers in the flower garden. Let's name them. (The girls take object pictures depicting garden flowers, show them, and the other children answer the question: how many flowers did this girl grow in the flower garden.)
– Masha has a lot of roses in her flower garden. Alina has many asters growing in her flower garden. Sonya has a lot of gladioli growing in her flower garden. Katya has a lot of marigolds growing in her flower garden.
The last girl holds a card with a question mark in her hand.
– What flowers grew in Nastya’s flower garden? Let's solve the riddle.
3. Guessing the riddle about the dahlia.
He looks down on you -
You won't find a prouder flower.
He is the ruler of the autumn garden,
This is a bright color - ... (dahlia).
The last girl takes an object picture of a dahlia.
– What flowers grew in Nastya’s flower garden? What time of year do these flowers bloom? So what can you say about them? What flowers are these? (Dahlias are autumn flowers).
4. Looking at a bouquet of dahlias from life.
– In autumn, flower beds blaze in gardens, front gardens, and flower beds. Behind the fences, bushes strewn with flowers are visible from afar. This is one of the most colorful and vibrant autumn flowers - the dahlia. They have no equal in splendor. They bloom for a very long time. The queen of flower beds in the autumn garden, the dahlia, leaves no one indifferent. (demonstration of illustrations of dahlia flower beds).
5. Didactic exercise “Flower character”
- Guys, we looked at live dahlias and flower beds of dahlias, listened to a story about what beautiful autumn flowers they are. Now let's play. Let's say, what is the character of this flower? What kind of dahlias? (colorful, lush, multi-layered, there are one-color and two-color dahlias, bright)
Master class 5. Dahlias from a circle using the origami technique
Not only adults, but also children can make such dahlias from paper. How to make this dahlia - in the step-by-step master class in the pictures below.
This dahlia, if it is made of petals - small circles - can be pasted onto the cover of a greeting card.
You will find another option for making a dahlia with your own hands in the article “How to make a dahlia: a step-by-step master class.”
For the most inquisitive readers of “Native Path”: what is the correct name for this flower for children? The botanical name of the flower is “dahlia”. But in colloquial Russian it is often called in the masculine gender - “dahlia”. According to Ushakov’s Explanatory Dictionary and Efremova’s Explanatory Dictionary, the most common masculine form in the Russian language is “dahlia”.
You can read more about how to make paper flowers with your own hands in the articles on the site:
Get a NEW FREE AUDIO COURSE WITH GAME APPLICATION
“Speech development from 0 to 7 years: what is important to know and what to do. Cheat sheet for parents"
Click on the link or course cover below to subscribe for free
The author of the course is Valasina Asya, candidate of pedagogical sciences, author of the website “Native Path”
Tools and materials Time: 2 hours • Difficulty: 6/10
- regular office paper and printer;
- printed flower template;
- scissors or cutting machine;
- yellow scrap paper;
- floral tape;
- floral wire;
- glue gun;
- watercolor and brush (optional if you don't want to paint the paper).
Dahlias are incredibly versatile flowers. As a symbol of inner strength and creativity, they are ideal gifts for close friends and colleagues. These paper dahlias are similar to peonies - just as bright and colorful, and their petals can be curled up any way you want!
The template below will allow you to create dahlias with a diameter of 10 cm if you print them on a standard A4 sheet of paper. If desired, you can reduce or enlarge the scale of the images, which will allow you to make flowers of the desired diameter.
Sample:
Step-by-step instructions with photos
So, let's start our master class.
Step 1: Print the Templates
- Print out the dahlia templates on standard A4 paper in the quantity you want to get, based on 1 sheet - 1 plant.
- You can print your templates on colored paper in yellow, pink, and other shades without having to color them!
Step 2: color the blanks
Paint the petal details with watercolors and a brush. Leave to dry for a while.
Step 3: make a ball
Use scrap paper to form a small ball.
Wrap the ball in yellow scrap paper. Securely secure the bottom of the ball with glue.
Step 4: Glue the Petals
Take the ball and apply hot glue to the bottom and sides. Place the ball in the middle of the small circle with the petals.
After gluing, bend all the petals up so that they seem to “hug” the ball. Glue the second and third small layers of petals to the ball in the same way.
- Apply glue to the bottom of the ball with the small petals already glued.
- Place the ball on a layer of medium-sized petals and glue the pieces together.
- Fold the petals of the middle layer upward.
- Glue the next layer of petals around the first layer.
Then glue two large layers of petals to the flower.
Step 5: attach the wire
Glue floral wire to the back of the flower.
Insert two small circles from the template into the wire, first larger and then smaller, and glue the circles to the base of the flower.
Finally, wrap the wire with green floral ribbon. Securely secure the ends of the floral tape with glue.
DIY paper dahlias are ready! Happy handmade everyone!