Making crafts from plasticine offers almost limitless possibilities for realizing any creative ideas. If you have the desire, free time and at least minor skills, you can make anything from such material, from small figurines in the form of animal figures to full-fledged compositions, for example, scenes from animated films.
However, when doing this type of needlework with a small child, there is no need to rush, since in order to create complex crafts the child must acquire the necessary skills. Therefore, you need to start by sculpting simple figures consisting of simple geometric elements. Modeling balls and cubes, flattened geometric shapes and sausages and then combining them into a single craft will allow the child to gain basic skills in sculpting crafts, which will provide a more comfortable transition to making more complex figures.
In addition, do not forget that modeling for children should be subject to some other equally important rules, which must be taken into account in order for modeling classes with a child to be not only fun, but also beneficial to him:
- Firstly, the child must be passionate about the type of activity offered to him. Otherwise, you won’t be able to get him interested in modeling. Therefore, your child should be encouraged to fashion crafts that are interesting to him, for example, figurines of his favorite cartoon characters.
- Secondly, the child needs to be helped in everything, teaching how to make various geometric shapes by personal example.
- Thirdly, it is very important to choose high-quality material, which should warm up well and quickly and not contain harmful substances.
An excellent option for the first modeling lessons would be making various foods. This could be candy and other sweets, baked goods, sausages, and so on. Making food is quite simple and exciting, not only for kids, but also for their parents.
By the way, answering the question of how to make food from plasticine, it is worth noting that such crafts can be made from the so-called edible mass, which can be made at home according to the instructions available on our website. Of course, crafts made from such a composition can then be eaten.
PHOTO step by step - How to make food from plasticine
In today's lesson we will look at how to make a beautiful pizza. To do this we will need a small amount of material of different colors, a stack and a little time.
To begin with, let's make a flattened circle out of orange, which will serve as the base (dough) for pizza and put several circles of purple mass on it. On each circle we will put several small pieces of white color, thus obtaining some kind of sausages.
Let's remove the sausages for a while and place a flat red circle on top of the pizza base, giving it uneven edges. It will serve as tomato sauce, which almost no pizza can do without. Return the sausages to their place and add olives to the composition. We will make them from black plasticine, rolling it out into very thin sausages and connecting them into ovals.
Let's finish the pizza with thin yellow sausages, which will act as cheese.
Let's make a kind of board out of brown material and put the pizza on it. Then, using a stack, cut a small triangle from the pizza and move it a little to the side.
Children's games are becoming more and more attractive, because this world provides more and more opportunities and material things. Dolls continue to be in fashion, but more importantly, many of their accessories are selling like never before. Food, household items, furniture and even a house, this is what we can find on store shelves, but all this can be done with our own hands much cheaper. For example - food, so let's get ready and try to make beautiful food for the dolls together.
How to make food for dolls from dough?
Let's start with simple things, how you can make beautiful food from dough. We will need:
Salty dough . Toothpicks. Stationery knife . Paints, pastels. Varnish
1.
First of all, let's make a pie, this will be a good lesson for beginners. Roll out the dough and cut a circle out of it using a regular bottle cap. The base is ready, now you need to decorate it, we do this using the same dough only with stripes made.
Use toothpicks to give the correct shape.
3.
And finally - croissants. Roll out the dough into a thin layer and cut out a circle using a bottle cap. Divide the circle into 6 even parts and start rolling the croissants. Next, we paint them with pastels and place them in salt. This way we make them more attractive.
4.
To make our miniature food last longer, it should be dried in the oven. To do this, place our baked goods in an oven preheated to 110 degrees.
For a more attractive look, the pie can be immediately cut into pieces.
5.
The last step is to give the baked goods a natural look, using paints - brown and white. Don't forget to varnish the food when the paint dries.
How to make food for dolls from plasticine?
Plasticine is also good for making food. It is easy to process and is not very expensive. And so, today we will make chocolates, for them we will use:
Brown and white plasticine. Toothpicks. Stationery knife
Let's get started!
1.
Roll out the plasticine in a small layer and divide it into even squares.
2.
The mold for the candy is ready, now you need to decorate it, for this you use white plasticine twisted into a thin tube.
3.
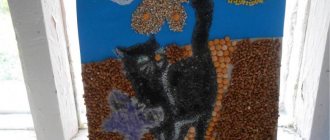
The last step is to decorate the candy with coffee beans, which we will also make from plasticine.
4.
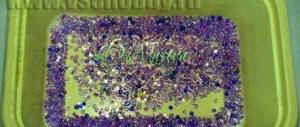
The second type of candy is a little more difficult to make. We roll small balls of plasticine and then process them with a toothpick and brush. Use a brush to make a small indentation on top, and use a toothpick to make many edges on the sides. Here's what we get:
Ready-made candies can be placed in a small box.
How to make food for dolls from clay?
We have prepared photo instructions that will help you quickly and beautifully make food for dolls from polymer clay.
Many parents have already become convinced that modeling with plasticine is a fun activity for children. Today we will focus on girls. Girls love a variety of dolls; to make the game fun, you can have a tea party. Of course, you can buy food, but we suggest getting creative and making it out of plasticine.
Let's start sculpting
Now we’ll tell you how to make food from plasticine that looks like delicious donuts. For such a creative process, you will need multi-colored material and hand napkins. Donut making:
- we take colors similar to the dough, combine them to obtain the natural color of the baked goods; mix together and get the color of the dough;
- roll the worm and the ball, press the products;
- decorate the top of the product with yellow color to get an imitation of glaze;
- you can attach small drops, they can replace berries or dragees;
Our donut is ready. After spending a few minutes of time, your toy will not remain hungry. Having finished with sweets, we begin to sculpt vitamin-rich fruits.
So different
The modeling mass, later called plasticine, was first patented by Franz Kolb and William Harbutt about two hundred years ago. Most of all, Harbutt's invention was loved by his children and he decided to open his own factory for the production of this wonderful material. Modern plasticine is strikingly different in composition from its ancestor. After all, Kolb and Harbutt made it from clay, and now plasticine is made from various synthetic materials - rubbers, polyvinyl chloride, high molecular weight polyethylene and others. And there are quite a lot of types of this material. Let's look at some of them:
- Regular wax plasticine.
A safe and plastic modeling mass, which is used for children's creativity. - Sculptural plasticine
is similar in composition to the invention of Franz Kolb. It's very hard. This property is widely used by students of art institutions to create sculptures. - Ball plasticine
looks like a mass consisting of many small foam balls. It is held in place using special glue. It hardens easily in air and is used for finishing appliqués and sculpting unusual figures. - Hardening plasticine
is similar to very soft and light modeling dough. Does not stick to hands and hardens after drying. You can play with figures from it. - Bouncing plasticine
differs from its counterparts in that when dry, products made from it acquire the bounce of rubber. - I would especially like to mention Play-doh brand plasticine. Its composition is still classified. On the packaging, the manufacturer only indicated that the product is made from safe natural materials, including wheat, salt, water and food coloring. It turns out that this is not plasticine at all, but modeling dough. This composition of this unusual plasticine makes it absolutely safe for children. Now modeling lessons can be started with very little children who have just learned to sit. And this is wonderful, because modeling is a very useful activity. Plasticine of this brand has a wide range of bright and rich colors, but its price is much higher than that of others.
A lot can be said about the benefits of modeling. Modeling calms the nervous system, allows you to develop perseverance and develop attention and memory. Such classes can be carried out with very little ones, teaching them the basics of modeling. Modeling real models (meaning plants, animals, equipment) allows the child to better understand the essence of how something works. Modeling fictional characters develops imagination, allows the child to realize his creative potential, and instills aesthetic taste. In addition, modeling stimulates the speech center and develops fine motor skills. And handmade crafts will certainly delight your child.
Bananas
You've learned how to make food out of plasticine, now let's move on to fruits. We will begin our creativity by making everyone’s favorite banana. For the work you need a color that will be associated with a banana peel. You need to add a little dark shade to the materials to decorate the end of the product. Banana making process:
(Step 1)
Our bunch of bananas is all ready.
Girls often play tea party with dolls, but what tea party would be complete without a delicious pie. We mold him from plasticine. Modeling the cake:
- start working by making a base for future baking; you can use an orange color or one that best matches the natural shade;
- We place purple and red berries on the workpiece;
- twist a thin and long stick to form a rim;
- We decorate the edges of our pie with a rim;
- We cut thin strips of white color and lay them on the surface of the workpiece, and they should be a mesh.
That's it, everything is ready for tea. These plasticine crafts for children are the easiest, even a small child can handle them. It is advisable to supervise the child during the sculpting process, because in most recipes there are small parts that the baby can pull into his mouth.
Perhaps every girl should know how to make food for dolls from plasticine in order to organize doll dinner parties and tea parties. Making plasticine food is fun and exciting. The sculpting activity itself can be turned into a game. Creating plasticine food will help not only decorate the doll's table and make the game more interesting, but also develop hand motor skills, provide a field for imagination and aesthetic taste.
Any plasticine is suitable for modeling. To ensure that food retains its appearance for a long time, it can be sculpted from special modeling masses, for example, from colored polymer clay that hardens in air.
Send your photos
Do you also make beautiful crafts?
Send photos of your work. We will publish the best photos and send you a certificate of participation in the competition. See also.
Delicious cakes, pastries and other desserts, who doesn’t love them? Everyone knows that children love to eat sweets. Little girls can practice making beautiful cakes for their dolls using plasticine. And the boys will probably want to try themselves as a chef. This article will provide several colorful master classes that will tell you how to make cakes from plasticine.
Let's start sculpting
For Monster High dolls, which are popular today among children and adults, you can make barbecue, donuts and fruit. Some girls collect these dolls, create homes and spaces for them, make furniture, clothes and shoes, so a food modeling master class may also be of interest to collectors.
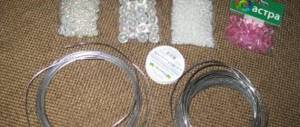
Making a barbecue with kebabs from plasticine is very simple. For this you will need:
- gray, brown, pink or white plasticine;
- matches (7 pieces);
- a small box (for example, a perfume box);
- stacks;
- modeling board;
- napkins.
Progress:
- We prepare the box (cut off the excess, cut out recesses for skewers) and knead the plasticine;
- Roll out the plasticine into a thin cake and wrap the box;
- Making the legs: spread a small layer of plasticine on each match, smooth it out so that all the legs are the same;
- We assemble the grill completely (insert the legs);
- We make skewers: cut brown plasticine into small pieces, make cakes from pink or white plasticine;
- We string the prepared pieces of plasticine onto matches, alternating them with flat cakes (“onions”);
- We place the finished skewers on the grill; you can put pieces of black and red plasticine (“coals”) inside the grill.
Here’s another option for creating a barbecue out of cardboard and toothpicks (you don’t have to cover it with plasticine):
Plasticine donuts turn out beautiful and appetizing.
The following materials are required:
- plasticine yellow, brown, black;
- modeling board;
- tools;
- hand wipes
You can also use blue and white play dough for the “icing” or orange to give the donut a golden brown look. It all depends on your imagination: the donut can be decorated with “chocolate”, “vanilla” icing, “confetti” or berries.
Progress:
- Mix yellow and brown plasticine to get the color of the dough;
- To create two types of donuts, roll out a small sausage and a ball, which we press on top to make a flat cake;
- Glue yellow plasticine on top of the sausage and flatbread;
- We assemble the sausage into a ring, coat the seams, and press the cake in the middle with a felt-tip pen or other suitable round object;
- Decorate the “donuts”: make a thin sausage from black or brown plasticine and glue it on top with a zigzag, make purple (or other color) berries and confetti.
You can also make a cake from the baked goods. Just follow the instructions below:
From the fruit we will make a bunch of bananas and a watermelon.
To sculpt bananas you will need yellow and brown plasticine, a board and sculpting tools.
Progress:
- Cut the plasticine into small pieces and roll them into balls;
- We make sausages from the balls: they should be short and pointed at the ends;
- We bend the sausages a little and collect them in one bunch, placing shorter “bananas” on top;
- Glue small brown dots to the ends of the sausages;
- We press the bundle at the base with your finger or tools and glue a brown strip of plasticine.
Bananas are ready!
Watermelon is made from black, red, white and green plasticine. First, we make thin black sausages - these are the future bones.
Then place one sausage in the middle of a rolled out piece of red plasticine.
Fold in half and place the “bones” again.
We bend the red plasticine in half and form a ball.
We wrap the “pulp” in white and then in green plasticine.
We make stripes.
You can also make pizza for Monster High.
To do this, you will need yellow or orange plasticine for the base and multi-colored plasticine depending on the “ingredients.”
Progress:
- We make a dough base from orange or yellow plasticine (you can mix brown and yellow). To do this, roll out a round cake from a plasticine ball. To make the pizza look fluffy, you can wrap the edges with sausage and press the seams, or use your fingers to create sides from the flatbread.
- “Coat” the base with sauce: roll out a thin layer of red plasticine ball to the size of the cake and place it on top. You can also use white plasticine.
- We mold the ingredients: tomatoes, onions, sausage, olives, peppers and whatever we want.
- We lay out the ingredients in layers or simply in a chaotic order on the base.
- You can sprinkle “cheese” on top - finely chopped pieces of yellow plasticine.
The pizza is ready.
A tea party for Barbie will be decorated with a beautiful plasticine cake.
First, a small flat cake is rolled out. Balls of orange or purple berries are laid out on it. Strips are cut from a thin sausage and placed crosswise on top. A braid of two intertwined sausages is glued around. The pie is ready!
You can take note of the ideas for creating doll food from plasticine from the selection of videos below.
Food for dolls: how to make it yourself?
Similar toys may look different. You can style them to look like real food, shaped like vegetables or dishes. A more complex option is detailed study. If you wish, you can create food for dolls that will differ from the real thing only in size.
To make various products or dishes, you can use different materials at hand. This can be ordinary plasticine, polymer clay, or even ordinary paper.
Of course, plastic toys will be more durable. But they also have their disadvantages. One of them is that you need to have artistic skills. Working with polymer clay is reminiscent of a sculptor's modeling. In addition, not all children can sculpt with it. It’s better to do this interesting activity with older guys.
The easiest and safest option is to make food from papier-mâché. You only need paper, water and PVA glue. Using this technique, it is better to make medium-sized voluminous objects. For example, you can make apples. Papier-mâché also allows you to take impressions of any objects. This will help create plates for your food. You just need to find a suitable small object, which should then be covered with shredded paper mixed with water and glue.
If you still choose modeling, then you should prepare additional tools in advance. To avoid getting the table dirty, you need to purchase a board. For polymer clay, a rectangular piece of glass is more suitable. It is easy to wipe off during practice. Also, for working with plastic, it is best to buy latex gloves. The reason is simple - polymer clay gets dirty quickly. If you want to create realistic food for dolls, it is better to work with gloves. Stacks are useful for working out details from any materials. They can be replaced with regular toothpicks. A utility knife will also come in handy. You can use it to cut parts.
Plasticine food for dolls: simple options
This type of craft does not require any special skills. In addition, you can sculpt food from plasticine for dolls with a child from one and a half years old. The material is absolutely safe. The easiest way to start sculpting is with stylized fruits and vegetables.
- Carrots - take orange plasticine. Mix it with a little red. Then form a cylinder. After this, begin to stretch the workpiece so that it tapers on one side. To do this, you can pinch the future carrot between your index and thumb, creating the desired shape. On the other side, the base of the vegetable should be rounded. In the center we make a small notch with a toothpick or a stack for the green tail. We sharpen the opposite part of the carrot. Then you need to mold the carrot tops. To do this, take green plasticine and a stack. Divide the material into several parts. Pull out each of them. You should end up with thin pieces. Then, using the stack, we form the leaves. To do this, we make cuts at an angle of 45 degrees. We repeat this step with all the blanks for the tops. Take some black plasticine and roll it into thin small strips. Stick them in random order onto the carrot. At the end, attach the tops to the base of the vegetable. Plasticine carrots are ready!
- It's very easy to make bread. To make a bun, take plasticine of 2 tones - light brown and dark brown. Form a small loaf from the lighter one. It can be made round or elongated. Roll out the darker plasticine into a flat cake. Then cover the formed workpiece with it. Carefully hide the resulting seam. To do this, run your fingers over it. Finally, use a stack to make several slanting cuts.
- Pizza for plasticine dolls is also very simple to make. Take a piece of sand-colored plasticine and roll it into a cake. Also form small circles in pink and red. The first will be sausage, and the second will be tomatoes. Make small “grains” less than 1 mm from white plasticine. To size. They should be placed on pink mugs. We make olives. To do this, we form “grains” of dark blue color. Place pink circles on the golden circle first, then red ones. Place olives on top. In order to create the appearance of cheese, you need to form thin yellow stripes. They should be placed on top of the pizza in any order.
Plasticine recipes
It's time to practice making plasticine desserts for dolls. We bring to your attention several recipes for plasticine cakes.
Chocolate cake
To prepare it, use ordinary plasticine, a modeling board and a stack.
This cake will have four tiers.
You can make any number of them, the main thing is to remember that the shortcakes should be reduced in size.
Form four balls of brown plasticine.
Each cake needs to be flattened and placed in decreasing order. The base of the cake is ready.
Let's start decorating. Roll several thin sausages and intertwine them in pairs and place them between the tiers of the cake.
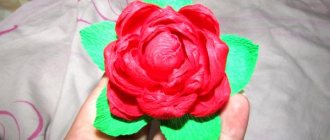
Now make roses as shown in the photo.
Decorate the top tier with cream roses and serve!
Rainbow cake
To prepare a cake according to this recipe, it is best to use Play-Doh brand plasticine. It has very bright and beautiful colors. To make a cake, you need to arm yourself with a stack and select a round template according to which you will cut out the cakes. Take plasticine in all the colors of the rainbow, at the same time you can repeat the colors with your child. Roll each color into a flat cake, not very thin. Cut out the cake layers in a stack and place them in the correct order on top of each other.
To decorate, you need to roll out white plasticine into a flat cake and cover the cakes with it, trim off the excess with a stack. Place a border of two intertwined strips of white plasticine along the bottom of the cake. It turned out to be a very tasty cake for dolls.
Bright cake with roses
Nowadays, most girls have Monster High dolls. They are very unusual in appearance and are the children of famous monsters. These dolls don’t even need a simple cake, because they are bright personalities. Make a beautiful cake with roses for them. The manufacturing principle is not much different from the rainbow cake recipe. Take several pieces of plasticine. Choose colors that are as bright and unusual as possible. Make an arbitrary number of equal-sized cakes and place them on top of each other. Roll roses from plasticine strips and decorate the top of the cake with them. Add some greens. Cut the cake into pieces and treat your favorite dolls.
Food for dolls: making from polymer clay
From polymer clay you can create real masterpieces that will be no different from real food. The only thing you need to remember is the safety rules. The clay becomes hard after baking. On average, a small miniature cooks in the oven for about 15 minutes. At this time, it is better to open the window, since heat treatment releases a colorless gas. Also, after baking, the oven should be thoroughly washed with detergent.
You can create many textures from polymer clay. So there are several ways to create bread. The easiest one is using salt. It helps to reproduce the structure of the crumb. You will need sand-colored polymer clay. To create a sandwich, form several pieces. Then sprinkle each with fine salt. In this case, it needs to be pressed into the dough using a rolling pin. Sprinkle each circle 2-3 times, roll it out, and then do the same on the other side.
We cut the resulting blanks so that they resemble a sandwich in shape. Then bake them in the oven for about 5 minutes. During this time they should harden. Remove from the oven and rinse under warm water until the salt dissolves. Then we put the pieces on top of each other and glue them along the edges with special glue for clay. Send to bake for another 5 minutes. Forming a crust. To do this, we use clay of several colors. Glue it on the first side, and then bake again for 5 minutes. Cover the finished sandwich with matte varnish. You can make pancakes using the same principle. Individual pieces are simply baked and coated with matte varnish.
You can also create real winter doll preparations from polymer clay! To do this, you should sculpt vegetables - cucumbers and tomatoes. For the first we use green clay, and for the second we use red clay. You just need to give the shape to small pieces of material. You can also work out the details - using a stack to create bumps on cucumbers and indentations on tomatoes. To create greens, finely chop green clay. We put vegetables in small bottles, and then sprinkle them with “greens”. Then add the vegetables again. At the end, pour a special clay gel or epoxy resin into the bottle. We seal the workpiece with a lid that can be glued with glue.
Do-it-yourself food for dolls can be made from plasticine or polymer clay. In the first case, it is enough to simply give pieces of material the shape of vegetables or dishes. When working with polymer clay, you can use additional tools such as varnish and gel. They help to detail the structure and give the food a realistic look.