DIY costume of Koshchei the immortal
With the onset of winter, parents are usually faced with two pressing questions: how to dress their beloved child so that he does not freeze, and where to get a suit for him for the New Year's party. And if there are usually no problems with the bunny-squirrel-snowflake costume, then the immortal Koshchei costume is not so easy to find. But there are no hopeless situations. And therefore, it is precisely how to make the costume of Koshchei the immortal with your own hands that will be discussed in our article.
Master class on creating a costume for Koshchei the Immortal
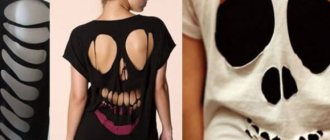
- First of all, let’s decide what our Koshchei costume will be. The usual set includes trousers and a T-shirt with a skeleton design on them, a crown, leggings, boots and a cloak. But the most important part of Koshchei’s costume is, of course, the black base suit with a skeleton pattern applied to it.
- Let's start work by making a “skeleton”. To do this, take pajamas or a black knitted suit, silver foil (you can use regular food foil), scissors and glue. If you don’t have a ready-made suit, you can sew pants and a T-shirt from any black fabric, or paint any suit black.
- Depending on the size of the child, we will draw a stencil of bones for Koshchei’s costume on the newspaper. Let's try it on the baby, and if everything fits, we'll cut out the bones from foil. Alternatively, you can use masking tape, white cloth, self-adhesive paper, or even Christmas tree fabric for the bones rather than foil.
- Attach the bones to the trousers and T-shirt using glue or thread. We will make a cloak from a piece of black fabric and trim it with Christmas tree trim.
- The main part of Koshchei's costume is ready!
- Another way to apply a skeleton design to a costume is to paint it with special paints. This is done like this: on thermal paper, draw a stencil of bones for Koshchei’s costume.
- Cut out the bones, leaving the paper around them untouched. This must be done very carefully, because the appearance of the entire costume depends on it. It is best to use a sharp stationery knife for cutting.
- We apply the resulting stencil to the base fabric and make the final corrections.
- We smooth our stencil onto the fabric with a warm iron so that the stencil does not move during painting and the design is not deformed.
- Apply paint to the costume using a brush. Alternatively, you can use spray paint or use regular toothpaste for painting. Those who want to use a suit for everyday wear after the holiday should use toothpaste. To remove toothpaste from the fabric, it will be enough to wash the suit by hand or in a washing machine.
- After the paint or paste has completely dried, carefully remove the stencil from the fabric, being careful not to damage the design.
- We sketch out minor flaws and make the outline clearer. If you wish, you can draw details, decorate the bones with sparkles or rhinestones. A costume painted with glow-in-the-dark colors will also be effective. In general, there are no limits to the manifestation of creative abilities.
- The basis of the costume of Koshchei the immortal is ready.
- To complete the look, Koshchei’s costume requires a crown. It can be made from cardboard and foil. To do this, cut out a cardboard base to fit the circumference of the child’s head and cover it with food foil. The result is a royal crown.
- The leggings and tops of boots can be made from taffeta or any other shiny fabric. You can also complement the costume with an egg, in which, according to fairy tales, Koshcheev’s death is stored. Cut the egg out of polystyrene foam and paint it with silver paint.
You can also make costumes for other heroes with your own hands, for example, a king or a pirate.
Making a crown from wire and beads with your own hands
To make a crown you will need:
- wire 1.5 mm, 1 mm and 0.3-0.4 in diameter,
- pliers,
- beads and beads of different colors and sizes.
First you need to make the base of the crown; for this, 1.5 mm thick wire is best. The diameter of the decoration depends on the child’s head; for a 3-year-old child it is 12 cm.
We cut off part of the wire and close the circle, wrapping its edges. To ensure reliability of the structure, it is better to make two bases and connect them by wrapping them with wire around the entire perimeter.
Next, we need to prepare the frame for the peak of our crown. To do this, take a wire 1 mm thick and cut it into pieces of the required length. On a product of the indicated diameter, peaks 10 cm high look good, which means you need to measure 10 cm on both sides of the crown tooth and make a reserve of 3 cm for attaching to the base, i.e. we will need pieces of wire 23 cm long. For a three-year-old child, five spades on the crown are enough. If you are making a decoration for an older child and want a royal accessory, you can safely make eight spades.
Wire 1 mm thick bends well, and it is quite easy to make peaks of the shape we need from it. We attach the peaks to the base in a simple way - by twisting the ends onto the base. For greater stability of the product, when fastening one part, it is better to grab the other so that the peaks are connected to each other, so the parts will not wobble.
We should have a crown frame with the required number of teeth.
Then the most interesting part begins - decorating our product. To begin with, we take the largest and most beautiful beads that will crown the crown, and small beads - details in contrasting colors will look very impressive. To secure the bead to the peak, we do the following: take the thinnest wire that we have, string a large bead onto it, then thread the tip of the wire into the bead and immediately pass the wire back through the bead. The bead was on top. We attach the part to the top of the crown tooth, wrapping the wire around it. We do the same with all peaks.
The next stage will require imagination and patience, since the work ahead will be painstaking. We string different beads and seed beads in any order onto a thin wire, wrapping them around the peaks. Details can be alternated in any order or creating a specific pattern - according to your desire. You can also use pieces of tulle or decorative flowers.
An accessory made from wire of the specified thickness is quite flexible; the peaks can be directed in the desired direction or bent.
You can attach the finished crown to your head in the following way: we make loops from wire on both sides of the product, then, using hairpins or bobby pins, we attach it to the hair. This way, the owner of the crown will be able to actively participate in the performance and have fun at the celebration.
Did you like the master class? Save it for yourself:
Master class “Bracelet made of wire and beads”.
We continue to prepare for the New Year! You can make a Christmas ball using the Kinusaiga technique.
Or a very beautiful ball using the Artichoke technique with the help of a detailed master class.
When copying a master class, an active link to vdnt.ru is required.
Current ideas
While going through your child's old things, you may come across a black body shirt and pants; if the item has served its purpose, you should not rush to throw it away.
If you remember all the costumes that can be found on the shelves, you will notice that they all have a black background.
Bones can be made as follows:
- Find a small piece of white fabric, print a pattern on a printer and cut out beautiful bones. You can sew it on using a thread and a needle.
- Draw bones by hand - if you have high-quality white paint at home and some drawing skills, you can easily draw bones on old black clothes.
- Use reflective fabric - it will look great in complete darkness.
- If a girl wants a costume, you can make it from a black skirt and sweatshirt - bones can be painted with white varnish on the tights.
Bones are far from the main thing in the costume of a koshchei and a skeleton; the accessories that are used in the addition play a role here.
Before you get acquainted with information about them, it is recommended to study the photo of Koshchei’s costume, made by yourself.
Accessories
If we remember all the fairy tales and cartoons about the immortal Koschei, we can highlight interesting details:
The death of the koshchei was kept in an egg - you can attach a papier-mâché egg to your belt and cover it with foil, you can even make cracks. It will look very creative and unusual.
Chain - Koschey is a kind of king, so he must have a crown chain. Making it gray or metallic is not a good idea as the accessories will blend into the bones. You can use gold foil.
A sword - what kind of koschei would be without his sword; by the way, you can buy a decent option in a regular toy store or thrift store. To make the sword look impressive, it can be covered with foil or the same reflective fabric.
By adding such accessories to the Koshchei costume for a boy with your own hands, it will look complete and very creative. Not a single child who comes to the holiday can resist touching it.
Crown
The crown must certainly complement the costume of Koshchei the Immortal, which will not be difficult to make with your own hands. You can use a ready-made crown, if available. If not, then we will now tell you how to make it yourself. Thick cardboard, which is used for packaging goods, is suitable for this. From it we cut a strip with teeth to fit the size of the head. We chose black color in order to sew the costume of Koshchei the Immortal with our own hands. The crown template shown in the picture has no color, so it needs to be painted. It is better to choose gold or silver color. Spray paint is the best choice as it can completely cover the crown. After painting, we connect the strip with the teeth with a stapler.
But you can choose another option for painting the crown, which will complement the costume of Koshchei the Immortal. You can decorate a cardboard crown with your own hands using foil. We have a beautiful shiny crown, which is recommended to be decorated with rhinestones or one voluminous stone.
Girls costume
Speaking of costumes for girls, it is better to take the new Skelita doll as a basis.
In order for a girl to look like a real living doll, the design of her image must be taken very seriously. For example:
- You need to take care of makeup in advance - if mom manages to purchase high-quality face paint during the holidays, then the girl’s image at the event will be unique.
- A wig is a good alternative to hair dye. You can find one close to the image of Skelita.
- Crown - what a koschey without a crown, in this case a diadem is suitable.
- The suit itself should preferably be made from a black blouse and a full skirt.
- Shoes - they should be comfortable.
You can make a Koshchei costume with your own hands using the ideas from the templates. The Skelita girl is a good alternative to a boring princess.
Princess model
If you are thinking about how to make a cardboard crown for a princess, or more precisely, which model to choose, then turn your attention to a mixed type headdress. Paper, beads, sewing, and applique work well together in it.
Materials:
- cardboard;
- 80 weight colored paper;
- compass;
- a simple pencil;
- stationery scissors;
- PVA glue, “Moment”;
- rhinestones, sequins.
Instructions:
- Cut out a rectangle 15 x 30 cm from cardboard.
- Using a compass, we draw small circles and cut them out - these are decorations for the crown.
- Glue the round blanks onto the rectangle.
- Cover the base with colored paper.
- We make a decorative seam along the top edge.
- We cover the crown with rhinestones, colored paper applications and sequins.
- Glue the sides of the headdress together. The craft is ready.
Costume for adults
Adults, like children, sometimes want to have fun too. To keep up with the children, you can come to the holiday in family uniform.
The principle of making the costume is the same as with the children's version. The only thing is that a woman should look for a fuller and longer skirt in order to look like a respectable and experienced Skelita mother.
It is advisable for the father of the family to find a good robe, because the most important boss of the family should look as intimidating as possible.
When making a Koshchei costume for an adult with your own hands, it is better to adhere to the general style, because joint photos taken during the holidays will become warm memories.
Adviсe
The first warning from experts concerns the use of the material. Usually holidays are held during the cold period; you should not skimp on materials and buy thin fabric for a suit. After the holidays, a child should only have pleasant memories, and not painful sensations.
Also, all accessories used must be as safe as possible. In the heat of play, sharp objects can easily injure. The sword should be soft and not have a sharp tip.
To complement the look with makeup, it is advisable not to use gouache and watercolor. These paints contain quite a lot of dangerous carcinogens that damage the skin. Baby cream will not save you; it is advisable to use special paints for face painting.
Templates
As the modern film industry shows, little Koschey can take his image from War of Thrones. Although the series is far from being suitable for children, games based on the series have not been banned. You can also make a costume in the style of a walker. However, parents will have to spend a single evening making it.
The White Walker costume is a great alternative to the usual skeleton. By the way, the template for the costume of Koshchei the Immortal of the Western industry can be found in the public domain. The main focus here is on makeup and armor. They can be made from papier-mâché, if you choose the right shades of paint, you will get a unique costume that not only children, but also adults will be delighted with.
Cloak
Now let's move on to the question of how to sew a cloak that will complement the costume of Koshchei the Immortal (with our own hands). The pattern for one of the cloak options is shown in the following figure.
As you can see, there is nothing complicated about patterning a raincoat, you just need to take the measurements correctly. The material from which the raincoat will be sewn is chosen black. It is advisable that the suit and cape be made of the same material. But if this is not possible, then a satin cape looks good. The hem of the cape can be processed, but this is not necessary - the bottom of the cloak can be torn. Such a cape will be secured with an elastic band or braid, which must be sewn to the cloak using a machine or by hand.
DIY costume of Koshchei the Immortal
First, you need to decide on the appearance. Typically, the appearance of this fairy-tale villain has several characteristic features:
- External darkness. This factor is achieved by using black clothing;
- Ominous coloring. For this effect, the clothing must contain an image of the bones of a human skeleton. It would not be superfluous to use a mask or appropriate makeup;
- A cloak or robe with an uneven bottom edge. In some ways, this character is a Russian analogy of the most famous vampire - Dracula, and what is a vampire without a cloak;
- Crown. Koschey is the ruler of all evil forces, so the crown will not be superfluous.
Another item emphasizing his status could be a curved (wavy) sword and an egg-shaped amulet on a thick chain. There are several options for constructing this outfit:
- Use ready-made clothes as a base;
- Buy fabric and sew a suit using sample patterns.
Each method has its positive sides. The first one allows you to get an outfit in a short time, and the second one looks more harmonious and allows you to get the perfect ensemble.
Recommendations for making the costume of Koshchei the Immortal
The easiest way is to use available black tights and a turtleneck. Skeleton parts are attached to these things. This action can be carried out using threads, pins or glue. The latter option can be used if the clothing will no longer be worn, as the glue will damage the fabric.
Instead of a mantle, you can use a raincoat of the desired color. The remaining elements can be constructed from scrap materials, which are available in large quantities in every home or can be easily purchased in a store.
Also, when creating a costume, you should consider some points:
- During the festive event, the child has to move actively, so when making an outfit, try not to restrict movement;
- When attaching parts, do it as efficiently as possible so that they do not fall off during dances and competitions;
- When constructing a costume, be sure to involve your child in the work process. Ask his opinion more often, because these are his clothes and when going to a holiday he should feel joy and confidence.
Material and tools for creating the costume of Koshchei the Immortal
To understand this issue, let’s divide the request into areas of work: fabric for sewing; how and from what to make bones; material for parts (crown, sword).
Let's look at each point in more detail.
What fabric to choose for sewing
If you want to sew the base of the outfit yourself, you will need fabric, scissors, a pattern, a needle and black thread. It is better to use elastic options as fabric:
- Lightweight knitwear;
- Fabric with added elastane;
- Taffeta;
- Flannel.
To obtain a pattern, you need to take the child’s measurements and make changes to the basic version based on them. Then attach the parts to the fabric, cut out all the elements and you can start sewing.
How and from what to build skeleton parts
In this matter, the flight of human imagination knows no bounds. Of the variety of options, a few of the most acceptable ones should be highlighted:
- Applying a design with paint to the base using a stencil;
- Attaching skeletal elements made from various materials.
Reference! Paint can be replaced with toothpaste. In this case, to remove the pattern, it will be enough to wash the clothes.
If you choose the second method, then, using a stencil, cut out all the elements from thick white paper or cardboard and fix them on the clothes with threads, pins or PVA glue.
Attention! A good replacement for paper is white self-adhesive film for furniture decor (sold in hardware stores).
To enhance the ominous surroundings, the surface of the bones can be coated with luminous paint.
Costume details
It’s a good idea to complement Koshchei’s outfit with a crown and sword. It is enough to make cardboard blanks according to the sample and cover them with foil. Cooking foil for baking is perfect for this role.
Another easy-to-make detail is the black robe. To perform it, prepare a rectangular piece of black material. Fold one short side and sew to create a hole into which you can insert a ribbon or cord to secure the raincoat on the shoulders.
Addition
If you decide to sew a New Year's costume (Koshey the Immortal) with your own hands, we recommend decorating it with tinsel. The headdress can be decorated with foam to create a snow effect.
For shoes, it is better to choose boots, but if this is not possible, black boots or sneakers will do, which, of course, can also be decorated if desired.
If you want to make an original costume of Koshchei the Immortal with your own hands, you can use the following tips. You can make an egg, where, according to fairy tales, there is a needle with which you can kill the Koshchei. The egg should be cut out of polystyrene foam or made using the papier-mâché technique. And, of course, paint it with any color you like.
In fairy tales, Koschey plays the role of a villain and a robber who always carries a saber with him. This is exactly what we recommend choosing as an additional attribute. There are ready-made plastic sabers available for sale, but you can make your own. For this, brown cardboard is suitable, which needs to be painted silver, and we recommend highlighting the handle with a darker shade. The main thing is to maintain a proportional relationship between the saber and the height of the person.
It would be a good idea to use black gloves made of thin material to complete the look.
With the onset of winter, parents are usually faced with two pressing questions: how to dress their beloved child so that he does not freeze, and where to get a suit for him for the New Year's party. And if there are usually no problems with the bunny-squirrel-snowflake costume, then the immortal Koshchei costume is not so easy to find. But there are no hopeless situations. And therefore, it is precisely how to make the costume of Koshchei the immortal with your own hands that will be discussed in our article.
Master class on creating a costume for Koshchei the Immortal
- First of all, let’s decide what our Koshchei costume will be. The usual set includes trousers and a T-shirt with a skeleton design on them, a crown, leggings, boots and a cloak. But the most important part of Koshchei’s costume is, of course, the black base suit with a skeleton pattern applied to it.
- Let's start work by making a “skeleton”. To do this, take pajamas or a black knitted suit, silver foil (you can use regular food foil), scissors and glue. If you don’t have a ready-made suit, you can sew pants and a T-shirt from any black fabric, or paint any suit black.
- Depending on the size of the child, we will draw a stencil of bones for Koshchei’s costume on the newspaper. Let's try it on the baby, and if everything fits, we'll cut out the bones from foil. Alternatively, you can use masking tape, white cloth, self-adhesive paper, or even Christmas tree fabric for the bones rather than foil.
- Attach the bones to the trousers and T-shirt using glue or thread. We will make a cloak from a piece of black fabric and trim it with Christmas tree trim.
- The main part of Koshchei's costume is ready!
- Another way to apply a skeleton design to a costume is to paint it with special paints. This is done like this: on thermal paper, draw a stencil of bones for Koshchei’s costume.
- Cut out the bones, leaving the paper around them untouched. This must be done very carefully, because the appearance of the entire costume depends on it. It is best to use a sharp stationery knife for cutting.
- We apply the resulting stencil to the base fabric and make the final corrections.
- We smooth our stencil onto the fabric with a warm iron so that the stencil does not move during painting and the design is not deformed.
- Apply paint to the costume using a brush. Alternatively, you can use spray paint or use regular toothpaste for painting. Those who want to use a suit for everyday wear after the holiday should use toothpaste. To remove toothpaste from the fabric, it will be enough to wash the suit by hand or in a washing machine.
- After the paint or paste has completely dried, carefully remove the stencil from the fabric, being careful not to damage the design.
- We sketch out minor flaws and make the outline clearer. If you wish, you can draw details, decorate the bones with sparkles or rhinestones. A costume painted with glow-in-the-dark colors will also be effective. In general, there are no limits to the manifestation of creative abilities.
- The basis of the costume of Koshchei the immortal is ready.
- To complete the look, Koshchei’s costume requires a crown. It can be made from cardboard and foil. To do this, cut out a cardboard base to fit the circumference of the child’s head and cover it with food foil. The result is a royal crown.
- The leggings and tops of boots can be made from taffeta or any other shiny fabric. You can also complement the costume with an egg, in which, according to fairy tales, Koshcheev’s death is stored. Cut the egg out of polystyrene foam and paint it with silver paint.
You can also make costumes for other heroes with your own hands, for example,
Surely, many parents often face the problem of finding original costumes for their children, when at various school events their child has to play a certain role, or simply appear in the image of an unusual fairy-tale character. Naturally, in this case, the appearance of the young “actor” should speak for itself. But, unfortunately, it is quite difficult to find a ready-made suit of a suitable size, especially in a fairly short time. But making it yourself is quite simple, using a few useful tips.
Let's consider several options that will help in just a few hours to turn ordinary everyday clothes into... a costume of Koshchei the Immortal, without spoiling the thing itself (black knitted leggings and a regular turtleneck are ideal).
So. How to make a Koshchei costume:
- From newspaper we cut out the “skeleton” and tibia bones approximately to the actual size. After this, using a bright felt-tip pen or chalk, we outline the contours of our clippings on a pre-prepared piece of unnecessary black fabric (its length should also be within the limits of the child’s height). Then we take cheap toothpaste, squeeze out the contents along the length of all the drawn bones, and blend evenly with a paint brush. After complete drying, carefully sew the resulting “skeleton” to the clothes. Another piece of black fabric, which will serve as Koshchei’s cloak, can be covered with fluffy rain, if desired and depending on the circumstances. An additional attribute of the costume is a headdress - a kind of crown, which can be made from cardboard and painted in lighter colors for variety.
- We move the same newspaper clippings of our “skeleton” onto shiny foil, carefully cut them out and glue them onto black fabric. After drying, sew it onto leggings and a black turtleneck.
- When cutting out bones from masking tape or self-adhesive paper, the entire “skeleton” structure can be immediately placed on clothing, since these materials are quite easily removed and subsequently do not leave marks on the fabric.
- The “skeleton” can be cut from ordinary cotton fabric. In this case, it is better to sew it to the clothes manually, so that later it will be more convenient to remove the threads.
- If the costume of Koshchei the Immortal is needed specifically for the New Year holidays, you can simply “replace” the bones with shiny rain (but not too fluffy, so that the distinct shape is preserved).
- If the costume is made on an ongoing basis, it is best to use special paints for the fabric. At the same time, the imagination of the “master” is not limited to standard paper cutouts, but works in full force, right down to drawing each individual bone using various sparkles and even rhinestones. Without a doubt, such a suit will be brighter and more impressive. But we should not forget that the result of the work will not appear immediately, but only as the paint dries.
All of the above methods on how to make a Koshchei costume with your own hands will help you avoid extra cash costs and save your free time. Many of the indicated materials that may be needed for work are likely to be found in every home, and simple original tips are suitable not only for children’s outfits, but also for adults. It is unlikely that anyone would suspect that the neatly made costume of Koshchei the Immortal was not purchased in a store of similar goods...
To be prepared for various masquerade parties and carnivals, you need to sew or buy an unforgettable outfit. You will put a piece of your soul into the vestments you made yourself and will shine at the holiday. In this article we will tell you how to make a skeleton costume with your own hands.
This is one of the most traditional and popular Halloween costumes. A girl or a guy can dress up in it, and it’s not difficult to make.
Master class on making the costume of Koshchei the Immortal
Let's look at the example of step-by-step production of the simplest option. The base is a black turtleneck and leggings.
- Draw an image of bones on thick cardboard;
- Using sharp scissors, carefully cut out the parts along the contour;
- Carefully arrange the elements of the skeleton over the clothes and trace the outlines with a bar of soap;
- Using white paint, paint along the resulting contour of the part (you can use toothpaste for this purpose);
- Make a crown out of cardboard and cover it with gold foil. Instead of foil, you can use gift wrapping paper.
Recommendations for choosing fabrics and accessories
For the costume you will need: black knitted fabric, white knitted fabric, purple taffeta, whatman paper, silver gift wrapping paper, wooden stick, parts from the dinosaur egg toy, adhesive pad, Velcro tape (Velcro).
Description of work Pullover and trousers. Find a pattern for a pullover and trousers in a fashion magazine. A pajama pattern would work well. Sew a pullover and trousers from black jersey, sew on white bones. The operating procedure is described in detail. Cape. Sew a long cape from shanzhan taffeta. Detailed description and pattern. Cut the hood pattern at the top so that a high collar remains. Cut out 2 parts of the collar, strengthen both with a gasket. Sew cleanly, stitch to the neckline of the cape. Make a Velcro fastener, attach a dummy fastener on top - cover a square of cardboard with gift paper. Crown. Cut out a crown from whatman paper (see sketch), cover it with paper for gifts. Try it on your head, select the diameter so that the crown does not fall off, and fasten it with a stapler. Leggings. Sew two pipes from shanzhan taffeta, reinforce with a gasket, and make a Velcro fastener along the entire length. Boots. Sew the boots from shanzhan taffeta, reinforced with a gasket. Alternatively, you can sheathe rubber boots. Another way is to cover ordinary rag slippers with fabric. Cut out and sew the boot tops separately. Sew an elastic band to the tops to secure them under the shoes. Mace. Attach two detachable parts from the dinosaur egg toy to a wooden club. Cover the club with silver paint from a spray can. Additionally, you can choose rings with large stones, and you can also make a claw out of foil on one of your fingers.
Making a Skeleton Suit
There can be a great variety of types of clothing, from seductive girls to gloomy creatures from the underworld. It all depends on your creativity and desire to stand out.
First type of DIY skeleton costume:
- From the things you have in your closet.
- We find a bodysuit, leggings, or sweatpants and a T-shirt (black).
- Cut out bone fragments from cardboard. To make them as natural as possible, use the stencil shown below. With its help, the drawing will turn out more natural and expressive.
4. Using tape, glue the bones to the clothes.
5. You can use white paint or chalk.
6. Your Halloween look is ready!
Second example:
- We look into the closet again and find a T-shirt, trousers and gloves.
- In this example, you can use a hat, which is necessary to imitate the head of a skull.
- Or pay attention to bright colors - for example, blue or red.
- To make a skull, use two pieces of fabric.
- You can use a pattern or your imagination to draw bones on a dark-colored T-shirt. Or make stripes from fabric.
- We sew two pieces of fabric (black and white) along the edges, make a semicircle on top, and leave a hole at the bottom (so that you can put it on your head).
- We cut out slits for the eyes and sew on the cut out pieces of fabric. There is no need to make such a hat yourself - you can buy a masquerade mask in a store or paint your face with makeup. It will be much easier this way.
The third type is for girls.
- Sew fragments of ribs, etc. onto the dress.
- Buy black nylon tights or leggings and also sew bones on them.
- Low shoes or heeled sandals will complete the look.
To cover your face, you can also use a mask or apply thematic makeup.
Costume
Koschey the Immortal looks like a skeleton, so we need to create the effect of bones. This can be done in two different ways, each of which we will now consider. First, we need to prepare a black set of clothes, pants and a jacket. You can use ready-made clothes or sew them yourself from black fabric. Even a jumpsuit will do, the main thing is to use cotton or knitted fabric. After this, we need to sew bones onto the costume of Koshchei the Immortal. You can make a bone template with your own hands using cardboard. Each bone, cut out of cardboard, is wrapped in foil and attached throughout the costume with glue. You can choose another option, which is shown in the figure, and use this template.
A stencil is cut out of paper, and then, using paints, we draw the bones. This option requires special paint for clothes. Drawn bones using dye with phosphorus look very impressive. In the dark, such a suit will glow.
We complement the image with accessories
A mask will complement the image. It is not necessary to buy stamped versions in theme stores; you can create it yourself.
Algorithm of actions to create an original accessory:
- White paper, string or elastic thread, felt-tip pen, glue, scissors and pencil to draw a sketch.
- Draw yourself or use a stencil the outline of the skull, eye socket, openings for the mouth and nose.
- Cut out the design from cardboard.
- Carefully cut holes so you can see the world around you.
- Outline the eye sockets with a dark marker to make them stand out more.
- Draw the teeth in the mouth and carefully outline them. The darkness of the drawing depends on your desire to create.
- The finishing touch: attach a lace or elastic band to hold the mask tightly.
It is not necessary to create a mask that will cover your entire face. An example in the photo below.
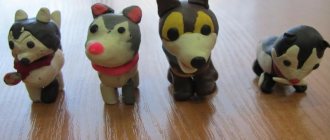
An interesting option for children is an eye accessory, which is designed in the form of a small skeleton.
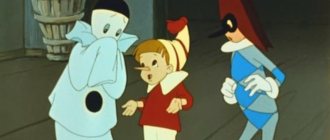
Humble Grace
If there is absolutely no time to make a crown, then you can get by with a small model, like the Princess in the cartoon about the Bremen Town Musicians.
Materials:
- empty cardboard toilet paper roll;
- scissors;
- glue "Moment";
- foil.
Instructions:
- Cut cloves onto the roll.
- Carefully cover the workpiece on both sides with foil.