Apple girls look so touching at children's matinees and New Year's masquerades. If you definitely want to dress your child in such a costume, you can rent it, you can buy a ready-made apple costume, or you can sew it yourself. And the last option is precisely the most preferable, because then it will certainly turn out to be the most unique.
Apple costume: master class No. 1
This costume for a matinee will make your child feel like a real juicy and ripe apple. As a base, you can take a simple green summer dress. You need to sew a skirt on it, which we sew from red satin.
The skirt pattern is simply a circle skirt, which needs to be folded from the bottom and a green ribbon sewn to the bottom - an apple tail. We thread an elastic band through the bottom of the skirt to tighten everything. And under the apple skirt itself there is a tulle petticoat with rings, like in a wedding dress. It is better to baste the petticoat and rings to the skirt, so that during the matinee there are no troubles in the form of them falling out.
For the head, we make or buy a ready-made elastic band, to which we sew an apple. If desired, you can decorate the costume with additional elements - a leaf, a worm. They can be embroidered by attaching fabric of the desired color to the satin with a pattern transferred to it and stitching it on a machine.
How to sew an apple costume: master class No. 2
Another option for sewing an apple costume for a girl, for which you will need:
- 1 m of fabric;
- linen elastic;
- green braid;
- satin ribbons in green and brown colors;
- stickers for clothes in the shape of apples.
In order not to create a pattern, for the apple costume you can buy or use an existing green suit - trousers (skirt) and a turtleneck. All that remains is to sew a hat and a vest, which we will later put on a turtleneck.
To sew a hat, you need to know the volume of the child's head. We cut out a rectangle from green fabric, hem its lower and upper edges so that an elastic band can be inserted into them. We gather one side with an elastic band and sew the fabric together to make a bag.
We grab it with a regular hair elastic, and wrap a brown ribbon tightly around the end that sticks out. The result is the tail of an apple, to which you need to sew a leaf. We decorate the hat with a beautiful braid - it is ready!
Sewing a vest is not difficult, especially if you have another ready-made vest. We simply apply it to the fabric, cut out the back and front, sew it together, trim the edges and decorate it with braid. Glue the apple stickers in random order.
Paired with a green turtleneck and trousers (or skirt) this suit will look amazing.
The apple costume is an original masquerade outfit for the holiday. It is suitable for both girls and boys.
All the materials necessary for the “apple” carnival outfit are easy to obtain, and such a costume can be sewn with your own hands in just one or two evenings.
What will you need to create a children's "Apple" costume?
To make an apple dress, you need to purchase the following tools:
- Yellow, light green or red fabric, a combination of all three shades will look beautiful, but you can also use one color of the fabric. Iridescent fabric, such as crepe-satin, looks very bright and festive.
- Suit pattern from the Internet.
- Scissors.
- Paper, cardboard for patterns.
- Pencil and chalk.
- Pins and needle and thread.
- Sewing machine.
In order to make a pattern, you will need children's clothes: a T-shirt, a T-shirt, shorts and a skirt, depending on who the outfit is being sewn for - a boy or a girl. But if you have ready-made things in the appropriate shades, then you can simply decorate them in the “apple” style using paper apples and leaves attached to things.
Decoration
Additional fittings and accessories will help make the costume complete and complete.
Leaves
The foam base can be decorated with several leaves . To do this, cut out two leaves from green paper, of different sizes. We glue them in the neck area so that they are located in the chest area.
Many parents exchange colored paper for fabric of a similar color scheme. In this case, we sew the base of the leaves in the elastic area located at the throat.
Cape
When assembling a lemon costume from ready-made clothing, the outfit should be complemented with a cape.
To do this, cut out a circle from yellow fabric that is equal to the length of the product (up to the elbow or wrist). In the center we make a small circle for the head. We carefully hem the edges using a sewing machine using small stitches. To decorate such a poncho, leaves cut from paper or green fabric are suitable.
The cape can also be made from whatman paper painted with yellow paint.
It is recommended to make the end of the cape slightly pointed to accurately convey the oblong shape of the fruit. The product itself will be fixed only on the shoulders.
Baby outfit
It’s very easy to create such a costume for a small child; he will look very cute in it. Take a red or yellow bodysuit, or sew it according to a ready-made pattern using the dimensions of your baby. A green cap is suitable as a hat.
Sew leaves from emerald-colored fabric and attach them to the hat and body of the apple-shaped sticker. You can cut an apple from the remaining fabric and sew it on the front of the bodysuit. In such an outfit, the baby will not be too hot, and he will look unusual and playful.
Important! If the suit with bodysuit is very simple, then you can sew an apple outfit using a jumpsuit or sew it yourself using a pattern.
Headdress
The final accessory in creating a carnival costume is a hat. It can be made from residual foam rubber, unnecessary yellow fabric or an old headdress.
Materials:
- foam;
- takes yellow tones;
- gouache or paints;
- brush;
- scissors;
- glue;
- sewing meter;
- colored paper.
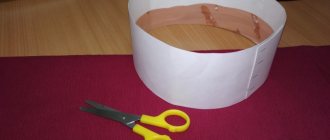
Using a sewing meter, measure the circumference of the child's head. We cut out a rectangle from foam rubber that corresponds to the obtained indicators. We make the top edge zigzag to obtain the desired shape of the product. Using glue, connect the edges and let dry completely. Carefully paint the resulting cap with gouache.
To ensure that the paint lies evenly on the foam rubber, it is recommended to dilute gouache, a small amount of water and PVA glue.
After dyeing, leave the headdress until completely dry. The top can be decorated with several small leaves. We also decorate the finished beret or light hat with greenery.
The suit is ready.
Model of a costume for a girl with step-by-step instructions
A masquerade costume for a girl in the shape of a cheerful apple will become a holiday decoration. The child’s ready-made clothes, namely a dress, are suitable as the basis for the pattern . Buy yellow fabric the length of the girl's original dress. Fold a piece of fabric so that on both sides you get two-layer parts along with folds.
Carefully place the front and back pieces along the folds of the fabric and cut out the resulting pieces. Sew “apple” sleeves from scarlet fabric to decorate the dress. From a fabric of a soft green shade, cut out a collar and a thin strip for a frill on the bottom of the suit, its length depends on the openwork of the hem.
Important! Instead of a hat, it is better to use a paper crown with the image of an apple; tights and shoes should match the dress.
DIY sunflower costume for a boy
Marina Bobrovnichaya
DIY hats for “Sunflowers”. Master Class
Sunflower hats . _
Everyone is starting or will soon start the autumn holidays.
In my senior group, there is an autumn entertainment called “Cabbage Party”.
The boys will dance the Sunflower . I made these hats for them:
For the frame of the hats, I used regular Whatman paper. Made the blanks:
the diameter of the bottom is 12 cm, the height of the cap is 4 cm. And the leaves were cut out from colored xerox paper. I pasted it in two rows. Before this, I covered the finished frame of the hat with black self-adhesive paper. then I glued the yellow leaves. And with shiny yellow self-adhesive paper, cutting it into thin strips, I made cells on top of the black bottom, and also put a thin strip in the middle of each leaf. I did this both on the top side of the leaves and on the bottom. Now I’ll add a hat elastic so that the boys’ hats stay on top of their heads and that’s it. It looks very cool. Boys can wear white shirts, black trousers and yellow vests. The suit is ready. Simple and beautiful!
I wish all my colleagues creative success.
Master class “Making handgam with your own hands” STATE BUDGET EDUCATIONAL INSTITUTION SCHOOL IN KAPOTN Educational building “Mokhovoy” Master class “Making handgam with your own.
Master class on making a postcard “Sunflower” for “Sunflower Day at MAAM” Under the sun there is a sunflower, When it’s a fine day, He looks at the sun all day – He looks like him! E. Trutneva on August 7 at MAAM.
"Do-it-yourself book." Master class Tatyana Nikolaevna Strizhenova - teacher at MDOU Kindergarten No. 10 “Forest Fairy Tale”, Zhukovsky. Master class “Do-it-yourself book”. Book.
Master class “Do-it-yourself baby books” Master class “Do-it-yourself baby books” Working on creating a baby book is a very exciting and complex activity.
Master class on making plasticine with your own hands Purpose: Development of cognitive and creative activity of children. Children create plasticine with their own hands, “smart” plasticine. One of the available ones.
LiveInternetLiveInternet
Quote from BelayaLiliya
Read in full In your quotation book or community!
Crocheted Sunflower hat for a girl or doll.
Source
A hat for a girl, especially a small one, is not only a beautiful accessory, but also protection. On a warm summer day, you can wear a light panama hat or scarf, but in the evening or in bad weather you need a warmer hat. This is where the question arises for many mothers, what to wear to keep them warm and appropriate for the season. Today I propose to knit an interesting and easy-to-make openwork hat with a “Sunflower” flower - bright and delicate.
Here we crocheted “Strawberry” booties and a delicate headband.
Cap size for 0.6–1 year. If desired, it can be made to any size by increasing the number of rows in the circle. You can use any children's yarn, preferably acrylic.
So, to knit a Sunflower hat you will need:
- Yellow yarn and leftover black yarn
- Hook
- Thin green satin ribbon
- Threads with a needle.
How to crochet a hat for a girl: Take yellow yarn, make a loop and tie it with 7 sc. We connect the loops together into a ring, tighten it and knit 2 dc in each column.
1. Next row we knit 1 dc in a column of the bottom row, 2 dc in 1 column of the bottom row. So alternate until the end of this row. Next, we increase the circle to the diameter we need, depending on the required size. In order not to make a mistake with the size of the future product, you can take a ready-made hat and apply the product to it as you tie it.
2. We knit the next two rows with DC, without increases or decreases. Don’t forget to cast on 3 lifting stitches in each row and finish the row with a connecting stitch. Next, we cast on 4 runways and knit a dc into the second column of the bottom row from the runway. Cast on 1 ch, knit a dc through 1 stitch of the bottom row. There should be a mesh. We knit the next row similarly to the previous one.
3. Next we knit two rows of dc, and the next two rows with a mesh.
4. Now we look at the volume of the cap: if the girl’s head is small, then at this stage the volume is suitable, but if you increased the size, then you can knit a couple more rows of DC, alternating them for symmetry with the “mesh”.
Next we need to tie the product beautifully. To do this, cast on 4 chain stitches and knit them into every fifth column of the bottom row. We knit arches from air loops to the end of the row, then we knit 1 dc, dc, 1 dc in them.
5. The hat is almost ready, all that remains is to decorate it a little. We will do this with the help of a satin ribbon and a small voluminous sunflower flower, thanks to which the hat itself was named. To crochet a sunflower, you need to take the remnants of black yarn, make a loop and knit 8 sc into it. We knit 2 more sc into each of the columns.
Now we knit a flower to decorate the hat. In our case, this is Sunflower.
So, how to crochet a sunflower:
6. Next, we connect the yellow yarn and knit arches from air loops in two rows.
7. To make the arches exactly in two rows, you need to knit the first row of arches behind the front wall of the loop of the bottom row, and the next row of arches behind the back wall of the loop. The number of air loops in the arches should be 1-2 loops, no more. Next we tie each arch with 1 dc, c 2h, 1 dc.
8.
9. This is the kind of voluminous sunflower we got.
Now we take a green satin ribbon and stretch it through every two legs of the dc of the last row in front of the net. Next, we form a bow from the same satin ribbon and sew it to the hat along with the sunflower. If the hat is knitted for an older girl, you can make several sunflowers. For a small hat, one flower will be enough.
10. A crocheted hat for a girl is ready. This hat will go perfectly with denim or knitted items. It is original, interesting and performs its functions perfectly. Now you can also crochet a hat for your girl!
Series of messages “Dressing Barbie and CO”:
clothes for dolls
Part 1 - Clothes for Barbie patterns Part 2 - Dressing the Barbie doll... Part 38 - Crochet bodysuit for Baby Born. Part 39 - Crochet pants and sleeveless vest for Baby Born. Part 40 — Crochet “Sunflower” hat for a girl or doll. Part 41 — MK shoes for Baby Born-2. Part 42 - Crochet sundress with ruffles on Baby Born-2. ... Part 49 - Shoes, hat and bodice for Baby Born. Part 50 - Crochet slippers and socks for Baby Born. Part 51 — Dress for Baby Born with a zig-zag crochet pattern.
Series of messages “Knitting and Crocheting”:
handmade/made with love
Part 1 - Ideas for children's socks Part 2 - Children's knitted slippers ... Part 22 - We knit together a luxurious snow-white hat with a designer bow Part 23 - Crochet hat for a girl, master class for beginners Part 24 - Crochet Sunflower hat for a girl or doll . Part 25 - Crochet mitts for a child. Part 26 - Crochet handbag for girls. ... Part 36 - MK “Handbag “Lazy Kitty” - crochet” Part 37 - MK Kerchief “Little Charming” - crochet Part 38 - Dress for a girl with a zig-zag pattern - crochet
Hello again! Again a spring matinee and a new image - lily of the valley. And in this master class we will create an elegant flower , using previously created carnival costumes .
We will need the following parts, materials and tools:
1. green leaves from the monkey costume (master class here ); 2. tutu skirt made of white tulle (for a master class on creating a skirt, see here ); 3. remains of thin green woolen fabric; 4. green felt 3 mm thick; 5. white pearl color beads about 30 pcs. diameter 6 mm; 6. threads; 7. transparent universal glue “Dragon”; 8. scissors, sewing machine.
Sewing a tuxedo for a lily of the valley flower costume
This will be a simple vest with leaves from a monkey costume sewn around the perimeter. In this place, we pat our practical selves on the head - collapsible carnival costumes make it possible to save materials and time. We measure the child, we need the following sizes:
1. chest volume - OG; 2. length from waist to armpit - DT; 3. length from waist to waist through the neck - DP; 4. chest width from armpit to armpit - SH. Measure and cut out two rectangles from green fabric. The first rectangle has a width equal to SH and a length equal to DP. The second one is 2*DT wide, OG-SHG long.
Sew the first rectangle by folding it lengthwise. We sew, retreating from each end a length equal to DT.
Turn it inside out and iron it right side out.
We take out the basting.
Sew and stitch the second rectangle. When stitching, we loosen the tension of the upper thread so that it can then be pulled out.
Turn it inside out, iron it and remove the thread.
We connect the two resulting strips at right angles, placing the wider one into the narrow one.
We lay out the leaves around the perimeter at the same distance from each other. We retreat from the edges by approximately 5 cm, because... The vest will be fastened with a wrap.
We sew it all down, making a finishing seam. We measure it on the model, mark the location of the buttons. We make simple loops by hand.
Sew on the buttons.
The lily of the valley outerwear is ready.
Making a headdress for a lily of the valley flower costume
On felt with soap or chalk we draw the base for the crown - a leaf + a stick.
Carefully cut out.
We overlap and sew by hand for safety.
We sew pearl beads onto each stick at approximately the same distance. They will imitate lily of the valley flowers. We stretch the needle inside the felt.
For complete identity, we do not sew the beads tightly to the second so that they dangle.
The crown of the queen of lilies of the valley is ready.
We sew the metal bases of the hairpins to its lower edge and you are ready to wear it.
Let's decorate our flower. We put on a white tutu skirt over a white blouse or swimsuit. On top is a green tuxedo. On the head - a crown. You can use a ready-made swimsuit, just sew on the lanterns on the sleeves. “Doll Costume” master class.
Or completely sew a sports swimsuit with your own hands, similar to the swimsuit for the Bee . Naturally without stripes and with puffy sleeves.
And here is your exit, queen!
Afterword. A green vest with leaves, spontaneously invented and sewn in an hour, encourages the creation of the image of Tinker Bell fairy
Author of the material: LeviL
Useful tips
- At the base of the cap you can add a small twig that will support the leaves.
- When decorating leaves, do not forget to make veins using a green or brown felt-tip pen.
- When making sleeves on a foam suit cover, the material does not need to be cut off. It is cut into two halves and the fabric is glued inside.
- The cape can be decorated with unique slices . To do this, a white thin satin ribbon is glued over the entire surface of the product, creating petals.
One of the main attributes of a children's party is bright costumes with many famous characters. The lemon dress, a bright and juicy fruit, is one of the popular styles. Using available materials and a little imagination, you can make a costume for a boy yourself.
