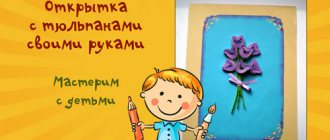
In our previous articles, we told you about how you can make interesting and original greeting cards for your grandfather or father for February 23rd. You will find such articles without any problems on our portal. A gift in the form of a handmade postcard can become an independent present. But still, it would be better to supplement it with a children’s craft for Defender of the Fatherland Day. Perhaps it will be a cardboard plane, a paper boat or a car, maybe even a DIY tank. There is another very interesting craft for Men's Day, which we will tell you about today in our article. This is a homemade robot made from tin cans, nuts, plastic caps, unnecessary screws and radio components.
February 23 with your own hands. Crafts for February 23
Here are special crafts for dads on February 23rd. A great gift for your grandfather or father on February 23 could well be a boat made by the child himself. And such a craft can be made from various materials: wood, cardboard, walnut shells, plastic bottles. The simplest option would be to make a paper boat. You can attach flags to the finished paper boat. An ordinary wooden toothpick will serve as a mast.
A very original gift-craft for February 23rd, which any grandfather or father will surely like - this is a paper boat filled with various sweets.
If you make waves from strips of paper, you will get a boat sailing on oxen. This will be a beautiful and impressive gift for dad or grandfather on Defender's Day. On our website you can find detailed instructions on how to fold a paper steamer. If you complement the steamer with a seascape made from colored paper, then you will have a beautiful craft for this wonderful holiday.
Crafts for February 23. DIY gift for dad
Grandpa or dad will definitely really like this homemade airplane. In this article we will bring to your attention three simple options for making this craft for February 23rd.
An airplane made from a matchbox.
Our site invites you to make a gift for your grandfather or father on Defender's Day - an airplane made from a matchbox. To do this, you will need to take 1 matchbox, scissors, colored cardboard and glue.
Craft airplane.
It is worth noting that handmade crafts for dads on February 23 can be created directly from handy materials. From a simple clothespin and wooden ice cream sticks (or medical spatulas) you can make a craft - an airplane for the holiday of February 23rd. When making this craft, we advise you to use a glue gun and acrylic paints. If you make a lot of these colorful airplanes, you can make a whole suspended mobile. Below you can look at the picture and see that the tail of the plane can be made from cardboard.
Airplane made of cardboard.
Even on our website you can see many articles that allow you to make various crafts directly from garbage. Indeed, if you look at this site, you will learn how to make your own boats, cars, airplanes, funny animals from simple garbage: cardboard boxes and packaging, lids, etc. Basically, every craft from this site can serve as a great gift for your dad or grandfather on February 23rd. Choose, watch, create! And of all the crafts presented, we liked the cardboard airplane the most, for the reason that it is very original and beautiful. And it's quite easy to make. In addition to all this, ready-made templates are also included with this craft. You need to first print this template and transfer it onto cardboard. In order to make this craft for a men's holiday with your own hands, you will also need a paper cup from a roll of toilet paper.
Airplane made from a plastic bottle.
A special article has been published on our website that is dedicated to crafts made from plastic bottles. As a rule, such crafts are made quickly and easily. Therefore, if you put a little effort into this, you will end up with a wonderful airplane.
DIY crafts for February 23rd. February 23 in kindergarten
There is another very interesting DIY craft for February 23rd. This is a tank made from matchboxes. Therefore, if you are looking for crafts for February 23 that you can do in kindergarten in the preparatory group, then you should like this idea. In order to make such an interesting gift, you will need: a cover from an ordinary notebook or a piece of wallpaper, magazine paper, three matchboxes, a plastic bottle cap and corrugated cardboard.
In preparation for the February 23rd holiday in kindergarten, you can make another interesting tank yourself as a gift for your grandfather or father.
We have for you another very interesting version of a tank made from a matchbox. This tank has a cannon barrel made of a cotton swab, tracks made of corrugated cardboard, and rollers made of buttons. Using corrugated cardboard, you can make not only tracks for your tank, but also the entire tank.
DIY crafts for February 23rd. Gift for dad on February 23
Your little child will also like to make a gift for dad on February 23rd. Small children, of course, cannot make very complex crafts. For this reason, we specifically published simple crafts for February 23 in our article. One of them is a machine made of cardboard. You will need a cardboard toilet paper roll, paint, cardboard, and glue.
Crafts February 23. Children's crafts for February 23
If you want to surprise your grandfather or father with something original, then original crafts for February 23rd will suit you. On our website you can find paper boats, various models of paper cars, helicopters, airplanes and all kinds of architectural buildings. Making these crafts for Defender of the Fatherland Day will be very interesting and exciting for both schoolchildren and adults.
Now we move from transport to robots. From simple cans, plastic bottles, caps, cogs, screws, nuts, washcloths and other things you can make many cute robots. It’s very easy to make such a gift for your dad yourself. Especially if you have a glue gun.
You can also make a robot-shaped pen and pencil holder. There is also a very interesting option for a pen stand. You can see below how to make such a gift for your dad or grandfather for the holiday. In addition, you can make a pencil holder by folding it from Lego Duplo.
If you want to make your own pencil holder, which will be decorated with a photograph, then you will need a part from the designer to make such a craft - a transparent door. The photo is inserted into the space between the door and the wall.
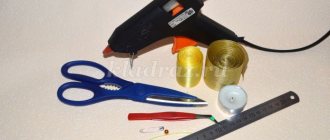
If you want to surprise your grandfather or father with a wonderful holiday gift, then make these beautiful cubes. In order to make this original craft for February 23, you will need: pasta of various shapes, cardboard, golden spray paint, a glue gun, various jewelry. It is necessary to cut out a cup from cardboard and make a stand from it. Then you need to stick pasta of different shapes onto the cardboard. The easiest way to do this is with a glue gun. After the glue has completely dried, you should paint the craft with golden spray paint. Next, you need to decorate the cup with various clippings from family photos and jewelry. It should be said that such a gift can be given to dad or grandfather not only for a men's holiday, but also for a birthday. You can write on the craft: “To the best father from the children,” or “To the best grandfather from the grandchildren.”
Here you can also find paper crafts for dad on February 23rd. If your dad wears a formal suit and tie to work, then the following gift for the twenty-third of February may well be suitable for him. Help your child make this interesting gift for dad - a paper tie. You can cut out a tie from cardstock or paper and then decorate it. Below in our article we have presented to your attention a detailed diagram of how to fold an origami paper tie. You should pay attention to the numbering of the photo in the above diagram of an origami tie.
Children's crafts for February 23. Crafts February 23
Make a paper airplane mobile for your dad as a Men's Day gift. This gift can create a good, festive mood. In order to make this craft yourself, you need to take colored paper and fold a lot of airplanes out of it. And then, using a thread, hang them from the chandelier.
Crafts for February 23. DIY gift for grandfather
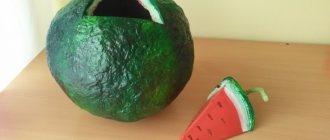
At the end of our article, which is dedicated to children's crafts for Defender's Day, we will tell you about another very original and interesting craft made from waste material - a deer head, made from the caps of plastic bottles and the bottles themselves. If your grandfather or father is an avid hunter, then such a craft will be very relevant.
Finally
This extensive article was able to offer you a large number of different crafts for every taste. Just choose what you like and help your child create something interesting.
On the holiday of February 23, men traditionally receive gifts from their loved ones. With special trepidation, fathers and grandfathers perceive the touching gifts that their kids make in kindergarten classes. The teacher’s task is to come up with and implement an original idea that will inspire the children to be creative.
sailboat
Teachers often choose military equipment and transport as the theme for “male” crafts: kids enjoy drawing and making guns, planes, tanks, cars, ships, etc. The teacher can offer the children to make a three-dimensional sailboat based on such an unusual material as a foam sponge for washing dishes.
The craft can be done with children of both junior and senior groups, only in the first case the teacher offers ready-made parts, and in the second - preschoolers do everything themselves.
For work you will need the following materials:
- brightly colored dishwashing sponges;
- thin wooden sticks, such as bamboo skewers;
- small plastic skewers (for canapés) in bright colors;
- scissors;
- colored paper;
- square or rectangular stencils of three sizes for cutting out sails (the size of the largest approximately corresponds to the plane of the sponge), a stencil for a small flag;
- PVA glue;
- glue brushes.
The children will be interested in working with unusual materials when making a sailboat
The craft is performed as follows:
- The corners of the sponge are cut off on one side to create the bow of the ship.
You need to make holes along the length of the resulting base using a skewer. At one end the sponge becomes sharp and looks like the bow of a boat. - The next stage is making the sails.
Children draw them using stencils in three sizes and then cut them out. The sails should be put on a skewer, securing a flag on top with glue. The sails are arranged in decreasing order - from bottom to top - The sails are then connected to the sponge base.
A skewer with sails is inserted into the hole farthest from the bow of the boat - The final stage is decorating the sailboat.
A small plastic skewer is inserted into the hole on the bow of the boat. The bow of the sailboat needs to be decorated to make the craft look elegant
Instead of paper for sails, you can use cloth napkins for cleaning - it looks very nice. In addition, the sponge (the basis for the sailboat) can be profiled (wide and with slots).
Sails can be cut from fabric napkins for cleaning, and for the base you can use a profile sponge with slots
Video: sponge boat with silver sails
Photo gallery: ideas for crafts on the theme “Sailboat”
As a basis for the craft, you can take a disposable plate and make a 3D applique on it. Waste material, for example, plastic cups, is perfect for making a boat. Pieces of fabric can also be used to create 3D appliqués. You can use walnut shells as the basis for a mini sailboat. There is no sponge or other base with your hand, the deck of a sailboat can be made from simple paper or cardboard. You can decorate finished crafts with multi-colored flags on threads. For younger preschoolers, the option of making such an applique from paper and plasticine is suitable
Tie as a gift
In order to make a gift tie, you need to prepare cardboard, multi-colored napkins, a pencil, scissors, gel glue, regular glue and a hole punch.
Gift creation process
We draw a tie and several stars separately on cardboard, and then cut them out with scissors. We place all the stars on the tie in a chaotic order. This is necessary in order to outline them with a pencil. It is necessary to immediately make holes for threading the tape. For decoration we will need napkin balls. They can be done in two ways:
- cut into small squares and roll into balls;
- tear the napkin into pieces and form into balls.
Apply glue to the drawn stars and place balls on them. It is worth paying attention to the fact that the same-color balls are pressed tightly against each other and that the entire space of stars is filled. We glue the edges of the tie with a different color of napkin balls. We fill the remaining space with other balls of different colors.
Original mug for dad
All men love to drink tea and coffee. Therefore, a homemade mug may well become a small holiday present. The main thing is to decorate it with patriotic attributes.
Such a simple craft can be done with pupils of the junior or middle group (the teacher makes all the preparations himself).
Materials for work:
- thick cardboard in yellow, orange, blue (you can also take a light green shade - the main thing is that the colors of the Russian flag stand out on the base);
- stripes of white, blue and red (their length should correspond to the width of the resulting mug - approximately 10 cm, and width 2 cm);
- tea tag with string;
- glue stick.
Algorithm for making a gift mug:
- The teacher cuts out the blank, and one part of the product should be slightly smaller than the other.
The teacher prepares the mug in advance - The base is folded in half using the accordion method.
This will create a slight volume effect. A fold is formed at the edge of the upper part (all these manipulations are also done by the teacher in advance). Folding the mug using the accordion method will create a slight volume effect. - The child glues a thread with a label to the back of the upper part of the base (fixed with a small piece of paper).
A child spreads glue on a piece of paper and uses it to secure a string of a tea bag. - The kids glue stripes to the bottom of the mug to create a Russian flag (the teacher tells you in what order to place the colors).
Preschoolers glue the strips in the desired sequence, which the teacher will tell them - The final step is to secure the edge of the top of the mug to the bottom.
Children smear it with glue and press it. Ready-made mug crafts look bright and festive
The mug can be made not in the form of a postcard, but in volume, then it can be placed on a table or shelf.
Dad can put a voluminous mug on a shelf at home
Video: how to make a voluminous cardboard mug
Postcard “Order for the Pope”
Postcards with three-dimensional elements always look interesting.
This effect can be achieved using, for example, the technique of plasticineography. The following craft is suitable for older preschoolers.
To create a postcard you will need:
- plasticine;
- stack;
- cardboard (rectangular blanks of A5 format).
The creative process includes a number of stages:
- A thin layer of plasticine should be applied to the cardboard base.
This coating should be very smooth. The plasticine layer should be as even as possible - You need to roll thin flagella from yellow plasticine - this will be a fireworks train.
A ball is rolled out of the red piece, then it is compressed into a flat cake. Using a stack, cut the cake in five places, grab each resulting segment with your fingers and pull it into a corner - you get a star with rays. The star is obtained from a piece of plasticine after pulling it from five sides - The star is attached to the center of the card.
It is framed by a thin flagellum made of red plasticine. At the top there are short yellow flagella - this is the trail of fireworks, and above them there are small red stars. Additionally, the composition is decorated with small yellow balls. Small decorative elements make the order impressive - Stripes are drawn in a stack along each ray of the star.
The stripes on the star make it more expressive - A thin flagellum is formed from green plasticine - the basis of a laurel branch.
Yellow petals and balls are attached to it. To the right of the branch, in the corner of the postcard, you need to assemble the number “23” from yellow flagella. At the bottom of the order is complemented by a laurel branch and the number “23”
Photo gallery: ideas for creating voluminous postcards
The volume of the composition is given by clouds made of cotton wool and flowers made from crumpled napkins. The boat is made according to the simplest scheme, but together with paper waves and seagulls everything looks very impressive. The flag is glued only on two sides in the shape of a wave - it seems to be fluttering beautifully in the wind. The Russian flag can be glued from different strips of paper, which will give the card volume The number “3” is originally made using the quilling technique The sail seems to be fluttering in the wind In classes at a preschool educational institution, children can make a collective gift composition for men Postcards with three-dimensional elements inside look unusual Even younger preschoolers can make such a postcard if the teacher will prepare the necessary elements in advance. This card combines elements of origami and 3D appliqué. Old CDs are perfect for making holiday cards.
Postcard for a man with a shirt using the iris folding technique
Try making an original card with a men's shirt in the center using the Iris Folding technique.
This is a fascinating craft that allows you to create appliqués that are twisted in a spiral and go deeper towards the center of the composition. The name is translated from Dutch as “rainbow folding”, since in the process of work multi-colored strips of paper of equal width are used, which are fixed to the base in a certain order.
- Materials and tools
- How to put a shirt in a card
Materials and tools
To create a postcard with a shirt using the Iris Folding technique you will need:
- thick cardboard - 1 sheet each in white, red, gold and brown shades;
- white A4 paper;
- checkered sheet;
- ruler;
- stationery knife;
- a simple pencil;
- scissors (with straight and curved blades);
- colored tape;
- nail polish.
If the proposed master class seems complicated to you, make a postcard with ties, it is simpler. For a romantic occasion, we have fluttering butterflies.
How to put a shirt in a card
On a checkered sheet, make a template according to which you will apply strips to the cardboard. To do this, draw a square with a side of 11 cm. Next, moving clockwise, on the left side of each side, step back from the corner 1.5 cm and mark this place with a dot.
By connecting 4 points, you get the first square, offset in a spiral.
Repeat the manipulation until the central part is reduced to the desired size. In order not to confuse the colors in the process of distributing the cardboard strips, you need to number each side of the inner squares. Do this in the same way as you drew, clockwise.
To make the composition as similar as possible to a man’s shirt, additionally draw two symmetrical sleeves and a collar along the outside of the figure. Their dimensions are indicated in the diagram.
If the spiral width is 1.5 cm, cut the colored cardboard into strips at least 2 cm wide. This will help avoid gaps.
Colors can be chosen arbitrarily. In this master class, the main shade is red (one shade of red is attached to the numbering 2 and 3 of the spiral), and the bottom is gold and brown on opposite sides.
Fold a sheet of white cardboard in half - this is the basis of a postcard for a man. Process the bottom edge with curly scissors. Attach the drawn template and use a stationery knife to make a neat cut along the contour . Place the card with the inside facing you. Attach the template to the “face” and secure it with paper clips.
Attach the sleeves and collar of the shirt, then begin filling in the main square using the Iris Folding technique. To do this, lay out the cut strips in the desired order in a spiral, securing them with tape (colored is preferable, but colorless is also suitable).
The beginning looks like this.
Continue folding the shirt until there is a small, undivided square left in the center. cover the gap with a small piece of brown cardboard.
Hide the “work process” in the inside of the postcard using a white sheet of paper, securing it beautifully with tape on all sides.
To decorate the cover, use nail polish (you can use paint) and tape.
An original card with a shirt in the style of Iris Folding will be a pleasant addition to a hand-made gift for a loved one or loved one. It will take 2-3 hours to create.
Shirt with tie
A real man's attribute is a shirt and tie. It can also be used as a children's gift. You can use the origami technique (an option for older preschoolers).
To work you will need:
- blue cardboard A4 format;
- colored paper (2 contrasting colors, for example, blue and yellow - respectively, A5 format and a 7 by 7 cm square);
- PVA glue.
Progress:
- A sheet of blue paper needs to be folded in half along the long side, then unfolded and each edge folded towards the middle.
After this, the sleeves are formed: for this, the edges are bent at the top of the workpiece. The corners are used to make the sleeves of the future shirt. - On the opposite side, bend the edge by 5 mm.
The opposite edge needs to be unscrewed and ironed with your finger - On the other side, each folded edge is bent, forming corners with the point towards the middle.
It turns out to be a shirt collar. The corners make a neat shirt collar - Now all that remains is to bend the piece in half - the shirt is ready.
The elements should be fixed in several places with glue. The edges of the collar need to be placed on top of the folded piece - the shirt is ready - The upper corner is bent 1 cm, and then a small corner of it is raised.
The acute corner is folded 1 cm, and then another small corner is bent - On the other side, the top of the tie is slightly bent and fixed with glue. The side parts are also folded towards the center and glued.
The result is a patriotic gift with a beautiful blue ribbon. The tie is made using the origami technique, and the collar of the shirt simply folds down. Craft shirts can be decorated with buttons, this will give the products a finished look. Epaulets with stars will give the shirt a military look.When I worked as a teacher, the children of the preparatory group and I also did a craft for February 23rd “Tie”. It was very similar to the composition with rhinestones in the photo gallery, only the preschoolers cut out the tie themselves from colored paper (they first folded it in half to create a symmetrical piece). And it is very important here to use cardboard, which has a different color on each side - then the “shirt” looks impressive. The children were delighted with the result, especially the girls - you could see with what love they did the work for dad, how they anticipated the joy with which he would receive their gift.
All crafts dedicated to February 23, first of all, have a masculine and patriotic orientation. Preschoolers make such gifts with great enthusiasm, putting a piece of their soul into them and anticipating the joy they will bring to a loved one.
Every grandson or granddaughter wants to give an original gift to their grandfather on February 23rd. With their own hands, children, using various materials for child labor, can make many interesting souvenirs that will pleasantly surprise their close relative. Of course, creating a paper gift will require a lot of effort and time, but what can you do for your beloved grandfather!
Video instructions
Carefully watched videos will help you understand in more detail the intricacies of paper crafts and make the chosen model in the best possible way.
1. Postcard suit:
2. Origami Shirt:
3. Shirt made from banknotes:
Hello dear masters and craftswomen. I present to your attention a master class on making such an origami swan, and I called it “Swan in Pink”. How to make an origami swan? We will make a pink drawing, highlight the swan with pink modules around the perimeter and place it on a round stand, and also glue small eyes. Please watch this video on making an origami swan. IN […]
Hello dear masters and craftswomen! Today I bring to your attention a master class on making a tricolor Swan from triangular modules. It would seem that what else can you come up with, what other options are there for making Swans using the modular origami technique. But it turns out there are still options and this is not the last thing in my arsenal. The tricolor swan is so simple […]
Hello dear masters and craftswomen! I bring to your attention a new master class on making a Swan in black from 3D modules. In the last lesson we made a Swan in red, but now I decided to change the style a little and make a Swan in black. The scheme is not complicated and will suit anyone, even a beginner in modular origami. Specially […]
Hello dear masters and craftswomen! I bring to your attention a new master class on making a Swan in red shades. On the Internet you can find a huge number of different schemes and master classes on making Swans using the modular origami technique. I'm sure you've never seen a swan like this before. This scheme is quite simple and even [...]
Swan in blue. Video tutorials and diagram. Part 3. In the third part of the master class, I offer you two video lessons and a detailed origami diagram of how to make a swan. The first video shows how to make a swan's neck and how to make a small stand. The second video talks about how to glue a swan better and faster. Lesson 6 (neck and […]
Swan in blue. Video tutorials and diagram. Part 2. In the second part of the “Swans in Blue” tutorial, we finish making the body. I have prepared for you two video tutorials and a detailed diagram of an origami swan from modules. To assemble a swan you will need 1438 modules of 1/16 size, of which: 317 - purple modules 471 - blue modules 552 - blue […]
Swan in blue. Video tutorials and diagram. Part 1. I bring to your attention a new master class on making an origami swan from paper from 3D origami modules. The design is quite unusual and the appearance of the wing is not quite classic. In the photo you can see small through holes and a mesh pattern. I’ll be honest – the scheme is quite complicated! Especially for this scheme I […]
“Rainbow Swan” diagram and video tutorials (part 3). The third part of the “Rainbow Swan” master class consists of three video tutorials on assembling the stand. And I also decided that a video tutorial on gluing the “Rainbow Swan” would be very useful for you. Lesson 5 (stand part 1) Lesson 6 (stand part 2) Lesson 7 (stand part 3) […]
Invitation card to a men's holiday.
Master class with detailed description. Berdnik Galina Stanislavovna, primary school teacher of the KhMAO-Ugra “Laryak boarding school for students with disabilities.”
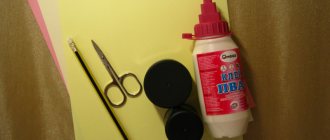
Description: this master class is intended for children of primary school age, additional education teachers, educators and creative people who love to create beautiful gifts with their own hands. Purpose: the work can be used as interior decoration, a holiday gift or an invitation card for any special event. Intended for use by children aged 8 years and older. Goal: Making an invitation card from paper. Objectives: 1. Strengthen skills and abilities in working with paper. 2. Cultivate a desire to make a product with your own hands. 3. Cultivate the habit of working independently, carefully, and bringing the work started to its logical conclusion. 4. Develop creativity, imagination, fantasy. 5. Develop compositional skills and aesthetic feelings. Materials and tools required for work: 1. Colored sheets of paper for printing A-4 (colored paper), scrap paper. 2. A simple pencil, ruler, scissors, glue. 3. Ribbons, beads, rhinestones, and threads may be needed for decoration. A postcard is a gift that is usually given in addition to the main gift.
But just buying a postcard with the text already prepared is, to say the least, impolite; you should at least sign it. But it’s better to design the card yourself. It will be much nicer to the person you give it to. Stages of product manufacturing.
I. Making the base. 1. The base of the card is made of simple tinted office printing paper.
From one standard A4 sheet you will get three bases. To do this, divide a sheet of paper into three parts. This size is the most economical in the sense that three card bases can be prepared from one standard sheet. 2. Fold each rectangle like an accordion, keeping the proportions as follows. It is important to determine the right side of the card base, since the greeting text will be placed on the right side. Therefore, start folding the accordion from the left side. 3. This will create a card base consisting of three pages. 4. To prevent the accordion from falling apart, connect the inner sides of the card with a drop of glue. Iron well. It’s better to put the workpiece under weight for a while. Then the postcard pages will be straight, even and look neat. We selected the following color scheme. II.
Making a men's shirt using the origami technique. 1. Decorate the postcard with a men’s shirt made using the origami technique.
For the shirt, you need to select the appropriate design on paper. You can use scrap paper. If there is none, then you can print it on a printer. The most economical way is to fold a shirt from colored office paper. 2. So, draw and cut out a rectangle with sides 8 cm by 15 cm. 3. Determine the middle of the rectangle. To do this, fold it in half lengthwise, with the white side facing inward. 4. Unbend. Bend the right edge approximately 5-7 mm. 5. Fold the bottom and top sides of the workpiece to the marked center line. 6. Perform an outer “lapel” on the right side. These are shirt sleeves. 7. Rotate the shape. On the left side, bend a strip 1 cm wide. 8. Turn the workpiece again. Now, on the left side, bend the top and bottom corners towards the center line. Thus, we will form the collar of the shirt. 9. Connect the right side of the workpiece to the left side. Place the right side under the collar. Iron all folds well. Our shirts are ready. All that remains is to place and glue them onto the base of the card. III.
Making a paper tie. Shirts were decorated with ties. We chose a “money” tone for the ties. 1. A tie can be made from plain colored paper as follows. Fold a square with a side of 3 cm diagonally. 2. Fold the right and left sides to the intended center line. 3. Turn the workpiece over. Bend the top corner down a third. 4. Now, lift the same corner up, forming a small fold in the middle. 5. Turn the shape over. Bend the top corner down. 6. Bend the right and left sides at the center line. Iron well. Use a drop of glue to connect the folded parts. 7. Connect the tie with the shirt. We place and fix the finished shirts on the first page of the blank. Postcards are stable in a vertical position. On the second and third pages you can write congratulations or an invitation to the expected celebration. Here are some color combinations for postcards and shirts.
In order to congratulate dad on some holiday or simply express your love to him, you don’t have to buy expensive gifts. A handmade postcard will remain in your memory for a long time. Recently, handmade products are valued much higher than purchased ones. We offer a step-by-step master class on how to make a 3D postcard
for my beloved father.
Origami shirt: DIY sleeve folding
One of the most unusual gifts that a child can make with his own hands using paper is an origami shirt. Such a homemade gift can simultaneously play the role of a souvenir and a postcard. So, to make this gift for grandfather on February 23 with your own hands, you will need to prepare colored paper and pencils or markers.
Creating a souvenir should begin by folding a rectangular sheet in half, but not across, but lengthwise. Next, you need to unfold it and then bend the edges towards the middle. As a result of this action, you should get a two-layer rectangle, the bottom layer of which is solid, and the top layer consists of two halves. After this, you need to straighten all the bends again and lay the sheet vertically on the front side. Now the upper corners of the workpiece need to be bent towards the middle, then straightened out and the sheet turned inside out. Next, you will need to fold the upper corners again, but only to those bend lines that were made at the previous stage.
The next step for those who make a gift for grandfather on February 23rd with their own hands should be to fold the top of the page where the edge of the sheet intersects with the fold lines of the corners. Next, you need to fold the edges of the workpiece towards the middle, and form sleeves from the upper part. You can see exactly how it should look in the picture below.
Making a collar for an origami shirt
To create the collar, the bottom part of the sheet will be used, which must be turned over to the other side after making the sleeves. Next, the paper should be folded so that the collar is twice as narrow as the sleeves. Then turn the sheet over again and make the corners of the collar, the tops of these rectangles should touch the center line. Now all that remains is to fold the workpiece so that the collar protrudes beyond the sleeves, and secure the product using the corners of the collar, which must be laid on top of the “shirt”. At the final stage, you can decorate a gift for grandfather on February 23rd with your own hands with a folded paper tie, a bow tie, as well as painted or glued buttons.
Progress:
1. Take cardboard of any color and cut out a tie (two pieces,
2. Take template circles to decorate the tie . We took white mugs for our crafts;
3. Glue the two parts of the tie with glue ;
4. Glue white circles of the tie
5. Use a hole punch to make two holes in the tie for decoration with braid. For our craft, we took the braid, also white;
6. Decorate our craft with braid.
We got these gifts - ties for our beloved dads and grandfathers. Ties can be decorated with any figures of any color. Preferably the colors should be contrasting.
Thank you for your attention! Happy holiday!
"Mug for Dad." Master class on crafts made from cardboard for February 23rd I present to you a master class on making a gift for dads on February 23rd Material: *Colored cardboard; *white cardboard + 1 sheet of thick paper.
“Congratulations to dad on the men’s holiday!” Master class “Postcard for Dad” The wonderful holiday “Defender of the Fatherland Day” is approaching. This holiday develops and strengthens the sense of justice in children and helps.
Synopsis of the direct educational activity “Bow tie for the clown” Synopsis of the direct educational activity “Bow tie for the clown” (decorative drawing) Educational objectives: to promote.
Master class “Postcard for dad for the holiday of February 23” for children of the preparatory group. The holiday of Defender of the Fatherland Day is approaching, we need to please our dads. “You are my best defender, And there is no one braver and cooler than you!”
Master class on making a gift for dad Hello, dear colleagues. The month of February has arrived, which means it’s time to think about what gifts to please dear dads.
Master class “Gift for dad on February 23rd” Master class “Gift for dad on February 23rd”. Very soon the last very significant winter holiday “Defender of the Fatherland Day” will come.
Master class with children. Postcard for February 23rd for dad “Boat” I present to your attention the execution of a postcard for February 23rd. The most original and inexpensive were crafts made from napkins.
Master class “A plane for dad on February 23” The month of February is already on the calendar, which means that soon our whole country will celebrate “Defender of the Fatherland Day!” And every time...
Picture from pencils and paper: preparing details
Another interesting craft to present to your grandfather could be a picture made from pencils and paper. To make it you will need a wooden frame measuring 10x15, a sponge, and a sheet of paper.
The frame, which will become the basis of the picture, will need to be decorated with colored pencils, and in its center a volumetric boat pre-folded from paper should be placed. That is why you first need to create the main element of the composition, and then continue to make a gift for your grandfather on February 23rd with your own hands. A photo of the finished boat can be seen below, and it must be folded according to the instructions given.
How to decorate and surprise
Even when you don't feel like doing origami, a shirt card can turn out stylish and impressive if you use additional decor. Three-dimensional parts are glued onto the finished product or, conversely, shapes or numbers are cut out using a stencil or with scissors. If you have handwritten inscriptions or use printed or printed cards with standard wishes or exclusive congratulations. Glued real buttons look original.
So, after a few simple manipulations with the available materials, you will have a postcard-shirt in front of you. It’s quite easy to make such an interesting souvenir with your own hands (step-by-step instructions will help you with this). Our master class is the basis for further creative research. When the manufacturing technology is clear, you can easily create your own versions of products. You will quickly cope with creating a gift for your brother, boss, or friend. Use the card to write nice wishes or as an envelope for a cash gift.
Not only on February 23, but also on any other holidays, you can surprise your male friends and relatives with an interesting postcard made by yourself. In addition, knowing how to make a paper shirt with your own hands, you can wrap a gift beautifully and tastefully.
Content:
Making a paper boat
First you need to fold a rectangular sheet of paper across, and then slightly bend the workpiece along, but not all the way, but only so as to outline a line. After this, you should bend the upper left corner to it. Do similar actions with the right side. One layer of the lower free edge should be folded up; the fold line should be the lower edges of the triangles made at the previous stage. Next, the workpiece should be turned over and a similar action should be done on the opposite side.
At the next stage, you will need to secure the edges to the craft by bending all the protruding corners around it. Next, the resulting triangular pocket should be opened and folded along opposite fold lines. The resulting part should have a square shape. After this, one free edge of the workpiece needs to be folded diagonally, and then the same should be done with the second. The resulting product should be taken by the opposite edges and carefully stretched - this will be the boat needed to make an original gift for your grandfather on February 23rd with your own hands. The master class given above will help even the youngest grandchildren create crafts without much effort and time.
Assembling a picture from pencils and paper with your own hands as a gift to your grandfather
Finally, all the materials and parts are at hand, all that remains is to assemble the picture. To do this, the photo frame must be covered with pencils in three rows. It is necessary that they cover the entire length of each side. It is important not to forget to insert a blank sheet inside the frame on which this composition will be formed. When the frame is dry, you can move on to the next stage of making a present for grandfather.
The previously made boat should be attached with glue in the center of the base. The lower part of the picture can be painted in the form of sea waves, and the upper part can be painted with clouds and the sun. This gift will definitely make your grandfather happy.
Unique tie
The following materials will be used to create an original and unique tie:
- colored cardboard with an unlimited number of colors;
- various pictures of cars, planes, ships, etc.;
- corrugated multi-colored paper;
- scissors, napkin, glue and oilcloth.
Making a Tie
To make the base of the tie, we use a ready-made template. Using a template, cut out a tie from cardboard. To create the braid, we will use crepe paper. To do this, use scissors to cut out a rectangle measuring 5x20 centimeters from it and roll it into a tube.
We connect the resulting paper tube with a tie using glue. On the front side, we lay out the prepared cut-out pictures in a different order and glue them.
It turns out to be a very beautiful tie that is not available anywhere else.
Picture for grandfather on February 23 from his granddaughter: preparatory stage
When thinking about what kind of gift you can make for your grandfather on February 23rd from paper with your own hands, girls should pay attention to the picture made using the quilling technique. To make this souvenir you will need a special set or double-sided white and colored paper, which can be cut into narrow strips and continue working. In addition, you need to prepare glue, scissors and a sheet of cardboard for the base.
We all know that girls really like to use the quilling technique to make flowers, so we suggest making them the basis of a product that will be presented as a gift to grandfather on February 23. With your own hands, your granddaughter will need to make a lot of curls from paper strips using a toothpick. Next, each resulting part will need to be shaped into a petal by extending its edges, or left round - the centers will be made from them. The leaves for the composition are created in the same way as the petals, and green stripes will be used as stems. You can create several elements and any other fancy shapes.
Example of a paper tie idea
There is a ready-made template, using it we cut out two pieces of absolutely identical ties from cardboard. Now we need to make decorations, for this we can use figures cut out of paper. We glue the two parts of the tie together and apply them to the front part for decoration. Using a hole punch, we will make holes and thread a beautiful ribbon through them.
Creating a painting
When all the details are at hand, all that remains is to assemble a composition from them. To do this, you need cardboard, preferably colored, and stick the details prepared in advance onto it, forming flowers or any abstract shapes. You should leave 3-4 centimeters free at the bottom of the postcard. In this place, you will need to line up the inscription “February” in white, and stick a large number “23” on top of the entire color composition. Of course, it will not be easy for your granddaughter to make such a gift for her grandfather on February 23rd with her own hands, but the result is worth all these incredible efforts.