Features of darts and targets
Although the game's tools are simple at first glance, there are some minor quirks. There are 2 types of inventory: non-professional and professional. The second option is more expensive, but more efficient in operation. The first one wears out faster.
To understand the differences between the sets, you should consider each element in more detail.
The target is a circle divided into 20 sectors. It comes in 3 types depending on the dividing wire at the base:
- Standard is a non-pro version that has the shape that gives the most bounce.
- Triangular - type for semi-professional level of play. In this case, the shape allows the tip to roll toward the field along the edges.
- Thin - this model is used in tournaments. Its advantage is that it minimizes bounce.
The targets are distinguished by a dividing wire at the base.
The next important aspect in choosing equipment is darts. They have a complex design, but when choosing, you should pay attention to only 3 main elements:
- The barrel is the base that the player holds onto.
- Tip - it can be metal, in the form of a pointed needle, or magnetic (in electronic darts).
- Plumage - aerodynamics depend on it. In most cases, products with an average weight of 20-25 g are used. The maximum possible length of the plumage is 30.5 cm with a weight of 50 g.
Darts with a metal tip.
Various materials are used to make darts. Tungsten and nickel products are used in professional tournaments. It is recommended to use brass during training.
Beginner players do not need to immediately buy expensive sets. Having learned to hit the target on an amateur target while maintaining a minimum number of bounces, a person will achieve better results when using professional equipment.
We sew a donut cover with Velcro for a stroller or bicycle wheel
Miliana shared.
We sew a donut cover with Velcro for a stroller or bicycle wheel.
Today I will tell you how to sew beret covers on the non-swivel wheels of a stroller with your own hands to protect your apartment or car from street dirt. Beret covers are very similar to plastic shower caps, only more durable :) So, let's get started. We need fabric. I use raincoat fabric. But not a simple one, but with an oilcloth base, so that the moisture that will drain from the wheels remains inside the cover.
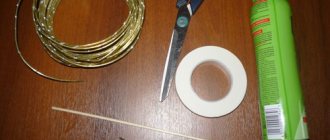
- We will also prepare a measuring tape, chalk, elastic band and thread.
- To save time, fold the fabric in half and draw a circle with a diameter equal to the diameter of the wheel + 25 cm.
- We fasten the top and bottom layers of fabric with pins along the drawn line inside the circle so that the fabrics do not move.
- Carefully cut out our circle.
- This is the circle we got
Next, we need to turn the edge of a centimeter twice by 1.5-2. It is difficult to tuck the curved edge neatly. I turn the edge up 1.5 cm, pin it, stitch it, turn it back 1.5-2 cm, pin it and stitch it.
- This is how the edge turns out.
- On the last line we leave 1 cm unfinished to retract the elastic.
Use a pin to tighten the elastic. We tie the edges of the elastic together and hide them in the “hole” left for threading the elastic.
- We repeat the same sequence of operations for the second case.
- The beret covers are ready!
- I hope my experience will help you and there will be no more dirt and water from the wheels of your vehicle in your apartment!
- Good luck to you!
But most strollers have swivel front wheels. And the beret cover will not fit on the swivel wheel due to the fastening of the swivel mechanism.
No problem! I'll tell you how to sew a detachable cover with your own hands, I call it a donut cover. We will make it detachable using ordinary linden.
So, let's go!
We will need raincoat fabric on oilcloth, thread, linden, elastic band, tape measure, chalk, scissors.
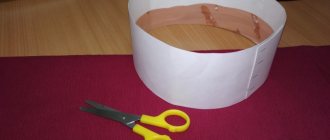
- We measure and cut a rectangle of the following dimensions:
- width = 25 cm (for a wheel 5-7 cm wide);
- length = wheel circumference (circumference = diameter x 3.14) + 10-15 cm
- Fold the short sides twice, 1.5-2 cm each, first and stitch.
- Only then do we fold it twice, 1.5-2 cm each, and sew the long sides.
- We apply it to the short side, measure and cut off the required amount of linden.
- We attach the linden - the soft part to the front part of the cover, the hard part to the inner (wrong) opposite side.
Attention: we attach the linden, not reaching 1 cm to the edge! This is important, since we will still need to retract the elastic band.
- Use a pin to tighten the elastic.
- We secure the elastic on both sides with a machine stitch or by hand.
- This is the rectangle we get, assembled with an accordion.
- If you connect the Velcro and straighten it, you get a donut like this