Alas, the foreigners are right: we use whole trees for firewood, but we have learned to make furniture from sawdust. It’s good that many enterprises have switched to finishing these products using veneer. The products began to look richer. Veneer has always been a decoration for wooden products. The finishing looks especially beautiful using combinations of veneers from various types of wood.
So, let's look at how veneer is produced.
Veneer is usually called a thin piece of wood. They are made in various ways, let's consider three main ones: sawing, planing and peeling.
In any case, to produce veneer you will need:
- drying chamber;
- equipment for determining wood moisture content;
- equipment for direct production of veneer (depending on the method of production of the material).
Plywood classification
Depending on the characteristics, plywood of any hardness differs in service life, appearance, types and grades:
- By purpose it happens:
- construction plywood – used in the construction of houses as floors and partitions;
- industrial plywood – for ship, carriage and automobile construction;
- packaging plywood – used for packaging large items, furniture, electronic equipment and more;
- furniture plywood - home and office furniture is made from it;
- structural plywood - used to create various structures, decorations and displays.
- Depending on the number of layers of veneer, plywood is:
- three-layer;
- five-layer;
- multilayer.
To ensure that the veneer sheets are arranged symmetrically with respect to the central sheet, they are taken in an odd number. In the case when the number of veneers is even, it is necessary to glue the two central sheets perpendicular to the two outer ones, this will increase strength and resistance to deformation. The thicker the plywood sheet, the more expensive it is, accordingly.
- There are three types of plywood:
- moisture-resistant plywood (FC) – moisture resistance is relative, since even in rooms with not very high humidity it can suffer. Actively used in the manufacture of furniture and packaging material;
- increased moisture resistance (FSF) - due to its good resistance to moisture, it is used not only for interior work, but also for exterior work. This type of plywood bends well, can easily be processed in other ways - drilling, sanding, planing, sawing, and can be painted and varnished well. Many builders note that working with this material is a great pleasure;
- increased moisture resistance melamine (FKM) - melamine or bakelite glue is used in production. This type of plywood has a popular name - marine plywood. It is used for shipbuilding, aircraft manufacturing, and mechanical engineering; it does not sink in water and has good resistance to most aggressive environments. FKM also differs in that it can withstand more than 100 stains.
- Plywood processing can be laminated or conventional.
- Depending on the material from which the veneer is made, plywood can be:
- birch - less in demand due to its high cost;
- coniferous plywood – made from larch, pine, fir, spruce;
- Siberian cedar plywood - used mainly for decoration purposes.
- Depending on the number of defects that can be identified by external signs, plywood comes in several classes:
- E class (elite plywood) - production of plywood without any defects, not counting only minor changes in the structure of the tree itself;
- I – a defect of no more than 20 mm in length is allowed;
- II – a defect of no more than 2% of the total area of the material is allowed;
- III – defects in the form of cracks of no more than 10 per square meter are allowed. m., the area of which can be up to 6 mm;
- Class IV - very low quality plywood with cracks starting from 40 mm.
- Depending on the surface treatment, plywood can be:
- unpolished (NS);
- plywood sanded on one side only (Ш1);
- polished on both sides (Ш2).
A sanded surface is easier to process and has good adhesion to varnishes and paints, which is why this type of plywood is more expensive and is usually used for decoration. Unsanded plywood is often used for hidden work; its price is low compared to sanded plywood.
DIY plywood manufacturing technology
Today, plywood can be purchased at every hardware store. But many people who like to do everything themselves are interested in how to make plywood with their own hands. It turns out that this is possible. To make plywood you will need veneer; you can also make it yourself.
Making veneer at home
Veneer is divided into three types:
- Natural – veneer that has the natural color and structure of wood. It is made by sawing, peeling and planing thin layers. It is important to preserve the wood structure. Environmentally friendly material, very light.
- Colored veneer is the same natural veneer, only painted in different colors.
- Fine-line is obtained after the reconstruction of old peeled veneer, which is formed into blocks, and from them, in turn, veneer is made. It can have any color scheme, pattern and dimensions just like natural wood.
Depending on the manufacturing method, it happens:
- Sawn veneer is the thickest material of all types, obtained through the sawing process.
- Sliced veneer is obtained through the process of planing wooden blocks.
- Peeled veneer – produced using a veneer peeling mechanism.
How to make veneer at home
The easiest way to get yourself a few pieces of veneer is to “disassemble” a sheet of plywood. Place the plywood sheet in a container with hot water for 2-3 hours, maintaining a high temperature throughout the soaking period, and then cut the plywood into layers with a well-sharpened knife. Immediately after this, you need to put the resulting veneer slabs under a press to maintain a flat surface.
You can even make sawn veneer at home, but be prepared that this work will take a lot of effort and time. All you need is a prepared beam (not necessarily elite wood, ordinary maple or birch will do), a pencil, a ruler, a workbench and a good jigsaw, preferably with a set of replacement blades in reserve. Fix the workpiece in the workbench and mark it vertically in increments of 10-12 mm (thicker is not practical, and if thinner, it will be very difficult to saw). Take a jigsaw in your hands and cut the veneer along the lines, layer by layer.
How to make veneer if you have a plane at home. Sliced veneer is made from the same timber as sawn timber, with the only difference being that thinner plates can be made. But there is also a downside to the coin - it is difficult to make plates of the same thickness with a mechanical plane. Well, if you have an electric plane with an adjustable layer thickness control, then the task is much easier. Firmly secure the timber in the workbench and remove the veneer, remembering to use a clamping ruler or beam. If you have access to a peeler or other woodworking machines, then the process of obtaining veneer is no different from the industrial one. How to make veneer suitable for further use? It must be sanded, coated with waterproof solutions or varnished, depending on the purpose of production.
There are three main methods for making veneer, and each of them, theoretically, can be done at home.
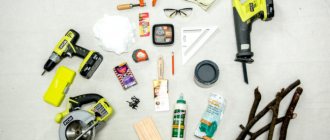
Tools for work
To make veneer, and subsequently plywood from it, you will need the following material and tools:
- wood (birch, pine, spruce), which you can purchase in a specialized store or at a woodworking factory;
- veneer peeling mechanism for the production of peeled veneer;
- sawmill for the production of sawn veneer;
- plane for making sliced veneer;
- grinder;
- grinding machine;
- cold and hot presses;
- drying chamber;
- phenol-formaldehyde resin as glue and its components;
- pencil;
- varnish or paint.
Veneer manufacturing stages:
- The first thing you need to do is select the raw materials (wood). Give preference to birch or pine, in extreme cases, spruce, or use it to combine plywood. Birch is a more durable material, while pine and spruce are lighter.
- Prepare the wood for work - peel it from the bark and cut it into 1 m long beams using a sharpening machine.
- Lay out the workpiece vertically.
- Using a veneer peeling mechanism, peel off veneers of the thickness you require. If you are making sliced veneer, then you need to use a plane, and for sawn veneer, a sawmill is useful.
- Cut the veneer into the required pieces.
- Dry the veneer in a drying chamber that has the ability to regulate humidity.
- Sort and discard the dried veneer.
- Then the dried veneer of good quality can be refined, and the rejected one is recommended to be cut and glued to obtain a sheet of the desired size.
Assembly of plywood
Finished veneer sheets can be collected in bags:
- Apply glue to both sides of the veneer and connect the sheets together into bags.
- Place the bags under a cold press.
- Glue veneer packs into plywood sheets using a hot press. Do not forget that the number of veneer sheets must be odd; they must be connected so that the fibers of the sheets being glued are perpendicular to each other.
- Now you can cut the plywood sheets to the size you need.
- Sand the plywood using a sander until the surface is perfectly smooth.
- Finished plywood can be decorated with paint or varnished.
Veneering: types
There are several main types of veneering, let's take a brief look at them.
— Hot veneering. With this method, the veneer is glued to the base using adhesives. The most accessible method for home conditions, it will be discussed in the article.
— Cold veneering. Here the veneer is pressed onto the base. We are talking about pressing machines or screw clamps, which not every home owner has.
— Membrane veneering. An industrial method used for veneering complex surfaces. Membrane veneering is based on vacuum joining of veneer and boards - both smooth and textured.
How to bend plywood
In some cases, such as furniture making, you may need bent plywood. It is also possible to bend it at home. The easiest way to do this is with flexible plywood, the thickness of which does not exceed 3-4 mm. Flexible plywood can be purchased at the store. But you can bend plywood of any thickness, but first you need to make an accurate calculation of the plywood - in what specific place you will bend it.
The process consists of the following steps:
- Steaming. In production conditions, this is done in special installations, after which they are bent under pressure. At home, you can steam sheets of plywood in the bathtub or in other containers. The thicker the material, the longer it must be kept in water. The minimum time is 15 minutes, the maximum is 5 hours. The water temperature should be 90-100°C. But, as you understand, this is quite difficult to do at home, and not cheap. Steaming can be replaced by soaking in warm and cold water, and the process time increases 20 times for cold water 15-30°C, and 1.5-2 times for warm water 60°C. After steaming, the plywood sheets must be bent and secured so that they dry completely in this position. To speed up and facilitate the process, you can only moisten the surface of the plywood and steam the place of the planned bend.
- Notching. The method is suitable for plywood with a thickness of 15-24 mm. Using a cutter, you need to make small cuts (no deeper than half the thickness of the sheet) in the places of the planned bend. This is the method used in the construction of boats. The cut blank is bent, another sheet of veneer is glued onto it and secured. The plywood should remain in this position for at least a day.
- Gluing. This method helps to create a rounded part. Cut pieces 5 mm larger than the required length. Lay out the parts on the table so that the veneer directions in the finished product alternate, this is necessary for greater strength of the plywood. Glue all the parts together and fix them on the workpiece of the shape you need. Once your piece is dry, sand it and remove any excess glue.
Before you start bending plywood, read this useful information:
- Transverse fibers are more difficult to bend than longitudinal ones.
- The humidity of the rooms in which you plan to store bent plywood sheets should be low - no more than 10%.
- Steamed and soaked workpieces bend more easily when warm.
- The thicker the plywood, the more difficult it is to bend.
- It is easier to bend plywood in which the veneer layers are located parallel to each other.
- Do not overexpose the plywood in water, it may delaminate. To find out the exact time required to steam plywood of a specific thickness, you can use an experimental workpiece. Soak it and check the condition every 3-5 minutes.
- It is still recommended to bend very complex and voluminous structures in specialized workshops.
Painting plywood
For longer service, plywood must be painted or varnished. This is especially true for material that is used outdoors.
Stages of painting work with plywood:
- First of all, the plywood is sanded. For this, sandpaper No. 80 is used.
- After this, the plywood is coated with acrylic primer and left for at least 4 hours.
- If necessary, the surface is puttied with wood putty.
- After the putty has dried, the surface is again rubbed with sandpaper No. 80-100.
- Another layer of primer is applied and left for 4 hours.
- And the final stage will be the painting of the plywood itself.
Having become familiar with how plywood is made, how it is bent and painted, you can build not only arches and partitions in your apartment or country house, but even make and decorate furniture yourself.
Varieties of veneer
Veneer is divided into various types. Depending on the production method, the material is divided into:
- peeled;
- sawn;
- planed.
Depending on the appearance, veneer is divided into the following types:
- Natural. This material takes the form of thin sheets of natural color and structure. The main task in the production of such material is to preserve the naturalness of the wood. The advantages of natural veneer are its environmental friendliness, preservation of the unique structure of wood, and attractive appearance. Products finished with the material are similar to products made from solid wood, but cost an order of magnitude lower, and the weight of the structure is less.
- Color. When producing colored veneer, its surface is painted and treated with stain. As a result, the material comes in a wide range of colors.
- Fine-line. This type of material is obtained as a result of the reconstruction of peeled veneer obtained from softwood. Initially, blocks are formed, from which veneers of various structures, patterns and colors of natural wood are subsequently produced. This method allows you to imitate valuable wood species when making material from cheaper wood. As a result, veneer has a more aesthetic appearance and costs less.
Veneer has found application in the manufacture of various structures and products. The most popular material is for finishing doors, furniture, and for making plywood. It is also quite often used in the production of guitar bodies and for decorative work. In addition, veneer is widely used in car tuning and interior trim.
It is worth noting that some manufacturers save on high-quality glue and varnish by using low-quality compounds. All this significantly affects the environmental friendliness of the product.
Why veneer furniture?
Two main points can be highlighted.
Firstly, the price
. You can veneer a pine table with your own hands, “turning” it into oak, and the appearance will hardly be inferior to real oak. But the price will be much lower. And if you remember that it does not dry out, does not deform, and is not affected by moisture and temperature, then you should seriously think about whether it is worth spending money on furniture made from valuable wood?
Secondly, wide design
. Do-it-yourself veneering allows you to turn a tattered window sill into a new one, and a boring cabinet into a completely new item in the Art Nouveau style without much expense, just by applying veneering.
Veneer manufacturing methods
As mentioned above, veneer is divided into three types according to the manufacturing method.
Let's take a closer look at these methods of producing material.
- Peeling method. In this case, specially prepared wood is used, and when rotated, the top layer is removed using a special machine. In the production of veneer using the peeling method, soft and hard woods are used. With this treatment, the top layer is cut off spirally. The result is large sheets of veneer, but their pattern is not very clear and bright. Therefore, peeled veneer is most often glued to plywood.
- Planing method. With this method, the top layer of wood is cut in the transverse or longitudinal direction. This type of veneer is made only from hardwood. The result is a sheet of material of fairly high density with a bright and beautiful pattern. Therefore, sliced veneer is used in the production of furniture and doors.
- Sawing method. In this case, veneer is obtained by sawing sheets with a minimum thickness from a prepared log. The material obtained by this method is the most expensive, since a large amount of waste is generated during production.
When producing veneer, it is important to pay attention to the quality of the wood itself. The tree must have a straight trunk with a minimum number of twigs and branches. The prepared log is inspected by a specialist and determined by him for one or another processing method.
Stages, materials and technology of the production process
So, you have to initially soak the wood for some time in water (the time depends on the density of the wood and its initial condition) and steam it.
Soaking and steaming are necessary to give the wood the same physical properties throughout its entire volume.
Otherwise, you risk damaging the interior of the wood or even rendering the equipment unusable. Next comes the drying process in a drying chamber. Natural drying of the wood will not give the uniformity you were striving for. Insufficiently dry wood is not used in the production of veneer, since in this case the percentage of defects is very high.
The moisture content of wood can also be checked in a homemade way using a laboratory hygrometer. To do this, cut a small section of wood and place a thermometer in the sawdust. The second thermometer remains open. Humidity is determined by the difference in thermometer readings and using a table. This method is not entirely reliable, because it gives very noticeable deviations from real results.
Return to contents
Making veneer yourself
You can make veneer with your own hands at home.
Of course, for this you need to have a special tool and have at least some skill in working with wood.
To make sawn veneer you will need a blank in the form of a beam. The surface of the workpiece is lined with vertical stripes with a pitch of no more than 12 mm. After this, the timber is secured in the workbench and cut along the marks using a jigsaw.
Sliced veneer is initially made in a similar way to sawn veneer, but then the surface is processed with a mechanical or electric planer. It is better, of course, to choose an electric planer, as it provides better processing quality. In this case, you need to work extremely carefully so that the thickness of all veneer sheets is the same.
To produce peeled veneer, you will need a blank with a round cross-section. Therefore, you will need a sharpening machine to obtain a cylindrical workpiece or a finished log. Further veneer manufacturing technology is similar to the processes described above. The only difference is that it turns out to be a large sheet of material.
Further processing of the resulting veneer depends on the personal preferences of the owner. To obtain the desired effect, grinding and treatment with paints and protective compounds are carried out.
One of the significant disadvantages of wood is that it quickly loses its attractiveness. Even if the conditions for its storage and use of lumber products are the most favorable, over time the surfaces inevitably change color and “fade,” that is, the wood loses its original appearance.
Many technologies have been developed for restoration and renovation of furniture and structural elements. One of them is veneering (the term veneering is sometimes used), which is quite accessible for DIY implementation.
There is no definition of the term “veneering” in various dictionaries. In essence, it means pasting materials with the thinnest layer of decorative wood-based coating. In principle (if you don’t go into specific details) this is the same lamination technology. The only difference is that, as a rule, products (objects, structural parts) made of wood are subjected to such surface finishing.
Veneer has a certain classification. Differences in production technology, as well as durability and specific use. A detailed description of the groups is unlikely to interest the reader. It is enough to note that if you plan to finish furniture with your own hands, then it is advisable to focus on peeled veneer (a natural product)
and fine line (the so-called reconstructed modification).
They have a lot in common - ease of working with the products (the layer is very thin), a variety of textures (especially fine-line modifications) and an affordable price.
Veneering technology is applied not only to wood, but also to materials (sheet, slab) based on it - chipboard, OSV and a number of others.
Therefore, talking only about furniture restoration is not entirely correct. With the help of veneer, you can give a “second life” to old door jambs and panels, wall panels, countertops - there are plenty of options for using such finishing.
There are several technologies for fixing veneer. There is only one available for DIY implementation - “hot”, which is based on the use of glue. This technology. The other two require special equipment and are not suitable for home use.
Creating strokes and patterns
At the end of the work, strokes and patterns are applied to the mother-of-pearl to complete the image.
First, they are drawn with a regular pencil, and then they are cut through with a device with a sharpening in the shape of a triangle, with the tip down. The sharpening angle of the gravel is about forty-five degrees, which is due to the good strength of mother-of-pearl.
The methods of working with such a device differ from engraving with a drill, which makes lines in any direction. They work with a graver somewhere along the axis of the hand, and the workpiece, together with a vice, is turned over on the table so that the cut takes place in the direction that is easiest for a person. In this case, the thumb of one hand rests on the finger of the other, which helps control the device: it cannot run forward and cause a real scratch.
The device is sharpened on a special disk inserted into a drill.
The large lines that create the main pattern are made first. Next, mark small lines with a pencil and cut them with a thinner pencil. At the end, the points are set with an electric tool (matte, it is very similar to a small jackhammer and produces blows with the tip). When all the lines and dots are made, the mother-of-pearl is painted with alcohol-based black paint, which can penetrate and be absorbed into parts of the cuts. Remove unnecessary dye from the surfaces of the mother-of-pearl using a thick rubber band.
At this point, work on the product is almost complete. All that remains is to wipe the wood with linseed or some other drying oil, and you can take the item to the customer or transfer it to a new operation. Well, in the end, many should remember that do-it-yourself wooden mosaic for walls is suitable for decorating rooms in the Country, Provence style and is considered an excellent alternative to wallpaper.
To decorate products, you can also use the wood marquetry technique for beginners; it is performed in a similar way and does not require any special skills.
Attention, TODAY only!
MARQUETRY
In one of the halls of the Kuskovo estate museum near Moscow there is a small table, very simple in shape. But visitors still linger around the table and spend a long time looking at the delicate and complex design that decorates it. With scrupulous precision, the artist depicted the architectural ensemble of the huge Kuskovo estate, not leaving even the smallest bush unattended.
Taking a closer look, visitors discover that the landscape is not painted with paints, but is laid out from many pieces of multi-colored wood. Perhaps more than one thousand thin plywood pieces had to be selected by a patient craftsman to do this jewelry work. And not on a whim - that was the order. The artist coped with it with honor, showing the unlimited possibilities of wood mosaics. And - amazing thing! — despite the many small elements, the design organically merges with the surface of the table, forming a single whole with it. There is a legend that the author of this amazing table, serf cabinetmaker Nikifor Vasiliev, went blind immediately after its manufacture - the visual strain was so great.
The art of mosaic made from thin wooden plates, the so-called marquetry, arose in the 17th century in Europe and was most widespread in France. For some time after the birth of the marquetry technique, furniture decorated with mosaic sets was brought to Russia from Western Europe. But already in the 18th century, domestic masters from serfs appeared. The marquetry technique has advanced the art of mosaic on wood far forward, since it replaced the labor-intensive intarsia - cutting pieces of various wood into a wooden base.
Interest in the marquetry technique has not waned to this day. Modern craftsmen decorate musical instruments, furniture, artistic parquet and much more with mosaic sets. To make mosaic sets, you need to purchase veneer - single-layer plywood made from wood of various species. The thickness of such veneer ranges from 0.5 to 1.2 mm. It is sold in building materials stores, in the Young Technician and Pioneer stores.
Karelian birch veneer is an excellent material for a mosaic set. The curly wavy texture gives the wood an extraordinary decorative effect. But ordinary birch wood is also quite suitable for marquetry. Pear has dense pinkish-brown wood. Often used in sets is oak veneer, which is well etched (we will talk about this later) to resemble the so-called bog oak. Moderately hard walnut wood is easy to work with. It cuts perfectly in all directions and has a wide range of colors - from light brown to almost black. Mahogany is widely used in mosaic sets. It also comes in different shades - from light pink to red-brown.
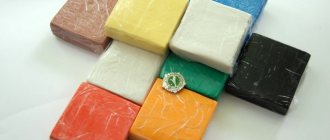
In addition to the listed species, which are most used in marquetry, any wood with all sorts of defects is used (false heartwood, blueness, tilt, flow, redness, double sapwood, etc.), allowing one to obtain a unique pattern. But marquetry uses not only the natural color of wood. Wood of many species is sometimes subjected to pickling - deep staining, thereby imitating other, more valuable species. To dye veneer red, it is first well soaked in a weak solution of copper sulfate (15 g per liter of water), then dried and dipped in a solution of yellow blood salt (ferrous potassium sulfate) - it is sold in a photo store. For one liter of water you need to take 90 g of yellow blood salt.
To obtain a blue or light green color, the wood is etched with a solution of ferric chloride. To obtain a dark brown color, use a solution of copper sulfate, for black and gray - iron sulfate, dark green - copper chloride. The concentration of solutions can be changed depending on what shade you want to get. Oak, walnut and beech wood, which contains large amounts of tannins, is pickled without pre-treatment.
And the wood of linden, alder, birch, poplar, pine and other species must be soaked in a decoction of ink nuts before pickling - these are growths on oak leaves. If you don’t find ink nuts, make a decoction of oak or willow bark.
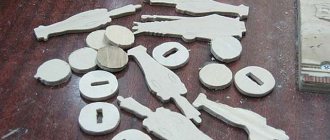
There are two ways to make a mosaic set using the marquetry technique. The simplest is laying out an ornament from pre-cut identical elements. But this method has limited capabilities, since it allows you to relatively quickly create only a geometric pattern with repeating elements. Nevertheless, it is advisable to start studying the marquetry technique with this simple method. Our figure shows a set made of three repeating elements. Accordingly, three different types of veneer with different textures and colors were used. This set can be used to decorate a box or pencil case lid.
Clamp the piece of paper to the drawing board or plywood. Draw a life-size template drawing. Decide right away which three types of wood you will use in the set and select the veneer. And in order to clearly imagine the future ornament, paint its elements on the drawing with watercolors to match the color of the proposed rocks. Use cardboard or thick paper to make a template for each element. Now place the templates on the pieces of veneer and trace with a pencil.
Along the pencil lines, cut out the elements of the ornament with a cutter, the shape of which is shown in the figure. The cutter must be made of good steel. How to make it yourself and sharpen it is described in the article about wood carving. Hold the cutter in your hand as you would normally hold a pencil or fountain pen. When cutting, guide the cutter exactly along the line, slightly tilting it towards you. The cutter should maintain its position unchanged, and when cutting long curved lines, move the veneer towards the tip. Place a board of soft wood under the veneer pieces while cutting. Sometimes the elements of the set are cut out with a jigsaw. In this case, from several sheets of veneer connected into a package, several identical elements are obtained at once.
The sawn or cut out elements of the ornament are smeared with carpenter's glue and pasted onto the template drawing, tightly fitting each element to each other.
When the entire set is completed, it must be glued to the base. The base can be a board or a thick sheet of plywood. Lubricate the base with wood glue and place the set on it so that the paper template is on top. Place three or four sheets of newsprint on top and press them down with a wooden board. Place all this under a press, hold for three to four hours, then unpress. Carry out further work no less than two days after unpressing, when the set is completely dry.
Using coarse sandpaper wrapped around a block of wood, remove the paper template from the set. Then sand the set with fine grit sandpaper. The elements of the set must be sanded along the grain of the wood. When sanding across the grain, scratches are formed, which will inevitably appear during further processing. Scratches are especially noticeable on soft wood.
The polished set is varnished or waxed, depending on the artistic design. If you are planning to varnish the surface of the set, it is best to use nitro varnishes. They are moisture resistant, transparent, dry quickly and acquire an intense shine. It is not recommended to varnish a mosaic set with oil varnishes, since they produce a low-transparent film and do not sufficiently reveal the wood texture (although oil varnishes are sometimes good for other types of woodwork). Nitrovarnishes are conveniently applied to wood with an ordinary spray bottle, which is used for cologne.
Apply the first coat of varnish to the sanded set and let it dry for an hour. Then sand the surface with fine-grained sandpaper and apply another 2-3 layers of varnish. After each layer, increase the drying time by about an hour. So, before applying the fourth layer, dry the third for three hours. After applying the last layer, dry the varnish for 24 hours, then polish with polishing paste.
For waxing, you need to prepare a mastic consisting of two parts turpentine and one part wax. Slowly pour turpentine into the melted wax, stirring, then stir thoroughly. Wax with cooled mastic using a rag swab or bristle brush. The mastic is allowed to dry for 2-3 hours, after which the set is rubbed until shiny with a brush or cloth.
Now try to complete the mosaic set using the second method. As with the first one, first of all develop a life-size sketch. Complete the sketch in color, and draw the boundaries between adjacent colors with a clear contour line. Place a sheet of tracing paper on the finished sketch and transfer a linear drawing onto it. Turn the tracing paper over and you will get a mirror image of the drawing. It is this mirror image that is transferred using carbon paper onto a sheet of veneer, which will serve as a background and at the same time a template.
You can get a mirror image without resorting to tracing paper. To do this, wipe the reverse side of the sketch with a cotton swab lightly moistened with linseed or sunflower oil. When a mirror image of the design appears on the back side, carefully wipe the paper with a dry cloth. As with tracing paper, the reverse drawing is transferred to a sheet of veneer.
In the picture you see the sequence of making one fragment of the set - a flower. First, try making a mosaic set of this flower. You will need veneer from three types of wood. For the petals - yellow acacia, for the background - simple oak, and for the stamens - bog oak. Of course, you can replace all the named species with other types of veneer, having previously painted them, if necessary, in suitable colors - you have already read in this article how to paint wood.
So, you have applied a mirror pattern to the veneer sheet that will serve as the background. Now cut out nests for petals on the background. Then place yellow locust veneer underneath the cut hole. Using a cutter to trace the hole, apply thin but clearly visible marks to the underlying veneer. Set the background aside, and cut out petals from the acacia tree along the marked marks, which you then insert into the cut-out sockets of the background, securing them on the reverse side with adhesive tape or a piece of paper coated with glue.
The next stage - cutting out and gluing the stamens - is performed in exactly the same way, only instead of acacia, bog oak veneer is taken.
After all the elements of the set are cut out and glued, all further operations are performed in the same way as when setting in the first way. Only when you stick it on the base, you will no longer have a template drawing on top, but adhesive tape or glued pieces of paper. In conclusion, one piece of advice. Do not try to replace painting with marketing techniques, do not get carried away with portraits and landscapes. Marquetry has its own visual possibilities - emblems and ornaments, for example, look great. And it’s better to use these opportunities. Marquetry - wooden mosaic
You can purchase furniture made entirely from Karelian birch or decorate the walls with walnut panels, however, this is a rather expensive pleasure that not everyone can afford. However, there is a wonderful old way to create an elegant interior using simple, and therefore much cheaper, types of wood. This can be done using marquetry
.
Marquetry principle
consists of gluing plates of valuable wood onto a base of simple wood. The thickness of the plates is 1 - 3 mm, and they have different textures and colors. As a result, mosaic designs from thin wooden plates are created of extraordinary beauty.
In medieval Europe, furniture was decorated using the intarsia technique, which is a type of inlay. Intarsia
- This is wood inlay on wood, in which a figurative image or ornament is carved into the wooden surface of an object, and pieces of expensive wood are inserted into the resulting recesses.
The emergence of marquetry
became possible only after the invention in the second half of the 16th century. this machine for the production of sawn veneer. Since that time, they began to veneer furniture made from local inexpensive wood species with veneer of valuable imported wood species (black, mahogany, rosewood).
In the middle of the 17th century. In France, for the first time, mosaic sets were used for cladding, which were made from pieces of veneer according to a preliminary drawing. The marquetry technique quickly spread throughout all European countries, displacing the previously used intarsia. The marquetry
reached in the 18th century. It was widely used to decorate interiors and furniture. The use of thin veneer sheets made it possible to decorate not only flat, but also curved surfaces with mosaic sets.
In the 18th century, the marquetry technique reached Russia. At first, Peter I sent carpenters to Holland and England to study furniture craft. However, the Russian school was finally formed during the reign of Catherine II.
The most common decorative themes are various geometric shapes, plant and floral patterns, biblical motifs, landscapes, and genre scenes. To make the works more picturesque, craftsmen began to use techniques such as ignition, tinting, engraving, and etching.
Stacked mosaics were used to decorate the floor, doors, tables of various shapes and sizes, chests of drawers, and cabinets. It was thanks to the outstanding Russian masters who created highly artistic works of painting that the marquetry
has become real art.
marquetry technique
in Russia dates back to the 18th century. If at the beginning of the century, furniture with decorations using this technique was created by visiting specialists, then by the middle of the 18th century, Russian capital and serf craftsmen mastered the marquetry technique so well that the tables and cabinets they created were real works of art.
Recently, the marquetry technique has regained its former popularity. Furniture lined with marquetry
, looks very stylish and beautiful, but at the same time costs less than one that is made entirely of solid wood.
In addition, the marquetry technique allows you to make each piece of furniture unique. Even if the same design or pattern was used when decorating a set of furniture, due to the variety of colors of the veneer used, each item will have a completely unique look.
Today, with the help of typesetting mosaics, you can tile not only furniture, but also create amazingly beautiful panels and paintings, wall panels, doors, and stained glass windows.
The word inlay is of Latin origin. Since we are talking about Latin, it is already clear that this art has been known for a long time. It means decorating any covering with pieces of glass, marble, ceramics, metal, etc. These pieces are laid out on the surface, differing from it in composition and color. And although a variety of materials are used, wood is still the most common.
People of the older generation remember how 30-40 years ago the most common hobbies were embossing, intarsia and marquetry. True, many had not heard of such names, but everything looked very decent and everyone liked it. Oddly enough, over time, nothing has changed; these crafts still exist, and the products are not only in great demand, but also cost a lot of money.
Wood intarsia
This type of inlaying in modern language can be called 3D technology
. Such images are created from wooden pieces, selecting them according to texture. Such pieces are cut into a wooden surface:
- selected pieces are cut from a single piece or different wood species;
- the cut out parts of the future mosaic are sanded and, if necessary, painted;
- a recess is made in the surface in thickness equal to the typesetting image;
- The details of the picture are assembled into one whole, glued to each other and placed in a cut-out recess.
There is the simplest method, which is used by more and more craftsmen - the set is glued to plywood
. In this case, plywood is prepared according to the required dimensions. A lining is made around the perimeter, and a picture is placed inside. The cover and picture are selected in advance so that all the details match and make up one story.
If someone decides to inlay something themselves and do something similar, they will need to adhere to a number of rules:
- the texture of the laid pieces should be directed strictly according to the intended pattern;
- the work uses parts of various types of wood or they will need to be painted;
- volume is achieved by grinding corners, raising and lowering entire areas of the picture;
- thickness greatly affects the appearance of the canvas and its quality - use blanks of small thickness.
Gallery: mosaic on wood (25 photos)
Marquetry on wood
The word is quite little known, although it is the same intarsia, only made of veneer
. Now everyone immediately understands what we are talking about. Although the technique is considered simplified, firstly, it is very expensive; secondly, it requires certain experience; thirdly, it is labor-intensive.
The work uses natural wood veneer
. Creating a painting is very similar to the procedure used in intarsia:
- first a template is made on paper;
- using carbon paper, the design is transferred in detail onto veneer of various shades;
- if you don’t have the desired color, you can cover the part with stain;
- the cut out pieces are glued onto the template, fitting tightly to each other;
- the canvas glued to the paper is smeared with glue and glued to the surface;
- paper is placed on top and pressed in a press;
- After drying, the product is sanded and treated with mastics or varnishes.
Working conditions with veneer will require familiarization not only with working techniques, but also with:
- with the behavior of different woods in a variety of conditions;
- using glue and varnish;
- proper grinding;
- presence of artistic taste;
- perseverance and accuracy.
Most of all, of course, experience influences the masterpiece created. Specialists in this field create beautiful furniture and use marquetry techniques in parquet elements. A novice artist will first have to learn how to make small paintings,
to practice on small objects, a good training video or a detailed master class will help with this. When such a picture is not embarrassing to hang on the wall, you can move on to the next more complex technique.
Mosaic on wood
The easiest and most affordable way to decorate your interior with your own hands is to use wood of various species. Any mosaic made of wooden pieces is a type of inlay. The accessibility of the wall type of inlay is that when creating a new interior, they take wood tiles of any shape. The mosaic is made from these tiles.
The answer to expensive inlaying from valuable materials is inlaying with improvised materials. The ideal budget option would be to use production waste
. Carpentry shops always have a wide variety of pieces of wood. Sometimes even shavings mixed with cement and dyes are used.
Good wall mosaic panels are assembled from sawn squares, triangles and polygons. Mosaics began to be often used for cladding the facade of a house. It is enough to cut slats of different thicknesses from boards and stick them on the surface so that they have no gaps between each other and alternate in size. Afterwards, this “masonry” is painted with stain and covered with a protective varnish.
Block mosaic is basically the same, but it’s just much easier to work with. A drawing is drawn according to which the bars are glued together. After drying, the bars are sawn crosswise into several identical tiles. The bars are glued so that they contain a variety of wood species. Externally incompatible rocks create a pattern on the surface when combined. Such a mosaic is glued according to the drawn up sketches and acquires the required pattern in the end section.
DIY wooden mosaic
Before you try to create something large, or take on an expensive project, remember that in order to create some products yourself, you can start small. So, it’s worth trying a couple of workshops on creating mosaics from wood
. Examples of creating a butterfly or a fish are usually used. The methods for making marquetry with your own hands were described above, so there is no point in repeating them. With veneered paintings the principle is the same and it coincides with the first one.
However, there is one mosaic option that is slightly different and can be done by everyone. This is making a children's toy with your own hands.
. For work you will need a furniture board, a hacksaw, a jigsaw (manual), sandpaper and PVA.
The scheme is quite simple:
- A circle is drawn directly on the wooden shield. Two or three more circles are drawn in the circle. All this is done with a compass, since the circles must have one center.
- Wavy lines are drawn from the center to the edges of the largest circle. It looks like petals divided into several parts by lines.
- Saw off the fragment with the circle from the main sheet with a hacksaw. You will have to work with a hand jigsaw and therefore need an approach from all sides.
- The sawn-off part with the pattern is pressed against the table with clamps.
- Using a jigsaw, we cut out each fragment along the lines.
- The resulting set of parts needs to be sanded and painted. Each set of “petals” is painted in its own color. Any paint will do (gouache, watercolor, etc.). To prevent the paint from wearing off, the top is coated with a water-based varnish.
- The sides are made from the same material, and the base of the box is made from a plywood sheet. The sides with the plywood circle are glued together and painted or varnished. In order for the mosaic set to coincide with the box, another circle is drawn in advance on the drawing for the sides and bottom.
yourself at home
. Let's say you decide to decorate your old favorite box:
- the simplest drawing is drawn;
- the part is cut out and placed in the insertion points;
- a small notch is made in the outlined outline;
- an insert coated with glue is inserted into the recess;
- After the glue has dried, the insert is sanded and varnished along with the entire surface.
Mosaic on wood products
In addition to wood, other materials are also used in mosaic compositions. In the Middle Ages, bone and stones were widely used. Now, for example, metal is used more.
In products made from expensive wood, special grooves are made with a cutter. The craftsman drives rolled wire into these grooves so that it forms any pattern imagined by the artist.
Typically, such equipment is needed in the production of custom souvenirs. Most of all it can be seen on expensive weapons and boxes for exclusive watches. These types of work are difficult to do at home yourself, if only because special equipment is required.
There are several types of mosaic techniques. You will learn about some of them from this article. You can also try making a mosaic on pre-prepared wood using the intarsia technique with your own hands; a step-by-step master class will help you with this.
Hot veneer technology
Preparing the base
- Removing fittings (if any) and structural parts. For example, a peephole from a door leaf, the rim of a keyhole.
- Dismantling the old layer of finishing on a wooden surface. It’s easy to decide what you’ll need – a spatula, an iron for heating the coating, and so on.
- Elimination of existing base defects. Methods and materials are selected based on their nature and “depth”. Basically, grouting agents, putties and adhesives are sufficient. Upon completion of the work, the base is carefully sanded so that no bulges, dents or folds are formed when the veneer is applied.
Veneer preparation
- Editing sheets. This thin finishing material is sold in rolls. Consequently, when straightened, it will try to return to its original position (memory effect). To restore their correct geometry, just walk along the reverse side with a damp sponge. The veneer will soften somewhat and straighten out. To consolidate the result, the sample should be clamped between two flat surfaces. For example, sheets of plywood, fiberboard slabs and the like, depending on the size of the fragment. To quickly remove moisture from the veneer, it is advisable to cover it with soft cloth or paper. After drying, it will remain in a straightened position.
- Editing edges. When restoring large surfaces, one sheet will not be enough. Veneer is sold with a blade width (with rare exceptions) of 30 cm. Consequently, splicing of fragments cannot be avoided. Edge straightening is nothing more than cutting sheets along a line. At home, 2 pieces of boards with treated ends are quite suitable for this (as an option). A sheet of veneer is placed between them so that only its edge protrudes. All that remains is to clamp the resulting “assembly” with clamps and trim off the excess (irregularities) with a sharp knife. It is advisable to work with a special tool designed specifically for cutting cardboard or thin plywood.
Veneering
Applying glue.
Recommendations for using the selected adhesive are always given by the manufacturer. But those who have already done this work with their own hands advise processing the base in 2 passes. First, the thinnest first layer - a short exposure until it “sets” - then the second. This technology allows you to see all the imperfections and distribute the glue as evenly as possible over the entire area.
Fixing sheets.
Experienced craftsmen recommend placing a sheet of paper (only waxed paper) first. The reason is that the veneer is thin, easily damaged, and it is unlikely that it will be possible to place it on the base immediately as needed. This means that it will inevitably have to be moved. When it reaches the optimal position, it is quite easy to remove the wax sheet without damaging the glue layer.
Processing of joints.
- Before the glue dries completely, in order to ensure the quality of the veneer, it is advisable to secure all joints with adhesive tape. Then it is easy to remove it.
- In some cases, it is advisable to first fasten the veneer strips into a single sheet, and only then lay it on the base. You will have to decide for yourself what to do best. But it’s worth considering (as one of the acceptable options).
- To avoid moisture absorption into the base, it is advisable to veneer not only the front part of the sample, but also the back and ends. This should also be taken into account when determining the course of action.
The final stage
After the adhesive composition has hardened (which implies reliable fixation of the veneer), a number of simple technological operations are performed.
- Inspection of the surface and identification of possible defects in the work.
- Removing excess (if any) glue.
- Sanding joints (edges). Extreme care must be taken here. The veneer is thin, and excessive zeal will lead to bald spots. Everything will have to be redone, since it is difficult to disguise the stains to match the finish, and it will not always work. Of course, the highest quality polishing is ensured by a grinding machine, but not every home has one. If possible, asking friends for some time is the best solution.
- Application of a protective coating. This is necessary mainly for peeled veneer. It is not difficult to choose a composition, depending on the design of the sample, its purpose and specific use. The range of various oils, varnishes, and stains is impressive.
Having dealt with all the nuances, it becomes clear that do-it-yourself veneering is not a very complicated process. Knowing the technology, anyone can implement it at home. And if you wish, you can bring some of your own “zest” to this work.
Good luck to you, home craftsmen!
Those who make repairs with their own hands should take a closer look at such material as veneer. It is a thin layer of wood, that is, a completely natural material.
It is classified into the following types:
- standard: made from walnut, oak, cherry and other types of trees,
- special: varieties of rare and valuable tree species are used for production,
- root sections of tree species unsuitable for furniture production, but with an interesting pattern and texture (for example, eucalyptus or myrtle),
- exclusive: has a non-standard texture or size.
The material can be peeled, sawn and planed. The latter has greater value and practicality and is used most often in the furniture industry.
Most often, veneer is glued onto MDF, for example, onto wall or facade panels. Doors made of natural veneer also look stylish.
This material has an aesthetically attractive appearance and can be glued to any wooden surface. At the same time, the price of the material is quite affordable, so without any special financial costs you can transform the interior of an apartment or country house.
The advantages of veneer include:
- durability,
- moisture resistance,
- environmental friendliness,
- strength.
It is impossible not to note the affordable price of this material with high aesthetic qualities and practicality. That is why it is chosen for finishing furniture, doors and other interior items at home.
Let's look at how to properly glue veneer so that it lasts a long time and the surface acquires a beautiful new color.
VIDEO ON THE TOPIC
When working with veneer, it is important to carefully prepare the surface. If it is coniferous material, remove the resin with a knife and treat the area with acetone.
It is also necessary to remove any knots and irregularities, get rid of greasy stains, chips and cracks. To obtain a smooth surface, it is sanded and primed.
Many people are interested in how to glue veneer onto chipboard.
or plywood. It is easiest to work with flat surfaces, for example, a coffee table without protrusions or other shaped elements.
To finish it with veneer, you will need:
- sheet of white paper
- iron,
- thin cutter,
- sandpaper,
- glue,
- wooden block.
Select several sheets of plywood in width and length, preferably with a small margin. Veneer can be simple or figured. In the first case, the fibers are arranged in parallel; in the second, the pattern is more varied, and you can experiment with it.
Apply a thin, even layer of glue to the table surface and to the veneer sheets.
Place the sheet of material in the desired place and iron it with a heated iron. To avoid burning the veneer, use a white sheet of paper as a layer between the material and the iron.
Iron the heated area with a wooden block.
Place the next sheet slightly overlapping and repeat the procedure. Excess material is carefully cut off.
It is important not to overexpose the glue while it dries, as it quickly loses its properties.
After finishing gluing, make sure there are no air bubbles by tapping the surface. If they remain, cut them with a thin cutter, pour a little glue if necessary and heat them again with an iron.
VIDEO
- the color of the veneer sheets should be matched to the color of the wallpaper, furniture and other interior elements,
- veneer sheets of different tree species joined together look original,
- If you decide to pre-paint the sheets, after painting, rinse them with running water and dry them in a warm place, but not near heating appliances.
Thus, following a simple algorithm, you can quickly, easily and inexpensively give a second life to many things in the house, as well as realize your design ideas.
There are three main methods for making veneer, and each of them, theoretically, can be done at home.
Sawing finished material
Sawing veneer is similar to sawing an ordinary board. But the requirements for the sawmill are much stricter: very precise adjustment of the cutting planes is required, and the wood feeding speed is much lower than usual. The veneer turns out even, smooth, requiring virtually no modification. Band sawmills are quite suitable for this method of veneer production. There is only one thing to consider: about 60% of wood inevitably turns into sawdust. Let's call this a payment for the quality of veneer, but when using valuable types of wood, this production method is not used. High-quality material obtained by sawing is always used to produce expensive goods. They decorate furniture with it. The soundboards of musical instruments are made from the same veneer.
Veneer obtained by sawing must still “ripen” for a certain time in a darkened room where a certain humidity is maintained. In mass production, the resulting veneer is kept under pressure for a short time. This is a completely unnecessary procedure, since after sawing the wood can be heated, and the process of moisture evaporation will accelerate. This can cause various distortions and bends. It is better to play it safe and avoid damage to the material by placing it under a press.
It is much easier to obtain veneer by planing. Don’t be alarmed: it was only in the Middle Ages that veneer was planed from an ordinary board using a plane. Nowadays, everything is much more technologically advanced: a block of wood (namely a block!) is fixedly fixed on a workbench, and a wide, sharp knife removes a layer of a given thickness.
Here's the veneer for you. The equipment requirements are the same: very precise settings, low feed speed. The knife must have a certain sharpening angle, which is selected depending on the thickness of the required veneer and the density of the wood. This veneer is very often used for the production of plywood. For plywood to be of high quality, the veneer must be of the same quality. True, this rule is often abandoned in production in favor of the quantity of goods produced. At the same time, it is completely forgotten that at the final stage the plywood is pressed, which means the veneer is subjected to a rather impressive load. When its quality is low, normal cracking occurs.
When building models, it is often necessary to use veneer of varying thicknesses. Usually the required thickness is obtained by grinding using a fungus with sandpaper glued to the end, inserted into the chuck of a drilling machine. This method is the most affordable, but it has a number of disadvantages: low productivity, the inability to process veneer with a thickness of less than 0.5 mm, since due to the rotation of the fungus, the veneer is pulled out of the hands and breaks, and, finally, the main disadvantage is the high level of air pollution with wood dust . It is not possible to process more than three or four plates even with a respirator.
The grinding machine I designed, which works on the principle of counter milling, is free of all these shortcomings. It was manufactured (with the exception of welding) in an aircraft modeling laboratory. There are no scarce parts or materials in its design. All machine components are mounted on a base, which is a parallelepiped with dimensions of 200x265x340 mm, welded from steel angles 40x40x4 mm. In addition, two brackets made from channel No. 8 are welded to the base to secure the drum bearing housings. The drum (the main working body) and its pulley are cast. The material used is aluminum alloy AL-25, from which car engine pistons are made. The pistons are melted in a muffle furnace and then sand cast. The holes in the drum for the rotating bolt-clamp of the skin and the counterweight bolt must be drilled symmetrically relative to its axis. By the way, the mass of the first (together with the “pawl” latch) and the mass of the second should be equal. Otherwise, as a result of the imbalance, vibration will occur, which will lead to premature wear of the bearings and affect the performance of the machine.
The bearing housings are welded. The final size for the bearings in the housings is bored after welding. The drum is driven into rotation using a V-belt drive from an electric motor with a power of at least 300 W, with a number of revolutions per minute from three to five thousand, with a fairly large starting torque, since the drum has a fairly decent mass, despite the fact that it is made made of aluminum alloy. Commutator electric motors meet this requirement. I used a motor from a household electric polisher on the machine.
Fundamentally important in the design of the grinding machine I propose is the presence of a suction system for air contaminated with sawdust and wood dust. This system makes the machine environmentally friendly and more “comfortable” when working, as it allows you to do without a respirator. To suck out sawdust, a centrifugal blower fan of the vehicle interior heating system is used, which is installed on the threaded end of the drum axis. This “vacuum cleaner” is not inferior in performance to a household unit. The fan casing is attached to the bearing bracket using wing screws, allowing it to be quickly removed when it becomes necessary to replace worn out skin. A thick fabric bag is placed on the discharge pipe to collect sawdust. The suction hole of the fan casing is connected to the cavity of the drum casing using a pipe. The pipe is glued from fiberglass onto a foam blank, which is then melted with acetone. The cavity of the drum casing is formed by two concentric shells welded to the end flange plates. The inner one can be welded with an intermittent seam, and the outer one must be welded with a continuous seam, in order to avoid pressure losses. The distance between the shells is selected from the condition that the area of the suction opening of the fan casing is equal to the area of the two slots formed by the shells. Sawdust thrown out by the drum during grinding is sucked into the front slot, and sawdust is sucked into the back slot, which is captured by the sandpaper and thrown out by the centrifugal force of the drum.
The drum and belt drive casings and the casing of the machine base are made of 1.5 mm thick steel sheet. The drum axis is machined from 30 steel, and the remaining parts are machined from 10 steel.
The operation of filling the skin is simple and quite clearly shown in the figure. The skin is tensioned using a pawl lever placed on the square part of the turning bolt-clamp of the skin and fixed in one of five positions. The table is made of steel sheet 10 mm thick and has dimensions of 180x350 mm. Its working surface should be smooth, if possible ground on a surface grinder. The table, hinged to the base, is raised and lowered using an adjusting bolt, which makes it possible to obtain veneer with a thickness of 0.3 to 30 mm. The required size is set using a ruler screwed to the base. The ruler is graduated using measuring bars clamped between the drum and the table. The good performance of the machine is eloquently evidenced by the fact that in one pass it is possible to remove “chips” up to 1.5 mm thick.
In simple terms, veneering is gluing thin plates of wood with a beautiful structure (actually) onto a wooden base - be it a table, wall or door - of lower decorative qualities. It turns out that veneering furniture means dressing it in beautiful clothes.
Veneering is more correctly called veneering
. But it just so happens that the slang word “veneer” is more familiar to the average person’s ear than “veneer.”