You need to prepare for the New Year in advance, especially if you have a lot of friends, which means you need to give a lot of gifts. 2020 will pass under the sign of the Earth (yellow or brown) Dog.
This article will collect all the photographs and master classes sent to the “New Year's Crafts” competition.
Also see what ideas and master classes for making the symbol of 2020 are already on our website. Master classes are collected in a separate section “DIY Dogs”.
A simple DIY paper dog mask on your head for a child - step-by-step lesson with photos
Necessary materials for a simple DIY paper dog mask for a child
- sample
- paper
- scissors
- glue
- rubber
- scotch
Step-by-step instructions for a simple DIY paper dog head mask for a child
- First of all, print out the mask template on thick paper. If this is not possible, then you can try to transfer the drawing manually.
Carefully cut out all the details of the mask.
Let's move on to assembly. First, coat two sides of the mask with glue from the top in the middle. Then we glue the side parts.
Now we bend the ears a little at the base.
And glue the ears to the base of the mask.
We glue an elastic band to the sides of the inside of the mask using tape. Ready!
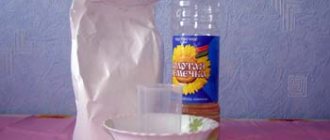
New Year crafts made from salt dough
Fiddling with dough is one of children's favorite pastimes. So why not create some interesting crafts with your child. This craft can be stored for quite a long time. It is not recommended to eat it, especially if you paint it with watercolors, and it is not tasty. You can hang your handmade craft on the Christmas tree or give it to friends or family for the New Year.
Preparing the craft is very simple - knead the dough, dry it, give it the desired shape and paint it.
You will need:
- fine table salt
- flour (use salt and flour in equal parts)
- 1/3 part potato starch
- some water
Mix salt, flour and starch, pour in a little water and knead the dough. The dough should not stick to your hands, but should not be too tight.
To make the dough more elastic and shiny, add a little vegetable oil when kneading the dough.
Crafts can be colored in different ways. You can color the dough, or you can decorate ready-made crafts.
For coloring, you can use watercolors, gouache, food coloring, or color with beet juice, turmeric or coffee.
After this, roll out the dough, mold the planned figures or simply cut out with cookie cutters.
Take a sheet, cover it with parchment paper and lay out the dough figures. The dough should dry out. You can simply keep them for several days at room temperature, or put them on a warm radiator. You can also dry these dough crafts in the oven. In this case, the heating temperature should be approximately 130 degrees.
Important: if you are using an oven, do not open it until it is completely ready, otherwise the figures will begin to crack.
Do-it-yourself children's mask of dog ears made of fabric - pattern templates with step-by-step photos
Necessary materials for a do-it-yourself children's mask with dog ears made of fabric (pattern templates)
- paper
- pencil
- wire
- felt in two colors
- scissors
- glue
- wire cutters
Step-by-step instructions for a children's do-it-yourself dog mask made of fabric with patterns and templates
- On paper, draw two oblong ears with a simple pencil - one larger and one smaller. Cut out the templates and transfer them to felt. We need to cut out 2 large and 2 small ears.
Each ear will consist of one small and one large blank. We make a blank from wire to the size of a small ear.
Using a glue gun, carefully secure the wire to the felt piece.
Using glue, we connect two felt blanks together so that the wire is inside the ear and extends slightly beyond the edge.
Various application options
Using step-by-step instructions, making a dog from any material will not be difficult. It could be a specific breed or a small puppy.
From paper
This dog looks very original, but even preschoolers can make it, especially since it won’t take much time to make.
What you will need:
- cardboard for the base;
- a sheet of paper (white or colored);
- scissors;
- a simple pencil;
- marker, felt-tip pens, pencils or crayons;
- cotton pads;
- stapler
- First of all, you need to apply a poodle stencil to the sheet. This will be very easy to do if you print this picture on a printer, from which you need to cut out the necessary parts.
- Transfer the template to paper, tracing all the contours with a simple pencil.
- It is necessary to prepare blanks from cotton pads. This can be done in two ways, the first of which is to cut out small spirals on each cotton pad and glue them individually onto the upper body and paws of the template or onto the entire body. The second method is to fold the disk in half, and then in half again (four in total). Using a stapler, secure these parts in this position.
- Before fixing all the main elements on the cardboard, you can decorate it or draw any elements (a booth, a bowl with a bone, grass, etc.)
- Glue the template securely to the cardboard and let it dry.
- Fix the blanks of cotton pads with glue, leaving no gaps between them. Using markers, felt-tip pens, crayons, paints or pencils, you can draw the eyes, mouth and nose of the poodle. The application is ready.
From fabric
The material for the craft can be a thick fabric that does not slip: fleece, flannel, felt or cotton.
This applique is somewhat more difficult, because when cutting thick felt it is more difficult to control the scissors. A child may not be able to do this, but for adults this option is suitable.
What you will need:
- felt in white and black (you will need twice as much black) with a thickness of up to 2 mm;
- glue (you need a special glue - “Crystal” or “Moment”, because the usual types saturate the material through and through, and after complete drying it becomes tanned);
- black threads (a thick thread is better, since a thin one can cut through or tear the material);
- three black beads for the nose and eyes (they can be the same, but you can take a larger one for the eyes, a smaller one for the nose);
- sheet of cardboard;
- nail scissors;
- a paper knife, blade or surgical scalpel;
- a simple pencil;
- crayons or white marker;
- gel pen with black refill.
- You need to choose a suitable photo of the dog and print 2 copies of it. We outline the light areas in one photo. The size must be compared with the size of the felt before printing. If the picture is larger, adjust its parameters.
- Place the template on dark felt and outline it with chalk or a white marker.
- Place the white parts of the dog on light felt and outline with a black pen. It is advisable to apply the paper elements with the front side so that later the black outlines, if they remain uncut somewhere, will not be visible.
- After all the white elements are in place, you can glue them one by one.
- The glue is used little by little so that the excess does not come out over the edges during gluing. If this happens, you should not remove it immediately, because it will smear and leave dirty marks. It can be removed carefully and without a trace after it has completely dried.
- The next step is to attach the eyes and nose. They are sewn on with a needle and thick black thread. For the eyes, small marks are made with chalk in the right places, as shown in the figure.
- Small incisions are made along these marks with a scalpel, blade or utility knife. The cuts are treated with glue and beads are immediately inserted into them. The eyes can simply be sewn on, but if you insert them into the cuts, you get bulges like eyelids, and the dog looks more natural and original.
- A design is embroidered with black threads on the muzzle under the nose, and light eyebrows are fixed above the eyes with glue.
- If the applique needs to be given additional rigidity, it can be glued onto cardboard, which is then cut out along the contour of the dog.
The same algorithm can be used when making appliqué from any other type of fabric. In this case, small parts must be sewn on manually or using a sewing machine. The eyes will also be sewn on, and not inserted into prepared holes, as is the case with felt.
On a disposable plate
This type of application perfectly develops a child’s imagination and imagination. It can be done very quickly and easily.
What you will need:
- several sheets of colored paper;
- scissors;
- disposable plate (preferably made of thick cardboard);
- glue;
- markers;
- optional - eyes for crafts.
- Fold a sheet of colored paper in half and draw and then cut out a shape resembling an elongated pear. Thus, there will be two of them at once. These will be the ears.
- Cut out spots for the face from colored paper. Their shape and size can be arbitrary.
- Cut out two small circles for the eyes from black paper. Eyes can also be made from self-adhesive blanks. This will be especially convenient for the youngest creators of crafts, because cutting out small parts is difficult for them.
- Glue all the elements onto the underside of the disposable plate.
- Draw a pink tongue and mouth.
If you wish, you can not glue, but draw spots on the dog’s face, and even eyes. The application is ready.
DIY carnival dog costume made of fabric for a boy - step-by-step diagram with photos
Necessary materials for a DIY dog carnival costume made from fabric for a boy
- Hoodie
- felt
- thread with needle
- paper and pencil
Step-by-step instructions for a do-it-yourself carnival dog costume made of fabric for a boy according to the diagram
- This costume will be based on a sweater with dog ears. To complete the look, just put on dark pants and attach a homemade ponytail to them. Draw ears on a piece of paper and cut them out. We attach the template to the felt and make blanks.
Sew the felt ear blanks to the hood. It is better to take thick felt or glue together several pieces of thin material - then the ears will stand.
From felt in a contrasting color, cut out a long strip that will become the basis for the collar.
From paper we make a template for a zipper that will decorate our collar. Place the template on the felt and cut it out.
Sew the collar to the neck of the sweater. The edges can be decorated with Velcro, then the collar can be easily unfastened during fitting. Ready!
Masquerade outfits are beloved by kids. You can complement a store-bought carnival costume with such a detail as cat ears.
This accessory is easy to make with your own hands. How? We'll tell you in this article.
Wool dogs
"Dog Knopa." Popova Polina, 7 years old. Master Class.
Dog Snowball - master class.
"Felted dog." Parkhomchik Dasha. Dog made using dry felting technique.
***
Dog, dry felting
Ears on the headband
How to make ears with your own hands? Quite simple. Take the following materials:
- a piece of fur;
- a piece of beige or coral fabric;
- a coil of thin wire;
- threads;
- finished headband;
- filler.
Tools you will need are wire cutters and scissors. As you can see from the master class “making a headband with ears,” the procedure is as follows:
Let's make a pattern. There should be two of them - one larger, the other smaller. We transfer the pattern to the fur and carefully cut it out. We sew the resulting blanks together.
We take the wire, cut a piece of 44 cm, which we divide into two parts. Our ears will be 11 cm in height each.
We work the wire, giving it the shape of the ears. We sew the fur blank to the fabric part, stepping back from the edge by 1 cm. We insert the wire into the resulting pocket. We fill the ear with padding polyester. We bend the lower part and sew it to the rim.
This type of decoration is universal. It can be worn by both girls and boys.
Instead of fabric, you can use suede or leather. For greater rigidity, it is appropriate to use cardboard or paper inserts.
Materials for making dogs
A little friend can be made from any items. Very popular materials: paper, cardboard, plasticine, fabric, polymer clay. There are many things around us that we want to throw away, they can make a beautiful dog: discs, socks, scarves, plastic cups, toilet paper rolls, threads of yarn. These are not all the things that can be used. On the street, in the park, in the forest you can find twigs that look like a dog, leaves, cones, pebbles and much more. The choice is very large. Fantasize, invent, make unique four-legged friends.
Nylon tights
One of the materials that produces charming doggies is nylon tights. Women will always find torn nylon claws to create a toy. To make a dog you will need:
- nylon torn tights;
- needle and thread;
- filler;
- buttons;
- nail polish;
- acrylic paint.
We cut off a part of the tights without a hole and fill it with cotton wool or padding polyester. The back of the head should be flat. We make the cheeks and nose from padding polyester, forming them separately in claws and securing them with pins. Using a needle and thread, we tighten the tights, forming a snub-nosed and small nose. We pull the nasolabial fold vertically, forming the cheeks and lip below. Sew up the bottom. We form a fold that goes down to the nose, add cotton wool or padding polyester and stitch it. In this way we do all the other folds, eyebrows, ears and tail.
Cardboard ears
They can be made in a couple of minutes. To make ears on your head you will need:
- cardboard;
- paints;
- scissors;
- base (rim).
Take cardboard and cut out two rhombuses from it. Fold them in half and insert a headband between them.
We cover the inside of the cardboard blanks with glue and compress them. You should end up with elegant triangular ears. Let them dry and put them on.
Knitted ears
Prepare:
- thick yarn;
- headband;
- hook No. 4;
- needle and cardboard.
Photo gallery: Mask and dog costume for the New Year 2020 for a child: do-it-yourself patterns and diagrams, made of paper and fabric, step-by-step master class with photos and videos
According to the eastern calendar, the coming year 2020 will pass under the auspices of the Yellow Earth Dog. It is believed that the animal symbol of the year is capable of bringing good luck and prosperity to the home. Therefore, a good sign would be to celebrate the New Year in colors characteristic of the dog’s color, or in the carnival costume of man’s four-legged friend. The last option is especially relevant for children: a dog costume is perfect for a festive party in kindergarten or elementary school. In addition, this is a fairly universal New Year's outfit for both girls and boys. If you want your child to look like the main symbol of 2020, then be sure to take a closer look at our next step-by-step master classes with photos and videos. From them you will learn how to make a dog mask for your head from paper, cardboard and fabric according to the diagrams. Also below are step-by-step lessons on how to sew a mask and a dog costume with your own hands using patterns. All master classes are easy to perform and any adult can master them.
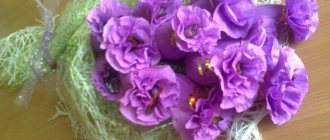
How to create a toy from flowers. Video
We bring to your attention a master class on making a toy bouquet, a funny animal.
From this video tutorial you will learn how to make your own charming toy, a cute puppy from fresh flowers.
Creating toys from flowers is not at all difficult; you can easily make them with your own hands. Treat yourself and your friends. Such a gift in the form of a unique floral arrangement will be especially pleasant for anyone who loves dogs.
To create the floral composition “Puppy” we need very few flowers: 6 large white chrysanthemums, 4 small white chrysanthemums for the paws, 2 red carnations for the ears.
For work we will also need: floral foam in the form of a ball, a basket, decorative moss, plastic eyes and a nose for a puppy, 2 bows.
Let's start creating the composition. Place 2 large chrysanthemum flowers in floral foam. Then we install the third flower, but it should be slightly higher than the first two. Next to it we place 2 red carnations, these will be the puppy’s ears. Now we add a large chrysanthemum on which the dog’s nose will be located. We place two more large chrysanthemums nearby. Then we place 2 small chrysanthemums on each side, these will be the dog’s paws.
We put our puppy in the basket. Glue on his eyes and nose. To make the dog look beautiful in the basket, we place decorative moss around it.
We attach bows near the ears.
So, our funny toy, a puppy made from fresh flowers, is ready. It took 6 large chrysanthemums, 2 red carnations and 4 small chrysanthemums.
Video prepared by rankindragon
.
Many children and women love toys in the shape of dogs and have fun making them. These charming animals always delight with their presence. It doesn’t matter whether they are living, toy or handmade crafts.
A simple DIY paper dog mask on your head for a child - step-by-step lesson with photos
Necessary materials for a simple DIY paper dog mask for a child
- sample
- paper
- scissors
- glue
- rubber
- scotch
Step-by-step instructions for a simple DIY paper dog head mask for a child
- First of all, print out the mask template on thick paper. If this is not possible, then you can try to transfer the drawing manually.
Carefully cut out all the details of the mask.
Let's move on to assembly. First, coat two sides of the mask with glue from the top in the middle. Then we glue the side parts.
Now we bend the ears a little at the base.
And glue the ears to the base of the mask.
We glue an elastic band to the sides of the inside of the mask using tape. Ready!
Do-it-yourself children's mask of dog ears made of fabric - pattern templates with step-by-step photos
Necessary materials for a do-it-yourself children's mask with dog ears made of fabric (pattern templates)
- paper
- pencil
- wire
- felt in two colors
- scissors
- glue
- wire cutters
Step-by-step instructions for a children's do-it-yourself dog mask made of fabric with patterns and templates
- On paper, draw two oblong ears with a simple pencil - one larger and one smaller. Cut out the templates and transfer them to felt. We need to cut out 2 large and 2 small ears.
Each ear will consist of one small and one large blank. We make a blank from wire to the size of a small ear.
Using a glue gun, carefully secure the wire to the felt piece.
Using glue, we connect two felt blanks together so that the wire is inside the ear and extends slightly beyond the edge.
Then we make a wire rim. Its length should correspond to half the volume of the child's head.
We bend the edges of the wire on the ears.
We attach the rim to the formed bends and fix it well with glue.
We bend the ears slightly inward, imitating the natural shape of dog ears. Ready!
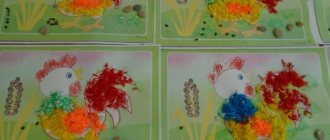
Dogs made from scrap materials
"New Year's Poodle" Mironova Olga Sergeevna. My daughter and I made this poodle for a New Year's competition at school. For this, I took foam plastic 1x1 m, 10 cm thick, twisted such little panicles from plastic bags, and then attached them to the workpiece using sewing pins (needles). The paws, part of the nose and body were sealed with cotton wool, the nose was made of felt.
"The New Year is in a hurry." Kallaeva Lyubov. A cheerful dog made of stones, cardboard, sea stones, cones, an eye, a shell (tail), and packaging material were also used.
"Dog Lucky." Volodichev Ilya. Application. The Christmas tree is made of colored paper, the dog is made of millet and barley groats.
"Symbol of the year 2018." Christmas Nika. The craft is made from waste material: corks, ribbon, braid, flower, button eyes.
"Yellow Earth Dog." Kurtz Ekaterina. For the toy you needed: A light bulb, gouache, white woolen threads for a hat, cardboard ears.
Dog made from a towel - master class
Yellow pompom dog. Valentina Glukhova.
To make it you will need: newspaper, glue, yarn of a suitable color, scissors, fork, felt and time for creativity.
Stage 1: for the base of our future dog, we take wallpaper glue and newspaper, tear the newspaper into small pieces and soak it in glue. From these wet pieces we sculpt the silhouette of a dog, in this case it is the head. Let it dry. Stage 2: This is making pompoms on a fork. We place a small piece of thread between the teeth in the middle, then we wind 20 turns on the teeth, cut the main thread and tie a knot in the middle. Remove from the fork and use scissors to cut along the edges and straighten the pompom. The number of pom poms depends on the size of your base. Stage 3: We cut out eyes, ears and tongue from felt. Stage 4: Assembly. Our blank has dried, we begin to decorate it, first we glue the eyes, tongue and ears with Moment Crystal glue. Then we begin to glue the pompoms from the muzzle and then the entire base. Our dog is ready.
"Symbol of the Year". Modina Victoria. The work was made using stationery glue and thread.
"The dog is the symbol of the year." Berezikova Galina Pavlovna. The dog is made of wool threads. Parts of the body, head, ears and paws are bandaged. In my work I used: woolen threads, scissors, imagination.
"Symbol of the coming year." Bazhakina Elena Vladimirovna. The work is made from a can, a soft toy using paints, glitter and a little imagination.
Author: Ksenia Shabrova, 13 years old Student of the state educational institution Nizhny Tagil boarding school No. 1 Title of the work: Faithful friend Supervisor: Natalya Dmitrievna Markova.
"Symbol of the Year" Kucherova Ulyana. Eggshell applique.
"Symbol of the Year" Cherepennikova Anastasia. The work was done using loose grains and glue.
DIY carnival dog costume made of fabric for a boy - step-by-step diagram with photos
Necessary materials for a DIY dog carnival costume made from fabric for a boy
- Hoodie
- felt
- thread with needle
- paper and pencil
Step-by-step instructions for a do-it-yourself carnival dog costume made of fabric for a boy according to the diagram
- This costume will be based on a sweater with dog ears. To complete the look, just put on dark pants and attach a homemade ponytail to them. Draw ears on a piece of paper and cut them out. We attach the template to the felt and make blanks.
Sew the felt ear blanks to the hood. It is better to take thick felt or glue together several pieces of thin material - then the ears will stand.
From felt in a contrasting color, cut out a long strip that will become the basis for the collar.
From paper we make a template for a zipper that will decorate our collar. Place the template on the felt and cut it out.
Sew the collar to the neck of the sweater. The edges can be decorated with Velcro, then the collar can be easily unfastened during fitting. Ready!
Dogs - modeling
"Little dogs." Semova Yulia Valerievna. Dogs made of felt and foamiran for decorating the New Year's table, have a hole at the bottom, can be put on a spoon or skewer. If you glue a magnet, you can put it on the refrigerator.
Dog made of cold porcelain. Master Class
"Symbol of the New Year." Kalycheva Victoria. The dog is made entirely of plastic. Decorated with thermal rhinestones and sequins. The eyes are decorated with artificial eyelashes.
“We celebrate the New Year together with the Barboskins)))).” Lavrentieva Polina Igorevna. Plasticine, colored paper, cotton wool, paints, artificial snow, glue, toothpicks, transparent paper, New Year's tinsel, plastic base.
"Dog with a gift." Vorotyntseva Natalya Vasilievna. The work is made of plasticine. We select the colors of the desired color and get to work. Roll out the balls, trying to make them the same size. Next we lay them out along the contour of the picture, tightly to each other. And now the picture is ready!
*** Snoopy, Rex, terrier, pug and poodle - sculpting step by step
Application “Gift under the Christmas tree”:
***
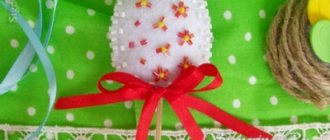
Dachshund made from salt dough “I bring good luck”
Puppy