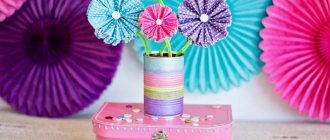
The easiest way to make flowers is from colored paper - it can be corrugated or ordinary, and if you plan to make strictly decorative flowers, you can take paper with a mother-of-pearl or metallic effect. You shouldn’t make a tulip or a rose as your first experiment - try something very, very simple first.
Decorative crafts
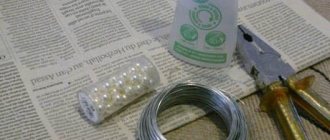
In order to make simple and spectacular flowers you will need: double-sided colored paper (corrugated paper is also suitable); thin wire; sharp scissors and a pencil for marking. It is better to take colored paper of several shades, so your flowers will look impressive and attractive - for example, it can be shades of yellow or several tones of red. Don't try to mix cool and warm colors if you doubt your taste. For beginners, the easiest way to do this is to fold colored paper several times so that you get a stack of squares approximately 6*6. Then mark the shape of the future buds on the top square with a pencil - it can be a smooth rounded figure, regular circles, or whatever your imagination suggests. Then, using scissors, you need to carefully cut the stack according to the shape of the marked sepal and disassemble it into components - for each flower you will need three to five blanks. The wire needs to be cut into pieces of approximately 15-25 centimeters, twisted on one side so that a decorative center is formed, then the previously obtained “petals” are put on each wire, after which a stand is made at the bottom of the wire (a stable ring is twisted). With such crafts you can decorate a table for a holiday, or use them for a photo shoot or interior decor, or you can simply attach them to the wall in the nursery or in the hall near the mirror - a good mood is guaranteed. Or this simple option:
Flower extravaganza - ideas for creativity
On the eve of spring, when nature begins to wake up, on the eve of Women's Day on March 8, together with your children you can create a paper applique called “Snowdrops on a thawed patch” and give it to your mother or grandmother for the holiday.
This idea is especially good for collective creativity in kindergarten. It's very easy to do. For work you will need: a white sheet of paper, colored paper, scissors and glue. Then cut out the stem and leaves from green paper, and snowdrop petals from blue paper.
Take a blank sheet and lay out the shape of the future flower on it, then glue all the elements to a sheet of paper. The flower is ready. On a sheet you can make an applique of several flowers in the form of a clearing.
Methods for making roses
Each master makes roses in his own way. For decorative purposes, when flower heads are glued to branches, thick paper is used. It is better to take velvet dark red or burgundy color. Cut the paper into squares. Make a circle out of them. Now cut the strip in a spiral from the edge towards the center. Try to keep the line straight. Then, taking the center in your fingers, you begin to twist the rosebud. Attach the edge of the paper and glue it to the branches.
You can make a flower from paper tape. To do this, take a long corrugated tape 6-8 centimeters wide. Fold the edge one centimeter outward along the entire length of the tape. Now insert the wire with or without stamens into one edge and form a core by wrapping the paper tightly.
Next, wrap the ribbon in a circle, adjusting the shape of the rose. At the last stage, glue the edge, wrap the stem with green paper, and attach the leaves. If you wrap everything in wrapping paper, diluting the flowers with artificial branches, decorative berries, and small flowers, you will get a bouquet.
Using origami technique
In addition to applique, flower crafts can be made using the origami technique. Create a whole bouquet and place it in a beautiful vase. And when, after some time, you get tired of it, just make a new one in a completely different image. A variety of photos of flower crafts will help you in this choice.
Beautiful do-it-yourself flowers using the origami technique can be different: daisies, roses, tulips, snowdrops, etc. They will perfectly decorate both an apartment and groups in children's institutions.
In addition, the development of motor skills in children is of great importance in their development. And the spring mood will be guaranteed for you every day.
More ways to make flowers
Using the method described above, you can quickly make asters. To do this, cut the ribbon so that you get trapezoids, the top of which is decorated with small teeth or zigzags. You also stitch from the other edge, forming an aster.
If you cut the ribbon into “fences” two centimeters wide, then when creating a flower you will get a kind of velvet. The middle of such a flower can also be made in the shape of a candle flame (wrap it in cotton wool and cover it with the same paper).
River flowers can be obtained by cutting the tape into centimeter strips. Then, every other time, “thin out” the strips, that is, you get a strip - emptiness - strip. Round off the remaining petals. Sew the ribbon and attach it to the stem. In this case, make the middle a contrasting color. This method is fast, but is only available to older students. Hand stitching may cause the paper to warp in the hands of children.
With preschoolers, another method of making flowers will work. Also simple and original. So, how to make a paper bouquet of flowers in one lesson?
- Give the children square sheets of paper with flower patterns in different sizes. For example, a flower with five petals with a diameter of 15, 10, 8 centimeters.
- Transfer the templates onto squares of paper and cut out.
- Thread a bead onto one end of the green wire.
- Place all the petals on the wire from the other end, starting with the smaller size.
- Glue the sepals and leaves.
DIY bouquet of roses
A bouquet of roses of different sizes will look very elegant and festively elegant from corrugated paper, and you can place a chocolate candy inside the buds.
After all, as you know, a rose is not only a beautiful, but also a noble flower. Such a bouquet of flowers will decorate any interior, refresh your mood and give positive emotions.
A couple more ways to make roses
Patient craftsmen cut out petals of different lengths and widths from paper squares according to a template and form a rose bud. Corrugated paper is more pliable, but dense material can also be bent into a petal. To do this, draw a circle on the sheet, divide it into sectors, then round the petals. Now use scissors to cut along the sector and use them to bend the petal.
That is, place a third of the sector on the blade of the scissors, hold the paper with your fingers, and pull the petal up. As a result, the edge is rounded. By collecting such petals into a flower, you can achieve lush volumes. Children can create a curve using a pencil.
How to make paper flowers from templates? Cut the ribbon into squares. Fold in several layers, the splendor of the tea rose will depend on their number. Cut out a circle. Fold it in half as many times as you want to get petals. Next, round the edge. Straighten it and you get a flower with petals. Insert the wire with stamens into the middle of the templates. Secure with sepals. Straighten the templates one at a time, lifting the petals up.
Spring tulips with a surprise
The youngest children can make crafts in the form of tulips by placing lollipop candies in the core of the buds. These truly spring flowers will delight any representative of the fair half of humanity. You can also make color handprints as an application. These will be the best flower-themed crafts for moms.
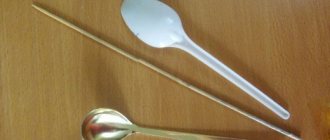
An interesting craft option is creating tulips from plastic spoons. The creative process includes the following stages:
- first, plastic disposable spoons are painted in different colors: red, yellow, purple, etc. You can even mix them to get a new shade,
- when the paint on the spoons has dried, you need to connect the spoons with the back side facing out, and wrap the handles with green paper, making a stem,
- pour red beans inside a plastic cup and place the tulips you made in them,
- Make the leaves for the tulips from satin, tie a bow from this ribbon on the stem.
- Disguise the cup with a colorful postcard or a fragment of a magazine.
- decorate any corner of the apartment with a ready-made flower.
- Crafts from paper and cardboard - 110 photos of the best simple patterns for children and beginner craftsmen
- Crafts for girls: simple, beautiful and interesting crafts. The best ideas with explanations and step-by-step instructions for creation (70 photos)
- Coffee crafts: step-by-step instructions for creating three-dimensional figures from coffee (90 photos)
Floral-themed crafts made using the iris folding technique will come in very handy. Diagrams and instructions for implementation can be found online and printed for ease of use. Or study a detailed master class on crafts on the theme of flowers using this technique.
A method of making flowers for the patient
Many craftsmen individually cut out the petals and shape the curves of the flowers, trying to bring them closer to the original. So, for calla lilies, a wide leaf is cut out, a bend is formed and the stamens are wrapped. In many flowers, each inflorescence is collected separately. Let's consider this process using the example of mallows.
How to make paper flowers: instructions
- Draw a flower template on thick paper in the form of a circle cut in a spiral. Only the lines are not straight, like those of a rose, but wavy.
- Now each petal needs to be bent using a pencil or scissors, like a lupine. At the same time, the petals look “away from themselves.”
- Next, wrap the flower around the pencil and glue the core.
You form such heads on the panel into inflorescences. If you need a bouquet, then attach them to the stem on all sides.
According to the same plan (formation of each petal) lilacs and lilies of the valley are created. Only the paper tape is cut into long strips, which are folded into lumps with a pencil. From a distance, the illusion of small details is created. And to emphasize shades of the same color, two different ribbons are wound onto the stem.
Bouquet of callas
You can easily make crafts in the form of calla lilies, for which you will need ear sticks and cotton pads. Form a flower from the disks, and place half an ear stick inside, attach a wire stem and wrap it in green paper. The flower is ready.
Make several of them and you will get a whole bouquet. In addition, it can be an applique on paper, where the flowers will be voluminous, and the stem and petals will be flat, made of colored paper.
What else can you make a flower craft from? In principle, it is not difficult to make flowers from various materials. For example, wire, thread, beads, ribbons and even plastic bottles.
The main thing is the desire to do something with your own hands. In addition, children and other family members can be involved in the creative process, which is very useful for maintaining excellent family relationships and a warm atmosphere throughout the house. Create something beautiful and be happy!
Paper flowers
Flowers are an indispensable attribute of any holiday. This is a beautiful creation of nature that you can’t help but enjoy. The heady scent of roses is so rich and slightly sweet, the scent of lilies is light and subtle, and these fragrant field bouquets, how can you not love them. It seems to me that everyone likes flowers, especially women, and this love is quite understandable. After all, there are so many of them in the world, very different, from delicate girlish daisies, to mature elegant roses, and very unusual prickly cacti.
But now, when it has become so fashionable in the world to fight for the preservation of nature, how can we afford to decorate, for example, a huge banquet hall with fresh flowers. It seems to me that this is a real disrespect for these beautiful plants. Besides, is this really necessary, why can’t we use artificial flowers, or better yet paper ones. Made from natural material, not plastic.
This is worth thinking about, but you always need to start changing something first of all with yourself. So let's learn how to make beautiful paper flowers that will definitely become a decoration for any holiday, or an incredibly beautiful decoration for a photo shoot.
Be careful, because such a paper craft is not so easy to make. We have prepared for you several different types of patterns for making flowers from paper, we have selected many interesting videos and pictures for your creativity.
Content
How to make big flowers out of paper
Let's begin our acquaintance with making flowers from paper. You've probably already seen compositions that consist of large volumetric flowers. They resemble huge roses or peonies. But don’t be alarmed, such a large flower is very easy to make, all you need is some paper and patience.
What do we need to make such a paper flower?
- Paper;
- Scissors;
- Glue;
- Simple pencil;
- A dense base on which we will sculpt the petals.
Let's get started
Step 1
First, decide what kind of flower we will make, because depending on the type we need to use different stencils. (Figure 1) Several stencils for making petals.
Step 2
Let's start making the petals. You need to cut out many pieces of the same shape, but different sizes. From the smallest to the largest.
A small note: Calculate how many petals of different sizes you need at once, so that you understand how much paper you will need during the manufacturing process. Taking into account that 1 row of petals should consist of blanks of the same size. You will need fewer large petals than small ones.
Step 3
When all the blanks are cut out, all we have to do is glue them onto the base. We move from big to small.
Step 4
Let the flower dry thoroughly and you're done.
Paper flowers using a similar manufacturing technique
Corrugated paper flowers
There is a wide range of craft paper on store shelves and corrugated paper has a special place in the heart of every creative person. It is easy to work with, you can choose very beautiful colors and combine them. Crafts made from such paper look beautiful and original. We have prepared for you a way with which you can make a voluminous flower more like a peony.
What you will need to make flowers from corrugated paper
- Corrugated paper;
- Scissors;
- Pencil;
- Glue;
- Thread.
Step 1
To make your flower voluminous, take more paper and stack them together. And bend it like a bowl.
To make your craft look more interesting, use different colors. For example, to make a peony, take corrugated paper in three shades: deep pink, pink and pink fading to white.
Step 2
Let's make our flower more delicate, cut out a curve with scissors on one side and the other. And in the middle of the paper pot, tie it tightly with thread.
Step 3
Now let's start the wonderful process, straighten the paper one by one, starting from the middle to the edges, as shown in the picture.
Step 4
Done, we didn't use any terminals so you can use the flower right away.
Paper flowers using a similar manufacturing technique
Paper lavender
For this type of flowers you can use plain or corrugated paper of a suitable shade
Corrugated paper is easier to work with because it is softer
What do we need
- Paper;
- Glue;
- Scissors;
- Sticks for the base;
- Green tape.
- Let's start with making flowers. Take a small piece of paper and bend it into an accordion without reaching the edge and cut it.
- Now wind the resulting blank onto the stick you took for the base. Secure it with glue
- Now let's decorate the stem of the flower, wrap it with green tape. Try to make the layer of tape as thin as possible.
- Ready
Paper flower decor
Photos of flower crafts
Crafts made from foil: master class and step-by-step instructions. 90 photos of ideas and finished products- Craft a tie: master class and tips on how to make cards and souvenirs in the shape of a tie (75 photo ideas)
Crafts from socks: a selection of the best ideas and tips for beginners, which crafts can be made easily and quickly (75 photos)
Read here: Bird craft: how to make a bird for school and kindergarten from different materials (115 photo ideas)
Brief conclusions
So, how to make a big paper flower? There are many ways to make it! Children can make flowers using patterns in different colors. By stringing layers on top of each other, field plants are obtained. The fastest way to create curvy shapes is to make crafts from solid paper ribbons. The paper is folded like an accordion, the edge of the petal is cut out and glued to the stem. Any paper can be used for flowers. By crumpling the material with a pencil, hands, or other objects in different ways, the bend of the petal is formed. Try making the flowers described in the article, and new ideas will come to you as you work.
Red flower
The tulip is made from red and green paper. First, an equilateral square is cut out of a sheet of red paper.
- The square is folded in half from one corner to the other.
- The resulting triangle is placed base down. Visually draw a perpendicular from the top corner to the base. Through the point obtained on the base, bend the right corner of the triangle to the left as shown in Fig. 2
- The same procedure is repeated with the left corner. It turns out to be a small flower. The bottom corner of the part is bent.
To make the stem, a green equilateral square is folded with both corners towards the center. The resulting figure is folded in half along the long side. The bottom edge is folded up. The tulip is ready!
