What you can do with your children on the theme of autumn from paper
Golden autumn brings inspiration with its bright outfits and seasonal colors. Nature is also not asleep - animals are preparing for a long winter, some are going to hibernate, so everyone is stocking up. This is reflected in many crafts. They can be made using different techniques and using different types of paper. In addition, this material is almost always at hand. The child will be able to make many crafts on their own, without the help of their parents, which will encourage them to express themselves more.
Autumn-themed craft ideas can be useful for kindergarten and school events, or simply for introducing your child to the season more closely. There are simpler options that even little ones can implement, and complex ones for older children.
Origami on the theme of autumn
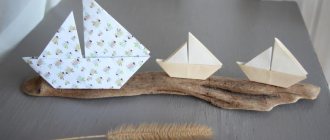
What is the main symbol of autumn? A yellow leaf falling from a tree. Moreover, most often it is a maple leaf, which has a beautiful intricate shape. It’s easy to do, based on the video master class.
- To work you will need 3 squares of paper measuring 7*7 cm and 2 squares measuring 5.5*5.5 cm.
- Take a larger square. Bend it diagonally.
- Bend both sides to it to create an acute angle.
- On the reverse side, bend the corner of the square towards the center.
- Open the folds and tuck the bottom corner inward.
- Fold the bottom corners up.
- Tuck this bend inside the “pocket”.
- Bend the resulting corners upward to form protruding “petals.”
- Do the same with the remaining squares (including small ones).
- Using double-sided tape, connect all the parts into a single composition.
- Form a stem from a rectangle of paper of the same color as the leaf itself.
- Connect it to the sheet using double-sided tape.
Autumn Leaf Origami
The resulting sheet can be decorated at your own discretion or left as is.
What's autumn without mushrooms? Every lover of quiet hunting dreams of collecting a full basket. But you can do this without going to the forest, by making them with your own hands.
- For work you will need a square sheet of 15*15 cm.
- Fold it diagonally twice.
- Then fold it in half twice.
- Fold 3 corners to the center.
- Fold the resulting “envelope” in half so that the folded corner remains on top.
- Turn the workpiece over and fold the top corners toward the center.
- Return them to their starting position.
- Lay out the resulting back pocket so that the bend coincides with the center line.
- Fold the pocket forward along the line again.
- Bend the sharp corner towards the center.
- On the other side, do the same.
- The top and side corners can be bent, then you get a boletus mushroom or something similar. Or you can leave them spicy by making toadstool or fly agaric.
- Also bend the corner at the bottom of the workpiece.
- Turn the craft over. It turned out to be a fungus.
How to make a mushroom out of paper. Origami mushroom made of paper.
It can be decorated with additional elements to make it more natural.
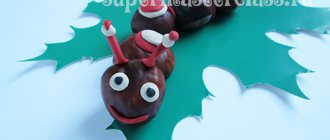
Another origami craft is a hedgehog. Before winter, he eats up “fat” in order to sleep through all the cold and wake up safely in the spring. Therefore, in the fall it can often be seen in search of provisions.
- To work you will need a square sheet of paper measuring 21*21 cm.
- Fold it diagonally twice.
- Turn the sheet over and fold it in half twice.
- Turn over again and bend 2 opposite corners to the center.
- Bend the two sides of the workpiece to the center.
- Fold the workpiece in half.
- Fold the origami along the bend lines to form a square.
- Flip through one fold of the square and fold the top corner into the pocket. It turns out to be a beak. Return the square to its original position.
- Bend the opposite side towards the center to indicate a bend. A fold is made along it.
- Turn the workpiece over and repeat the previous step.
- Select this fold on both sides. You will get a protruding sharp corner.
- Lift the lower part towards it on both sides.
- Bend the side where the corner sticks out towards the center.
- Bend the other side to the resulting bend.
- Turn the workpiece over and repeat steps 13, 14.
- Connect the top corner to the bend.
- Bend the larger triangle on the workpiece until an acute angle is obtained.
- Unfold and bend the top corner down.
- Unfold the pocket so that the top corner “goes” into a straight line.
- On the other side, repeat steps 17-19.
- Fold the resulting “line” forward.
- “Put” the bottom part into the pocket with a corner.
- On the other side, do the same.
- Bend the “back” part of the craft a little to get curves.
- Straighten out the corner from there.
- Separate the second one from the upper “corner” and move it back.
- Fold the top corner sticking forward twice.
- On the other side, do the same.
- Place the front corner inward so that the tip remains sticking out.
- Do the same on the other side.
- Fold the hedgehog’s “face” inward.
- Tuck the nose so that it is not sharp.
- The hedgehog figurine is ready.
[DIAGRAM] Origami Hedgehog (Sergey Yartsev)
Autumn applications
Appliques are most often the simplest type of craft. I start with it in kindergarten, gradually complicating the composition and method of creating creative work.
There are several options for simple, but at the same time educational applications of autumn trees. Once you show your child how to fold and glue the leaves to the base, he will immediately understand it and be able to do it on his own.
The first option is with ring-shaped leaves, the second - with colored circles bent in half. A child with cutting skills will be able to make the blanks themselves. If he has not yet mastered this, then an adult will help him.
For older children, such work will be too simple, so for them the compositions chosen are more complex, using interesting techniques. The quilling technique is suitable for this type of work. The works turn out to be airy, yet voluminous and original. Twisting the strips into different shapes makes the composition incredibly beautiful, and also develops the motor skills of the child’s hands.
You can learn how to twist modules using video lessons.
Quilling for Beginners - Basic Elements | Masherisha
Even a beginner can make a picture of a rowan branch from simple modules.
Quilling. Fridge magnet. Basics. Experimental MK
Templates and stencils for applications
If for quilling you need thin long strips of double-sided colored paper, then for simple applications it is better to use special templates and stencils. This way the details of creative work will be more accurate.
Autumn patterns using vytynanka technique
The “vytynanka” technique is similar to conventional templates and stencils. For many, it is familiar from snowflakes that are cut out of paper. Previously, the vytynanka was made in the form of a symmetrical figure: the paper was folded in half several times, and then the elements were cut out in pairs, forming gaps. Now the figures have become more complex and the resulting patterns can be different, even asymmetrical.
To make them smooth and neat, not scissors are often used for cutting, but stationery knives and razor blades. Therefore, it is better to entrust such work to older children or carry out it under the supervision of an older friend.
Volumetric crafts on an autumn theme
Volumetric figures made of paper look more realistic, especially for the design of compositions and installations.
One of the autumn holidays is Halloween. Although it came to us from the West and is celebrated recently, it has taken root among many. The main symbol of the holiday was pumpkins - bright orange vegetables with carved glowing eyes.
- To work you will need yellow (orange) and green colored paper.
- Cut a yellow sheet of paper into strips.
- Cut out two circles.
- Connect the stripes to the circle using a thread.
- On the other side, also secure the stripes with a circle.
- Straighten the stripes to create volume.
- Glue a leaf and a branch at the top.
- It turned out to be a pumpkin.
How to make a paper pumpkin DIY autumn craft Azbuka Creativa
It often rains in autumn. Only a bright umbrella can save you from them.
- Cut out identical circles from colored paper.
- Fold them in half and in half again.
- Glue inside to connect the quarters.
- Connect all other parts to each other in the same way.
- Open the string of quarters and connect the two ends. It turns out to be the dome of an umbrella.
- For the handle, you can use a wire, a wooden stick, or another similar device. You can also roll up a handle from a strip of paper and secure it with glue to the umbrella dome.
How to make a paper umbrella with your own hands
Wool painting “Poppy” step by step with photo
Painting made of wool.
Master class with step-by-step photos “Poppies” Author: Natalia Albertovna Fomicheva, teacher, MDOU general development kindergarten No. 30 “Teremok”, city of Rybinsk, Yaroslavl region. Description: This master class will be useful to preschool teachers and parents. Designed for children of senior preschool and school age. Goal: to develop children’s skills in using colored wool to create paintings. Objectives: - introduce children to wool, its texture, variety of color palettes; — introduce the features, techniques and subtleties of working with wool when creating an image; - develop imagination, creative initiative and fine motor skills; - to create interest in artistic activities; — evoke an emotional response and a desire to capture the beauty of nature; — cultivate a love of nature and ecological culture; - cultivate independence and accuracy when performing work.
Materials: small frame with glass fleece to fit the frame manicure scissors tweezers hairspray colored wool for needlework
Before starting work, invite the children to guess the riddle: A long, thin stem, On top there is a scarlet light, Not a plant, but a lighthouse - This is bright red... (poppy)
Indeed, everyone will notice poppies from afar. Bright, catchy colors give the flowers a festive character.
In the middle of the field, what kind of flags are they? The poppies bloomed in the morning.
There are stems in the drops of moisture, The flags are fluttering in the breeze. T. Kryachko The secret of these flowers lies inside the petals.
As soon as they open, a small box in the form of a vase will become visible. Tiny seeds appear and ripen in it. They are considered ripe when they turn black. If you pick a ripe poppy box and shake it from side to side, the finished poppy will rustle inside, like a rattle. These seeds have an amazing calming and sleeping effect. People have long noticed this property and are actively using it. Poppy infusions have long been given to restless infants to help them sleep. And the poppy seed itself is very tasty. They are sprinkled on buns, rolls, and bagels. Poppies are beautiful. To draw them, today we use colored craft wool. Work progress: Remove the cardboard base from the frame.
We turn it over and place it on a suitable piece of fleece or light plain flannel. The fabric can be replaced with a regular viscose napkin, which is intended for cleaning.
Carefully trim off the excess fabric around the perimeter of the cardboard. Place the base vertically.
We lay out the entire background from top to bottom with white wool. We place the wool strokes horizontally.
Lightly shade the edges of the picture with blue. Apply the first fiery red petal.
We form a flower cup. Tight. The wool should not be visible.
Below we draw a gracefully curved stem.
Add a barely noticeable burgundy tint to the flower.
Let's start drawing the next flower.
We depict three flowers on the plane.
We highlight the petals using yellow-orange wool.
We shade it with burgundy-colored wool.
Bend the second stem.
Using confident strokes we draw the grass and poppy leaves.
Add a stem to the left.
We form a poppy box on the new stem by rolling the wool.
We decorate its stigma on top.
We slightly shade its middle using finely chopped black wool. We fix the small hairs with hairspray so that they don’t move out when we cover the picture with glass.
Draw the middle of the nearest open flower.
Draw the middle of another flower. Add light green blades of grass to the foreground.
We make black cuts in the centers of the poppies.
Cover the picture with glass and place it in a frame.
The work is completed. A great gift is ready for poppy lovers. Looks impressive. Brings joy and positivity!
We recommend watching:
Painting made of wool “Bullfinches”. Master class with step-by-step photos Creating a painting from wool. Master class for beginners Painting made of wool “Daisies” step by step with photos Painting made of wool. Master class for beginners. Fly agarics
Similar articles:
Picture made of wool Tit. Master Class
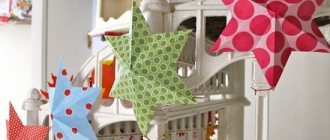
Options for decorating rooms with an autumn theme
Not a single kindergarten is complete without the Autumn holiday, every school celebrates Teacher's Day, many celebrate Halloween. For this purpose, the premises where the event will be held are decorated. Various decorative objects, ribbons, and balls are used. But with a limited budget, it’s easier to cut out pictures and decorations from paper and make large crafts with your own hands. Examples of other designs can inspire you to create the right atmosphere.