Marina Vandysheva
Master class on making New Year's toys for the city Christmas tree. "Nutcracker".
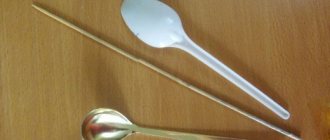
Materials: cardboard box, plain white cardboard, 4 matchboxes, 2 jars of yogurt, scissors, glue, watercolor paints, black braid, wide and narrow golden braid.
I had a narrow but long box, so I cut it to the required size (45 cm)
.
the Nutcracker's head and body .
I painted it on all four sides.
I made a diagram of the nose.
I bent, painted and glued the nose.
I cut out the eyes and buttons from self-adhesive paper.
I measured the length of my arms and cut out 2 wide rectangles (sleeves)
and 2 narrow
(cuffs)
.
I rolled them into cylinders so that the long ones could be inserted into the short ones. I stapled it together.
Painted it. I glued a circle of the appropriate size on top.
I used matchboxes for the hands. I glued them together with a ladder
.
I painted it with white paint, drew the fingers in black and inserted it into the sleeves.
a “hairstyle” from thick cardboard
.
Painted it with white paint. I tied a black braid.
I glued the toys .
For the hair on the sides: I rolled 4 identical cylinders from thin cardboard.
I rolled 8 rolls from strips of white paper and inserted them along the edges of the cylinders.
I made a pattern for the hat and glued it together.
She painted it, decorated it with a feather from thick cardboard, and taped the joints along the edge with gilded braid.
For the legs I used yogurt jars.
At the bottom of the toy I made holes for the legs.
The jars were wrapped in thin cardboard so that they could be painted later.
I inserted the legs from inside the toy .
I glued a wide golden braid, added a buckle - it turned out to be a belt.
All that remains is to glue the hair on the sides, the arms, paint the legs and apply the finishing touches on the boots and cuffs with stained glass paints. The finished toy was coated with colorless varnish.
The toy is ready.
"Cheerful Clown" Master class on making cardboard toys for a Christmas tree Greetings to all guests of my page! Thanks for stopping by! Today we will make a Christmas tree toy using the applique technique.
Master class on making New Year's cards from cardboard New Year is a kind, cheerful, happy and joyful holiday. And for a child, the New Year is the most important and perfect miracle.
Master class on making a flat New Year's toy "New Year's pendant" In the New Year's bustle, we often forget that the New Year is a family holiday. Spend precious moments with your children while decorating your home.
Master class on making a New Year's toy “The clock will chime soon!” For work you will need: – a cardboard box (preferably round) – a CD; – colored cardboard; – Christmas tree beads; – 2 invisible ones;.
Master class on making a New Year's toy from a plastic bottle "Grandfather Frost" master class on making a New Year's toy "Grandfather Frost" For work we will need: a plastic bottle with a volume of 5.
Master class on making a New Year's toy to decorate a Christmas tree. In our city, a "New Year's Toy" competition has been announced to decorate the city Christmas tree, which is located in the city square. I suggest it to teachers.
Master class on making a New Year's toy "Good Grandfather Frost" On the eve of the New Year's holiday, a competition "New Year's toy" was announced in the kindergarten. Santa Claus is the main character of the New Year.
Master class on making a New Year's toy “Monkey from waste material and colored paper” I bring to your attention my craft. You will need: 2 packages of processed cheese, color. brown paper: 11.5*11.5 cm – 4 pcs. ,18*2.3.
Master class on making a New Year's toy from socks “Monkey” To make a funny monkey you will need a pair of new socks. From these we cut out the monkey's body, arms, legs and head. To.
Master class on making New Year's snowflakes from buttons Good evening, colleagues! I present to your attention my New Year's snowflake made from buttons! If you have few toys and you have nothing to decorate yours with.
A red hat, sad eyes and angular shapes: we are probably all familiar with the funny Nutcracker from childhood - the hero of a New Year's fairy tale , so surprisingly kind and nostalgic, which we all associate with magic. Not only adults, but also children can make such a toy that can decorate both the New Year tree and the fireplace.
Rest assured : the presence of this grateful character on the Christmas tree is very important - the spirit of the holiday will instantly envelop the apartment. On top of that, this Nutcracker can be given to a loved one on New Year's Eve. What could be better than a handmade gift?
The Nutcracker and the Mouse King - summary
Before staging a fairy tale or making costumes, familiarize yourself with the plot of this story. This will certainly be useful to you. A summary of “The Nutcracker and the Mouse King” will help you get acquainted with the plot in 15 minutes.
The fairy tale “The Nutcracker and the Mouse King” was written by Hoffmann in 1816. Here are the main characters of this magical story:
- Nutcracker;
- Mouse King;
- Marie Stahlbaum is a kind seven-year-old girl;
- Fritz Stahlbaum is Marie's brother;
- Drosselmeyer is Fritz and Marie's godfather.
On the eve of Christmas, the Christmas tree in the hall is decorated. Marie and Fritz are impatient, they are waiting to run to the tree and find gifts for themselves there.
The wait is over, the kids go to the tree and find what they want there. An elegant dress, toy dishes, and beautiful dolls have been prepared for Marie. Fritz receives a toy horse and a squadron of hussars.
The kids were really looking forward to the gift from Drosselmeyer. After all, this senior court adviser and part-time godfather is a jack of all trades. And the man did not disappoint his godchildren. He made a musical castle for them, which has golden turrets, mirrored windows and dancing figures.
Then Marie saw that there was another gift under the tree. This is the Nutcracker. This character has a large mouth so that he can put nuts there and crack them in this way.
It was the Nutcracker. The summary moves on to the next part of the story. It's time for the kids to go to bed. But before going to bed, they put their toys in a special glass cabinet. Suddenly Marie sees the mouse king, who has seven heads with crowns. He wants to break into the toy closet.
The Nutcracker interferes with this. He becomes the commander of the toy soldiers and begins the battle. Marie cannot stand aside to save the Nutcracker, she throws her shoe at the mouse king.
The next morning Marie developed a fever and fell ill. Drosselmeyer comes to visit her. He tells the girl a story about a nut.
Here's a summary of the story. In one kingdom lived Princess Pirlipat. She was very beautiful. One day her father the king asked his wife the queen to cook his favorite sausages. The queen was kind, she shared a piece of bacon with the mouse queen Myshilda. A lot of mice came running to this treat, and they ate almost all the lard.
The king got angry and expelled Myshilda and her subjects from his kingdom, but Myshilda decided to take revenge on the king.
She kept her word. One night, Princess Pirlipat sneaked into her chambers and turned her into an ugly child. The king ordered his watchmaker Drosselmeier to give him this month's time to restore the princess's beauty.
He learned from the court astrologer that Pirlipat could be freed from the curse with the help of the Krakatuk nut. It should be presented to the girl by a young man who has never shaved or worn boots before.
Drosselmeyer wandered for 7 years in search of a nut and a young man. By chance, after this time, he found a Krakatuk nut in his hometown of Nuremberg, with his cousin. Drosselmeyer's nephew, the beautiful Nutcracker, played the role of the hero who will disenchant the princess. The young man was able to cast a spell on Pirlipat, but he stumbled and became ugly himself.
Marie realized that everything told by her godfather was true. Then at night the Nutcracker killed the mouse king and turned from a toy into a man. He presented Marie with 7 crowns of the mouse king.
That's how brave the Nutcracker was. The summary comes to a close. Our hero led Marie to the doll kingdom, which was located in the wardrobe. The Orange Creek, the Christmas Forest, and the Almond-Raisin Gate appeared before the girl’s astonished eyes. Then the girl, together with the Nutcracker, went to the capital of the doll kingdom on two golden dolphins, which were harnessed to a shell.
Together with the Nutcracker, Marie entered the Marzipan Castle and began preparing sweets with the sisters of her new friend, while the Nutcracker talked about his battle with the mouse king and his troops.
Then Marie tried to tell her parents about her adventures, but they did not believe her. After some time, a handsome boy came to their house. It was the godfather's nephew. He told Marie that he was the Nutcracker, and she saved him from a terrible curse. The young man proposed to the girl, and a year later he took her to the doll kingdom.
Hoffmann wrote such a beautiful fairy tale “The Nutcracker and the Mouse King”. Now you know the twists and turns of the plot and can make the appropriate costumes to then create a production.
Preparation of materials
Felt is easy to work with, and it also has a pleasant texture and exudes warmth, which is so lacking on cold winter evenings. A felt toy, made with your own hands, wherever it is placed, on the tree, under the tree, on a New Year's wreath, gives coziness to the home. It looks harmonious next to the fireplace or with candles.
For work we will need:
- felt - more red, a little white;
- leatherette - you can take it from an old bag or wallet;
- satin ribbon - a narrow one will do;
- matchboxes - 6 pcs;
- cotton pads;
- cocktail straws;
- feathers;
- skewers;
- sequins;
- acrylic paints;
- glue gun;
- a white sheet of paper—landscape or notebook paper will do.
It is easy to work with felt, and it also has a pleasant texture and exudes warmth, which is so lacking on cold winter evenings. A handmade felt toy, wherever it is placed, on the Christmas tree, under the Christmas tree, or on a New Year's wreath, gives coziness to the home. It looks harmonious next to a fireplace or candles. For work we will need:
- felt - more red, a little white;
- leatherette - you can take an old bag or wallet;
- satin ribbon - a narrow one will do;
- matchboxes—6 pcs;
- cotton pads;
- cocktail straws;
- feathers;
- skewers;
- sequins;
- acrylic paints;
- glue gun;
- a white sheet of paper—landscape notebook paper will do.
We suggest you familiarize yourself with Where to store chicken eggs
DIY dress for a doll from the fairy tale about the Nutcracker
The robe for this character can be made from a variety of materials. A cardboard box is especially useful here. You can use it to make both the lower part and the character’s mask.
- If you want to make clothes out of a box, then find one that is the right size. But you can also make a costume from a large box, making this container smaller, so that you can then put it on the child. Make a hole on top of the box so that the child can put this container on. Also make two holes for the arms.
- Now take the box and paint it. On the top part draw the Nutcracker's big teeth and his mouth. Color the box. When it's dry, glue gold paper aiguillettes onto the shoulders.
- You can do it simpler: Take only two sides of the box, in the middle at the top you need to cut a hole for the head. Then the sides will be free, and the child can easily put on the Nutcracker costume.
- Now we need to create other details for the Nutcracker costume. This cocked hat can be made from cardboard or thick fabric. To do this, cut a circle out of it, but you need to create small branches on both sides of this figure.
- Now fold the circle in half, pull one and the other side towards the center. In this case, the elongated branches will be on the sides. Fix the hat in this position. To do this, you can sew a button on top.
And if your Nutcracker costume is made entirely of cardboard, then also take a narrow box for the base. Color it in by drawing the Nutcracker's eyes and big mouth with teeth here. Make a tricorn hat out of cardboard using two identical pieces. Also color it.
You can take a cardboard box and cover it with two types of fabrics. In this case, the red one will be at the bottom in the chin area, and the light one at the top. Glue fabric eyes, eyebrows, and nose.
At the junction of these two canvases, glue golden openwork braid. In the same way you will decorate the sides of the headdress. Also create it from cardboard. To do this, you need to cut out two identical parts for the front and back. Connect them with a rectangle of cardboard. But first you need to cover these elements with fabric. Then you will decorate the hat with braid.
You will make such white curls for your hair from light fabric. To do this, you need to take suitable tubes and cover them with fabric. And use several scraps of white fabric to make hair for the Nutcracker.
See how to make such a headdress for this hero.
Make a cocked hat from cardboard and fabric or from one thick fabric. Now for the hair you need to knit these boucle tubes. They will be on the right and left above the ears. Take yarn of the same color and glue it to the back. Then you will braid it. See how to glue hair for bangs. This is also clearly demonstrated by the photo.
And if you are making a Nutcracker costume, then you can make a cocked hat from thick paper or even from wallpaper of a suitable color.
Take a rectangle of this material, fold it in half and mark the middle. Then bend the opposite corners to it and bend the lower parts, as shown in the photo. Now turn the headpiece 90 degrees and bend the front and back triangle. Rotate the headpiece again. You can decorate it with a feather or other elements.
If the child does not feel hot in such an outfit, then you can use the whole box to make a Nutcracker costume. From this you will create the upper and lower parts of this character.
Color it, make a small cutout for the nose and two for the eye. You will also need to cut holes for the arms.
To prevent your child from getting hot in a cardboard outfit, it is better to leave this part free on top so that air can penetrate here.
You can sew a hussar costume, make an appropriate headdress, and put a paper mask on your face. Then you will also make curls from this material. And when the Nutcracker becomes beautiful again, then the child portraying him will simply take off the mask and remain in his outfit.
Here's how to make a different type of Nutcracker costume. A box is also suitable for its base. From it you will make the lower part, create a cocked hat for the upper one. Between these two elements you will need to glue a red mesh, then the child will be able to see through this hole, and the integrity of the costume will not be compromised.
If you have sewing skills then create a fabric Nutcracker costume. In this case, you can take dark trousers that the child already has. And a mask can be made not only from cardboard and fabric, but also from papier-mâché.
To do this, you need to create such a mass, then stick it on a football ball so that it is the size of the child’s head. Create the necessary holes for the eyes and nose. When this action is dry, all that remains is to paint it.
Here's how to make a Nutcracker costume. Now see how to make hero costumes for the fairy tale “The Nutcracker and the Mouse King.”
This is another fairy tale character. Since this is the mouse king, his attire includes a robe. It can be made from faux fur of a suitable color. If this is not the case, then use thick fabric. To it you will sew small pieces of fur that differ in color.
We invite you to familiarize yourself with Planting garlic before winter 2020 according to the lunar calendar
The mouse king had several heads. For stage productions, an image with three heads is usually used. To do this, you need to sew the head of the mouse king in the form of a hood and put it on the character who plays this role. The other two heads are sewn in the form of soft toys and sewn onto the shoulders of the mantle.
Attach a crown to the main head. Then the mouse king will look like this.
If you are planning to stage the puppet show “The Nutcracker and the Mouse King,” then look at how to create images of these characters.
If you are planning a puppet show, then create the image of Marie by making this character out of a doll.
Then you need to sew a dress for the doll. To make it fit her figure, you can make a finish in the upper part, which is called puffs. Sew puffy puff sleeves with cuffs.
For the skirt, cut out a rectangle, sew it on the side and gather it at the top. Sew this skirt to the top of the dress.
Having sewn a fluffy petticoat, you will also put it on the doll. All that remains is to do her hair and put on her shoes. This is how Marie will turn out from the Nutcracker fairy tale.
Now look at how a negative character is created. You can even use unnecessary tights for this.
Master class on making toys
Nutcracker based on box
It’s not difficult to make a Nutcracker out of a box with your own hands . For the work you will need various materials. Experienced craftsmen plan the Nutcracker out of wood, children happily assemble a paper toy, older people will enjoy knitting a fairy-tale hero, and if you have experience in needlework, you can easily contribute to the creation of a doll in the form of an interesting design solution.
First you need to figure out how to make a nutcracker with your own hands from a box.
You will need the following materials:
- The simplest version of the toy would be a cardboard Nutcracker craft. For this option you will need cardboard, but better - an empty cardboard box of any size. It all depends on what exactly you want to make: a small toy can be made from a pill bottle, a large one from a shoe box, and a very tiny one from a matchbox.
- Once the box has been selected, you can begin designing the toy. A DIY nutcracker costume can be sewn, or maybe drawn. The second option is the easiest - just draw the clothes of a fairy-tale hero on paper: a face or mask, torso, suit, shoes, hat. Hands can be drawn separately. You can color with anything: pencils, paints, felt-tip pens, gel pens. The mask will look interesting if you add multi-colored sparkles to it.
- It is recommended to laminate the drawn parts with thick tape so that the drawing does not wear out or lose its brightness. Next, parts of the Nutcracker's body are cut out and glued onto a cardboard blank - the body. If you suddenly have difficulty drawing the elements of the hero’s clothing, you can find a template on the Internet.
- After the box is covered with various elements of the craft, all that remains is to attach the string.
A movable Nutcracker can also be an excellent option for a Christmas tree. The option is more complex, but also more spectacular. Let's look at it step by step using the example of making a toy from a matchbox.
Movable Nutcracker craft
- Cut off the top of the matchbox (about a centimeter from its edge).
- Paint the inside of the box with dark gouache paint (you can use dark brown).
- Use a needle to pierce two holes on the side of the sliding part.
- Next, you can use a regular staple from a notebook (it can be replaced with thin wire). The staple is inserted into the holes made with a needle.
- Using pliers, the edges of the bracket are bent. Try to form two identical wire loops - it is through them that the rope will be threaded so that the toy can hang on the tree.
- Next, use a regular thread or thin twine, tied in a knot at the end. A bead is placed on top, which should be lowered to the knot.
- Using a gypsy needle, we thread a string with a bead from the inside of the sliding part of the box on the side opposite to the wire legs. The bead is needed to prevent the thread from slipping out.
- Now you can put on the outer part of the matchbox. The cut edge should be at the bottom, relatively speaking, there should be an empty space above the wire legs.
- The Nutcracker wears a cocked hat. Find a tricorn hat template online. For production you will need four blanks made of thin cardboard or thick paper.
- Cardboard hats are glued on both sides of the box. It is best to do this with a glue stick, this way the work will look neater.
- For the next step, you will need a piece of any fabric, which should be glued on top of the cocked hat in such a way as to close the void between them both on the sides and on the top. The edges of the fabric are cut in the shape of a triangle.
- The remaining two parts of the Nutcracker hat are glued to the front and back.
- You need to make teeth out of paper and place them in the gap above the wire legs.
- The limbs can be made from four pieces of wire. We bend the edges of the pieces and cover them with polymer clay. We try to sculpt the shape of the arms and legs. The loops remain open. When the arms and legs are ready, all that remains is to bake them in the oven. If you don't have clay on hand, you can use salt dough.
- We make a thin tube of paper. Then fix it with glue.
- Using stationery scissors, four identical pieces the length of the end of the box are cut from the tube. The tubes are installed under the cocked hat.
- Using a gypsy needle, the string is carefully threaded through the fabric in the hat. Both parts of the box are glued together so that one does not move out of the other.
- To make hands, holes are made on the sides of the box, and short wire hooks are inserted through them.
- Now you can paint the entire craft from head to toe with white gouache or watercolor. Only the mouth and the flap on top of the hat remain intact.
- When it comes to decorating the Nutcracker hat, you can use your imagination or use ready-made ideas from the Internet.
- The eyes are outlined with a simple pencil. You can make them from beads or colored paper.
- Next, the toy is painted with acrylic or gouache paints. The separately painted legs are hung on the body only after they have dried. Using a thin brush with black paint, the main elements of the face and clothing are outlined to give them clarity.
The working process
Our character's figures will be matchboxes. Therefore, we advise you to immediately decide on the size. To do this, decide where the finished toy will stand or hang.
- We take six matchboxes and connect them together. The result is a rectangle. This is the body of the Nutcracker.
- We cover the boxes with paper. The base is ready. Let's start decorating.
- From a small triangle you need to make a nose and glue it.
- For the face, select the third part of our rectangle. Paint it with beige paint. Acrylic is better.
- We cut out clothes from red felt and dress the character. The material is also attached with glue.
- Using cotton disks we make bangs and form four curls on each side.
- We glue an improvised white felt tail to the back of the head and tie it with black lace.
- We put on the headdress and attach the feather using a hugger, which can be taken from the accessories department. This will be replaced by a regular piece of colored paper covering the tip of the pen.
- From straws we cut out handles along the entire length of the body of the leg.
- We cover the parts with red felt.
- Draw a big mouth on paper and glue on his red uniform.
- A golden-colored satin ribbon can be tied on the body or glued again.
- This is our character's belt. The role of buttons is the smallest buttons or sequins. We attach the arms and legs.
- We make shoes from black leatherette.
- The finishing touches: draw a face, decorate the costume with sparkles and insert a skewer into a satin belt.
If you plan to hang a do-it-yourself toy on your Christmas tree, then make a loop from a cord or thick thread. Our Nutcracker is completely ready.
Our character's figure will be based on matchboxes. Therefore, we advise you to immediately decide on the size. To do this, decide where the finished toy will stand or hang.
- We take six matchboxes and connect them together. The result is a rectangle. This is the body of the Nutcracker.
- We cover the boxes with paper. The base is ready. Let's start decorating it.
- You need to make a nose from a small triangle and glue it.
- For the face, select the third part of our rectangle. Paint it with beige paint. Acrylic is better.
- We cut out clothes from red felt and dress the character. The material is also attached with glue.
- We make bangs from cotton pads and form four curls on each side.
- We glue an improvised white felt tail to the back of the head and tie it with a black cord.
- We put on the headdress and attach the feather using a hugger, which can be taken from the accessories department. This will be replaced by a regular piece of colored paper covering the tip of the pen.
- From straws we cut out handles along the entire length of the body and legs.
- We cover the parts with red felt.
- Draw a big mouth on paper and glue it onto the red uniform.
- A golden-colored satin ribbon can be tied on the body or glued again.
- This is our character's belt. The smallest buttons or sequins act as buttons. Attach the arms and legs.
- We sew shoes from black leatherette.
- Finishing touches: draw a face, decorate the costume with sparkles and insert a skewer into the satin belt.
If you plan to hang a toy made by yourself on the Christmas tree, then make a loop from a lace or thick thread. Our Nutcracker is completely ready.
Master class on children's crafts “Nutcracker” with step-by-step photos:
1) Measure 5 cm from the top and cover it with tape in a circle, measure 13 cm from the bottom and also cover it with tape. We do this in order to paint the hat and jacket with a smooth edge, and leave the face untouched.
2) Using acrylic paints, paint the smaller part black and the remaining part red. We do this with acrylic paints because they dry quickly and are non-toxic. You can replace it with any other paints, for example gouache, but dilute it with PVA glue, or use colors.
3) Remove the tape. And this is how it turns out.
4) Next we need to use a hot gun. Do not trust children to use a hot gun themselves; burns may occur. And so we need to glue all our fittings. For the handles, we use a champagne cork; after cutting it in half, we glue the half from the narrow ends of the block. We take the buttons we like and glue them in the center in a row, these will be the buttons on the jacket. We will also decorate the headdress with a golden ribbon, attaching it to a hot gun.
5) Next we need to make hair blanks. We take paper with a width equal to the narrow ends of the bar, approximately 5-6 cm long. We wind the paper onto a skewer, remove it and glue it along the black edge. It turns out that the hair sticks out from under the hat. You can make two levels of curls, you can vary their number.
6) When everything is glued, draw a face. The eyes can be drawn or glued from sewing accessories (sold for 10 rubles a pair). And we paint the cork handles in the color of the jacket.
7) Having painted the face, we return again to the decor of the jacket. Let's make decorative green buttons. Pin buttons will help us with this; they easily fit into soft pine. If you do this craft with a child, then it will be very interesting and fun for him to hammer such buttons with a hammer (BUT remember!!! This should only be done under adult supervision, in order to avoid child injuries).
See more ideas for creative crafts with kids.
 And we are putting the finishing touches. We finish drawing the smell on the jacket, the cuffs on the sleeves, and the ends of the hands.
And voila our nutcracker is ready!!!
Children love to pick up various buttons, ribbons, ribbons, sequins, and choose the design of their jacket. And they are completely delighted with the hammer, you just need a little help, attach the buttons!
Master class with your own hands - a New Year's toy. Santa Claus's workshop.
Do-it-yourself Nutcracker from boxes
Author
: Maya Valerievna Mikhailova
Position:
art teacher, ChUOO Secondary School “Znayka”, Moscow, Sailor Zheleznyaka Boulevard, 29-A.
Job Description
: This work will be of interest to educators, additional education teachers, parents and children.
Can be used as a New Year's decoration for a Christmas tree (can be hung as a Christmas tree decoration on a large Christmas tree, for example, in the assembly hall of a school or kindergarten, can be planted under a Christmas tree), can be used as a visual aid when reading the fairy tale "The Nutcracker", can be a toy for a child, you can take it to the exhibition of New Year's crafts in kindergarten. Goal:
to make a craft - a New Year's toy “Nutcracker”.
Objectives:
to teach children how to make a toy out of ordinary boxes, to cultivate a child’s interest in fairy-tale characters, to develop a love for making crafts, and to love tinkering.
Master class on making “Nutcracker” crafts.
From the bright reflections of the candles, Among the nuts in a heap, The tinsel sparkled brightly On the branches of the Christmas tree.
Against the background of gnomes and balls, one is cheerful, lucky, all made of wood, with an open mouth, a nutcracker. The Nutcracker
is a New Year's toy, a Christmas tree toy made of wood, designed for cracking nuts.
I made my nutcracker out of boxes, but not for cracking nuts, but for beauty and play, to the delight of small children. I think that you can make one no worse than your own nutcracker. We'll need it.
1. Shoe box, size approximately 19 by 30 cm. The size of the box determines the size of the craft.
2. 5 boxes of tubes of cream or toothpaste. They can all be the same size, or there can be 2 smaller ones for the Nutcracker’s hands. 3. 4 toilet paper rolls for a wig. 4. Fluffy tinsel of any color. 5. Twine. 6. Paper tape. 7. Scissors and cutter. 8. A simple pencil and a black marker. 9. Brush for paint and glue. 10. Whitewash, gouache. 11. PVA glue. 12. Ruler. 13. The cardboard is not colored. 14. Colored paper. 15. Velvet paper. 16. Gold foil. 17. White sheets and soft pink. Stages of work execution.
1.
Making the Nutcracker body.
A. Making legs. For the legs we will need 3 boxes of cream or toothpaste of the same size. Cut one box in half. We got two feet for our feet. We attach the feet to the leg, connect half of the box with the whole box with paper tape as shown in the photo. We do the second leg in the same way. The legs are ready. b. Making hands. It's easier with your hands. Open the box from either end. Let's create a palm. The lid that closes and opens is four fingers, the side cardboard is the thumb, and the hole. This is a palm, it must be closed with paper tape as shown in the photo. We do the second hand in the same way. You need to make 5 holes in the box, for the arms, legs and for the loop on top of the head. First, use a ruler to mark where the holes will be. On the top surface of the box we find the center by dividing the sides in half. On the bottom surface of the box we find where the legs will be attached. To do this, we also find the center and mark one leg from it. Then, divide the width of the leg in half and find a hole for one leg. And from the center we measure the same distance to the hole for the second leg. Holes for hands. Sides of the box. We measure the same height of the head from the top edge on the right and left, where the hair ends. Then, we divide the width of the side in half and just below the border of the face and the caftan there will be a hole for the hand. On the other side we also find a hole for the second hand. We make holes according to the marks. You can use an awl, or if you don’t have an awl, you can do it with a cutter. Now we make holes on the lids of the arms and legs boxes. Find the middle of the lid by intersecting the diagonals. Attach the first leg. We take the twine and insert the twine from the outside through the hole made into the lids of the box. We tie a thick knot on the inside. We close the box, hiding the knot in it and seal it with tape. Leave a long end of the twine and cut it off. Then, we pull the end of the twine from the outside into the leg hole in the large box and pull it through the top hole as shown in the photo. We attach the second leg in the same way.
Attaching the arms. As on the leg, we pull the twine from the outside through the lid of the arm box, tie a knot, close the box and seal it with tape. Next we pull it through the holes for the arms. And we pull the end of the twine through the lid of the box of the second hand. Tie a knot tightly and seal the closed lid with tape. Attention! The hands should be positioned in such a way that if the palms are facing up, the thumb is facing back.
To prevent the arms from sagging, we pull the twine perpendicularly through the horizontal rope of the arms and pull it through the upper hole where the ropes from the legs are collected.
We combine all the ropes at the top and tie them with a tight knot, forming a loop so that you can hang the toy on the tree and hold it comfortably. Close the lid of the box and seal it with tape. Hair. It is most convenient to stick it on paper tape after attaching the lid from the shoe box. We attach toilet paper rolls as shown in the photo. We do this front and back. The places where the parts are fastened with tape must be glued with PVA glue. Wait for it all to dry. d. Making a hat. The hat is made from cardboard according to the pattern in the photo. Cut out two parts. We attach it with tape on the outside front and back, it is better to do this before decorating the face and the entire nutcracker in color. 2. The stage of reviving the Nutcracker.
Working with colored paper. We cut a face to size from soft pink paper, draw parts of the face with a marker and glue it to the box. We paste the same soft pink paper over our hands. Instead of a face, glue a sheet of white paper to the back. This is a white wig. Making a caftan. We cover the rest of the box and hands with red paper. You can use velvet paper on the front. If the paper is not self-adhesive, then it is better to glue it with super glue or instant glue. We'll come back to the caftan later. now the legs. We cover each leg with white paper. Boots, black or blue velvet paper. But you can also use regular paper. On the caftan we make the collar out of yellow stripes and the cuffs on the sleeves are also yellow. On the collar we complete the lower jaw with teeth with a marker. From gold foil we cut out buttons with fasteners for the caftan. On the hat we glue green velvet paper cut along the edge on the front and back. The inside can be covered with regular green paper. We decorate the hat with a gold circle and white paper feathers.
The angular hero with kind eyes and a noble heart is remembered by everyone who has read the fairy tale about the Nutcracker, watched a cartoon or theater productions. A master class on making crafts will introduce children and adults to the classics and create a festive atmosphere.
You can make a Nutcracker with your own hands from different materials and using different techniques. If you are a master in a certain direction, then you can safely use your skills in practice to create an exclusive toy.
Can you crochet? Great. Do you work with wood? Amazing. Do you want to make paper toys? As easy as pie. The main thing is to remember all the distinctive details that characterize the character. Crocheting a Nutcracker is a little more difficult and will require some skill. We decided to make a Nutcracker out of felt.
DIY dress for a doll from the fairy tale about the Nutcracker
If the girl has a dress that looks like a princess dress, then you can use it. If not, sew such an outfit from a suitable fabric. It would be nice to use gold brocade. It holds its shape perfectly and looks chic. The dress has a seam at the waist and a zipper at the back. A full skirt is sewn down.
To prevent the petticoat from becoming fuller at the waist, it is better to sew subsequent tiers of the petticoat below the waist.
Marie’s outfit from the Nutcracker fairy tale also implies the presence of long trousers. After all, this is exactly how they dressed in rich houses at that time. They are made from light fabric with elastic. It needs to be sewn to the bottom of these wardrobe items and to the top at the waist. And additionally decorate the bottom with a frill of braid.
All that remains is to do our heroine’s hair. To do this, you can tie your hair with a satin ribbon to match your outfit and make curls in advance.
Her brother will dress the same way boys dressed at that time. But you can use the child’s existing suit and wear a white shirt underneath.
Other ideas
Comments
comments
The shape of the toy is quite simple, which allows you to come up with a lot of other ways to make a Nutcracker with your own hands. For example, you can use a small wooden block as a base. You can draw all the main details on it: face, uniform, headdress. Then buttons and ribbons are glued on, and a champagne cork, cut in half lengthwise, acts as handles. The hairstyle can be made from paper rolled onto a regular pencil.
You can use paper as a material. First you need to draw and cut out the pattern of the toy, and then glue and paint everything. Crocheted or knitted, the Nutcracker will turn out to be a real soft doll that you can play with.
We suggest you familiarize yourself with How to make a car fragrance with your own hands?
Now you know how to make a Nutcracker with your own hands and can share tips. Choose the technique that suits you best. Crochet, glue from paper, make a toy from wood and invent new ways. It’s better to start work in a good mood, without rushing anywhere. Then everything will work out.
See similar master classes: DIY paper Christmas decorations.
Nutcracker made from champagne corks for a Christmas tree decorations competition. Birth story)
Participant of the Christmas tree decorations competition No. 46.
Good afternoon everyone and Happy New Year! The child went to first grade, I thought kindergarten handicraft lessons and mother’s work at night were over, but no, everything is just beginning))) There is another competition at the lyceum, this time a Christmas tree decorations, of course, as an active mother, I decided to participate))) For several days I was deciding what to create so unusual, fabulous and at the same time aesthetic and New Year’s, I came across this toy online: a Nutcracker from two champagne corks. The question arose where to get corks, I don’t drink champagne, one mother said that she had it and gave it to school the next day with her daughter. My beauty didn’t bring them home, they disappeared somewhere along the way, I rummaged through the entire briefcase, but never found them (((I had to urgently go to the store and buy two bottles of champagne. The contents of the bottles were poured out, the corks were left)) ) For three nights I created my Nutcracker. Briefly about the creation:
1) Two corks are fastened together with wire from the same champagne and additionally with glue. One plug is the head in a hat, the second is the body in a uniform.
2) The arms and legs are made from two sushi sticks.
3) Teeth are double-sided, sticky pads.
4) The owner of the idea had hair made from a piece of fur. I also got the fur, my husband went to the studio at night to get it, but the texture didn’t suit it, but was useful for decorating a toy box. I decided to make my hair from a damp cloth, after drying it and gluing it into tubes.
5) The saber is made from a can lid and sprinkled with glitter.
6) The nose is a piece of plastic, cut out to shape.
7) I painted it with acrylic paints and decorated it with rhinestones. The top of the entire toy is coated with acrylic varnish. Dental floss instead of string matched the color scheme and New Year's theme.
Since I have a curious little son, I only had time for three nights; it was impossible to work during the day, but I tried not to rush, but to work carefully.
The result was a true German toy, in retro style, 15 cm long. I put my soul into it, loved it with all my heart and am very proud that I created it. As a result, the Nutcracker left for the city competition and has not yet returned. I’m really looking forward to him coming home(((My husband strongly persuaded me not to give him away, but I promised my daughter. For this reason, there is no photo on the tree yet, I hope the guy will return and take pride of place on our retro beauty!
Thank you all for your attention!!!
P&S: the donated corks were found in the briefcase two days later and the daughter does not understand where they came from) New Year's miracles and a hint of the creation of another guy)))
And one more thing) We took first place in the city competition of Christmas tree decorations in the category “Best Miniature”, we gave another certificate to the piggy bank)))