Recently, the fashion for small and at the same time roomy backpacks has replaced the usual “shoppers”, travel bags and hobos from the wardrobe of many women. If previously they belonged to the sporty style and looked most appropriate with jeans and loose-fitting clothes, today’s assortment allows you to choose something suitable for both work and going out.
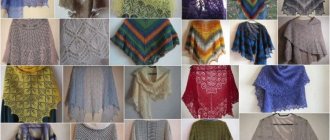
Models knitted from knitted yarn look especially interesting in the photo. Created by the hands of skilled craftswomen, they are a favorite accessory of young and romantic girls. Let's learn how to knit a backpack from knitted threads yourself.
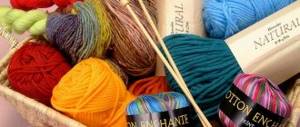
Knitting yarn
Knitted or ribbon yarn is a fabric about one centimeter wide, wound into a skein. When knitting, you need to use a thick crochet hook 6 - 8 mm.
Store-bought yarn stretches well. Products made from it are rough, but beautiful. Suitable for knitting interior pillows, blankets, rugs, napkins, etc.
In addition to the high price, tape yarn has another drawback - high consumption. It is known that when crocheting, a needlewoman spends more yarn than when knitting. And then there’s the thickness.
How to crochet a cardigan
In order to understand all the nuances of creating a cardigan from thick yarn, let's take a detailed look at the workflow using an example.
Scythe diagram
To make it, you will need bulky yarn (200 m/100 g) and a hook number 10, as well as a knitting needle for assembly. The main pattern is straight and rotating rows of dc.
Knitted yarn from bed linen
Each of us definitely has old bed linen at home that is no longer used for its intended purpose: it’s tired or torn. It is advisable to choose a plain material rather than a colorful set. The example shows how to make a skein from one pillowcase.
We cut the pillowcase so that it turns out to be one flat sheet (on both sides).
Next, you will need to cut a piece of fabric into strips about 1 cm wide. We cut it so that the strips are long, that is, we place the rectangle obtained from the pillowcase with the short side facing us. You can first draw the canvas using a ruler and cut along the lines. You can do this by eye.
We tie the pieces with an ordinary knot and wind them into a ball.
The knitted yarn from the pillowcase is ready!
Watch the video of the process:
Features of knitting a backpack from knitted yarn
Why is knitted yarn, and not any other, most often used for knitting various types of bags? The fact is that the thread, consisting of 100 percent natural cotton, can hold its shape perfectly, which makes it possible to create with its help not only wardrobe items and accessories, but also interior items, such as poufs, rugs, tablecloths, and so on.
Important! When working with knitted yarn, it is necessary to take into account that it has both positive and negative properties.
The undeniable advantages include:
- hypoallergenic, which is explained by the natural composition;
- stability of the shape of knitted products, which will not allow them to stretch;
- large selection of colors and shades of thread;
- elasticity and density of knitted fabrics.
Among the negative properties of knitted yarn is its ability to shrink when in contact with hot water. Compliance with the rules of care and storage of finished items will help to avoid shrinkage.
Before you start working on a backpack, you should pay attention to the recommendations of experienced needlewomen:
- For knitting with knitted yarn, a crochet hook is more suitable than knitting needles.
- Elements of one product must be crocheted in the same number.
- A plastic hook No. 8 or 12 is best suited for creating bags and backpacks from knitted threads.
- Products that need to keep their shape must be knitted from thicker threads.
In addition, you must immediately decide whether the rows will be tight or, conversely, loose. The chosen technique must be adhered to throughout the entire work.
T-shirt knitting yarn
Unlike the first method, this yarn will stretch; It will look more like a store-bought one.
First, cut the T-shirt on two sides: the side seam and the shoulder seam to make one piece.
And cut into ribbons.
And we wind the resulting yarn into a ball.
A small skein came out of one T-shirt. Keep this in mind.
If you want to knit a rug, pouf or something large from ribbon yarn, then take several T-shirts or an entire set of bed linen at once, and not just one pillowcase.
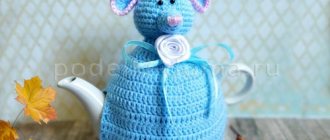
From a skein of knitted yarn obtained from a T-shirt, we will knit flower pots.
Flower pots made from hand-made knitted yarn
We already have a skein of yarn. Let's take hook No. 8 and make a small flowerpot for an indoor flower.
We cast on 5 air loops (v.p.), close them in a circle and knit 12 single crochets (dc) in this circle.
Then we knit in circular rows, adding loops symmetrically so that the knitting does not curl.
The number of rows (= diameter of the bottom of the pot) depends on the size of the flower pot. For me it turned out to be 15 cm (7 rows). Then knit with double crochet without any increments so that the flowerpot “rises” up.
I left the ends from tying inside the product. They can be cut off or hidden.
A total of 3 rows are knitted with double crochets.
As you can see in the photo, the black print on the T-shirt gave the yarn a bit of a gradient.
Now all that remains is to tie the string to our flowerpot.
We take ordinary twine and tie the ends symmetrically, first on two opposite sides.
Then from the other two sides. In this case, you need to intertwine the second tie with the first to form a small knot for strength.
The knitted yarn that we made with our own hands appeared long before modern times in our understanding of the word. My mother and grandmother cut up old tights and tied skeins of yarn in the same way. It was subsequently used to knit washcloths that were used to wash the bathtub, sink and other surfaces.
By the way, according to the description above, you can make your own yarn from black nylon tights - it will be most similar to store-bought yarn. Therefore, if a puff appears on your tights, do not throw them away! Place in a bag, then wind on a large skein of knitting yarn!
What to do with old T-shirts? Throw it away? Use it to clean the floor?
But no! You can make yarn from it, and you can knit or weave many amazing and beautiful things from the yarn.
How can you knit them?
Products made from knitted thread can be knitted using the following devices:
- hook;
- knitting needles;
- on hands.
The yarn is thick, so it is knitted on large knitting needles - from No. 8-10 or with a crochet hook of the same size . The resulting products hold their shape well, do not deform during use, do not wrinkle, and do not require ironing. For such large knitting with knitting needles, they do not use patterns with braids or Aranas, limiting themselves to the simplest satin stitch - knit or purl, garter stitch, matting or the most primitive elastic band .
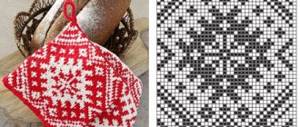
For crocheting, all kinds of stitches with or without crochets are used, textured patterns with convex, concave, lush posts that form bumps and thickenings, and various openwork patterns. Works made from several colors or trimmed with contrasting details look especially interesting.
Hand knitting is not used so widely, but knitted yarn is exactly the case when such a technique will be very appropriate. The knitting is the largest, and clothes literally knitted by hand look very unusual and arouse genuine interest.
RELATED MATERIALS
Weaving flowerpots on a hoop (hulahoop). Master Class
Flower pots are often woven using the macrame technique. What to do if you don’t know how to weave like that or not.
Weaving a knitted rug. Master Class
What to do with old T-shirts? Throw it away? Should I use it to clean the floor? But no! From it you can.
Bandana (kerchief) from a T-shirt. Master Class
An unnecessary colored T-shirt in skillful hands turns into stylish clothing items. We'll tell you how.
COMMENTS
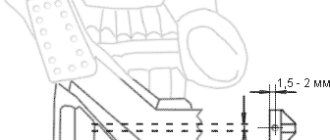
According to point 2, this is what happened. | | | | | | | | | | | | | | | | | | | | | | | | | | | | | | | | The white middle is like the “backbone” of the animal. The cuts form "ribs". Now we do the 3rd step as follows. | | | | | | | | | | | | | | | | / / / / / / / / / | | | | | | | | | | | | | | | | We cut the first “first belt of ribs” through the “spine” with access to the second belt and so on.
Guest, what bothers you?
Can you please tell me if it is possible to cut such a ribbon from a piece of fabric!?
Try to do this on paper first (take a regular A4 sheet and glue the edges together like a cylinder), then cut it according to the proposed pattern. I did it, THANK YOU for the advice on using old things!
Look at the pencil drawing at the beginning of the article. Those. After you have cut the fringes, you need to lay out the T-shirt so that the edge that you did not touch is in the middle. And then you just cut according to the “pencil” drawing. In principle, everything is clear