You can add individuality to a car, bicycle or motorcycle, make an impression and make passers-by look behind you in just a few minutes, on your own and for little money. I wonder how this is possible?
The solution is simple - install LED caps on the nipple, which create the impression of LED wheel illumination when driving. In addition to its spectacular appearance, such lighting provides passive safety, attracting the attention of other road users to the vehicle.
Varieties
LED caps come in two types:
- Simple - they are installed on the nipple and work only from the rotation of the wheel.
- With a control unit (also known as an RGB strip controller) – it allows you to make color adjustments remotely (). In addition to installing the cap on the wheels, you also need to install the control unit in the interior of the car or motorcycle.
Appearance on a bicycle wheel
As a rule, a remote control with a set of colors is used for setting. From the remote control, a radio signal enters the control unit, which distributes power between several LEDs to achieve different shades. In some cases, a special LED may be installed in the cap, which changes its color depending on the current.
You can choose the color of the glow to suit your taste:
- Blue;
- Red;
- Yellow;
- Green;
- White;
- Multicolor (flashes several colors alternately).
Installing LED strip on bicycle wheels
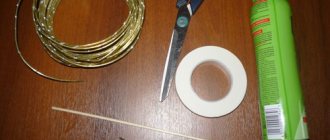
LED strip lights are another way to make your bike brighter and more attractive. Compared to installing individual lamps, the difficulty here is in soldering sections of the circuit. The tape is often laid on the rims. For knitting needles, you can use transparent film for wrapping and clamps.
To work you need to prepare:
- LED strip;
- two batteries with a nominal voltage of 9 V (same as for individual lamps);
- fasteners for batteries;
- switch;
- soldering iron;
- adhesive sealant.
Remove the wheels from the bicycle. The nipple will be the starting point for laying the tape. We cut it into pieces equal to the distance between the spokes (except for the nipple gap).
Do not cut the tape near or along the light bulb
Let's start installing the backlight with our own hands:
- Glue the pieces of LED strip to the rim.
- Solder the joints.
- Solder the lead wire to the end of the tape (where the nipple is).
- Place the holder in the wheel hub area and secure the batteries to them.
- Pull the lead wire through the knitting needle to the battery.
- Install a switch button in the gap between the end of the tape and the battery.
- Apply sealant to open connections. For additional protection of the soldered joints of the tape, plastic caps can be installed on each knitting needle.
Securing batteries around the wheel hub
We put the wheels on the bike and check their functionality. Everything is lit - great, you can safely drive through the streets at night. If the tape does not turn on, check the connection of the wire with the lamps and batteries. In extreme cases, you will have to disassemble the entire circuit and reinstall it. True, the adhesions will break, and a new LED strip will be needed.
Glowing wheels on a bicycle are beautiful, cool and, most importantly, simple. To install homemade lighting, you do not need to look for any special tools and materials. All this is inexpensive and available for free sale.
This article will discuss different types of bicycle lighting. Illumination ensures good visibility of the bicycle at night, increases safety and allows you to stand out from the crowd of cyclists.
Bicycle lighting can be divided into 2 types: wheel lighting and frame lighting.
Wheel illumination.
Bicycle wheels can be illuminated in the following ways:
1. Illumination using special LED caps on the nipple.
The most common lighting method. Typically the caps are small in size. The price of the caps is minimal, the efficiency is quite high. When the wheel rotates, it creates the effect of a completely glowing wheel, and is powered by one or more button batteries.
The disadvantage can be considered the insufficient intensity of the glow and the fading of the backlight when the speed decreases and the bike stops.
2. Graphic illumination of wheels.
In fact, it is an improved version of the previous illumination method, only in this case, instead of the usual LED cap, a special LED module is installed on the wheel. The specified module is an LED display, which, when riding a bicycle, creates a certain light pattern (with text, images, a different set of colors). The LED module, as a rule, is attached to the wheel spokes using special clamps.
Most often they run on several AAA batteries. LED modules also greatly depend on the speed of your bike. In addition, they are slightly more expensive than simple LED caps. However, due to the larger number of LEDs used, this type of illumination is much brighter, which has a beneficial effect on the appearance of the bicycle.
3. Use of flexible neon.
Flexible neon is a light source in the form of a colored wire; when connected to a power source, it emits a uniform, bright light along its entire length. The central copper core of the wire is covered with phosphor, two thin wires are laid on top and everything is covered with transparent PVC of various colors and thicknesses. At one end the wire is connected to a special power supply (inverter), at the other end a plug is installed.
The glow of the phosphor occurs under the influence of high frequency alternating current, the source of this current is a special inverter.
To connect, just connect the contacts of the flexible neon to the inverter, after which all that remains is to secure the flexible neon to the spokes using clamps. The inverter is also mounted on the wheel using clamps.
Frame lighting.
The bicycle frame can be illuminated in the following ways:
1. Illumination of the frame with LED strip.
Illumination using LED strip is easy to install and has the brightest glow.
To install LED backlighting, it is enough to cut a piece of LED strip of the required length and attach it to the frame (after cleaning and degreasing the surface of the frame) so that the glow of the LEDs is directed towards the ground.
After this, all that remains is to attach a 12-volt energy source to the frame and connect it to the LED strip.
The main disadvantage of the tape is its bright glow. If the LEDs are not pointed at the ground, the brightness of the LEDs will dazzle surrounding people and vehicles, which may cause an accident.
2. Frame illumination with flexible neon.
It differs from neon wheel lights only in that the inverter must be mounted on the frame. The rest of the process is similar. Using clamps, we secure the flexible neon and connect it to the inverter.
The flexibility of the wire allows you to bend it at any angle, fold it in half and even tie it in a knot, if necessary. The use of flexible neon to illuminate the wheels of your bicycle is limited only by your imagination.
3. Painting with fluorescent liquid rubber Plasti Dip
Today, Plasti Dip is the most promising additional coating for any type of transport. Glowing Plasti Dip allows you to accumulate sunlight (or artificial) light and emit it in the dark.
Before painting, the bike should be disassembled. We remove all unnecessary parts from the bicycle frame, carefully remove dirt from the frame, and then degrease the surface. There is no need to remove the existing frame coating to apply Plasti Dip.
We paint in 3 layers. The first layer is the thinnest and is needed to bond the surface with liquid rubber. The second layer is the main one. It is necessary to paint the frame tightly over the entire surface. With the third layer it is necessary to level the layers and paint over the most inaccessible corners.
If desired, glowing Plasti Dip can be additionally applied to the knitting needles.
When applying Plasti Dip to the frame, we recommend that you disassemble the bike, hang the parts one by one on a rope and paint while hanging. An example can be seen below.
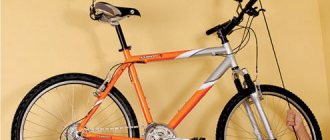
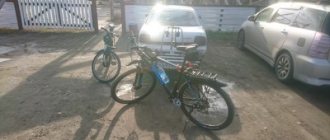
Probably almost everyone has a bicycle. At least among male representatives. Manufacturers, chasing customers in conditions of fierce competition, offer a huge variety of models of different colors and characteristics. You can distinguish them by the presence or absence of shock absorbers, different braking systems, and the number of speeds. Many people install electronic speedometers, navigators, and music players on their two-wheeled friend. However, I still want to somehow stand out and show my individuality, so to speak, to tune the bike.
A good option to stand out in the evening or at night would be to illuminate your bicycle wheels.
DIY wheel lighting
In this review, we will look at how to make your own bicycle lighting using LED strips. Do-it-yourself lighting will emphasize style and taste, make you bright and noticeable, and besides, it is definitely unique! Here you can independently choose the color of the glow, color scheme, number of lamps and other parameters.
Appearance
The shapes of LED caps are also varied, in addition to the classic ones, they can be in the form of: a cross, a star, a skull, a snowflake, a Christmas tree.
LED nipple caps do not require special care - the LEDs are protected from moisture and dust by a sealed polycarbonate housing, which ensures ease of use in any weather.
Requires 3 AG10 batteries to operate. The battery charge lasts for approximately 100 hours of continuous operation.
The video clearly demonstrates the principle of operation of LED caps with a control unit: switching colors is easy and quick, does not affect traffic safety, and such lighting looks very impressive.
Step-by-step installation instructions
We will describe the work using the example of a wheel, based on the dimensions of which we calculated the length of the LED strip - 26 inches and 36 spokes.
- Cut the LED strip in the designated places into 35 pieces of 2.5 cm each. Using a stationery knife, clean the contacts on both sides of each piece from silicone residues. Tin the contacts using a soldering iron.
- Thoroughly clean the wheel rim from dirt. Start gluing pieces of tape from the first spoke after the nipple. At the same time, pay attention to the polarity so as not to glue the piece on the wrong side. Glue strictly in the center between the knitting needles so that during subsequent soldering all areas are the same.
- After you have glued everything, solder the pieces with wires. Take the twisted pair and remove the insulation from it. Choose any 2 wires so that their color is not very noticeable. One wire will need to be connected to “+”, the other to “-”.
- Cut 34 pieces of each wire with wire cutters so that the length of these pieces is no less than the distance between the pieces of tape. Clean and tin with a soldering iron. Start soldering the wires from the nipple in a clockwise direction. First solder all the positives, then all the negatives.
- Cover the soldering areas with silicone sealant to protect from moisture. Do this carefully, using small amounts of product. One contact to which power will be supplied does not need to be covered. Let the sealant dry.
- Secure the battery compartment with three zip ties on the spokes immediately next to the bushing. Solder the female plug to its wires, and the male plug to the wires going to the LED strip. Pay attention to the polarity of the wires.
This is what wheel tuning with LED strip looks like
For such tuning you will need perseverance, time and the ability to work with a soldering iron. But believe me, it's worth it! You'll be the center of attention on any bike ride.