LED lighting favorably highlights any piece of furniture. Using a strip with smart LEDs, you can decorate a frame with a family photo. This type of ribbon is often used at New Year's sales to attract the attention of buyers.
On this topic:
What lighting is best for quails - nuances...
Nov 21, 2018
Light and ventilation in the dressing room are necessary for personal…
Oct 30, 2018
Why do you need aquarium lighting and how to choose it correctly
Jul 21, 2018
What kind of plant lamps are needed in the greenhouse and room?
Mar 30, 2018
BACK FORWARD 1 of 4
Gardeners can also use LED strip by mounting it in a shelf for seedlings or placing it on top of cassettes with plants. With the help of such illumination, it will be possible to provide the sprouts with a full spectrum of light waves, which will have a positive effect on their development.
Let's look at how to make such a backlight using a thick-walled photo frame as an example, since it will require a minimum amount of materials.
Installation process
After using the vehicle for quite a long time, the main backlight lamps on the license plate burn out - at the same time, car owners quite often continue to encounter similar problems. The room is illuminated thanks to two lampshades, which are located at the bottom of the trunk itself. And at such a moment, many car owners ask themselves the question: how to change the license plate light bulb? From the beginning they are being dismantled. At the same time, this process can hardly be called very labor-intensive and complex. To completely dismantle them, you will need an ordinary screwdriver that has a flat blade.
First, the trunk opens to make everything as convenient as possible. After this, the lampshade is pryed off from the left with a screwdriver so that it simply releases from the main latch.
After this, we press on it on the right side, and also try to move it a little to the left, and after that it should immediately come out.
After this, it is necessary to pull it out a little together with the main power wires directly for more convenient operation when replacing lighting lamps.
After this, you also need to lift the main plastic clamp up a little, and also remove the power plug itself.
With all this, it is possible to remove the base itself together with the main light bulb by turning the base of the white housing counterclockwise.
At the same time, the light bulb is removed relatively simply - to do this, you will need to grab it and also pull it to the side, and after that it is removed directly from the base itself.
After the main license plate illumination lamps are replaced directly with a new one, after which everything is installed in the reverse order on your own car. As you can see, all this is done elementary, quickly and extremely simply.
Penalties for violating the rules on license plates
The law talks about liability for failure to comply with the rules regarding registration plates:
- driving a car with license plates that are unidentifiable, non-standard or placed without complying with the requirements of state standards entails a fine of five rubles or a warning;
- the absence of state signs on a car, placement in places not provided for by the rules and the presence of means that make their identification difficult, entails a fine of 5 thousand rubles or deprivation of the right to drive a car for a period of one to three months;
Installation of knowingly false government signs involves the following fines:
- 2500 rubles for individuals;
- from 15,000 to 20,000 rubles for officials;
- from 400,000 to 500,000 rubles for legal entities.
Main room illumination
It is important to note that a frame for a backlit license plate can be made from the most ordinary license plate, and at the same time, it is not difficult to carry out this work. To tune the license plate itself, you will definitely need:
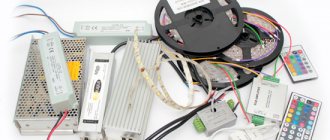
- LED strips available in white and red colors.
- Oracle film, red in color.
- Plexiglas
- Wires
- Tool
- Transparent glue
Further actions are described in the order of their execution. But the very first step is cutting out the logo itself. To do this, the logo is applied according to a standard template with a stationery knife or drawn with a pencil. Ultimately, the main outlines of the logo itself are visible. Holes are drilled using a drill and the letters are brought to perfection using a file or needle file.
After this, a podium is cut out of the main plexiglass for the base of the entire frame, with a small protrusion so that the glow itself is also noticeable, and we also solder an oval from the main red LED strip along the overall diameter of the podium itself and the illumination of your car logo is already soldered in there. All the main parts are glued together to create an LED frame for the license plate along with the main logo. It is important to consider that connecting the license plate frame illumination to the brake light, but many argue that it would be much more aesthetically pleasing to reconnect the license plate illumination directly to the dimensions. In addition, you can experiment with LED color schemes.
In this case, replacing the license plate light bulb on the network is possible both on the front license plate and on the rear license plate. At the same time, it should be taken into account that now the backlighting of the rear license plate is carried out as quickly as possible and much easier. One should especially take into account the fact that not every car owner can carry out a replacement in the rear.
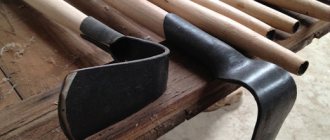
One should especially take into account the fact that the rear view camera for license plate illumination can be made in several basic types - closed, transparent and open. Each of the options is universal and at the same time, almost each of the options is the most suitable option and at the same time, they do not have any special differences. That is why almost everyone can afford to install license plate lights with their own hands.
Let's sum it up
As you can see, installing LEDs in the license plate illumination is not a very difficult task, which every car owner can handle on his own. The main thing is to install lighting that only complies with legal standards; this will save you from troubles when meeting with a traffic police inspector on the road.
Camera
Camera
tight fitting
Spending time and money
At the same time, some time after installation, many people ask themselves the following question: how to replace the license plate light bulb. In fact, all this can be done in just a few minutes - 15-25 minutes. To do this, using a similar scheme, you simply need to disassemble the number itself and replace the backlight itself. It should be taken into account that today, almost everyone can afford to install this upgrade on their license plate. At the same time, the need for replacement occurs quite rarely - once or twice a year - everything directly depends on the frequency of use, on their power, the serviceability of the electrical wiring and, of course, on the quality of the LEDs themselves.
As a result, I would like to note that the overall quality of the investment takes about 700 - 1000 rubles - in most cases it turns out cheaper, since a lot depends on the length of the LED strip itself, brands, volume of the strip, intensity, and so on.
Illuminating the license plate with LED strips will add uniqueness to your car. Making such a backlight is very simple and will only take one evening at most.
Nowadays you won’t surprise anyone with the production of shadow lighting. In order to give even more uniqueness to your car, you can highlight the name of the manufacturer located on the plate with the number.
Tools and materials
Set of needle files. Small diameter drills (depending on the size of the letters on the nameplate). Drill. Hacksaw blade with jigsaw. Sandpaper. Super glue. Transparencies. Textolite. Protected LED strip in red and white.
We begin work by drilling out the letters in the inscription, followed by cleaning each letter flush. This work should be done slowly, carefully and carefully. It should be remembered that the appearance of the product in the future will depend on the result of this event. The next step is to cover both sides of the inscription with transparent film. This is done so that dirt does not get into the recesses, which will then be difficult to pull out.
Considering that the license plate illumination is planned as an additional brake light, you should choose red LED strips. Pay attention to the performance of these tapes. Most of them are intended for indoor use; we are not interested in them. You should select a moisture-proof tape and appropriate connections to it. The next step is to cut out a window in the frame for future lighting.
Plexiglas is glued into the formed window, followed by the application of red self-adhesive tape.
The part under the letters is illuminated with a white LED strip, and the rest is illuminated in red.
A frame is cut out of plexiglass, which will be located on the rear of the license plate. It is on this glass that the LED strip is placed. The best option for uniform lighting is to place the tape in the shape of an oval.
In the process of installing the frame in its original place, it is necessary to connect the tapes to the corresponding contacts of the brake light.
Of course, you can do more original things, for example, by making a finished profile on a waterjet cutting machine, but this option, although more interesting, will be much more expensive. This option for upgrading the standard lighting will add zest to your car, make it stand out from the crowd of the same type and bring pleasure to the owner.
The requirement of the state traffic inspectorate provides for mandatory illumination of the rear license plate of the car. Doubts may arise as to whether such illumination is really necessary, since road safety does not depend on it? The answer is categorical - it is necessary. This measure is necessary to ensure that the vehicle license plate is clearly visible even in the dark.
The license plate light is an external lighting device, and driving with faulty lighting devices is a violation and is subject to a fine. Partial failure is also a violation.
Justification and amount of the fine
It is worth noting that a fine for the lack of illumination of the rear license plate can be imposed only in the dark, when the license plate becomes unreadable. The sign must be easily readable at a distance of 20 meters, and if one bulb has burned out, but the others provide sufficient illumination of the number, then a fine cannot be imposed.
This violation may, at best, result in a warning from the inspector, or a fine of 500 rubles. Most often, the violator receives only a verbal warning, because it is very difficult to prove that the driver knew about the malfunction before driving. It is also difficult to prove the opposite, so there is no point in taking unnecessary risks.
Types of backlight
Today's cars are equipped with rear license plate lighting already at the production stage, but many are not satisfied with the quality of the lighting. In Soviet-made cars this function is not provided at all. Or maybe there is a simple desire to update the appearance of your car? Then it’s worth familiarizing yourself with the types of lighting in more detail.
Standard lighting is incandescent lamps installed in the ceiling. A modern solution is diodes, LED strips. There is another backlight option - complete with a rear view camera.
How does a license plate light differ from LED lighting?
- The brightness of the lighting is much higher for diode lamps.
- Service life, on average, incandescent lamps last 2-3 times less.
- Color. For diodes, it is possible to set the backlight to any color.
More and more car enthusiasts give preference to diode devices (as in the photo below). Replacing the license plate light bulb with such a device is very simple; just unscrew the lamp and replace one with the other.
DIY installation
How to replace the rear license plate light? Easily! And you don’t even have to contact the service. Let's look at all the necessary manipulations step by step.
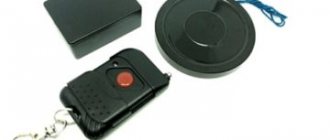
- Prepare materials (frame for a car license plate with backlight or separate lighting elements, heat shrink, scissors, silicone sealant, lighter).
- Remove all wires from old parts and remove the old frame.
- All visible joints with lighting elements and seams on the frame must be sealed to prevent possible contact with water. If this is not done, the backlight will last a maximum of 4-5 months, the contacts will rust, and the entire frame will have to be replaced.
- Twist the wires previously freed from the insulator on the frame and on the trunk of the car. To prevent short circuits, insulate them with heat shrink.
- Screw the frame onto the existing space on the back of the car.
- Put the number in place.
This procedure will take a little time. If you plan to install the lighting fixtures yourself, it will take a little time to attach the diodes to the frame.
An illuminated license plate frame can be designed similar to speaker lighting, from the inside. To do this, you will need a frame, a piece of plexiglass the size of the frame, 3 mm thick, LEDs from 8 pcs., foil. It will take a little more time, but the result will be more interesting.
- Grind the diodes down to glass size.
- Cover the back and end of the glass with foil.
- Connect the light elements to the glass, point them at the corners, and fill them with sealant.
- Take the wires out of the frame and connect to the car.
- Screw on the number, which in turn will hold the glass and diodes.
You need to carefully seal all connections and wires with silicone so that you do not have to disassemble the structure every 2-3 months.
You will find detailed instructions on how to install the backlight yourself in this video:
Illuminated license plate frame
Some people prefer to make a backlit frame on their own, while others prefer mass producers. And if the choice remains outside the ready-made framework, then you need to identify several criteria for choosing products:
- durability - accidents on the roads happen quite often. The frame must be durable so as not to break in a minor accident, and also withstand temperature changes from summer to winter;
- size accuracy - in most cases, all frames are of a standard size, but it’s still worth checking;
- brightness and serviceability of the backlight - it is better to check the performance of all lighting elements when purchasing.
Modern frames can accommodate not only a license plate, but also additional inscriptions, where the manufacturer, at the buyer’s request, will indicate any information.
About the intensity of the backlight and the permitted colors of LEDs
According to GOST, the light of rear registration plates must be white or yellow, or shades thereof. Thus, any other color of lighting may be regarded as a violation and subject to a corresponding fine of 3,000 rubles, since colored LEDs can confuse drivers following and provoke a traffic accident.
Taking into account the standards, it is possible to change the tonality and saturation of the lighting. However, this must be done without attracting the inspector’s attention by using too bright a light, which leaves a mark on the road surface, as well as using excessive amounts of license plate lighting of other colors.