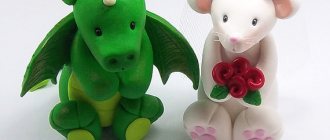
Today felt toys have become popular. They are beautiful, funny and sell out quickly in stores. In this master class we will learn about wool felting techniques and learn how to felt the simplest toys with our own hands.
Felting has been known to mankind for a long time. Until now, in the cold regions of Russia in winter, people prefer to wear warm felt boots, which protect their feet from the cold better than any boots.
Materials for creating a toy
To create a beautiful and natural craft, you must first of all use high-quality materials. Even the most experienced craftswoman will not create a good product from bad materials.
Typically, DIY wool crafts are made using the dry felting technique. What you need for this needlework:
Wool. A good material is cardace. It quickly falls off and takes the desired shape. To fill the base with high-quality and inexpensive felt, you can use a sliver. But for finishing it is necessary to use finer fibers; angora or merino are perfect.- Needles. For the main process, you need to use a needle No. 36, and for finishing and grinding the surface, No. 40 is recommended. You should always have several needles of different numbers in stock, because there is a possibility of breakage.
- Additional elements. Toys most often use special plastic eyes. You can also use a ready-made nose, eyelashes and other elements.
- Foam sponge or special mat. Work will take place on this device.
Do-it-yourself electric dry felting machine. Reincarnation of a toy sewing machine
Dry felting, or felting, is an interesting, exciting and very meditative activity. But it is very long and tedious due to the need to perform monotonous actions with considerable effort. I'm a lazy person, if there is an opportunity to dump something difficult and uninteresting on the car, I will definitely do it. After all, I can’t resist the expressiveness of this simple technique, where just piercing a ball of fur with a serrated needle works wonders. I think that there are sooo many of us, passionately working hard. I was sucked in. And toys are in great demand, I enthusiastically played the fool for the benefit of my wallet, until my hand rebelled. But hunting, more than captivity, began to look for an opportunity to mechanize the process.
There are felting machines in nature. For a whole year I heroically held on to the thoroughbred German miracle AddiQuick Turbo, which helped me in performing routine operations of primary felling and sanding toys, printing designs, I even darned socks with this machine. She was good to everyone, but not without flaws. The first and biggest thing is that it is impossible to buy it now, and the price was too high, and even more so after the jump in the dollar. The second is unreliability and whims. What haven’t I done? I lubricated, resoldered, changed plastic gears, drank valerian to fix my nerves - I still had to write off my assistant, whom I affectionately called Adolf, or Adik, for sabotaging my nerves. I felt bad without her. I was bored and mentally prepared to buy the professional version for half a kilo of dead raccoons. Here, by the way, in the Community, the adventures of the happy owners of this mega-device are described.
But a couple of months ago I had an attack of purity, I heroically and secretly from my mother began excavating once useful things in our home cemetery. The fact is that my parents and I are typical children of the era of shortages, and I also managed to work in those glorious years when salaries were paid out in all sorts of junk. Therefore, the house is a warehouse of quite vintage, and in some places, antique rubbish, which they won’t let me get rid of. Pieces of acrylic knitwear in pellets, yellow sheets stinking from low-quality paint and synthetic towels with naked beauties. This is my inviolable dowry, no wonder there were no hunters for it. One day I was incredibly lucky - instead of a salary, I earned ten toy sewing machines made by our Chinese brothers. Quite a functional unit from the Ting era, even with an electric drive. But one of the cars was defective; everything below the waist of the car was simply missing. This is the business of the era of early capital accumulation... It was sadly covered with the dust of centuries in a closet, affectionately nicknamed the trash store, and was waiting for its finest hour. So, when the box with this toy fell on my head, I was shell-shocked: if you remove everything unnecessary, the remaining stump will completely replace my wounded veteran soldier Adik! Field tests of the reconstructed unit showed that there are a number of advantages: adjustable speed, power, low vibration, a more physiological position of the hand when felting, and most importantly, a greater depth of immersion of the needle into the wool, along its entire length, whereas with Adik the needle only comes out of the body by 2.5 cm. Bingo!
How many of these machines do people have lying around idle when their daughters grow up? And buying a new one in order to subject it to execution is not so painful for the wallet, it costs one and a half to two thousand, and not five thousand before the crisis, like a German device! I really loved working with a homemade machine, I highly recommend that felters try to do something similar, the work speeds up significantly. And I no longer remember where the splint for my hand is lying around, I no longer have writer’s cramp, and “programmer’s elbow” doesn’t bother me yet.
Well, did you persuade me? Then let's get to work! We will need an electric children's sewing machine, which we will cut, a universal power supply from an auto parts store, a plastic doorbell housing, wires, electrical tape, wire cutters and the ability to twist two wires together and wrap them with electrical tape. A few memories of a physics course or a man lying on the couch won’t hurt either, but enough memories of physics lessons, I guarantee! If you know how to solder copper wires, you will need a soldering iron and soldering supplies, or just a gas torch.
So, here it is, our Chinese miracle. Spelling delivers 
I found out that in addition to the “electric machine” a little more garbage was already in the process of work. This is a power supply with a rheostat, a faulty extension cord and a doorbell. If you have a machine with a foot-operated electric drive, then these points can be omitted. I got a miracle of Chinese mechanical engineering with an “on” button on the frame, which is terribly inconvenient. Therefore, the idea arose to make a pedal out of a doorbell.
There was no photo before the execution; I didn’t think about the master class while I was shredding the machine. But the result was so impressive that I can’t help but share my experience.
And it doesn’t matter what the machine looked like, the main thing is that everything above the bed is in good working order 
Here is a drawing of our patient. The original spelling has been preserved.
Here is the operation plan:
Knowledgeable people don’t have to read further, but I’m writing out the details for girls.
I dismantle the lower part of the machine. I have it secured with four bolts. I unscrew them and find emptiness. No shuttle, no mechanism for removing loops, just the dust of centuries, donut holes, sleeves from a vest and the conscience of the manufacturer.
The device fits comfortably in the hand, but there are parts that are not involved in the process that create extra weight and vibration. We dismantle the protective casing, remove the thread take-up, foot, and mechanism for lifting the foot. Whatever cannot be unscrewed, we mercilessly cut off with a cutting disc. In fact, we only need a needle bar and parts in the machine sleeve that convert the rotational movement of the electric motor into reciprocating needle bars. It’s easy to remove the protective cover on my machine, but it’s more difficult for owners of more modern devices; the body has no seams. Those will have to put up with some heaviness. Top view, top green cover removed:
We return the casing back. You can thread the needle and try out the miracle device! I cut off part of the needle for felting with thick wire cutters and clamp it with a screw. Fits perfectly and holds securely. I plug it into the network. Zhzhzhzhzhzhzh!
Brrrrr…. Not. Chavoy is not that... Guts are hanging out. It is inconvenient to turn it on and off, and the speed is too high. I open the engine compartment, look at what, where, where and who. Yeah, you can solder the wires coming from the power supply more securely. It’s better to replace the supplied power supply with something more decent and with a rheostat to regulate the speed of operation (you can buy it in auto parts stores, I dug mine out in the depths of the garage and begged it as a gift for March 8th). And the foot pedal is really missing for complete happiness. No sooner said than done!
I cut off a piece of wire, clean the contacts, flux it with a solution of borax in water, solder it with PSR-25 solder, I just didn’t have anything else on the farm, don’t hit me with slippers. You can just twist the wires together and wrap them with electrical tape, we’re girls! But some don't look for the easy way out. I don’t know how to photograph the soldering process, I absolutely don’t have enough hands.
I remove the casing from the engine.
I attach the wires. I install a doorbell, which will be our pedal. I simply strip the ends of the wires and wrap them around the bolts and secure them with nuts. If you already have a machine with a pedal, you can omit this item.
Now, by stepping on the pink button with your foot, you can turn on the machine! Hurrrraaaaaa!!! Now you can figure out how to close the hole at the bottom of the pedal and at the place where the frame is attached so that there is no electric shock and dust does not fly. Since I couldn’t find any suitable trash, I wrapped the cardboard inserts with electrical tape. Let's see how long they last, then we can replace them.
So, thread the felting needle bitten off with wire cutters, tighten the screw well, aaaand... Oh. Scary...
But you have to! Here is an example of the initial fall:
And here is the sanding:
The result is a device that fits perfectly in the hand, is powerful, reliable and does not break (nothing, the parts under load are made of metal) and does not require special care, except sometimes lubrication. It rumbles no louder than Adik. And most importantly, it penetrates felted parts very deeply, makes toys very dense, and allows you to quickly and efficiently make large things.
Thank you for your attention! If the master class was useful, do not forget to vote 
Funny felt monkey
This craft will be made on a frame basis . The toy can be used as a keychain , a miniature souvenir, a brooch, a New Year's figurine, and so on.
Preparing the necessary tools:
- Fine wool. Any color can be used. The quantity depends on the final size of the souvenir.
- Needles No. 36 and No. 40.
- Wire. Its thickness also depends on the size of the souvenir: the smaller the toy, the thinner the wire should be.
The work begins with making a wire frame. At this stage, it is necessary to determine the size of the future monkey. A head, four legs and a long tail are created from wire. In order for the figure to change position, the legs and tail must be made quite long.
Now the finished frame is wrapped in wool. Moreover, the wool is applied so that its thickness is the same in any area. The applied wool must be fixed with a needle No. 36. The needle is inserted carefully so as not to hit the wire and break the tip. After rolling the wool, you need to start decorating the funny face and make the eyes.
Felted wool crafts in a New Year theme
The tradition of decorating the Christmas tree has existed for a long time. Two centuries ago, our ancestors hung apples on spruce branches. And for good reason.
Apple is not an easy fruit. In Russian folk tales it is a symbol of eternal youth and fertility. Later, traditional Christmas tree balls symbolically replaced apples.
We will try to revive the old New Year's custom. To do this, we will use the method of dry and, unusually, wet - “lazy” felting of wool.
Nature, materials, tools
Apple. Decide on nature: choose the apple variety that you like best. The wool palette will depend on this.
For the master class, we used a New Year's apple, a winter variety - Orlik. Its fruits have a yellow-green skin with a red blush on the sides. A Christmas tree with such apples will be amazingly beautiful.
Wool:
- Comb – coarse sheep wool in the form of fluffy lumps (like familiar pharmacy cotton wool). Use it to make the base.
- Carding is combed wool twisted into layers. Needed to decorate an apple. Colors: light yellow-green, yellow, any shades of red. Brown wool - for making the stalk.
The more shades you use, even if the difference is subtle, the more natural the apple will look.
Felting needles No.38.
Substrate.
Felting brush or sponge.
A cover for “lazy” wet felting of wool in the washing machine. This is nothing more than part of an unnecessary stocking or tights. The main thing is that there are no holes and a light color.
Master Class
Stage 1. Formation of the workpiece.
Tie a knot in the stocking. Place the wool for the base in large pieces into the resulting bag and give it the shape of a ball (apple).
The comb must be laid evenly and tightly. When the desired size of the ball is reached, tie a second knot with tension. There should be no gap left between the wool and the knot. If the second knot loosens, tie it again. The quality of wool felting depends on how successfully this part of the work is completed.
If you decide to make not just one fruit, but a whole apple garland, continue the process: knot – dense ball of floss – knot. It may end up resembling a bunch of thick sausages.
Stage 2. "Lazy" wet felting.
The apple blank is wet felted in a washing machine for one hour at a temperature of 30-40 degrees. Use automatic spin. The future apple can be subjected to this process at the same time as washing things.
Stage 3. Drying.
After finishing the wash and spin cycle, dry the ball (garland) in a hanging position. Do not untie the knots until the product is completely dry.
After drying, creases may appear on the ball. They are easy to fix when decorating.
Stage 4. Decoration using dry felting.
The shape of an apple is quite simple: a ball with two indentations. The upper recess is called the funnel. This is where the stalk is attached. The bottom, where the remains of the flower are located, is the saucer. It is less deep than a funnel. As you decorate, you need to take these apple features into account. Use light yellow-green wool to create the general background of the fruit peel. Apply other shades on top of it. Felt small strands of carded carding of the main shade along the meridians of the ball. The fibers should not overlap and leave white gaps in the fringe.
Control the shape of the apple: sculpt it with your hands, add wool to the creases. Use a needle to work out the dents for the saucer and funnel.
Slight asymmetry will make the apple very similar to natural. The process of imparting the base color to an apple requires patience. But when it's finished, start creating!
Work with colored wool like an artist: use small fibers of different shades to paint an apple.
The colors should flow smoothly into one another, without clear boundaries.
Be sure to look at a real apple - you will see ruddy veins, spots of different colors and sizes. Complete freedom of imagination!
Stage 5. Details.
- In order for the apple to have a stalk, you will need a piece of brown wool. Pull and curl the fibers lengthwise. Holding one edge, twist them with your fingers. The curled tip will be the tip of the stalk.
- Holding the fluffy end of the stem, carefully press the newly twisted edge with a needle. Twist the stalk with your fingers, making it firm and smooth.
- Place the fluffy edge of the stem into the recess of the funnel. Add brown fibers under the stem and roll them into the bullseye underneath.
- Work with the needle until all the fibers fall into the apple and the stem holds securely.
- Roll a small amount of brown wool into the apple saucer. Fluff the top layer a little. The remains of the flower (saucer) are ready.
You can decorate the Christmas tree. You can attach an apple to spruce branches in different ways. For example, using a narrow green ribbon. Tie it to the stem in the middle, and decorate the free ends of the ribbon with a bow on the spruce paw.
Apples don't have to look natural. If you decide to be naughty, use any color from the wool palette.

