Every woman at least once in her life is faced with a situation when there is nowhere to store her favorite small trinkets. Someone solves the problem by inspecting the house. But you can get by with “little expense” without depriving yourself of your accumulated wealth - make a cardboard box with your own hands.
What size your chest will be depends primarily on the volume of accumulated treasures - some will need an original small paper box for earring rings, while others will have a container of materials for needlework that will reach the size of a grandmother’s chest. In any case, whether you want to make a beautiful chest for your mother or make something convenient for yourself - take a look at our tutorials, you will be able to understand step by step the stages of creation and then you will be able to make a box of any size.
Cardboard crafts - an original hobby
with a distant history. In the modern world, few people master this art, however, twenty years ago it was the most popular way to have fun on a boring, rainy evening. The boxes were made not only from new cardboard, but also from old postcards or magazines.
The most interesting thing is that despite the incredibly beautiful appearance of the finished product, the manufacturing process is very simple. To create a paper box, you don’t need any special skills or knowledge; just collect all the necessary materials and you can get started.
Preparatory stage
On the Internet you can find many ready-made blanks for creating a cardboard box. They just need to be printed and assembled. But it’s much more interesting to create a blank yourself
. You'll have to use your imagination and a little ingenuity, but the result is worth it.
Before you start creating a workpiece, you need to decide on the method of fastening the parts:
- Gluing;
- Assembly;
materials depends on the chosen option
.
However, techniques can be combined, using both gluing and assembly for one product.
The finished box can be additionally decorated with applique
or flowers made of satin ribbons. It all depends on your taste and the purpose of making the box.
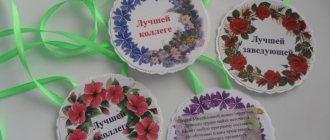
Gallery: cardboard box (25 photos)
Box using gluing method
So, let's get down to the main question of the article: how to make a cardboard box? Let's consider the simplest option
– glued cardboard box. The capacity and purpose of such a product depends on your needs.
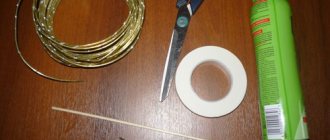
We will need:
- Thick cardboard;
- Two tetrapacks of milk (one tall, the other medium-sized);
- Clothespins;
- PVA glue;
- Super glue;
- Scotch;
- Kraft paper;
- Scissors;
- Two small magnets;
- Wood beads;
- Materials for decorating the product: beads, ribbons, fabric, flowers, fringe, etc.
Let's start the master class:
In such a product you can store various women's small items or materials for needlework. An original way to use it is to keep a watch
. For fashionistas who have a large number of these wrist accessories in their wardrobe, such a box will be a real salvation. The watch mechanisms will be protected from dust and accessories will no longer get lost, always being in one place.
The assembly method is the simplest possible. To complete it, you need to find it on the Internet and print the finished template on thick paper. Then, using scissors or a utility knife, cut out the shape and assemble. After assembly, the product can be decorated with any decorative elements. This option for creating a box is ideal as gift wrapping.
DIY cardboard box: an easy way
The first method is considered the easiest, but also somewhat unusual. After all, to create a box you will have to donate some book. The book will have to choose one that is no longer needed, or is simply gathering dust in the closet. Of course, this option may seem strange to some, but it still has its advantages.
In order to make a box, you need to take a thick book and cut out pages from it using a stationery knife. You need to cut it so that the edges of the page remain, and you can choose the depth of your box yourself. There is no need to cut out all the pages, as the box will lose its purpose.
After the pages are cut out, the remaining ones need to be glued together with liquid glue, the book should be left until completely dry, and decorative elements, such as flowers, rhinestones or ribbons, can be glued to the cover. Once the box is ready, you can put your jewelry or small items in it.
Original money box
Many people use various hiding places
, which can be easily purchased at any souvenir shop. But why, if you can make a money box with your own hands? An original piggy bank will reliably hide your savings and decorate your interior.
To create a box for storing money
we need:
- The book (it will serve as a hiding place);
- Stationery knife;
- PVA glue;
- Glue brush;
- Kraft paper;
- Pencil;
- Ruler.
Let's start the master class:
The product can be used as packaging for a valuable gift
, for example, luxury watches.
By making several compartments in the box, it can be turned into storage for small items. Or make a shaped hole, then such a box is ideal for storing memorabilia
.
Eggshell box
Anyone can make an unusual box with eggshell decor. It looks quite interesting, so it will definitely attract attention.
We will prepare the following materials:
- cardboard box;
- eggshell;
- paints;
- napkins;
- PVA glue;
- manicure sticks;
- brush.
Clean and smooth the box using sandpaper.
We coat a small area of the box with PVA glue and apply the shell to the surface.
Use a stick to poke it a little so that the shell cracks. Then we move the fragments apart to the required distance to form a mosaic.
When all the shells are laid out, treat the surface with PVA glue.
We cover the box with acrylic paint in several layers.
Let's start decorating. To do this, separate two layers from the napkin, leaving the one with the design on it. We coat the surface with a layer of PVA and immediately apply a napkin, after which we apply another layer of glue.
Let the box dry for several hours.
Cardboard box
Another simple way to create a cardboard box with your own hands is to use a ready-made box. For the master class we will need:
- A simple cardboard box;
- Magazine clippings;
- PVA glue;
- Pencil;
- Ruler;
- Thick cardboard;
- Lace or rope.
Let's get started:
Using the same principle you can make a box
with compartments or drawers.
Only in this case should you braid the box after connecting all the parts. It's not difficult to do this kind of work. Print out the diagram
of the box you like, cut out and assemble the parts.
Every woman has many little things that need a special storage system. These are various decorations, accessories for creativity or handicrafts and many other items. A DIY cardboard box can be an excellent option for storing all the little things you need. Creating a suitable drawer is easy. The main thing is to use your imagination and give it a unique and original look.
DIY cardboard box: master class
There is also a way to create a box from cardboard or box. Let’s look at how to make a box from such material step by step below.
For this process you will need a box of the required size or cardboard, from which you can make a box yourself. To learn how to make a box from a box, you can watch a video that will show you how to correctly make a drawing on cardboard and cut out a box from it.
All sides of the cardboard that are cut out must be folded together and glued together in the shape of a box. From the cardboard that remains, you need to create a box that will slide out of the box. It should be the same size as the box, but smaller in height. After the box is ready, it needs to be covered with paper, the color of which can be chosen as desired. The same paper can be used to cover the outside of the box; of course, the color can change depending on the wishes of the box’s creator.
Next, you need to take a flat piece of cardboard the same width and length as the box, and it also needs to be covered with colored paper. This cardboard will act as a partition between the boxes. You can choose the shape of your box and its contents, for example, you can make two compartments, one of which will be pulled out, and the second will simply be covered with the lid of the box.
In order to make a regular compartment in your box, you just need to glue another piece of cardboard, which will serve as the front wall. And at the very end, you need to insert a drawer on the bottom and decorate the entire box with the desired decorative elements. To decorate the box, you can choose different flowers, hearts, bright paper products and shiny hairpins. Inside the box you can put jewelry, accessories, paper products, and even money.
A simple box. Preparatory stage
This option is easy to create. The box is a cardboard box. Its capacity and functionality depend on your needs. To make the task easier, it is recommended to use blanks. In this case, it is much easier and simpler to make cardboard boxes with your own hands.
The diagrams must be transferred to paper. Before calculating the dimensions, think about what purposes your box will be used for. If jewelry will be stored in it, then you should not make it bulky. But if the box is intended for needlework, the dimensions of the box should be much larger.
Manufacturing technique
So, let's look at how to make a box with your own hands from cardboard:
- Prepare thick cardboard.
- Using the diagram, mark the contours of the box on it.
- Cut out the resulting blank.
- Fold the fold lines. Carefully glue the places where the box is connected. If you take thick cardboard, it is difficult to work with. But it is precisely this that allows you to create a durable structure. Such a box will be an excellent place to store various things. You can use superglue or PVA. But a more reliable option is tape.
- The resulting box needs a beautiful case. To do this, use wrapping paper. This is a thin material that perfectly decorates the surface of cardboard. Old wallpaper is a good option.
- When gluing the box, be sure to leave allowances for the hem. Wrap them up and glue them to the inside of the box.
- Choose wrapping paper that suits your style for interior decor. Cover the bottom of the box with this material immediately. Then - the inner side parts.
- Now all that's left to do is come up with the decoration. For decoration you can use any ornaments, flowers, beads, beads. It all depends on your imagination.
LiveInternetLiveInternet
Quote from NATALIY__GLADUN
Read in full In your quotation book or community!
Book-box.
A great gift for February 23rd!
Books are different. Good and not so good. I apologize to book lovers, but I made this box from second-rate science fiction. First, cut off the binding of the book and remove the text part. In principle, you can make the binding yourself, from cardboard, without spoiling the books.
We measure the dimensions of the sides of the book along the endpaper and subtract from them the thickness of the corrugated cardboard multiplied by 2.
We clean the corrugated cardboard from one side to the corrugation. We cut a strip of cardboard along the corrugation and, having previously pushed through the places of future folds with scissors on the flat side, bend it. We get a rectangle of the required size.
Let's try it on. For rigidity, we add strips of uncleaned corrugated cardboard, cut across the corrugations, to the inner walls.
Now you need to align the upper cuts. I was too lazy to prime the edges of the rectangle and covered them with thin fabric. Maybe in vain, because they turned out not even, but round.
Next, glue the rectangle to the back wall of the cover. Here you need to make sure that it is not skewed. For this purpose, I cut out two right angle triangles and placed them at the diagonal corners. But it would be better to temporarily put a rectangle inside the frame. He would certainly give the frame a rectangular shape. After drying, you need to check if there are any gaps under the frame. If you need to prime or glue them.
Next, you need to connect the top part of the cover with the resulting box. We do this using a strip of fabric, attaching it like gauze in ordinary books, only not to the spine, but to the cover.
No. 5 is gauze. In books it is glued to endpaper No. 6, but in ours we glue it to the inside of the cover.
To guarantee, I glued two strips, one went from the outside of the box to the cover, the second from the inside of the box to the cover.
While the box is drying, we work on the cover. Cut out a fragment of textured vinyl wallpaper.
We make embossing from a metal drink can. To do this, cut the jar and level it. We apply it from below to the window cut out in the wallpaper and mark the edges of the future embossing.
We cut out the form for embossing, leaving 1 cm on all sides for gluing. We mint the drawing. My jar was too bright on the other side, so I applied the design right from the front, and created the volume from the back. There are no special rules in my coinage. I simply draw a design, squeezing it out from the front side and from the back side with improvised tools. They are in the photo. If you want to make embossing, try to wash off the colored design from the foil, it really interferes with your work. Maybe alcohol or acetone will help.
Although, who said that there should be coinage there? Maybe put a portrait there, or a landscape cut out from a magazine?
Next, we glue the embossing to the wallpaper (so that it sticks at least slightly). I used thick glass gel. I glued the wallpaper with regular PVA.
We cover the wallpaper with color. It is better to take paint for decorative work with a slight tint. This will give the impression of embossed leather. I only had an artistic one, and it was matte.
Since I didn't have a special paste for gilding, I used a contour. Color is gold. I applied a little onto a sheet of paper and lightly tinted it with a sponge.
I glued wrapping paper to the inside of the cover. This paper covered the fabric that was used to connect the cover to the box. The inside of the box was covered with velvet paper.
I put a “surprise” in the box.
Since the artistic paint made the box matte, it had to be varnished. The surface became like wood with carvings.
Thanks to Elena Grechanaya for providing the master class! Source: Aster Crafts
Series of messages “—February 23”:
Part 1 - Gift for February 23 - DIY soap for a man! Part 2 - Book-box.
Round box
Sometimes it seems that making a box of this shape is difficult. Totally wrong! It is quite easy to make a round box from cardboard with your own hands. You will see this for yourself.
Round box manufacturing technology:
- Mark a circle on thick cardboard. This will be the base of the box.
- Draw a long rectangle. This is the side of the box. Its width is the height of the future box. And the length should correspond to the circumference plus 2-3 cm per connection.
- To assemble such parts together you will need allowances. They can be left on the base of the box. So, as shown in the figure or on a rectangular blank.
- Having carefully calculated the dimensions, cut out the blanks.
- Connect them with glue or tape.
- Make the lid for the box using the same technology. But remember that the base circle should be a little larger. After all, the lid should be easy to put on the box. And its height is less.
- So, you made an excellent cardboard box with your own hands. All that remains is to decorate it. When thinking about an interesting decoration, do not forget about an important point. All hems must be carefully disguised. Therefore, it is recommended to decorate both the external and internal sides.
Milk packaging box
A small box is an excellent solution for various small items. That's why girls like her so much.
To work you will need the following:
- packaging for dairy products;
- textile;
- double-sided tape;
- scissors;
- ruler;
- ribbon;
- knife.
We cut out two identical containers from the packaging to create compartments for the box.
We connect them together with double-sided tape and cover the box with fabric. Don't forget to treat the bottom.
Cut out a rectangle from the packaging that will serve as the lid. We cover it with fabric using tape. Glue a ribbon so that you can tie the box.
We connect the base and lid with double-sided tape. A cute box for small items is ready!
Scotch tape box
This is a simple but original solution. How to make a jewelry box with your own hands from cardboard and a reel (from tape)?
Let's look at it in detail.
- Trace the bobbin on thick cardboard in an outer circle. You will need two such blanks. One will become the base, and the other will become the lid.
- Connect the bottom to the bobbin. You can use tape for this. Or leave a hem allowance at the base in advance.
- To make the lid, use the technology described in the previous example. Remember that it should be slightly larger than the base.
- You have created a wonderful box with your own hands from cardboard with a lid. Now it's up to your imagination. The original decor will make it a real work of art.
Soft box
Having considered simple options, let's try to diversify the technology a little. For example, if you want to create boxes with your own hands from cardboard and fabric, then you can use the following method. This box will be a great place to store important things. In addition, it is an excellent decorative element.
Let's look at how to make such a box with your own hands from cardboard. The master class will greatly help with this:
- You will need a round box. You can use a ready-made blank (for example, left over from a hat) or make it yourself.
- Apply a thin layer of glue to the outer side surface.
- Glue thin foam rubber to it.
- Choose a nice fabric. Measure a rectangular cut on it. Its width should be equal to twice the height of the box plus 10-15 cm for free folding. The length corresponds to the circumference with the addition of seam allowance. Wrap your box in this fabric.
- Cut a cardboard circle that will easily fit inside the box. Cover it with foam rubber and fabric. It is better to choose a lighter fabric for the bottom.
- If desired, you can decorate such a box in any way. Use ribbons, beads, buboes, beads.
Heart box
This box itself looks quite original. In addition, this box is easy to make with your own hands from cardboard.
The master class allows you to understand the progress of the work:
- Cut out two hearts from construction paper.
- Prepare two rectangles. Decorate one side with “teeth”.
- Glue a rectangle around the perimeter of the heart. Combine the prepared “cloves” with the base. It is best to use Moment glue. This will provide the necessary strength.
- Repeat the procedure for the other rectangle. In this case, be sure to take into account the allowance required to connect both side parts.
- Glue the second heart blank at the bottom. The decor imitating lace looks original.
- Create the lid for your box in the same way.
- Cut out pictures of bears or illustrations in a romantic style will add sophistication and originality. Complete the decor with beads, flowers, butterflies.
Box made of threads
This is another amazing technique that you can use to make a box. Let's look at how to make a box with your own hands from cardboard and thread.
Progress:
- You can choose any shape for the base. It can be a circle, rectangle or heart. Cut out two blanks from thick cardboard.
- One of them, which will become the bottom of the box, needs to be decorated. You can choose any solution for this. As a last resort, cover it with colored paper.
- In this base, mark holes around the perimeter with a needle. The distance between the “holes” is 1 cm. Try not to leave much space from the edge. Screw toothpicks into the marked holes. Each of them must be glued.
- Now you can take up the threads. Place the first row between toothpicks. Pass the thread as follows: in front of the stick, then behind it. The next row is placed in a checkerboard pattern.
- Braid to the middle. Now place a bead on each toothpick. Continue weaving with threads.
- Having finished the box, you need to secure the structure. To do this, put and glue beads onto each toothpick.
- The upper and lower parts of the box can be decorated with an original chain or ribbon.
Now you know how to create a beautiful cardboard box with your own hands.
Box from a candy box
The easiest option for making a box is to use a candy box. Only the box must be solid, that is, the lid of the box must be connected to its bottom. This option for creating a box will take a minimum of time, and you won’t need a lot of material to decorate it.
You need to empty the box of sweets; it will be especially convenient if there is still a mold for sweets in the box, which usually has several compartments. So, the box needs to be covered with colored paper, you can choose any color, you can even combine several colors to make the box brighter. If you cover a box with one color, you need to take one large piece of paper so that it can cover both the lid and the bottom of the box. You can learn more about how to decorate a box with colored paper by watching a master class from professional craftswomen.
After the box is covered with colored paper, you need to let it dry and smooth out the paper from air bubbles. This can be done with glue, water and a brush. Next, you just need to insert the candy mold into the box, and you can put different decorations in it. The box can be decorated with different colors, ribbons and other decorations.
First way
Making such a box will require a small amount of time, desire and patience.
To create this type of box we will need thick paper, colored paper, super glue, and decorative decorations. The box has a size of 12*25*12.5 cm.
It’s worth looking at the photo to see how to properly make a paper box.
First you need to glue the left side of the box.
Then we glue the right side. Do this carefully.
And in the next step we glue all the parts together.
The second step will be making a drawer. Its dimensions will be slightly smaller than the dimensions of the box. After you make the box, you should cover it with colored paper.
Scheme of unfolded cardboard:
We assemble the drawer by gluing its sides.
We cover the outside of the box with beautiful paper.
Take a piece of cardboard measuring 10.6*14.4 cm. We then cover this piece with colored paper. Then we insert this piece into the box. We create and paste over the second partition.
This is such a cute box made of paper.
Boxes made of wooden bracelets
Stylish, bright, handmade boxes will definitely become a bright accent in your interior.
To make them, we will prepare the following materials:
- wooden bracelets or blanks of this shape;
- glue gun;
- polymer clay of different colors;
- tools for working with it;
- round cookie cutters;
- white marker;
- paints;
- brushes
Roll out a thin layer of polymer clay using a rolling pin.
We squeeze out a circle with the bracelet, which will be the bottom of the box. We bake it following the instructions provided by the clay manufacturer.
We paint the bracelet with yellow paint.
Using a white marker, draw a pattern on the bracelet. In this case, diamonds.
We insert the bottom inside the bracelet and glue it with special hot glue.
Take two cookie cutters. One of them should have the diameter of the bracelet, and the second should be slightly smaller.
Squeeze out circles from green polymer clay. We bake them and glue them together.
Using a knife, cut out leaves from a layer of polymer clay. We bake them and glue them to the lid of the box.
A bright, summer box is ready!
You can make other boxes using the same principle. Excellent examples in the photo.
Wooden spatulas or popsicle sticks are also good materials for a handmade box. To create such a box you will need free time, since it involves gluing sticks together, and this takes a lot of time. However, the result is worth it.
For work you will need the following materials:
- Wooden sticks in the amount of 60-100 pcs.
- Glue gun
- A small piece of fabric for curtains
- Decor elements
Method of making the box:
- Glue 10 sticks together. It is convenient to do this with a glue gun; it significantly reduces the work time.
- Glue two more sticks along the edges to secure the row. This will be the base of the box.
- You can immediately make another lid of the same size. Just glue two more sticks into the lid; in the future, it will fit snugly against the walls of the box.
- Now you can start working on the side walls of the box. Glue the sticks together as in the photo. Adjust the height of the box to your liking.
- Make curtains from a piece of ribbon or fabric.
The box is ready, all that remains is to decorate it. An excellent option for decorating such a wooden box is decoupage. You can also decorate in other ways:
- Make stickers from newspapers, magazines, photographs
- Decorate with a ribbon bow
- Make a pattern from buttons or beads
- Glue beads or stones around the edges
On average, you will need about 60 wooden sticks to make a box. If you want to make the box deeper, you should stock up on 100 sticks.
Ice cream sticks are not in short supply; you can easily buy them in city stores or order them online. You should look for such sticks in the section on food packaging and containers.
Box of wooden spatulas: step 1
Origami technique
Paper boxes made using the origami technique can turn out to be very original. There are a very large number of diagrams on the Internet that will help you create a box using the origami technique. In this article we will present you with a couple of schemes that are perfect for beginners. To create such boxes you will need desire and patience, and the materials you will need are paper and glue. The most important thing in the origami technique is to follow the instructions.
For those people who have never tried to do anything with origami techniques, these diagrams may seem a little heavy. Then you should make very simple elements first, and then try to make one of the boxes listed above.