Every year the school hosts wonderful events that allow children to express themselves and show their talent to teachers, classmates and parents. Autumn exhibitions are always especially noteworthy, since natural materials are in abundance at this time and there is plenty of room for imagination. An excellent material for creativity is pumpkin. Autumn-themed pumpkin crafts can be bright and original.
Even a small child can make a variety of pumpkin crafts with his own hands, because they are incredibly easy and simple to make.
What kind of craft can be made from a pumpkin? It all depends on the size of this vegetable. A children's pumpkin craft can depict some kind of animal, since kids love animals. You can decorate this vegetable using decoupage technique, or make curly carvings.
DIY autumn crafts from pumpkins for school
Every student wants to bring a real masterpiece to school that both teachers and children will like. After all, we all love when we are praised. Therefore, before you sit down to make an autumn pumpkin craft for school, consider a selection of works.
With a set of simple acrylic paints, you can create a beautiful and vibrant masterpiece.
Using a regular brush, cover the pumpkin with a thin layer of white paint. This is necessary so that the bright colors lie more easily on the pumpkin.
After the white layer, apply colored paints in stripes so that each strip overlaps the previous one.
School-age children are already familiar with such a holiday as Halloween and want to learn how to make such an attribute as Jack’s scary head. First of all, you need to cut off the stem and remove all the pulp inside the pumpkin. After this, the creative process of cutting out the muzzle begins.
There can be an endless number of options for Jack's face - you can take a sample or come up with it yourself.
You can combine pumpkin crafts and creating a beautiful ikebana. Such a bouquet can be an original and creative gift or work for an exhibition.
Materials:
- 1 pumpkin
- 1 glass of water
- Knife
- Scissors
- Floral sponge
- Natural flowers
First cut off the top of the pumpkin with a knife, and then remove the pulp. We put a floral sponge inside, having previously created the necessary shape.
Place the sponge into the pumpkin and fill it with water. It must be soaked so that the flowers can stand for more than one day, or even more than a week. Trim the stems of each flower.
Such a bright bouquet of crafts can decorate any exhibition or room.
Having a rich imagination and a little creativity, you can make a funny face out of a pumpkin. We cut out details from colored paper - eyes, lips, tongue, and you can attach them with glue.
You can also use acrylic paints to create funny faces.
Painted pumpkin carriage
To work, you need to stock up on an ordinary table and stationery knife, a glue gun, two pairs of tin lids from cans and various bright shiny paints (it is convenient to use spray bottles).
Craft materials
Cut off the top of the pumpkin.
Cut off the top
Through the resulting hole, carefully remove all the pulp and seeds.
We take out the pulp
We cut out the door and windows.
Doors and windows
We cover the future carriage with paint. You can spray it from a can, or you can apply it with a brush.
Pumpkin crafts for kindergarten on the theme of Golden Autumn
Painting a pumpkin with a permanent marker will look bright. This is a marker for CDs. With its help, a DIY pumpkin for a kindergarten exhibition can turn out to be unusual and will not require much time to make. You can complement the pumpkin look with various accessories.
To make such a pumpkin craft for a kindergarten for an exhibition, we don’t need much.
Materials:
- Pumpkin of the desired shape
- Carrot
- Parsnip
- Cutting board
- Knife, glue, marker
- Toothpicks
- Black paper
- Accessories (glasses, hat)
Vegetables need to be cleaned of dirt, so wash them thoroughly. Trim off the thick edge of the parsnip. Insert a toothpick into the middle of the cut and use it to attach the spout to the pumpkin.
The carrot spout can be attached in the same way to another pumpkin.
Use a marker to draw a smile under your nose
You can cut a mustache out of black felt and glue it to the pumpkin to create the look of Mr. Pumpkin.
It will be interesting for kids to create a cartoon character from a pumpkin with their own hands.
One of the favorite cartoons of kids is the story about Thomas the Tank Engine. So we’ll make it out of pumpkin.
Materials:
- Pumpkin
- Acrylic paints
- Brush
- Glue
- Eyes
- Colored paper
- cotton wool
- Scissors
- Toilet paper roll
The pumpkin must be cleaned and dried. Paint the surface of the pumpkin with blue paint. Most likely, you will have to paint in two stages.
We cut out a large circle from black paper, and another circle from white paper, but a little smaller. We glue the eyes to the white circle, and draw the nose and eyebrows.
Cover the sleeve with black paper. Glue the black circle onto the pumpkin.
We made a chimney out of the sleeve, stuffing some cotton wool into it to simulate smoke.
What to make wheels for a pumpkin carriage from
Wheels for the “Carriage” craft are made from various available materials. It can be:
- covers;
- thick wire;
- apple halves;
- carrot mugs;
- small squash;
- tree cuts.
To make carriage wheels from metal covers, they are first degreased, then painted with acrylic paints and varnished.
Baby food caps are used and glued to the craft with a glue gun.
Making wire wheels for a carriage is also easy. It is enough to twist a circle of the required diameter, make knitting needles, and connect them together. To make the work look more attractive, each wheel is wrapped with bamboo thread.
Start processing wheels from the spokes, then wrap the circle and hide the ends
Wooden mugs also work well as pumpkin wheels. They are pre-cleaned, painted and varnished. They are attached to the carriage with hot glue.
It is better to take birch or oak cuts
If the wheels are made from vegetables, then they are cut into circles, dried and used for further work. Papier-mâché blanks look original. The paper is soaked in PVA glue, the composition is applied to the wire wheels and allowed to dry. After this, the blanks are coated with golden paint.
Attach the finished wheels to wire axles
DIY pumpkin carriage: step-by-step master class
Pumpkin is not only a tasty, healthy and medicinal product, a material for school crafts, but also pumpkin has long been the hero of the fairy tale about Cinderella. Everyone remembers how at midnight the girl’s carriage turns into a pumpkin.
When you mention pumpkin crafts for a school competition, many people will see a pumpkin carriage before their eyes. Let's look at how to make a craft for an exhibition below.
Materials:
- Pumpkin
- Wire
- Plasticine
- Paper
- PVA glue
- Paint – gold or silver
- Knife
Let's start with the wheels. To do this, we make wheels and spokes from wire, fixing them with plasticine. We cover the wheels with white paper. The wheels are connected to each other with wire and painted.
Before proceeding to the cabin, cut off the top of the pumpkin and take out the insides. The carriage can also be pre-painted in any color. When the paint dries, draw windows on the pumpkin and, if you like everything, cut it out.
Using a golden outline we create a rich look for the carriage.
Let's attach the wheels to the carriage cabin and put a candle inside.
Some pumpkin carriages amaze you with how much skill and imagination the craftsman has.
Pumpkin figures for garden decoration
A bear and a pumpkin vase - decorating the garden for autumn
For some reason, it is believed that decorating a house and garden with pumpkins can only be done for Halloween, which means that the theme must be gloomy. But you can make quite cute figures for the garden from pumpkins, for example, make an owl from a pumpkin, a dragon or a caterpillar, a carriage, like in the fairy tale “Cinderella,” a dog, a large piece of cheese with mice.. In general, show your imagination.
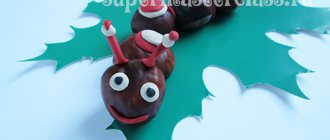
Positive pumpkin caterpillar for garden decoration
Pumpkin owl
Pumpkin carriage
Pumpkin house
Dog and Cheese Pumpkin Figures for Halloween
DIY autumn pumpkin composition
Decorating your home interior in autumn style is not at all difficult. Autumn is associated with yellow leaves, pine cones and, of course, harvest. But potatoes are unlikely to become a beautiful decoration, but pumpkin is exactly the vegetable that can be used for decoration.
The principle of creating compositions from pumpkins is the same, but the results are completely different, because the main point in this craft is the presence of flowers and imagination.
Materials:
- Pumpkin
- Floral sponge
- Scotch
- Scissors
- Flowers
- Leaves
Cut off the top of the pumpkin and clean out the insides.
You can additionally remove excess moisture inside the pumpkin using paper napkins.
Take the required size of sponge and soak it in water
Putting a sponge into a pumpkin
Wrap the pumpkin in foil using tape to secure it.
Tip: if you decide to use artificial flowers, then you don’t need to use a sponge or do not wet it.
When the base is ready, you can begin the most exciting part - decorating with flowers.
In this place you can use all kinds of decorative elements - flowers, twigs, leaves, spikelets. The result should be bright and unusual.
Applique of pumpkin seeds on the theme of Autumn
If you are going to make a craft from a pumpkin, then most often you have to free it from the insides, then the question may arise - where to put the seeds. And since we often feel sorry for throwing something away, we can consider how to make an applique from pumpkin seeds. Wood can be a great applique idea.
First you need to rinse them thoroughly and dry them.
The seeds will look beautiful on the applique if you paint them with different colors.
If you need a small number of seeds for work, you can color them individually.
But if the number of seeds is large, then place them in a bag, add paint or dye to it and mix. Paints can be anything - acrylic, gouache, oil. When the seeds are sufficiently saturated with paint, place them on paper and let dry.
The tree applique made from pumpkin seeds looks beautiful.
Making such a panel is quite simple - draw a tree trunk on a sheet of paper, or make it out of colored paper. Place pre-colored seeds on the branches of the tree.
Add a few seeds under the tree, simulating fallen leaves.
In addition to wood, you can come up with other themes for creating an applique from pumpkin seeds.
DIY pumpkin house: craft for children
Pumpkin houses turn out beautiful. Depending on the shape of the vegetable, you can make two-story mansions, or you can simply make large houses from a large, flatter pumpkin. Crafting a house is painstaking work and not as quick in time as it might seem. After all, you need to think through every detail. You can make a pumpkin house with your own hands in different ways, but in all of them, first of all, you need to remove the insides and dry the vegetable.
Materials:
- Pumpkin
- Chestnuts
- The base for the house is plywood or thick cardboard
- Green corrugated paper
- Acrylic paints, hot glue
- Foamiran
- Satin ribbons
- Cotton swabs, scissors
- Dough
- Wire – aluminum, floral
Prepare a square base and wash the pumpkin.
Draw out details on the pumpkin with a felt-tip pen - windows, doors
Let's make a template out of paper so that we can then transfer it to the foamiran. We decorate the details from Thomas - you can draw or make appliqués.
We make salt dough according to the classic recipe: salt, flour, water. Mix everything in one container.
We need to make a stork from salt dough. First we sculpt the body and head, and connect them together using wire, which we also cover with dough to hide. We make wings, a tail and steps from the dough. Let's also cut out a rectangle for the bench. Place all the elements in the oven at 100 degrees for 3 hours. The pumpkin needs to be glued to a board and covered with corrugated paper.
Cover the backing with green paper and attach the pumpkin to it. We will paint the place of the window on the pumpkin black and glue the parts from Thomas. In the meantime, the elements of the craft have been cooked in the oven; they can be taken out and cooled. Attach the threshold in front of the door.
We attach long legs to the stork and paint the feet.
We will place the stork on the pumpkin and paste chestnuts around it. We make a flower from pieces of red ribbon: we scorch the edges with fire and glue the parts onto a cotton swab. We use a chestnut instead of a vase. We continue to decorate our composition. This way we will have a flower and a bench. We'll use an acorn to make a lantern over the door.
All that remains is to work on the details and finalization - we will paint the path and threshold. We make a fence out of chestnuts, connecting the chestnuts with skewers.
You can make a romantic pumpkin house craft.
Transport for Cinderella
The secret to making a DIY pumpkin carriage master class is very simple: a little preparation, imagination and time.
- knife;
- paints of different colors;
- thin brush;
- cardboard;
- glue;
- golden paper
- decorative “fluffy” wire;
- dowels
First, you need to remove the seeds from the pumpkin and cut out an arched window. Then paint it white and use a thin brush to draw a lantern, the bottom of the carriage, the silhouette of the door and the monogram “C” (Cinderella). Set aside until paints are completely dry.
For the wheels, four circles are cut out, two of which have a slightly smaller diameter. We make duplicates from golden paper and glue them onto cardboard; add decorative wire rolled into a spiral on top.
Carefully make holes for the dowels in the pumpkin and wheels, assemble the entire structure; for greater strength, cardboard circles can be placed on glue.
Elena Meleshina
Master class “Pumpkin carriage for Cinderella”
Autumn has arrived, the time when nature plays with a riot of colors. This time of year gives us a bountiful harvest. One of the gifts of autumn is pumpkin . It is not only healthy and extremely tasty, of course, if it is prepared correctly. This vegetable is a symbol of fertility, hearth and prosperity.
The pumpkin has a memorable appearance; it is not for nothing that Cinderella arrived at the ball in a pumpkin carriage . And a lot of shapes - from multi-colored pumpkins the size of a child’s fist to bright red ones the size of a small car.
I want to show you a master class on making a carriage for Cinderella from a pumpkin .
–pumpkin;
- a doll (we will have a horse in the role of Cinderella ;
-gold spray; gold varnish.
So let's get started. Take a medium sized pumpkin .
Cut out the bottom and scrape out the pulp.
Next, we mark the windows of our carriage and carefully cut them out.
We make curtains from tulle and secure them with a safety pin.
We painted the windows with gold varnish, we placed a crown on the top (a hairpin for a girl)
Dad helped us make the wheels. Made using wire welding. Painted with gold spray.
My daughter gave me a doll with a horse.
They put the wheels in and attached a bow to the back.
We decorate with rhinestones, ribbons, and beads.
Using wire we connect the horse with the carriage . We paint it golden and decorate it with ribbon and rhinestones.
And this is what we got.
"Dress for Cinderella." Visual activities with children of the preparatory speech therapy group Dear colleagues and guests of my page, today I want to offer you material that may be useful when studying the lexical topic “CLOTHING”.
Didactic game “Grains for Cinderella” for children from 3 to 9 years old under the supervision of the regional component “Cuban Studies” Review of the author’s didactic game “Grains for Cinderella” for children from 3 to 9 years old, teacher of MBDOU kindergarten No. 4 Irina Balyasova.
Abstract of the GCD “Carriage for Cinderella” Summary of the GCD for artistic and aesthetic development in the senior preparatory group of the ZPR drawing on the topic: “Carriage for Cinderella.”
Autumn crafts made from pumpkin seeds
Kids love to get creative using natural materials for creativity. You can make original and fun crafts from simple pumpkin seeds.
This chicken is made from plasticine and seeds. First, we sculpt the body of a chicken from plasticine, and then stick the seeds into it.
You can make a cute hedgehog in the same way.
Chickens made from pumpkin seeds can turn out very beautiful. This chicken can be made from two foam balls of different diameters. Glue them with seeds using PVA glue or a hot gun.
DIY pumpkin owl
The shape of the pumpkin itself can tell us what kind of craft we can make from this vegetable. And the simplest craft option may be an owl. It can be in two versions - from one pumpkin, or take two pumpkins for the head and for the body.
An owl made from pumpkin and seeds is quite simple. The pumpkin can be cleaned of the insides in advance. And we decorate the outside using a variety of materials - felt, paper, seeds.
Materials:
- Brush
- Felt
- Paper
- Felt pen
- Pen
- Glue
- Scissors
- Eyes
Wash the pumpkin first. The stalk must be cut off. If you find a light-colored pumpkin, you can pre-paint it with orange paint. We make a pattern of parts from paper.
We need to make a blank for the eyebrows, face, beak, wings. Then draw circles for the eyes. We transfer the details to felt; it is better to choose a material in brown tones. For example, we will cut out the largest ones from purple felt, and two more from blue felt. Let the smallest ones be yellow or orange. We make the wings from gray or light brown felt. At the top you can attach some light details in the form of rectangles to imitate feathers. We make a beak from a diamond-shaped part. First fasten all the parts of the owl's face together.
It is better to make the beak voluminous. To do this, make a cut at the top and bend it into a gutter shape, tucking in the corners.
The owl's face is almost ready. We place the wings at the same level on the sides. Let's attach a face to the pumpkin. And at the end we glue the eyes.
You can make an owl using pumpkin and seeds, which can be used white or pre-painted.
DIY pumpkin seed panel
You can make a panel of pumpkin seeds with your own hands as a gift or for an exhibition at school.
Materials:
- Glue, twine
- Seeds
- Threads
- Leaves
- Letochka
- Sackcloth
- The basis
- Varnish
We cover a piece of cardboard approximately 30*35 in size with burlap.
Cut out circles from cardboard and cover them with seeds in a circle.
We place flowers on the base in any shape and glue them. We lay a green thread or twine between them
Glue bay leaves between the flowers.
You can use more dried flowers in creating panels.
Pumpkin seed tree: how to make a craft
Pumpkin seeds are an interesting material for creativity. You can use them to make both an applique and a three-dimensional craft. A craft tree made from pumpkin seeds is made in the form of a topiary.
For the base of the topiary, take paper. We make a ball out of it and wrap it with masking tape. We make a hole at the bottom and insert a stick or a broken felt-tip pen. Apply PVA glue to the ball and paste it with seeds to completely cover the surface. Instead of a base, you can use a foam blank in the form of a ball. You can complement the ball with other elements - beads, ribbons. Cover a jar of a suitable size with twine.
Fill the jar with alabaster and insert a stick with a ball into it.
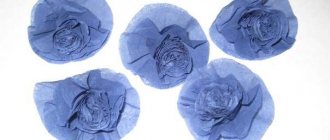
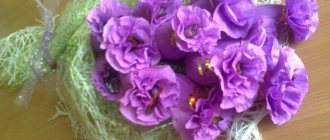
Flowers made from pumpkin seeds: DIY craft
Pumpkin seeds are an easily accessible material and can be found without problems even in winter. Therefore, if you need to make a craft for school from pumpkin seeds with your own hands, it will not be difficult.
Flowers made from pumpkin seeds are unusual and easy to create.
Materials:
- Pumpkin seeds
- Peas
- PVA glue
- Sackcloth
- Compass, pencil, ruler
- Jute
- Brush, acrylic paints
- Scissors
- Cardboard
- Hot glue
Soak the burlap in glue in advance so that it does not fall off. Pre-mix the glue with water 1:1. Dry the burlap and iron it. For the base of each flower, we cut out round blanks from cardboard. Glue the seeds in layers in a circle.
Turn the flower over to the reverse side and glue a row of seeds on the reverse side. We will cover the petals of our pumpkin seed flowers with white paint.
Let's make parts from cardboard - a circle with a diameter of 6 cm and a petal 7 cm high and 4 cm long. We transfer the cardboard blanks to burlap. You need 3 circles, and 6 petals. Glue the round burlap pieces onto the back side of the flowers. Glue a jute thread along the edge of the burlap petals.
We make flower stems by wrapping floral tape around a wooden skewer. We make a hole in the center of the round flower blank and attach the stem. Glue yellow peas in the center of the flower and fill it with PVA.
Glue two petals to the stem.
Three beautiful pumpkin seed flowers will take their place in a beautiful little vase in the kitchen.
Flower design may be different. You can also paint the edges of the seeds and make a bud that has not yet opened
DIY crafts from decorative pumpkins on the theme of Autumn
You can make various crafts from a decorative pumpkin - for an exhibition, a competition for school or garden, as well as a lantern for Halloween. Decorative pumpkins differ in shape and size. Most often they are small and neat.
You can make a candle stand out of pumpkin. To do this, you need to cut off the top of the head and make a hole to insert a candle. You can decorate the candlestick as desired.
You can make a variety of animals from a decorative pumpkin with your own hands. It is enough just to fit the required shape.
By painting a pumpkin gray or orange, you can make a baby fox and a raccoon.
Felt and glue will help you create such an animal.
Such crafts are easy to make and kids will enjoy working with felt, and space lovers can make a robot.
What beautiful and realistic donuts can be made from small decorative pumpkins of the same size.
Making your own pumpkin carriage: choosing and preparing a pumpkin
If this is your first time doing this type of creativity, you need to choose a large pumpkin. The larger the vegetable, the easier it will be to cut. Also, pay attention to the shape of the pumpkin. The main thing is that it is of the correct shape and has good relief. Choose the color yourself. Carriages in bright orange or white look very impressive.
Crafts are often made from decorative pumpkins, but they can be made from regular ones, then you need to dry them properly. When choosing a vegetable, you first need to make sure that there are no rotten spots on it. Then wash thoroughly and wipe with an alcohol solution.
If you're storing the craft for a short time, simply drying the pumpkin will do, which won't take much time. To do this, carefully cut off the neck and remove the pulp and seeds with a spoon. Do not throw away the cut top, it will be needed for the craft. Next, you need to stuff it with plenty of paper (you can use newspapers) to eliminate moisture. The paper must be changed until it becomes dry. The main thing is not to overdry the pumpkin, as this will complicate the work.
There is a more complex drying method that allows you to store the finished product for a long time. This process takes six months. The whole pumpkin is dried. To avoid disappointment at the end of the term, instead of dried pumpkin, choose several vegetables. Pumpkins washed and wiped with an alcohol solution must be placed in a dark and well-ventilated room. Arrange vegetables so that they do not touch each other. Now be patient and turn and check the pumpkins every day for six months to make sure they don't start to rot. Rotten vegetables should be thrown away immediately.
The carriage can also be made from fresh pumpkin, but then it will last very little.
So, the pumpkin has been selected and prepared, all that remains is to decide on the tools and material that will be needed to make the carriage with your own hands.
- pumpkin;
- white paper;
- wire;
- PVA glue;
- plasticine or plastic;
- golden outline;
- paint in golden and white shades;
- knife.
How to make a turtle from a pumpkin with your own hands
In autumn, pumpkin is considered one of the most popular vegetables. If the autumn exhibition season begins at a school or kindergarten, then it would be a great idea to make a turtle out of a pumpkin with your own hands. parents will have to help the baby, as they need to use a knife.
From half a pumpkin you can make the body of a turtle - a shell. For believability, draw a shell. Potatoes will help make the turtle's head and legs.
The principle of creating a turtle from a pumpkin is the same. There is only a difference in design. You can use cucumbers or carrots to create the legs and head.
Midnight Tale
The handmade pumpkin carriage in the photo just begs to be seen. Lighting, background and two mice complete the picture after midnight.
- 3 belt buckles (preferably with an ornament);
- 1 large pumpkin (about 25 - 30 cm);
- marker;
- knife;
- dark gray paint;
- glue, preferably in a gun for convenience;
- 1 decorative lamp or candle;
- 4 small pumpkins for wheels;
- 4 caps decorated with ornaments;
- 2 wooden or metal rods (length equal to the width of the pumpkin);
- thick wire;
- decoration instead of a stalk;
- drill.
Peel the seeds from the pumpkin, then trace the buckles you choose for the windows and door with a marker. Cut the openings to the required size, paint the fruit dark gray and secure the decorations with glue. Carefully separate the stalk and replace it with a decorated top.
In this master class for a DIY pumpkin carriage, we will need a drill. Use it to make a hole through the center of each small pumpkin. Now put them on the rod, forming an axis, and secure them at the edges by gluing the caps. Repeat the same steps for the second set of wheels.
Align the axes so they are approximately the width of the pumpkin. Carefully, without moving, tie the wire from one set of wheels to the next, forming a strong mesh for a large pumpkin. Place the “carriage” on the base and light it from the inside.