A light bulb vaporizer is one of the easiest and least expensive ways to make a DIY vaporizer . It really blows the minds and is made from several inexpensive household materials. It works pretty well for a cheap DIY vaporizer that only takes a few minutes to make. Everyone knows that using a vaporizer is much healthier than smoking from a pipe or bong, but some people don't know exactly what vaporizers are or how they work.
DIY vaporizer made from a light bulb
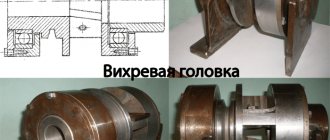
How to make a soldering iron: the history of the tool and its design
The first soldering iron was invented by Ernst Sachs in 1921. He also patented a hammer tool for tin work.
The inside of the soldering iron is simple and consists of the following components:
- Metal tube with handle and sting;
- An electrically insulated heating element (the insulation can be mica or ceramics);
- A current-carrying cord connected to a network or transformer.
Basically, electric soldering irons operate on mains power, a transformer, or batteries. There are types that have a built-in gas burner or conventional external heating.
A low-power electric soldering iron is used for soldering electronic parts and microcircuits, and a powerful one is used for massive, large parts.
Types of soldering irons:
- Nichrome - have a nichrome wire spiral that passes current;
- Ceramic - consists of ceramics, heats up quickly, but, unfortunately, such a heater is very difficult to repair after a breakdown;
- Induction – heating occurs using an induction coil;
- Pulse (spot) – works in the mode of pressing and holding the start button;
- Gas – stand-alone cordless soldering iron that can be used anywhere;
- Battery - this type is usually low-voltage, having low power (usually about 12 v or 15);
- Infrared – heated by infrared radiation with a wavelength of 2-10 microns;
- Ultrasonic – used where it is difficult to solder aluminum using conventional methods;
- A soldering iron heated over an open fire is a fairly simple device that sometimes replaces a high-power device.
The most common are network devices powered from a 220V network. Sometimes, when assembling industrial electrical appliances, an entire soldering station is used, with which you can use additional capabilities.
It is also worth noting a blowtorch, in which heat is released when flammable substances burn. It is used to heat elements, melt solder and warm up other soldering irons.
By the way, soldering irons are now starting to appear in games like Minecraft. To make it there, you need to add a bucket of water, 3 iron ingots and 1 bronze.
Guide: how to make a soldering iron at home from a resistor
The simplest scheme for creating a soldering iron from improvised means is from a resistor. The device will operate at a voltage of 6-24 Volts.
For a soldering iron you will need:
- Resistor PEV or MLT;
- A couple of copper rods of different sections;
- Spring ring, washer, screw;
- Textolite for handle.
It remains to find out the sequence of steps for creating a soldering iron at home.
The manufacturing process is divided into the following stages:
- The end of a thick rod is drilled with a thread for a screw;
- Next, you need to cut out a cavity for the retainer (spring ring);
- The second end is drilled with a diameter like a thin twig (it will act as a sting);
- Then all the parts are assembled into one;
- A soldering iron tip is attached to the resistor at the back and secured with a screw and washer;
- A handle with places for a resistor and wire is made from textolite;
- The power cord is connected to the terminals of the soldering iron.
Homemade pulse soldering iron with your own hands
The principle of operation of a pulse tool is to supply a small current to the tip during soldering, and not constantly. To assemble such a super fast heating soldering iron (for example, Moment), you will have to use a transformer.
What else is needed:
- LED indicators;
- Copper wire;
- Plastic body;
- Stand made of dielectrics;
- On/off button.
The operating principle of a pulse soldering iron is a little more complicated than that of a conventional device with a heating element. To start creating it, you will first have to tinker with the transformer, as well as make calculations and select the wire.
You can use a switching power supply, and in this case the transformer just needs to be slightly altered and rewinded.
This is done like this:
- The secondary winding is removed and rewinding is done using a couple of turns of wire;
- The transformer with a new winding is placed in the prepared housing;
- Instead of a switch, a button to turn on the device is inserted;
- A dielectric stand is mounted, and a copper loop is fixed on it - a thin tip;
- The tip is then connected to the secondary winding of the transformer;
- All that remains is to make the handle.
During operation, you do not need to hold the button in the on state for a long time, as in this case the device may overheat and fail.
DIY mechanical mod (Electronic cigarette)
The popularity of electronic cigarettes is increasing every day.
Some people use them to quit smoking, others simply switched to a cheaper and less harmful method of smoking, and others simply like to indulge in the tasty and fragrant vapor from an electric cigarette. Due to the current dollar exchange rate, electric cigarettes have a decent price, and, as practice shows, they last from one to several months. Personally, I have already purchased three of the most common electronic cigarettes, each of them served me for one month, and each time I was forced to buy a new electric cigarette with the money I saved on buying regular cigarettes. In the end, I decided to buy myself a cigarette that was more expensive and of better quality, I went to a store where they offered me a mech mod that did not have any electronics, I thought about it and decided to make a mech mod myself from an ordinary flashlight.
How did I do it?.. I’ll tell you now
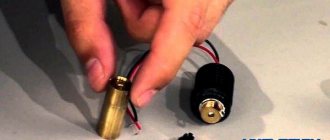
To assemble the mod we will need: • A pocket flashlight • A 18650 or 26650 standard battery (the difference is in diameter and capacity) • A piece of PCB • A soldering iron, flux, solder • A connector from an old cigarette • An evaporator (difficult to make yourself, I had to buy it in a store)
Photo of what we have first
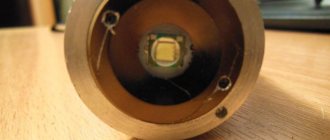
We disassemble the flashlight and take out all the insides from it
It took a long time to get the button, but we managed to do it anyway.
And so we see:
Flashlight body, glass, LED module, spring to support the module and to ensure contact, and a plate to fix it all in the flashlight body.
Next, take the textolite and glass from the flashlight
We need to trace the piece of glass on the PCB in order to later cut out of it a circle of the same size and diameter as the piece of glass.
Cut it out, straighten it out and this is what you should get
Ready.
Now in this mug we need to drill a hole for the connector from an old cigarette; I didn’t have a drill of a suitable diameter. I drilled a smaller hole and then bored it out with a file.
We insert our connector into our “puck”
Next, we unsolder the LEDs from the board of our flashlight and solder a wire from the central connector to the microswitch, which was soldered from the old TV, and from the switch to the central contact of the board, where the spring is soldered (positive terminal)
And we solder the negative terminal from the connector of the future cigarette to the negative contact of the board from which we soldered the LEDs.
We drill holes in the flashlight covers and in the reflector so that they coincide; they are needed to insert the microswitch into the housing.
(I had an idea to insert a microswitch at the bottom, but as the experience of my previous electronic cigarette showed, this is not entirely convenient)
We make a square hole out of a round hole and you can start assembling.
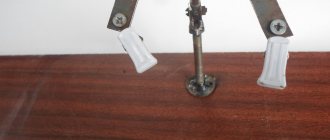
We insert it all into the flashlight cover and put it on hot glue, fix everything with a special washer that is included in the flashlight kit.
I used the negative bus from the flashlight kit, but instead of a spring I stuffed a 25-kopeck coin on the bottom.
Become the author of the site, publish your own articles, descriptions of homemade products and pay for the text. Read more here.
DIY battery-powered soldering iron
It’s quite possible to make a battery-powered soldering iron yourself by preparing the necessary materials.
To create a battery-powered soldering iron you need:
- Ballpoint pen body;
- Wire made of steel and copper;
- Resistor;
- Textolite double-sided;
- Copper foil and wire;
- Insulating tape;
- Heat-resistant handle;
- Iron tube (can be replaced with a body from a metal ballpoint pen);
- AA or Krona batteries;
- Talc;
- Wire cutters;
- Silicate glue;
- Scissors and stationery knife;
- Newspaper.
Instructions on how to make a cordless soldering iron:
- Work begins with sharpening the copper wire. This can be done on a newspaper with a stationery knife. Sharpening should be continued until the tip of the wire resembles the end of a screwdriver (bevel angle 45 degrees). After sharpening, solder must be applied to the surface, otherwise the uncovered part will burn during operation.
- To create an electrically insulating mass, you need to mix glue and talc to the consistency of liquid sour cream, and then apply it to the sting with tweezers or a plate. This mixture should be very sticky and after applying it to the sting, it should be sprinkled with talcum powder.
- Next, a foil tube is put on the tip. In this case, you need to leave the tip protruding from the tube no more than 1 cm. Next, the heater is covered with a thin layer of insulation and dried. The temperature should be at least 150 degrees, and the mass should become solid. After this, you need to use nichrome wire and wrap it around the sting. Winding is done in a spiral. The ends of the wire must be brought out straight, and the winding must be covered with an electrical insulating mixture and dried again. The turning end is retracted onto the heater and then attached to the tube. Apply the mixture again and dry.
- All that remains is to assemble the device. The ends of the heater are connected to the surface of the batteries. The contacts are insulated and the whole thing ends with a wooden or plastic handle that holds the batteries.
When working with a portable soldering iron, you should always keep a can of compressed air nearby. You will need it to remove dust from microcircuits before soldering.
You can make a model with a power cord. True, in this case you will need a 220/12V step-down transformer unit.
For ease of use, you can make your own stand for the device, the basis of which can be any metal box.
What will you need?
To manufacture the device you will need the following elements:
- The bulb is from a light bulb, the tube is from a ballpoint pen. These components make up the body of the device and are selected from new products. It is largely irrelevant to use used light bulbs due to various impurities and corrosive formations.
- Scissors. This is the basic and most important tool that a vaper will need.
- Plastic bottle, electrical tape. Don't forget about salt, which is useful for preparing the vaporizer. A plastic bottle is selected in a volume of 0.5 liters, and electrical tape can be bought at any office supply store.
A simple DIY mini soldering iron and device repair
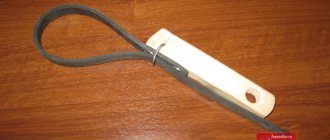
You can create a miniature nano-electric soldering iron at home using a gas lighter or car cigarette lighter. Kind of like a bitch.
What you will need to create a mini soldering iron:
- Gas lighter in a metal case;
- Copper wire;
- File;
- Pliers.
It is better to choose a lighter that has a large fire and the ability to work even in windy weather.
Work algorithm:
- The wire is clamped with pliers and then wrapped onto the lighter box;
- The other end of the wire element is sharpened;
- The sting should be fixed with the same wire in several turns.
A small homemade micro-soldering iron is ready. All that remains is to check its performance and you can solder SMD and other small parts. If the need for such a tool no longer exists, it can always be disassembled and then restored.
What to do if the soldering iron stops working? Most likely, the tip is charred or clogged. An activator will help to repair the part, which will very carefully clean the part from carbon deposits. Moreover, such repairs will not take much time.
Instead of regular cigarettes, it has become fashionable to smoke electronic ones, and instead of regular lighters, USB lighters have begun to be used, which serve as a kind of analogue of a car cigarette lighter. It is very easy to charge such a device by connecting it to the USB connector of a laptop or mobile phone. But the problem is that such things are expensive, and not everyone has the money. Therefore, some craftsmen try to assemble a lighter or electronic cigarette at home.
Warning! Making cigarettes at home can harm your body if you assemble the components incorrectly! You can get burns to your respiratory tract and face. Therefore, if you are not confident in your abilities, it is better to buy a vaporizer and not take risks.
What you need to create an electronic cigarette:
- Cardboard tube;
- Batteries 3 D or 4 C;
- The wire;
- Insulating tape;
- Scissors;
- Pliers;
- Alligator clip;
- Cartridge.
The process of creating a fashion device:
- The batteries are folded lengthwise and aligned with a wire, the length of which should exceed the length of all batteries by 3 cm;
- Then the insulation of the wire is removed with pliers and a spiral is made;
- The clamp should hold the other end of the wire;
- Then you should crimp the wiring again with pliers;
- Now the end of the spiral should be attached to the minus of the upper battery and secured with tape;
- Next, a tube is made, which should be longer than all the batteries and contain the batteries;
- The top of this tube must be wrapped with an elastic band and the cartridge must be connected to the cigarette with a plug.
The electronic cigarette is ready. But remember about safety precautions and the possible consequences of such work.
How to Use Your Homemade Light Bulb Vaporizer
- Put about 0.3 grams of marijuana in it
- Pinch one hole on the lid with your finger and press the end of the handle to your chest.
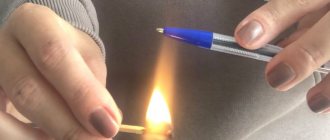
- Hold a lighter about 5cm below the light bulb and heat it until you see very light steam rising from the grass. Don't hold the lighter too close as this will cause the herb to burn, which is not what we want.
- Now draw in the vapors and enjoy your homemade light bulb vaporizer.
Note: Some people recommend a candle to heat your light bulb vaporizer because it can waste quite a bit of gas if you use a lighter for this method. It takes a minute or two for the steam to start coming out.
If you prefer to be more visual, here's a video on how to make a DIY vaporizer from a light bulb. It's worth reading the instructions and watching the videos first before you try to do it yourself, so you have a good idea of what to expect and don't waste your time with bottles and bulbs.
ATTENTION! Subtitles in the video in English.