The secrets of “fragrant creativity” from coffee beans are revealed in the publications in this section. From one package of cheap bean coffee (it contains beans of different sizes, which is very convenient) you can get several original paintings, crafts or compositions at once.
Coffee waterfalls, topiaries - trees of happiness, hedgehogs and sheep, cats and bunnies, paintings and applications made from coffee are presented here in a wide range. Coffee beans go well with jute filigree (twine) - there are many examples of this on these pages. Also pay attention to master classes on making soft toys with the smell of coffee, vanilla and cinnamon.
Cardboard and paper frame
Anyone can make a frame out of cardboard with their own hands. To do this, cut out 2 rectangles measuring 20 cm by 25 cm from cardboard, in one of which we cut out a rectangle measuring 10 cm by 15 cm. The result is a frame 5 cm wide.
The resulting blanks can be used to create any photo frame.
We glue both parts onto corrugated paper, leaving sufficient allowances along the edges and between the rectangles.
Glue the allowances on the outside and inside of the frame. It turned out to be a kind of book.
We cut out a rectangle measuring 11 cm by 16 cm from scrap paper and glue it onto the solid side of the “book”.
It is better to do all the above mentioned manipulations using Moment Gel glue, rather than hot glue, since Moment is more liquid and, accordingly, will form a thinner layer.
A variety of coffee fantasies for your creativity.
Contained in sections:
- Crafts made from natural materials
- Food
Includes sections:
- Coffee topiary. A coffee tree
Showing publications 1-10 of 146. All sections | Coffee. Crafts from beans, drawings, coffee fantasies
New
Photo
The best
Lesson summary on technology “Autumn composition in a coffee cup”
Lesson type: lesson on learning new knowledge Purpose: to consolidate children's knowledge about autumn. Pay attention to the color and shape of the leaves. Strengthen the ability to recognize familiar trees by their leaves and fruits. Develop skills and abilities to work with natural materials. Objectives: Educational: -…
Summary of a drawing lesson for the preparatory group using the caffeography technique “Enchanted Magic Forest”
Goal: to teach children a new drawing technique - caffeography . Objectives: - learn to apply an image on a landscape sheet using a coffee solution ; - continue to learn how to draw tree trunks - thin, graceful, naturally curved; - develop creative vision, imagination,...
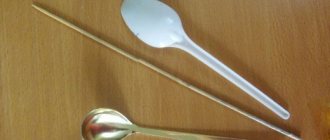
Twisted trunk
One end of the wire (or tube) from which the barrel for the frame is made should be made flat. Using glue, wrap the rigid wire with jute rope. Now we form some kind of spring.
If you form the spring first and then wrap it with jute, as I did, the wrapping process will be much more difficult.
The flat end of the wire must be glued into the frame. To do this, glue it to the side of the frame on which we have scrap paper. We spill glue over the entire inner surface of the frame and close our “book”. Press down well.
The surface around the barrel must be generously filled with glue. It is better to use hot glue here, as it gives a more reliable fixation. But you need to work with hot glue quickly, because it hardens quickly.
Wall coffee clock
How to make a wall clock with your own hands? These coffee watches are quite easy to make, so they are suitable for beginner craftswomen.
The following materials will be useful for work:
- watch base preparation;
- clockwork;
- napkin with a coffee theme;
- coffee beans;
- priming;
- water-based varnish for decoupage;
- colored acrylic;
- contour on glass made of gold, silver and bronze;
- stained glass paint;
- sponge, brushes, paint rollers;
- paper file;
- toothpick;
- PVA glue.
First you need to prime the surface of the workpiece.
Paint one side with white paint, the other with brown.
Apply PVA glue diluted in a 1:2 ratio with water onto a dry surface. Wet the napkin and glue it on top. Cover with glue again. Attach a wet stationery file and roll it on top with a roller. This is necessary to ensure that there are no air bubbles on the surface. Then leave until completely dry. Then varnish.
Draw a contour to fill with coffee beans.
After waiting 10-20 minutes, you can start decorating with grains. To do this, cover a small piece with stained glass paint and carefully place the coffee on it in random order, moving it towards each other with a toothpick.
Related article: DIY birthday crafts: best ideas with photos and videos
In an hour the paint will dry and everything will stick.
The dial can also be drawn with an outline, using special drawings or laying out coffee beans.
Next, insert the clock mechanism with the battery. If desired, varnish.
The table clock made from coffee beans is ready! This product can be hung in the kitchen.
Frame base
We fill a tin can with cement mortar, insert a frame into it and leave it to dry overnight.
The solution should be moderately liquid so that it does not crumble when drying. Otherwise, the solution will dry out, but the wire will not stick. Since the tin can is low, the solution is liquid, and the frame is high and voluminous, you need to make sure that the frame is level and does not fall anywhere!
From colored paper we cut out two circles with a diameter equal to the diameter of the tin can, and a strip of paper with a width equal to the height of the tin can with an allowance.
We paste the resulting parts onto the base.
Women's wristwatch
Necessary materials:
- watch;
- leather strap 70 centimeters long;
- chain with decorative elements;
- rivets;
- hole puncher.
First you need to take a new leather strap and cut it near the last hole.
Note! If the strap is made of leatherette, then after cutting it is probably worth burning the edges.
Cut the belt in half so that you get two 35-centimeter straps, one end with a clasp and the other with holes.
Related article: Painting on stones: master class for beginners with photos and videos
Use a hole punch to make holes and attach rivets. The base of the watch is ready, you can move on to decoration. To do this, take a chain with jewelry and attach it to the watch clasp.
That's it, stylish and inexpensive wristwatches for fashionistas are ready!
Features of the fragrant panel
It is impossible to list all the crafts that you can create with your own hands using green or roasted coffee beans. After all, it can be absolutely anything, from a simple candle (decorated with grains) to a unique author’s painting, the creation of which will take a lot of time and effort. By the way, to create a picture, in addition to the main raw materials, you will need a piece of burlap, the size of which depends on the scale and plot of the future panel.
You can, of course, use another type of material, but paintings based on such an unusual canvas in combination with coffee fruits look more stylish, and it’s much easier to glue one material onto another.
After the subject of the painting has been chosen, you need to use a pencil to draw the main lines of the drawing onto the “canvas” and use coffee fruits to bring the idea to life. By the way, in order to convey color diversity, experienced coffee beans recommend using not only green and roasted coffee beans, but also raw materials with different degrees of roasting, which can vary dramatically in color and be light brown, dark brown and almost black.
As a finishing touch, some craftsmen recommend coating items made with their own hands with colorless varnish. On the one hand, this will not only give the product an original shine, but also protect the surface from dust and make the interior item more durable. But on the other hand, crafts of coffee beans, coating with varnish or other protective substance lose their exquisite signature aroma. So here you have to choose whether you want the painting to be easily cleaned from dust or to fill the room with an exquisite aroma. Return to content
Trees of happiness
Whatever they call these crafts. Some call them trees of happiness, others decorate them with coins and consider them money trees. There are also those who use the book definition and call them topiaries. But no matter what we call these original tree-shaped crafts made using coffee beans, they still look unusual and very beautiful.
A topiary created using coffee beans can be not only a wonderful decoration for your own home, but also a gift to a friend or colleague for a housewarming or birthday.
Step-by-step instructions on how to create topiary using green or roasted beans can be found online. In addition to the main raw materials, you will need a flower pot, wire, papier-mâché, thread, glue and a piece of burlap. By the way, this material goes very harmoniously with coffee and this is not surprising. After all, packaging made from this type of fabric is considered the most suitable for exotic, aromatic-smelling raw materials. And it is in “rough” but durable bags that Brazilian or Colombian coffee floats to us.
When creating a topiary, a piece of burlap can be used either to decorate a pot or as the base of a tree trunk. There are a lot of options and everyone can choose the one they like best or even come up with their own (author’s). The main rule when creating any composition is harmony, that is, the materials used must be combined in color and even in style. Although, coffee beans are probably that unique material for creativity that can be combined with anything and in any way. With burlap it is more difficult in terms of compatibility, and it is unlikely to look good with glass or metal. Return to content
Several products made from coffee beans
The Greeks have a rule that work is work, and there should be time for a cup of coffee. In order not to miss this time, armed with a package of fragrant fruits, you can decorate a wall clock, or even make a new one with your own design. But before you start designing the dial, you need to think through its design down to the smallest detail and make sure that the new thing will fit into the existing interior design. So, in a room where strict straight lines predominate, it is better to limit yourself to modest decor and simply stick a few grains on a glass or wood dial. Well, if the clock decorates the living room, made in the Provençal style, then it is worth remembering burlap, wheat, lavender and other components that are associated with such rustic luxury.
Tablecloths made of burlap in combination with lace are especially chic in a rustic-style interior. Such products look unusual and luxurious at the same time, and if you approach the issue creatively, you can diversify the decor with the help of coffee beans, which will look beautiful against the background of white lace fabric and against the background of rough cloth.
Return to content
Paintings from cereals - step-by-step master classes and original ideas
An interesting and increasingly popular type of needlework is the creation of masterpieces from materials that can always be found at home or even from food. For example, paintings made from buckwheat or semolina, pasta or other products will organically fit into the interior of any apartment or cottage. Crafts from cereals are not difficult to make, so even a child can create paintings.
It is noted that calm work on the creation of such paintings has a positive effect on mood, helps fight depression and calms the nerves.
Working on paintings requires precision, concentration and helps develop motor skills. And creative work on thinking through a future painting will help develop a sense of style and artistic taste.
In the process of creating a picture from cereals, you can use various types of plants and crops. This could be peas, lentils, corn, rice, buckwheat, coffee and many others.
Also, for decoration, prepare: beads, leaves, ribbons, beads and much more.
Tools for creating a picture:
- PVA glue;
- glue moment;
- tweezers;
- needle or toothpick;
- pencil;
- gouache (if it is necessary to paint parts);
- spray varnish;
- frame for painting.
It is recommended to use thick cardboard for the base so that the base does not get wet or deteriorate during the manufacturing process.
Preparation of materials
To start working on a painting, prepare materials for work. The grains need to be sorted and all impurities removed.
If your painting will use a color other than the color of the cereal, it will need to be painted. Pour the grain of your choice into the bowl and add paint.
Mix thoroughly, making sure it colors evenly. Pour the cereal onto paper, spread it out and let it dry.
Creativity with children
Prepare a craft with your child for kindergarten or school. First, think and imagine what your future painting will be like. You should not use intricate plots or complex drawings in creative work with children. Give your child the opportunity to express himself, his imagination and make a picture with his own hands.
To begin, draw a picture of the painting onto the cardboard, try to draw it as inconspicuously as possible so that the outline of the pencil is not visible in your work.
Prepare different types of cereals and pour them into different bowls.
Start creating the painting. To get started, you need to use a brush to paint over the area that you want to fill with cereal. Now carefully sprinkle it with cereal; if the cereal is large (peas or lentils), then you need to spread it grain by grain with tweezers.
- Don't limit your imagination, improvise with different cereals, pasta or coffee.
After completing the painting, let it dry thoroughly and then spray coat it with varnish. Place the resulting picture in a frame and hang it on the wall.
Picture made from cereals and plasticine
You can make a picture with children not only using glue; if you don’t have glue at hand, ordinary plasticine will do just fine.
Print the drawing and transfer it to a cardboard base. Do not try to print a design with small details; it will be easier to apply plasticine on large parts.
Carefully, trying not to go beyond the contours, smear the plasticine of a suitable color. Fill the fragments of the picture with cereal and press lightly. The cereal will remain on the plasticine. Your painting is ready!
Panel "Mill" made of pasta
There is probably a bag of pasta in every kitchen. But from them you can prepare not only Bolognese pasta, but also a wonderful interior decoration.
To make the panel, prepare:
- base made of thick cardboard;
- PVA glue or Moment;
- cereals of different types;
- peas;
- pasta of various shapes;
- a piece of foam rubber.
- Draw a picture on the base.
- Think about what your drawing will be like, try not to depict too small details, as it will be difficult to decorate them with grains.
Start working by decorating the background of the painting. Using a brush, cover the background with PVA glue and sprinkle with semolina. Use a sponge to press the semolina onto the panel so that the cereal sticks.
You can start decorating the tree and the mill. Coat the tree trunk with glue and place the cereal on it, decorate the crown with twisted pasta.
- Make the blades from long pasta and cover the building with pea halves.
Make trails of their lentils or beans. Let the painting dry, then frame it.
Frame design
From cereals you can make not only a painting or a panel. Decorate a photo frame or picture with coffee beans or other grains, and it will harmoniously fit into the interior of any room in your home.
To decorate the frame you will need:
- frame,
- glue;
- cereals and or coffee beans that have been previously cleaned and prepared.
Before you start, decide how you want to design the frame. In a simplified version, just stick on the same grains and let dry.
You can glue coffee beans and various cereals to the base in a chaotic manner, or decorate each side with one type of cereal.
Show your imagination, and the result will not take long to arrive.
Outline paintings
The most complex panel manufacturing technique, where the cereal does not occupy the entire space, but is laid out along the frame of the picture. But the result will be amazing.
Butterfly and dragonfly
To create a panel we need:
- frame;
- base (cardboard);
- fabric or canvas;
- tweezers;
- glue;
- brush;
- coriander or buckwheat;
- white and brown rice;
- dye;
- dried flowers and herbs for decoration.
Let's start making:
- Wrap the base in canvas and secure on the wrong side;
- Apply the outline of the design to the fabric;
- Using a thin brush, apply a layer of glue to the outline of the design and, using tweezers, lay out coriander or buckwheat;
- Using the same principle, lay out the outline of insect wings, fill in the space of the wings and veins;
- Next, let's decorate the painting. Glue dried flowers and herbs in a chaotic manner.
- To make the picture sparkle with colors, paint the butterfly in bright colors. Apply paint to the cereal with a thin brush and let dry.
To make paintings from cereals, you do not need intricate and expensive materials. Be patient, use your imagination, and all the materials for creativity will be in the kitchen!