Electronic construction kits are a set of parts from which you can assemble electrical circuits and device models. They allow you to revive the results of your work by creating robots, moving machines, and fans. The child will not only learn how to design, but will also gain knowledge about circuits, transistors, and diodes.
| Name | Number of parts | Average price, rub |
| Electronic designer Connoisseur First steps in electronics K060-A | 17 pcs. | 990 |
| Electronic designer Connoisseur 180 circuits | 1950 | |
| Electronic designer Connoisseur 320 circuits | 3111 | |
| Electronic designer Connoisseur For school and home | 3990 | |
| Electronic designer Connoisseur First steps in electronics K061-B | 999 | |
| Electronic designer Connoisseur First steps in electronics K062-C | 1570 | |
| Electronic designer Znatok 70690 Alternative energy | 24 pcs. | 2090 |
| Electronic designer Connoisseur 70707 Voice magic | 49 pcs. | 3954 |
| Electronic construction set LEGO Boost 17101 Creative tools | 847 pcs. | 9380 |
| Electronic designer Connoisseur 70691 Smart machine | 31 pcs. | 5299 |
| Electronic designer Znatnik 70694 Super-meter | 57 pcs. | 4311 |
| Electronic designer Znatnik 70799 Light and Color | 1944 | |
| Electronic construction set LEGO Mindstorms EV3 Create and command 31313 | 601 pcs. | 24510 |
| Electronic construction set Xiaomi MITU ZNM01IQI Smart Building Blocks | 305 pcs. | 2990 |
| Electronic designer PinLab Positronic | 74 pcs. | 981 |
| Electronic construction set Xiaomi Mitu LKU4037GL Mi Robot Builder Rover | 1086 pcs. | 6800 |
| Electronic designer Amperka Matryoshka Z | 4990 | |
| Electronic construction set LEGO Education Machines and Mechanisms Renewable Energy 9688 | 12 pcs. | 12225 |
| Electronic designer BHV-Petersburg Dare 37742 Mobile robots based on Arduino | 266 pcs. | 10900 |
| Electronic designer Ampere AMP-S016 Mikronik | 100 pieces. | 1127 |
| Electronic designer Ampere AMP-S026 Robonyasha | 129 pcs. | 11583 |
Arduino: high-tech construction kit
Arduino is a microcontroller board with many contacts and its own processor. The board is the basis to which you can connect a fairly large number of so-called shields (from the English shield - shield), expanding the functionality of the board. It is used in process automation systems, but can also easily be used in robotics. There are many areas of activity for the Arduino board. But it gained popularity among radio amateurs precisely as an inexpensive, but simple and very multifunctional constructor.
You can make Arduino work as it should using programming. This process is easy, and even a beginner can handle it. And if the user has C++ language skills, then programming the board will be very simple and quick.
The main advantage of the board is the ability to connect an unlimited number of peripheral devices to it, thereby achieving maximum automation of work. Besides, if something doesn’t work out for a beginner, it doesn’t matter. There are a huge number of communities on the Internet with a lot of information and instructions for programming and connecting. "Arduino" for beginner radio amateurs is a great choice.
It should be noted that the designer runs on free software (for example, a special Linux distribution), so you won’t have to pay extra for the OS and software.
Homemade construction set made of thick cardboard
Have you ever thought about where you can use packing boxes made of thick cardboard? Any needlewoman and craftswoman will find a use for even the most unnecessary thing. You can make many interesting crafts from this material. But today we will focus on a very interesting constructor that is quite easy to make from packaging cardboard. Believe me, such an interesting game will captivate not only your child, but adults will also be interested in this unusual idea.
What will you need for the job? Minimum material:
- one large cardboard box (preferably clean and made of thicker paper);
- scissors or stationery knife;
- Ruler and pencil;
- PVA glue;
- watercolor paints or gouache, brush, paint containers.
So, take the box and cut it into separate parts. You will end up with a lot of cardboard rectangles. It is from all this that you will need to cut out the parts of the designer.
Using a pencil, ruler and other available tools (stencils), you need to draw the shapes that will be needed for the design. For example, such as shown in the photo.
They need to be cut along the contour. You will get: a bird, a butterfly, a flower (2 types), a leaf, a square with slots and a rectangle with slots.
Here are the same details, only in a painted version. In order for the paint to adhere well to the surface, you should dilute it with water and add a few drops of PVA glue. Don't forget to cut a slot on each part to which it will be attached.
Each construction part needs to be made in several pieces. For example, 5 yellow butterflies.
8 white flowers in the shape of stars.
24 red flowers (you can make them multi-colored).
7 blue birds.
25 green leaves (yellow, red, orange are also possible).
6 rectangles with slots - these will be flower stems.
40 squares with slots on all sides. From them it will be possible to construct a tree or a fence, a bridge across a river. That is, the brown parts are the main ones.
Make 3 gray parts to form a work stand.
This homemade and original construction set was made from thick cardboard from a box for packaging goods. To make it more durable, all parts can be varnished.
Now call your owl and start design activities. You can make a flower bed of white flowers.
As an option, the same flower bed, only made of red flowers with a butterfly and a bird.
This kind of tree can be built from brown square parts.
And this is what the tree looks like when its leaves and flowers grow, butterflies and birds flock to it.
In a word, give free rein to your creativity, fantasize and design whatever comes to mind.
By the way, such a designer can be periodically supplemented with new parts. And it is convenient to store it in the same packaging made of thick cardboard, pasted over with pieces of wallpaper.
Working with shield boards (shields)
As mentioned above, the functionality of the device is enhanced with the help of special boards - shields. These are ready-made boards for controlling a particular process. Shields are connected using connectors - pins. The range of processes that can be controlled using shields is very large: from data transmission via Ethernet to controlling electric motors. You can assemble a process control system using shields with your own hands. Arduino only distributes the role of one or another external device prescribed in the program, and the expansion boards themselves work directly.
There are times when you need to write certain data to memory (for example, GPS points). Arduino itself cannot do this, since it does not have a memory drive. This is where the shield comes in handy, adding the ability to use micro-SD cards up to 64 GB.
Oddly enough, you can even create shields yourself. For example, a simple LCD shield. Take a screen from a calculator or an old pager and attach it to the pins of the board. Of course, you still have to write a program so that Arduino displays the image on the screen. And that’s it, the homemade shield is ready.
How to design a robot yourself: testing Jimu from UBTECH
History of robots: from mechanics to superconductors
The word “robot” was written by the Czech writer Karel Capek and is derived from the Czech robota - “forced labor”. By robots we are accustomed to understand primarily anthropomorphic machines, the so-called androids. The first ideas about artificial man appeared in world culture thousands of years ago, when people mastered crafts and learned to make tools from stone and metal. The most famous of these revelations is the Greek myth of Cadmus, the legendary founder of the city of Thebes. Having killed the dragon, Cadmus sowed its teeth on the plowed field, from which an army of bloodthirsty soldiers grew. Another legend, much younger and better suited to the ideas of modern society, tells of the Golem - a clay image that was brought to life by a Prague rabbi and kabbalist as an unpretentious servant.
Pierre Jaquet-Droz, a pioneer of watchmaking and world-famous master mechanic, designed an amazing automaton doll of a writing boy back in 1773
Over time, the idea of creating increasingly complex and human-like mechanisms occurred to scientists around the world. Even the famous Leonardo da Vinci, around 1495, created a detailed drawing of a mechanical knight capable of sitting independently, moving his arms and head, and even opening his visor. And already at the end of the 16th century, the era of automata - complex clockwork dolls capable of performing a number of predetermined actions. Automatons could not only walk and perform primitive movements: in 1738, French inventor Jacques de Vaucanson created a human-like automaton that could play the flute.
With the advent of the 20th century, robots began to roughly resemble their modern counterparts. For example, during the world wars, mechanical manipulators were used as “safety sappers”, as well as for working with radioactive materials, during which a person had to avoid direct contact. The first industrial robot was released by the Japanese company Kawasaki Heavy Industries in 1968 - it was then that Japan took the first step towards rightfully earning the title of “robot capital of the world.”
Robots these days
Despite the fact that many ordinary people still perceive robots as technologies of the future, in our time they are found everywhere. First of all, developers pay attention to those areas of human activity that put people's lives at risk. This includes reconnaissance of complex terrain (for example, during a massive collapse of buildings in a seismically active area), and monitoring of underwater communications and, of course, military operations. A significant part of the research is focused around medicine: the robot is not only an excellent assistant for an experienced surgeon, but also a universal simulator of living tissues and individual body systems, on which the most revolutionary methods of healing patients can be tested.
Do it yourself
How we assembled a robot from a construction set: review of Jimu Tankbot from UBTech
Where the classic plastic construction set meets electronics, gaming robotics is born
But the scope of robots is not limited to industrial and scientific needs. A modern robot can be both a companion and a fun toy for the whole family. The Chinese company UBTECH Robotics Corp has taken on the mission of popularizing robots and, according to official information, is the first company in its country to make humanoid robots available to everyone. Their inventions are educational construction kits that combine traditional plastic parts with electronic components that can be programmed independently using a regular application on a smartphone or tablet.
Roboconstructor for all ages
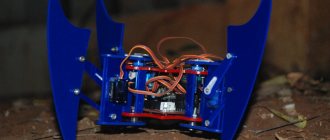
We received the UBTECH Jimu . It consists of several play sets, each of which includes a specific selection of parts and electronic components. To begin with, it is proposed to assemble several basic, pre-compiled schemes from them: in our case, this is the Explorer Kit, focused on the theme of the animal world.
The standard penguin robot model includes a full set of electronic components and more than 200 parts
In addition to 370 plastic parts, the kit includes 7 servos, a battery and a controller unit - it is with their help that the robot can be controlled in the future. All parts are numbered and sorted into special compartments, so even if they all get mixed up with each other, finding the right piece will not be difficult. The quality of the parts themselves is a little disappointing. Often plastic blanks are cut out of the mold rather carelessly: a thin “fringe” along the edges of the holes in the spare parts makes it very difficult to insert the part into the groove intended for it - you have to spend time cleaning the channel.
Box Contents
Instead of obsolete book instructions, UBTECH offers a free download of a special application, common for all sets, which will tell you step by step how to assemble and set up an electronic toy. There is support for the Russian language, and the translation as a whole is done at a very good level. Several times, instead of Russian text, Korean characters suddenly appeared on the screen, but everything could be fixed by simply restarting the application. The assembly of each set is displayed in 3D mode, so you can twist each virtual part from side to side and understand exactly how it fits into the overall composition. This is especially important when connecting servomotors - an incorrectly connected port simply will not allow the robot to move in space. However, sometimes the logic of assembling a model is not so flawless: this is especially felt in the final stages, when, due to the many details, the design itself becomes so cumbersome that each subsequent manipulation requires special delicacy.
Programming: from simple to complex
Programming is done using a simple graphical interface. In fact, we assign separate patterns to each pair of servomotors, from which full-fledged behavior algorithms are formed. For example, the funny penguin that I assembled first initially has a set of 10 basic actions: movement in a certain direction, several types of dance and demonstration of emotions. In simple terms, each action is a set of motor signals in a certain sequence.
Even an extremely simple design can perform a wide range of different actions
This, in turn, opens up wide possibilities for customization. Once all possible versions of the model have been collected, it’s time to experiment. As is the case with the popular Lego construction set, the pieces from different sets have universal connectors, so they can be combined in any order. Do you want to create your own animal, mechanism, or maybe a hitherto unknown creature? There are no problems: the application recognizes your model using a photo and allows you to configure any algorithms of your choice.
Conclusion
Jimu is a challenging but addictive toy. You can play with it for hours: fortunately, it does not require any special programming skills; you just need to get a smartphone. It is perfect for both children and adults who like to tinker with an intricate construction set in their spare time. Perhaps in the future, robotic constructors will become even more complex: it is possible that the development of artificial intelligence systems will allow them to independently learn new movements and behavioral strategies. Who knows, maybe in the future it will be possible to simply assemble the ideal home robot with your own hands?
Arduino programming
Programs for Arduino are written in the Wired language. This language is in many ways similar to C++. However, even if you do not have programming skills, it will still not be difficult to understand Wired. On forums dedicated to Arduino, programs for it are called “sketches”. Even if you are too lazy to program or can’t do it yourself, you can find a huge number of ready-made sketches.
Each sketch requires its own set of libraries. You can also search for them on Arduino forums. For beginners, there is a very good reference guide with step-by-step instructions for writing sketches for a particular process.
Making shields for Arduino with your own hands
It is not at all necessary to buy shields for Arduino. Let's say you don't have an extra $30, but you have a bunch of unnecessary parts and a great desire to automate something. No problem. The main thing is that you already have a main board with a firmware OS and the ability to write sketches.
From scrap parts you can make an Arduino circuit. All that remains is to solder the components with your own hands. Although, if the structure is supposed to be stationary, then there is no need to solder anything. Simply connect the components with wires. It should be noted that such a homemade shield for Arduino will be several times cheaper than the factory one. For example, an Arduino kit for automating the operation of electric motors will cost $80-90. But if you do the assembly yourself, you can reduce the cost to $30.
There are also many other kits created for certain areas, and they include, in addition to the main board, all the necessary parts. For example, a kit for creating a “smart” home, video surveillance, climate control or stereo systems.
Naturally, not all shields can be made by yourself. In some cases, you simply may not find the parts you need. For example, you will have to buy a shield with an extension for a memory card.
Rating
Electronic designer Connoisseur First steps in electronics K060-A
Advantages
- Quality of parts
- For the first scheme, a sufficient set
- Clear instructions
- Easy assembly
Flaws
- No batteries included
Electronic designer Connoisseur 180 circuits
Advantages
- Design
- Children enjoy collecting
- Many schemes
- Child-friendly instructions
Flaws
- No description of circuits
- Without an adult it is difficult to assemble your schemes
Electronic designer Connoisseur 320 circuits
Advantages
- Ease of assembly
- No soldering required
- Lots of diagrams included
- Quality of parts
Flaws
- Some of the schemes are duplicated
- Some diagrams are just a drawing
- No description of operating principles
Electronic designer Connoisseur For school and home
Advantages
- Detailed instructions
- Clear diagrams
- Interesting to collect
- Vivid details
- Safe
Flaws
- There are errors in the diagrams
- Some schemes need to be improved
- No protection of elements from incorrect activation
Electronic designer Connoisseur First steps in electronics K061-B
Advantages
- Interesting for children
- Easy assembly
- Convenient to use and store
- Child-friendly instructions
- Quality of parts
Flaws
- Few schemes
Electronic designer Connoisseur First steps in electronics K062-C
Advantages
- The parts fit together easily
- Everything is working
- Quality parts
- Child-friendly diagrams
Flaws
- Amplifier too powerful
- No description of operating principles
Electronic designer Znatok 70690 Alternative energy
Advantages
- Informative
- Child-friendly diagrams
- Quality of parts
- Assembly instructions as training material
Flaws
- No
Electronic designer Connoisseur 70707 Voice magic
Advantages
- Interesting designer
- Simple explanations
- The set does not match the base one
- Various schemes
- Many sound modes (songs, fairy tales)
Flaws
- No
Electronic construction set LEGO Boost 17101 Creative tools
Advantages
- You can use components not only for toys from the set
- Functional
- Compatible with other Lego series
- Visual programming
- Application in Russian
Flaws
- No Russian-language support
- The application freezes sometimes
Electronic designer Connoisseur 70691 Smart machine
Advantages
- Battery included
- Child-friendly instructions
- Design
- Quiet when driving
- Convenient storage
Flaws
- Instructions
- Voice recognition
- Few schemes
Electronic designer Znatnik 70694 Super-meter
Advantages
- Clear instructions
- Bright design
- Lots of experience and rigging
- No soldering iron needed
- The child is interested
Flaws
- No
Electronic designer Znatnik 70799 Light and Color
Advantages
- Simple schemes
- Vivid details
- Methodological kit
- Workmanship
- Safe
Flaws
- No
Electronic construction set LEGO Mindstorms EV3 Create and command 31313
Advantages
- High quality build
- Compatible with LEGO Technic
- You can create a “smart” robot
- Multifunctional
- IR remote control
Flaws
- Price
- Number of motors
- No updated instructions in Russian
Electronic construction set Xiaomi MITU ZNM01IQI Smart Building Blocks
Advantages
- Many models
- Battery operated
- Simple programming
- Application in Russian
- Compatible with other constructors
Flaws
- No
Electronic designer PinLab Positronic
Advantages
- Clear instructions
- Interesting for a child
- Lots of details
Flaws
- No
Electronic construction set Xiaomi Mitu LKU4037GL Mi Robot Builder Rover
Advantages
- Blocks are compatible with LEGO
- Good quality materials
- detailed instructions
- Controllability
Flaws
- Software
Electronic designer Amperka Matryoshka Z
Advantages
- Beautiful clear instructions
- Interesting schemes
- Everything you need to get started
- Lots of details
Flaws
- Not very clear explanations
Electronic construction set LEGO Education Machines and Mechanisms Renewable Energy 9688
Advantages
- Interesting set for learning the basics
- Instructions
- Support
Flaws
- Basic set required
- Design
Electronic designer BHV-Petersburg Dare 37742 Mobile robots based on Arduino
Advantages
- Possibility of creating independent programs
- detailed instructions
- You can control the robot from your smartphone
- Sturdy parts
- Additional modules can be connected
Flaws
- Basic knowledge required
- Price
Electronic designer Ampere AMP-S016 Mikronik
Advantages
- Interesting design
- Spare small parts available
- Instructions
- Ready-made schemes
- Clear and interesting for children
Flaws
- Small box
- Fine print instructions
Electronic designer Ampere AMP-S026 Robonyasha
Advantages
- Clear instructions
- Good for starting programming
- Lots of details
- Interesting robot
- Quality of parts
Flaws
- Price
What can you use Arduino for?
There are many areas of application for this device; let’s look at just a few examples of use.
For example, you have a car. And you need speed information to be displayed on the LCD screen of the radio. How to make a speedometer from Arduino? Very simple. We buy a board. For example, Arduino Mega 2560, Ublox NEO 6m GPS module. After that, we search the Internet for ready-made sketches for control, write it all in Arduino, connect it to each other, and everything is ready.
You can just as easily create an entire control system with your own hands. Arduino provides such an opportunity. The main thing is to stock up on the necessary sketches and details.
Using Arduino in robotics
Arduino is widely used in robotics. Due to the fact that the board can be connected to a large number of servos, motors, and sensors, you can get an entire robot made by yourself. Arduino also allows you to program it however you want. If you are interested in crawling, driving and jumping pieces of iron, then Arduino is definitely for you.
In addition, if you attach the device along with some sensors to a quadcopter, you can get a good robot observer. And this is already quite a useful development.
It is in robotics that you can show remarkable imagination, and with the help of Arduino you can bring it to life. Some craftsmen even make prototypes of the Bender robot from Futurama using this very construction kit.