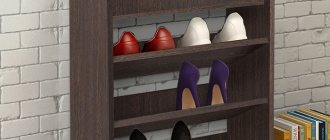
A fairly common case is when there is a decent amount of things, but there is not enough space to store them. For such situations, a design such as a rack was invented. There are a very large number of types of racks.
These can be garage or storage shelving, as well as book or kitchen shelving. This design has very decent functionality; in addition, you can create racks from various materials, of any shape and design.
The most important thing here is budget savings and low requirements for skills in handling materials and tools.
What can you use to make shelves in a pantry?
Not only the ease of making shelves in the pantry and their low cost depend on the material - the correct choice of base is the key to the durability, strength and beauty of the product. Pure wood or plywood, beams, metal profiles are only a small part of the suitable sources. To make a choice, it is worth considering the weight that the shelves must support, taste preferences in the appearance of the rack, as well as the materials available. So, the most reliable and unpretentious will be a metal profile and high-quality wood. They will provide high load capacity and will not cause inconvenience in the manufacture of storage space.
Options and drawings of shelves for pantry
Before choosing any shelving option, it is important to know the dimensions of your pantry. Armed with a tape measure, you can easily measure all the necessary data and build on them in the further selection of the scheme.
Dimensions for each structure must be calculated individually, depending on the available space
Based on the individual dimensions of the pantry, it is important to understand the height and permissible width of the shelves, the distance between them, and the most comfortable depth of the entire product. Thus, making a rack will not be very difficult. Furniture manufacturing, like nothing else, is subject to the principle “Measure twice, cut once.”
The design can be either simple or intricate - it all depends on the imagination of the manufacturer
Leaving aside the classic shelving, you can allow yourself to go a little wild in the design of your storage space. By putting more effort into the drawing and measurements, you can make with your own hands not empty shelves in the pantry, but a work of carpentry art.
Preparation
In order to make a rack, you need to decide what size it will be, what shape is needed, and also what materials it will be made from.
So, in order to make a rack with your own hands, you need to draw up a drawing. If this is problematic, you can always look at examples of drawings on the Internet. And when it is ready, you need to select materials and tools.
In order to make a simple rack, you need several planks for crossbars, boards for shelves, screws or self-tapping screws, a screwdriver, a jigsaw, a construction pencil (you can also use a regular one, the main thing is that it writes on surfaces), a tape measure, a bubble level and a drill.
Don’t forget about safety precautions when working with the tool. Use special clothing and construction gloves.
When working with an electric jigsaw, use goggles and a respirator to prevent small sawdust or chips from getting into the mucous membrane.
How to best arrange shelves
The location of the rack in the pantry depends directly on the individual preferences of the owner of the house or apartment. The purpose of the product and the dimensions of the room allocated for storage also play a role. In tight spaces, too much clutter can not only make shelves difficult to access, but also make them too vulnerable to careless movement.
Distance between shelves in pantry
This is a parameter that depends on the purpose of the rack. Shelves for jars in the pantry, made by yourself, can be placed quite close to each other - about 30 cm for convenient use. It’s another matter when the storage space is used for large tools, household appliances and large items. In this case, the distance between the racks can be increased.
What's the best way to make shelves in a small pantry?
The most rational and convenient location for shelves in a pantry would be to either install a rack along the wall or a corner version of the product. Based on individual preferences and based on available materials, the home craftsman can choose a favorable location for the structure. A good option is DIY hanging shelves for your pantry, which will not only be an interesting solution, but will also significantly save space.
This design of the rack will free up the floor of the pantry and give the owner additional shelves for storage.
How to arrange a room
Regardless of what type of cellar is used for storage, their designs can vary significantly, they must have a waterproofing barrier and a ventilation system that ensures that food is properly stored.
Let's take a closer look:
- Proper arrangement of the internal area of the cellars will allow you to correctly place all types of products that require a long storage period.
- To store root vegetables, vegetables and fruits, containers in the form of wooden boxes are used. You can make them yourself, or buy them ready-made, with racks and shelves on which you need to place the required amount of supplies in the form of rolls.
Purchasing finished racks is complicated by selecting a design of the required dimensions, and taking into account the prices for this type of product, not everyone is ready to shell out such sums; many prefer to build the structure with their own hands (read Cellar racks: recommendations for assembling structures).
Sizing
As mentioned earlier, the dimensions of the rack depend directly on the dimensions of the room. To make shelves in a closet in an apartment, it is important for a home craftsman to consider several parameters before drawing up a diagram:
- width, length and height of the pantry - for the basic layout of the drawing;
- convenient access to the shelves and low height of the rack - for comfortable use of the product without the use of stands and ladders;
- the expected number of items that will be stored on the rack, their sizes, from height to width;
- load capacity - the higher it is, the more stiffeners there should be to ensure the strength of the structure;
- The slope of the floor is an important parameter, without taking it into account you can get an unstable product.
Based on the listed parameters, the home craftsman should sketch out the most detailed drawing, or take a ready-made diagram and substitute his own dimensions. Such a thorough and responsible approach will bring successful carpentry results.
Important! If the floor is uneven, then both stands for the shelving supports and additional fastening of the shelves to the wall of the pantry can help.
The load capacity of the rack directly depends on the distribution of load on the shelves
How to extend the life of shelves in the cellar?
In order for the installed racks in the basement to serve for as long as possible, a number of simple rules should be followed:
- It is necessary to ensure good operation of supply and exhaust natural ventilation, which directly affects the maintenance of temperature and humidity in the basement.
- The basement, underground or cellar needs to be ventilated and dried well every summer, when supplies are minimal. To do this, the room is left open for 10-14 days.
- If possible, all shelves and racks are taken outside, washed with soap, and then left to dry.
- Metal shelves are cleaned of rust and then painted.
- To avoid the appearance of rusty deposits on cans, it is recommended to cover metal shelves with cardboard or film. At the same time, such protection will prevent the appearance of rust.
- Before treating wooden shelves to prevent them from rotting, they must be thoroughly cleaned of dirt and mold. Only then are they disinfected and coated with special antiseptic compounds. Before installation, they need to be soaked in drying oil.
- If the room is too humid, it is recommended to whitewash the walls with lime several times a season.
- It is necessary to place supplies evenly on the shelves of the racks to avoid overloads and possible collapses.
How to make wooden shelves in your pantry with your own hands
The classic way to design a storage space is a wooden base made of boards or plywood with additional stiffeners and supports. This is the most popular and simplest option for making shelves for a pantry with your own hands. The photo below is the result of the instructions given.
DIY design drawing of a wooden storage shelving unit
The dimensions in the diagram are approximate: they are selected in accordance with the dimensions of the room. The product consists of three ladder supports and four shelves. For additional stability, the author also added a solid platform down. Step-by-step instructions for making the structure are presented below:
- The first step is to cut 6 pieces of timber - these are vertical supports for future ladders. The dimensions correspond to the desired height of the product. Another component at this stage will be the crossbars of the supports - their length is based on the expected depth of the rack. Since each ladder will have 5 perpendicular elements, a total of 15 of these blanks will be required.
- Another step before assembly is preparing the bars for future shelves. Their size corresponds to the length and width of the desired rack. All raw materials must be sanded and treated with wood primer and paint for durability and strength.
- The next stage is the long-awaited assembly. A simple algorithm works here. 2 long support beams are placed on a flat surface, and partitions under the shelves are inserted between them. Secure with self-tapping screws.
- Final assembly. The photo shows that for additional stability, the rack is adjacent to a wooden wall. If possible, you can make such a mount yourself. To do this, small squares of 4 by 4 cm must be placed between the surface and the product, and then simply fixed with self-tapping screws.
Important! These kind of squares between the wall and the shelving will help to place the product close to the surface with the baseboard: nothing will interfere, and the structure will become more stable.
- The final step is installing the shelves. They are located in the same way as in the photo above: secured with self-tapping screws. It’s easy to make shelves from bars in your pantry with your own hands. This quick and easy process will not take much time, but will bring a lot of pleasure.
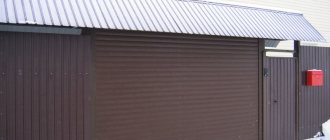
How to make shelves from a profile in a pantry
Making a rack using metal profiles is suitable for storage rooms, where the walls are easily subject to self-tapping screws.
Simple shelf design using metal profiles
There are several nuances in the execution of this version of the product. For ease of installation, it is fixed under the ceiling and near the floor; it requires fastening to the walls. If this can be done in a pantry room, then the rack will make the owner happy with its simplicity and conciseness. Step-by-step manufacturing instructions are below:
- Metal profiles three meters long will be placed on the wall as follows. A total of 8 supports for the shelves are required. If necessary, the dimensions of the diagram must be adjusted to the dimensions of the storage room.
- The dimensions shown in the diagram below can also be adjusted. At this stage, it is necessary to attach metal profiles to the wall, floor and ceiling of the storage room. The framework of the structure begins to emerge.
- Install additional perpendicular profiles on vertically fixed workpieces. They must be parallel to the wall ones. Thus, at this stage of work, the home craftsman needs to have three supports on the wall, two vertical ones from floor to ceiling, one from the beginning of the shelves to the ceiling, as well as three horizontal supports. The 8 profiles stated at the beginning of the instructions are used up - the shelving frame is ready.
- The next stage is creating shelves from plywood. Three blanks with a width of 500 mm are cut from a piece of 3000 mm. The quantity and sizes are selected individually.
- The final stage is the installation of plywood shelves on a structure made of metal profiles. Here you need to secure the bases with self-tapping screws and the rack is completely ready.
Quick and easy production will not ruin the home craftsman, but will provide additional storage space for tools, cans and other household items.
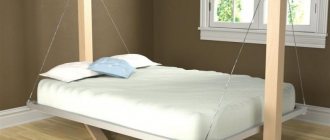
How to make hanging shelves in a pantry with your own hands
Wall shelves always look light and laconic. This option is perfect for lovers of high-tech style and minimalism. The whole secret of such products lies only in installing them on the wall. Read more about how to create this piece of furniture and install it correctly in step-by-step instructions:
- The first stage is making the shelves. In this design, they must be wide enough so that the mount fits securely to the product. Plywood must be cut into equal pieces - the dimensions in this case depend entirely on individual preferences.
- You should get one long and narrow blank - the front side of the shelf, two wide boards for the base itself, two small side ribs where objects will be located, as well as three bars - they will become jumpers.
Important! The side edges of each workpiece are sharpened at 45 degrees for easy assembly of the parallelepiped shelf.
- Having provided additional convenience with masking tape, you need to fold the shelf around three bars already attached to the base. In this position, they must be glued and secured with weighty objects until they dry.
- The next step is to secure the side panels in place of the shelf ribs. This can also be done using glue. The blanks are cut from the same plywood with a 45-degree edge.
- For aesthetics, treat the joints with wood putty - they should become invisible. Sand the shelf. If desired, you can prime, paint and varnish.
- For fastening, you need to take metal bars or profiles. They must go inside the shelf cavity. Weld or fasten the workpieces as shown in the photo. Paint as desired. Place them on the wall.
- Place the shelf on the metal fastener.
This design of a wall rack will not take up much space and will be an excellent design solution. Moreover, the load capacity of the structure is several tens of kilograms.
Creating a bookcase
As soon as we have prepared all the necessary preparations, we can begin to consider in detail how to make a wooden shelf with our own hands:
- We increase the width of the sides at the bottom and round the edges of the shelves. Now we begin to work with the parts of the boards cut off at the initial stage. Using glue and dowels, we fasten the side parts, increase the width of the side posts from below to 40 cm. This step will give stability to the bookcase and increase its depth. To make the edges of the racks more rounded, we process them using a router.
- We cut the shelves 70 cm in size, round their front corners with a jigsaw, and process the ends with a router.
- We make wide shelves. To make them, you need to connect two boards using dowels, clamps, and wood glue. The width of each shelf should be exactly 40 cm.
- We cut out the protrusions on the shelves. They are necessary to give the structure special strength. Use a hand saw to cut out rectangles on the shelves 10 cm deep from the rear edge and 2.5 cm from the side edge of the shelf. You also need to cut additional tabs for the topmost shelf.
- Fitting and sanding. We carefully check how compatible all the parts are visually, but there is no need to fasten them yet.
Important! If inconsistencies are found, clean the protrusions and grooves with a chisel. Using a grinding machine, we process all the parts, and clean the bevels and corners by hand.
- Pre-treatment of wood. If you prefer, for example, the idea of making a wooden bookcase with your own hands, you will have to prime it and apply a finishing coat before starting to work with the material.
Important! In the case of sleeper, it is treated first with tung oil and then with varnish. All ends and grooves must be left perfectly clean.
- Assembling the shelf. We glue the joints, fix each shelf on both sides with clamps. We make holes for dowels directly into the shelves through the side posts. Immediately before installing the dowel, glue should be applied to the hole itself and on top of it. We do the same with each shelf.
- Once the glue is completely dry, use a reciprocating saw or hacksaw blade to cut off the protruding parts of the dowels. To avoid damaging the surface, tape it around the dowels with masking tape.
- All cuts must be cleaned with sandpaper and coated with varnish.
The product is ready! All that remains is to install it in any convenient place.
Over time, a household accumulates so many necessary things that the existing cabinets are sorely lacking. This problem is especially acute for owners of small houses and apartments. A rack will help out - a universal shelf structure of any size and for every taste. We recommend ordering the wood-polymer composite that you will need on the website https://mydecking.ru/.
Since you can put it absolutely anywhere: in the nursery, in the office, in the garage, etc., there are an endless number of manufacturing options. The design of any rack includes vertical frames, crossbars and shelves. You can build a simple rack yourself in the basement for storing jars with blanks or in the garage so that all the available tools are neatly stored on the shelves. In addition to convenience and aesthetic appearance, the rack also significantly saves space.
Of course, you can install a simple frame with shelves in the basement, and this will be enough, but to decorate your home interior, you will have to try. In rooms with high humidity (basement, garage), the use of metal will be more rational and practical, while wood is better used in dry rooms. Even when treated with an antiseptic, wood will not survive long in conditions of constant dampness. Preference is given to natural wood (pine, mahogany, oak); laminated chipboard, OSB board and plywood are suitable.
Chipboard rack with dimensions Photo of OSB rack
The dimensions of the rack depend on its purpose, the design depends on the desires of the home craftsman. It is convenient when the structure is built up to the ceiling: the storage area increases and it will be possible to attach the rack to the ceiling for greater stability and reliability.
For “weighty” items: books, dishes, jars of pickles, the optimal shelf depth is 25 cm, for light items – up to 50 cm. You should not make the shelves wider, as it will be difficult to reach items placed against the wall. The length of the shelves also depends on the load: for light items they can be made up to 1.5 m, but for storing heavy items you will have to limit yourself to 90 cm, otherwise the shelves may bend or even break.
Rack drawing with approximate dimensions
You will definitely need a drawing in order to beautifully and correctly plan the position of the shelves, taking into account the weight of the items that will be laid out on the shelves. The distance between them is from 30 to 60 cm; You can make the lower shelf higher if large items will be stored there. The top shelves are for boxes with light items.
Scheme for making an indoor rack for aquariums