A characteristic feature of Japanese philosophy is harmony in everything, but above all, the harmony of man and nature. To convey the atmosphere of this unity, gardens of very original design began to be created in the Land of the Rising Sun in the 10th century. Subsequently, they became known throughout the world and do not lose popularity to this day. Our summer residents also liked it.
You should immediately pay attention to the fact that the “skeleton” of a Japanese garden is water, and the “blood” is water. The Japanese themselves think so. There is also a third important component - . But since water, stones and plants can be found in other gardens, the peculiarity of the Japanese one lies in the arrangement of these elements and the use of symbolic attributes.
Tsukubai
This mysterious word hides the traditional bowl for washing hands and face before the tea ceremony.
Tsukubai is made from solid untreated stones. Decoration with hieroglyphs or symbols characteristic of Japanese spiritual culture is acceptable. Outwardly, tsukubai resembles a small well. There should be a bamboo ladle next to the bowl.
Of course, Japan has its own strict rules for the construction and location of gazebos. In the dacha version of the Japanese garden, you can neglect them and install a gazebo so that it does not obscure the plantings and fits organically into the overall picture of the site.
All the new DIY concrete crafts for the garden
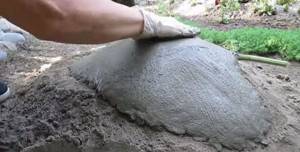
You can make various garden crafts from concrete. Some of them are ubiquitous, others are new. When you decide to create your own jewelry, pay attention to:
1. Ladybugs. They are easy to form, and then you just need to decorate them in bright colors so that they can create a special atmosphere in a flower bed or along a garden path;
2. Flower pots, decorated with rope or painted in various colors;
3. Bio-fireplace, which will become a real decoration of the recreation area;
4. A beautiful dog.
There are quite a lot of execution options. It is worth dwelling on some of them in more detail.
Stone sculptures
in a real Japanese garden they are never placed randomly or randomly.
And the sculpture itself cannot be anything. Each has its own meaning. Buddha - peace and tranquility, dragon - strength, lion - protection, turtle - longevity, crane - the desire to know the truth, etc. Sculptures in the Japanese garden. Photo from iStock.com/PicturePartners Leiden, Netherlands
If you are not immersed in Buddhist philosophy, then it is better not to overuse this kind of symbols and buy something neutral. Benefits of all kinds can be found without much difficulty. One “but” - for a Japanese-style garden they should be as natural as possible and painted in one tone, no riot of colors.
Cement sheet for decoration
A leaf can act as a decorative element. To make it, you can take a mold or select a plant leaf of the appropriate size. In the latter case, the prepared cement mortar is applied to the sheet and left to dry.
After this, the natural leaf is carefully removed using a suitable tool.
If you are going to pour pebbles into a leaf or plant a stone rose, then it should be concave, like a plate.
To do this, the sheet is placed on a pile of sand, and concrete is smeared on top.
From concrete you can make various decorative products that can become a real decoration of the garden. Choose the right option for your site, and you will have a piece of paradise in which you will spend a lot of time.
Lanterns
What is a Japanese garden without? Usually they are placed along paths on the way to a gazebo, pond or other significant object. All lanterns are single-colored; there are no colored ones in a Japanese garden. But there are options for forms:
- Tachi gata
are tall stone lanterns that look like small pillars. Their height should not exceed 3 meters. Tachi gata can illuminate a large area; - Katsuga
is a lantern that is very similar to the tachi-gata, but differs from it in the abundance of carved decorations; - Ikekomi-gata
are shaped like a pillar. They are dug into the ground along the edges of the paths; - Oki-gata
are the most compact flashlights. Their goal is to create a mysterious twilight. Oki-gata can be placed along the banks of a garden pond, on stones or among plants; - Yukimi-gata
, or "snow lantern" is a squat lantern with a wide roof. Thanks to the shape of the roof, it is called snowy, because during snowfalls the snow remains on it and is effectively illuminated.
Of course, due to climatic conditions and cultural differences, it will not be possible to recreate a real Japanese garden on a summer cottage. But you can get as close to the original as possible thanks to these design elements.
What do you think about Japanese-style gardens?
Japan has many of the most beautiful and varied gardens, striking in their combinations and proportions of selected components. A Japanese garden can be defined as a small landscaped area of Japan, and each element of this small model surprises with its special appearance.
One of the main places in any garden is occupied by various garden structures. Typically made from materials such as metal, bamboo, clay, wood and stones.
Japanese gardens are decorated with such objects as: bridges, hedges, benches and stone garden lanterns (or). However, this is certainly not a complete list of decorative elements of the garden.
Japanese garden lanterns are placed in different places in the garden, in particular near ponds, along paths that cross the garden, next to bridges and bridges; near traditional buildings - Tsukubai, which are stone ceremonial bowls filled with water.
The number and height of Japanese stone garden lanterns placed in the garden depends on the size of the area and the personal taste of the owner.
For this reason, they can be divided into several types:
≈ The first place is occupied by a lantern called “Tachi-Gata”, which is translated from Japanese as “pedestal”. The purpose lies in the word itself - they are used to illuminate the place where the owner of the house conducts conversations with the most honorable people.
What sets Tachi-Gata apart from other types of stone garden lanterns is its height (from 1.5 to 3 m), which is why they are installed only in gardens with a vast territory.
≈ The second type of Japanese garden lanterns is “Ikekomi-gata”. In Japan, a place is often reserved for this type of lantern near Tsukubai. However, some Japanese also install this type of lantern in other places.
In Japan, there is a legend according to which the lantern must be positioned so that the beam of light falling on it is certainly directed towards the ground. Therefore, as a rule, garden plots open to the sun are selected for the installation of “Ikekomi-gata”.
≈ Another lantern - Katsuga. It is similar to the Tachi-gata model, but has more ornate carvings. It is made from at least four separately cut elements.
≈ Another type of stone lanterns is called “Yakimi-gata” or “Yukimi-gata”, which means “appearing to be covered with snow.” The advantage of such lanterns is roofs with a square or round shape. The basis is the stands, which are made of stone or concrete.
Another advantage that deserves attention in this type of lantern is the frosted glass, which gives a smooth glow to the sunlight falling on it.
It is thanks to the frosted glass that this type of Japanese lamp received its name - it seems that the stones are covered with snow. These lights are usually placed near the edge of bodies of water.
≈ The fifth type of Japanese lanterns differs from the rest in its miniature size - and that is why it was called “Oki-gata”, which means “small lanterns”.
It will perfectly complement the landscape of a Japanese garden, in areas located near the path or on the shore of a pond. But in a small garden, this one can decorate the courtyard of the house.
As you may have guessed, the distinctive property of all the listed types of stone lanterns is their design and height, which varies from 0.5 - 3 m. But if you complement the landscape with a beautiful tree planted behind the stone lantern, you will only emphasize its size.
For example, for this you can take maple, which fits perfectly into the landscape, especially in autumn, when the leaves turn several shades of red and yellow. And against the background of such leaves, the grass looks even greener, and the stones look like gray guards of the garden.
These stone lanterns are especially beautiful at night, when they illuminate the surrounding view with the light of the candles located inside them. And immediately everything around transforms and takes on a mysterious look. It is in the light of such lanterns that the Japanese walk along the path to the house for tea ceremonies - Chashitsu.
A Japanese garden lantern is an unusual design solution that allows the owner to demonstrate his taste and ability to select non-standard solutions in matters of garden decoration.
Flowerpots made of cement from rags and fabric
If you want a garden figurine to perform an additional function, you should pay attention to a flowerpot, the manufacture of which will require cement, an old rag, a strip of fabric and a container. If the latter has an original shape, then the finished product will also have a non-standard shape.
Advice! To get a flowerpot with decorative walls, you can take unnecessary tulle instead of fabric.
The manufacturing process is as follows:
1. The prepared container is placed on a support with the bottom up. The support should not protrude beyond the contours of the base;
2. Liquid cement mortar is prepared. The fabric is placed in the solution and thoroughly soaked. The presence of poorly saturated areas is unacceptable;
3. Place a rag over the container and carefully attach it to the base, tightening the strip of fabric. If you want to beautifully decorate the top edge of the finished product, the edges of the fabric are lifted up and secured with safety pins or other improvised means;
4. The workpiece is left for a day for the concrete to set. After 24 hours, the pots are removed from the container and placed on the floor. The ribbon is tied higher to give the flowerpot its final shape. I carefully bend the upper elements, achieving the desired result.
Attention! If desired, the product can be painted in different colors using spray paint to add brightness to the flowerpot.
Types of flashlights
In recent years, the popularity of Japanese stone lanterns has increased significantly, but not many people know that in ancient times such lanterns were used in temples and monasteries to protect fire from various external factors. They began to be used for practical purposes only in the 16th century.
There are several types of similar flashlights
When choosing Japanese lanterns, you need to start from the fact that they are produced using ancient technologies, thanks to which in the daytime they serve as a beautiful and elegant decoration of the garden, and at nightfall they perform their main function of illuminating the area. The main types of Japanese lanterns include:
- "Tachi-gata." Translated from Japanese, their name translates as “pedestal”. Already from the name one can draw a conclusion about their purpose. Usually they are installed in those places where the owners meet their guests. They differ from other types of lanterns by their impressive height, which ranges from 1.5 to 3 m. They fit perfectly into the garden landscape over a large area.
- "Oki-gata." Their distinctive feature is their small (miniature) size. They look great in modest-sized gardens. Most often they are installed near flower beds and paths.
- "Ikekomi-gata." Open areas of the garden are chosen to install these lights. This is due to the legend that says that the rays of light that fall on the lantern must be directed towards the ground. Such decorative elements are especially popular among those who are interested in Eastern philosophy and culture.
- "Yukimi-gata." The feature of this type is the presence of a round or square roof, thanks to which the fire is protected from snow and rain. Often such lanterns are made with closed frosted glass to give a greater glow effect.
- "Yamadoro-toro." This is one of the most unusual decorative solutions. Such lanterns are made of roughly processed stones and are installed in remote (shady) corners of the garden. Their peculiarity is that over time they become overgrown with greenery.
- "Kasuga-toro." This is one of the largest and most elegant types. Such lanterns are usually decorated with beautiful carvings and installed near the entrance to the garden. They look most original in pairs.
How to place stones in a Japanese garden?
When making a Japanese rock garden with your own hands, you need to pay special attention to how the stones are placed. Their location must be diagonal, parallel or almost parallel to the main line of the garden. For this, it is recommended to use untreated stones, which may be covered with rust and moss, this makes the overall appearance more natural. Those that have been corroded by wind or water will work well and will often turn greenish, reddish, bluish, whitish or brownish in color.
Regarding the number of stones - it can be different, but it should always be odd, you can take 3, 5, 7 pieces and all of them need to be grouped according to the “3-2-2” or “2-3-2” scheme. In most cases, the composition consists of three stones (one large stone and two smaller ones are taken for this purpose). If five or more pieces are used at the top of the composition, then they should be made in the shape of a triangle, they should have a single common point (then it can be omitted).
The stones are installed on the surface; they can also be partially buried in the ground at an angle to the surface of the earth. There is free space between them, it can be filled with various herbaceous plants or shrubs, it all looks very beautiful.
Sidewalks and paths made of stones are an integral part of the Japanese garden; in order to make them, you need to choose stones that have one smooth side, this side remains on the surface, and the part that is uneven is buried in the ground. The long axis of each of these stones is perpendicular to the path.
Return to contents
Manufacturing instructions
Japanese lanterns can be purchased ready-made or made yourself. To make lanterns with your own hands, the best material is foam concrete. Such blocks are much easier to process than brick and other materials.
Lanterns are made (cut) not monolithic, but consisting of several parts: dome, roof, base, spire. The finished parts are glued together using facade putty, which practically does not differ in color from foam concrete, and therefore the joints in the finished product are practically invisible (it is not advisable to use concrete).
The main tools for work are a hacksaw, files and sandpaper. If there is no experience in carrying out this kind of work, then at the initial stage it is advisable to make drawings.
It takes experienced specialists from 10 to 14 days to make one flashlight.
When the product is ready, it is coated with acrylic paint. The color choice is chosen so that the lantern fits perfectly into the garden design.
Japanese lanterns are not only products that act as lighting devices, they also serve as decoration for any garden, local area and summer cottage. Their main task is to create additional comfort, a calm and sincere atmosphere.
Japan has many diverse and beautiful gardens, which amaze with their proportions and combinations of selected materials. can be called a small piece of the Japanese landscape, and every detail of this miniature model impresses with its special landscape. Not the least place in any garden is occupied by various garden structures. Typically, they are made from materials such as clay, stones, bamboo, metal, and wood.
In Japan, the use of (a symbol of nobility) in various decorative compositions adds a special sophistication to them, which fits perfectly into a garden that is thought out to the smallest detail. To do this, it is not processed and most often the bark is not even removed. But the Japanese prefer to use stones only those that have an irregular and unusual shape. After all, as you know, in nature there are no stones of ideal size and appearance. Although, if necessary, it is possible to slightly change their shape. Instead of clay, tiles are sometimes used in Japan, while concrete is used only mixed with other natural materials.
Japanese gardens are decorated with the following structures: fences, benches and stone lanterns (lamp). This, of course, is not the entire list of decorative garden elements.
Japanese stone lanterns are placed in various places in the garden, in particular along the edges of paths crossing the garden; near bridges and bridges; at the edge; near traditional structures - tsukubai, which are ceremonial stone bowls filled with water. The height and number of stone lantern models placed in the garden depends on the taste of the owner and the size of the garden plot. For this reason, they can be divided into four types.
The first place is rightfully occupied by “Tachi-gata” lanterns, which means “pedestal” in Japanese. This word itself contains the purpose of such lanterns - they are used to illuminate the place where the owner conducts conversations with the most honored guests. “Tachi-gata” are placed only in gardens that occupy a large area, since they are large in height (from 1.5 to 3 m).
The second type of Japanese stone lanterns is “ikekomi-gata”. This type of lantern in Japan is often reserved for a place near the tsukubai. However, some Japanese erect this type of lamps in other places. The chosen location in this case depends on the wishes of the owner or the decorator hired for this. In Japan, there is a legend according to which the lantern is positioned so that the beam of light falling on it must be directed towards the ground. Therefore, usually, areas of the garden open to the sun are chosen for installing ikekomi-gata lanterns.
The next type of stone lanterns is called “yakimi-gata”, although some pronounce it a little differently (“yukimi-gata”), but this does not change the meaning of the word - “appearing to be covered with snow.” Roofs that are either round or square are considered the highlight of such lanterns. The bases of such lanterns are stands, which are made of stone or concrete. Another noteworthy part of this structure is the frosted glass, which gives a soft glow to the sunlight falling on it. It is thanks to the use of frosted glass that this type of stone lanterns received its name - it seems that the stones are covered with snow. Typically, such lanterns are placed at the edge of bodies of water.
The fourth type of Japanese garden lamps is distinguished from the others by its small size - and that is why it received the name “Oki-gata”, which means “small lanterns”. It perfectly complements the landscape of areas of the Japanese garden located on the shore of a pond or near the path. But in a small garden, such a lantern can take its rightful place, being placed in the courtyard of the house. In such conditions, he will seem like a king among his retinue of flowers and shrubs.
As you may have already guessed, the distinctive feature of all of the listed types of stone lanterns is their appearance and height, which ranges from 0.5 to 3 m. But by adding a beautiful tree planted behind the stone lantern to the landscape, you will only emphasize its size. For example, you can use maple for this, which fits perfectly into the landscape, especially in the fall, when the leaves turn several shades of yellow and red. And against the background of leaves, the grass seems even greener, and the stones seem like gray guardians of the peace of the garden.
Stone lanterns are especially good on a dark night, when they illuminate the surrounding landscape with the light of the candles inside them. And immediately everything transforms and takes on a mysterious appearance. In the light of just such lanterns, the Japanese walk along the path to the tea house - chashitsu.
Making stone lamps is a very labor-intensive process, but extremely interesting. First, the chosen composition of the desired stone lantern is considered; here it is important to determine the main stone - the base, which, together with the other two stones, should form a divine triad.
Japanese stone lantern
When choosing the right stones, the Japanese are guided by the following principles: it is necessary that each stone forms a certain “face” and “pose”, that is, you need to see what place in the composition a given stone can occupy. On this occasion, the following lines are given in the book “Senzai Hise”: “stones run away and catch up, lean and support, look up and down, lie and stand.” This statement makes it clear in the best possible way what kind of stones should be used when creating a stone lamp.
Once this task is completed, remember that a lot of patience and time is required, as the stones must become an integral part of the landscape. Installing the stone in the chosen location is the first step. If there are pebbles (sand or moss) on the stone, then it must be given time to “unite” with the pebbles, putting down “roots” into it, or, in other words, “enter into an imagined image.”
At the same time, the designer takes into account the fact that stone lanterns are part of the cultural tradition of Japan, which means their appearance must be reproduced exactly. Therefore, a true Japanese designer will never come up with any new original forms. Harmony with the climate of the area in which the garden is located also plays an important role here. For this reason, in most cases, lamps are made from stones from the local area.
The second step is to complete the “building” of the stone lantern. The remaining stones are selected to be the same texture and color as the base stone. Moreover, in its completed form it should resemble a scalene triangle, at least remotely. According to the old custom, it is necessary that the long side of the triangle points to the “front” side of the house (where the entrance to the garden is located). To feel the right composition decorating the garden is the designer’s goal.
For those who want to create their own corner of the Japanese garden and test their strength in such art, we will tell you how stone lanterns are made, describing this process gradually, step by step. We just warn you that it is unlikely that you will get an exact copy, unless after a lot of practice over several years. And, frankly speaking, such a task is not facing us.
So, to make a stone lantern you will need stones of different sizes, clay and a couple of candles. The stones must be of a certain shape and color, and to determine this, rely on intuition and use your imagination, not forgetting the traditional rules. The following types of stones are used to create stone lamps: vertical, recumbent and flat. In this case, you will need: one round (or square) stone, one flat, several fist-sized stones.
Japanese lantern on the shore
Once all the necessary components have been collected, you can begin the process of turning the scattered stones into a lantern. First of all, the flat stone must be placed on the ground so that it does not wobble. As a last resort, you can loosen the soil or pour in enough sand to fix the stone. After installing the base stone, you need to gradually and very carefully make a column of stones (the same ones the size of a fist) and secure them together with clay, covering all the cracks that have arisen with it. Then you need to wait until the clay is completely dry. There should be at least four such columns, the most important thing here is not to get carried away, because you need to put candles inside.
Place the round stone that will act as a roof on the posts after they are firmly on the base. Thanks to the round stone, the candles will not go out in rainy weather, only if there is no wind. If you do not have a sufficient number of small stones at your disposal, you can replace them with blocks cut from wood and coated with clay. If you do not coat it with clay, the burnt bars will gradually be broken by the “roof” of the lantern.
If you notice an error, select the required text and press Ctrl+Enter to report it to the editors
It would perhaps be appropriate to continue the conversation about Japanese gardening with a story about lanterns and lamps in the garden. Actually, I planned to time this post to coincide with the installation of a lantern in our garden, to illustrate it with step-by-step pictures, but due to bad weather, our garden work is being postponed for now. Therefore, I will make a short post about our lantern a little later. For now, I’ll tell you in general.
Traditional lanterns, whose common name is toro
, perhaps the most recognizable element of the Japanese garden. Often designers, when creating an Asian-style garden, first of all install such a lantern, immediately giving the composition a Japanese flavor. Thoros come in bronze, wood and stone. Stone ones are most famous. They are preferred because, of all materials, stone combines best with other elements of the garden.
These lanterns came to Japan from China along with Buddhism. Initially, lamps of this type illuminated the space near temples. In their form they repeat the outlines of temple architecture. Having become one of the design elements in monastery gardens, they then migrated from there to secular culture.
Wooden lantern
And this is a plastic imitation for a budget option
Bronze standing lantern
Hanging bronze lanterns.
Stone lanterns.
As I said above, stone lanterns are the most popular. They have many variations and should be discussed in more detail. All stone lanterns are called gata. There are four main types of these lights. This is tachi gata
,
yukimi-gata
,
ikekomi-gata
and
oki-gata
.
Each group also has its own variations. Tachi-gata
are lamps on a high column-like leg. Such a lamp is installed near the gate leading to the tea garden, at the doorstep of the house. At a fork in a garden path or other nodal points, a tachi gata is usually installed on a high stepped pedestal.
katsuga lantern
similar to Tachi-gata, but has the ornate carvings. It is made from at least four separately cut parts.
Yukimi-gata
- squat lanterns with a very wide flat lid. The task of a Japanese gardener is to create a beautiful garden at any time of the year, in any weather, including winter. The shape of the yukimi-gata is designed to collect caps of snow, effectively illuminated by a light hidden under them.
Yukimi-gata on two supports
Ikekomi-gata
- these are low lanterns designed to illuminate tsukubai stone bowls standing on the ground, or they can be installed to spotlight a small decorative element, such as a statue.
The lantern in the first photo is covered with moss. In a Japanese garden, it is highly valued when things have traces of time on them. Preference is given not to new accessories, but to those covered with moss and patina. Often lanterns or other small forms are artificially aged. This is consistent with the story of the tea master Sen Rikyu, who could not understand what he did not like about the stone lantern in his garden. Finally he realized that the shape of the lantern was too artificial and did not fit into nature. Then he knocked off the edge of the lantern with a hammer and, destroying its ideality, made it fit in the garden.
The smallest of stone lanterns - oki-gata
. They are designed to be installed on the shore of a reservoir so that their light is reflected in the water.
In the Japanese garden you can find lanterns assembled from simple unprocessed stones, selected according to shape and size. in their simplicity and naturalness, they reflect the simplicity of Zen ideas.
A few words about the pagoda-shaped
. They are always square in cross section and the number of tiers will necessarily be odd. Such a pagoda in the garden can be seen on natural elevations, on a hill.
Next time I will tell you the role of stone in Japanese gardening traditions.
TOP best gifts for a guy (husband) on Valentine's Day
08.09.2020
Light in the apartment according to feng shui
08.09.2020
Getting ready for summer: the best anti-aging face masks that give a super effect!
08.09.2020
Concrete ball for garden design for beginners
If you have never made concrete products before, you should try making your own balls. They can be safely used to decorate a garden of any size.
You should not think that forming a sphere is quite difficult, and therefore you will not cope with the task. It is enough to have an inflatable ball or fitball. They will act as the basis for the future ball.
You will also need a deep bowl to use as a support. Its diameter should be much smaller than the prepared ball. In addition, it is worth preparing a roll of packaging film and cotton cloth.
The work is performed in the following sequence:
1. The ball and/or fitball is placed in a bowl. If it is light in weight, it is worth placing a stone inside. This will prevent the workpiece from rolling during the ball manufacturing process. Begin to carefully wrap the base with packaging film. You should end up with several layers that fit tightly together. A small gap is left in the place where the valve for inflating the ball is located;
2. The prepared cotton fabric is torn into separate fragments. Their size directly depends on the area of the base. The larger it is, the larger the pieces can be formed. Cement mortar is being prepared. To do this, cement is mixed with water, achieving a mixture with a fairly liquid consistency. The mixture is thoroughly mixed until the binder is completely dissolved;
3. Fragments of cotton fabric are placed in cement mortar, ensuring their impregnation with the prepared mixture. The soaked and slightly wrung out fabric is placed on the base, achieving uniform distribution over the surface. Then they take the next fragment and glue it to the base, overlapping with the previous one, ensuring that the segments are in close contact. The concrete solution is carefully smoothed, achieving uniform distribution over the surface and ensuring saturation of the fabric. The blanks are left for 3 – 4 hours for the concrete mixture to set;
4. A concrete mixture is prepared, consisting of two parts sand, one part cement, one part construction putty. First, the dry ingredients are thoroughly mixed together, then water is added to obtain a plastic mass. The surface of the future ball is sprayed with water. For this purpose it is worth using a spray bottle;
5. The concrete mixture is applied to the base and carefully distributed over the surface to form a layer of uniform thickness. The layer being formed should be quite smooth. The workpiece is left for two hours for the top layer to set. Then the surface is re-coated with concrete mixture, carefully smoothing the composition over the base;
6. The ball is periodically sprayed with water to prevent cracking of the surface during the hardening of the concrete mixture. After a day, open the valve and bleed all the air from the ball or fitball. Remove the form from the concrete product. The packaging film is also removed. Focusing on the imprint formed by the bowl, remove excess material using a construction knife. Thanks to this, the product will stand steadily on any surface;
The finished concrete ball is placed in the selected part of the garden.
Attention! To prepare the concrete mixture, you should use cement M400 and higher.
Instead of a solid concrete figure, you can form its aerial counterpart. In this case, a balloon is used instead of a ball, and the fabric is replaced with thick threads.
Source
https://youtu.be/-ETq6Ye0hsg
The latter are thoroughly impregnated with concrete mortar and then wound around the ball. After the mixture has hardened, the ball is popped by piercing it with a toothpick, and its remains are removed from the resulting figure.
Solution composition:
- 1 part cement and sand mixture
- 1 part tile adhesive
- water
1. Mix the cement mixture with a consistency like liquid sour cream.
2. Soak the rope in water, then wring it out and dip it into the mixture.
3. Wrap the rope around the ball. We wear gloves. It is better to take the thread in small pieces, it makes it easier to work.
4. Leave to dry. When the balloon is completely dry, pierce the balloon and take it out.
5. Remove excess concrete that has clogged in the space between the threads with a stick or screwdriver.
6. To make the ball more durable, impregnate it with a primer. Color as desired.


