Making a pump with your own hands is not at all an insurmountable task, as it might seem at first glance. The device is not complicated; there are no intricate parts that cannot be made with your own hands. Let's take a closer look at the design of the pump and how to make a column in a well.
On the water intake pipe pos. 2 Fig. 1 (well), a check valve pos. 3 is installed. its purpose is to prevent the flow of water back into the well by blocking the hole. When the handle pos. 7 is lifted, the piston pos. 4 rises through the connecting rod pos. 5 and draws water inside the pump housing. In this case, the check valve rises due to the created vacuum and allows liquid to enter. When the handle stops, the pressure is equalized and the check valve, under its own weight, closes the hole in the intake pipe.
When the handle is moved down, the petal valve on the piston opens and water from the lower part of the pump housing enters the upper part above the piston. During the next cycle of moving the handle, the next portion of water enters the lower part, and pours out from the upper part through the hole in the body.
§ Drilling swivel, rods and locks
At first, it is recommended to purchase a ready-made drill swivel and drill rods. In the manufacture of these parts, processing accuracy is very important, since the loads on these units are large. We do not recommend making a swivel from improvised means. One slightest inaccuracy and it will fail.
If you decide to order a swivel from a turner, you will need to find a qualified specialist, and preferably with modern CNC machines. The swivel and locks will require strictly defined types of steel. For locks – 45 steel. For the swivel – 40X. Download a drawing of a homemade drill swivel:
Attention! Private traders will not do high-quality hardening! After hardening, grinding will be required. Use HDTV hardening, but this is an expensive procedure.
You can save money by purchasing ready-made units, but finding a suitable specialist will take a lot of time. But it's worth it - homemade parts are much cheaper than purchased ones. To get started, purchase parts for samples. Turners work better when they have drawings and templates on hand.
If you have factory samples, it will be much easier to check the quality of work. For example, if a turner made drill rods (locks), then you take factory-made and home-made parts and screw them to each other - check the quality of the thread. The match must be 100%!
Do not buy spare parts by delivery. This is necessary so as not to buy a marriage - this, unfortunately, happens. And most importantly, if you order delivery from afar, you can wait more than one month.
We recommend making the threads on drill rods trapezoidal - it is no worse than a conical thread, but if you then order turners, it is more difficult to make a conical thread.
If you make or buy locks for drill rods separately, then take simple suture pipes for the rods if you are drilling no deeper than 30 meters (3.5 mm thick and an internal diameter of at least 40 mm). But a professional welder must weld the locks to the pipes! In vertical drilling, the loads are high.
To drill deeper than 30 meters, you need to take only thick-walled pipes (with a wall of 5-6 mm). Thin rods are not suitable for great depths - they will tear. Download the drawing of locks for drill rods:
Conclusions and useful video on the topic
Before you start making your own hand pump, study the experience of home craftsmen. This will not only help you learn new technologies, but will also help you avoid annoying mistakes.
A hand water pump is a great helper in a difficult situation. If an accident occurs on the electric main, you will not be left without water: you can pump several buckets from a well with a hand pump.
And to assemble a useful device yourself, you don’t need to study complex technologies or look for special materials - you’ll find everything in your household.
Have you decided to assemble a homemade water pump from scrap materials? Maybe you would like to clarify some points that are not fully discussed in this material? Ask your questions in the comments block - we will try to help you.
Or maybe you want to supplement our article with clarifications or useful recommendations? Please write to us about this and express your opinion.
Water is one of the most important resources for country houses and cottages, and it is impossible to do without it. However, it is not advisable to organize a public water supply on the site, because this pleasure will cost a lot of money. It’s cheaper, and much easier, to use your own water source. can be beautifully arranged in different styles: this will help improve the environment. The only question is what needs to be done first. Having your own well will give you confidence that there will always be water, because you will need it for household and residential needs. You can forget about counting the cubic meters spent, only the only concern will arise - timely cleaning.
Of course, it is possible to install or extend a city water supply, but this will be expensive. The best option would be. A self-equipped well in a dacha will give the owner the opportunity to be proud of his property. Having become familiar with drilling technologies and the general design of wells, making a water supply system will not be as difficult as it might seem at first glance.
Scheme for drilling a well at a summer cottage
Before you begin work and start drilling, you need to examine your site and determine the level at which the groundwater lies. This parameter is very important, because it will determine how much work needs to be done.
After determining the occurrence of water, you can select the type of well:
- Abyssinian well. The construction of this type of well is used if the depth of the water layer is no more than 12 meters;
- A sand well is dug when the water layer is up to 50 meters deep;
- An artesian well is installed with a minimum depth of 200 meters, but this is more difficult.
It is worth noting that any owner of a country home who wants to install a water supply system can make a well of the first two types at their dacha. As for the last option, the use of professional equipment is mandatory for its implementation.
Diagram of an artesian well
Sand well
This type received this name because the water comes from a sandy layer, which, as research shows, lies at a depth of no more than 50 meters. There are no guarantees that it will be free of impurities, so you definitely need to invite a specialist from the sanitary and epidemiological station to check: to make sure whether there are chemical and organic compounds in the water or not.
Necessary materials for drilling a sand well for a water supply system:
- . You can find out how much it costs in any specialized store;
- Classic scheme;
- Depth filters for water purification.
The service life of this installation is approximately 15 years, but do not forget that the filters need to be cleaned regularly. This will determine how safe for health and quality the incoming water will be.
If you follow this simple rule, your water supply will last much longer.
Construction of an Abyssinian well
The installation is intended to be very shallow, so it is very easy to design a pattern that allows it to be drilled. should be easy to use, so you need to take good care to choose a suitable place for the well and not forget about the design and arrangement.
Drilling should not be started immediately. It is worth paying attention to the fact that there are no sewage pits, septic tanks or garbage nearby. Since the water supply is shallow in depth, harmful substances can penetrate into it and pollute it, and cleaning is not very easy.
Drilling a water supply can begin right in the basement of a house or in a nearby area, but only if there is no hard rock in the ground. By the way, the basement is the most convenient place for digging a water supply system, because in this case the installation can be used even when it is frosty outside.
§ Homemade winch and gear motor
When manufacturing a mini drilling rig, a “RA-1000” winch is used. You can take another one, but preferably one with a carrying capacity of at least 1 ton (or better yet, more). Some drillers install two winches, one electric and the other mechanical. In the case of a drill string wedge, it is very helpful.
To make the work easier, it is advisable to buy and connect two remote controls: one for reverse and engine speed, the other for the winch. This will save a lot of effort.
A gear motor for a homemade mini drilling rig will need 60-70 rpm, with a power of 2.2 kW. Weaker will not do. If you use a more powerful one, you will need a generator, since it will not be possible to connect to a voltage of 220 Volts. If you make a hydraulic drill with your own hands, take a motor-gearbox of the following models: 3MP 31.5/3MP 40/3MP 50.
Less popular manual modifications
In addition to piston models, which have proven themselves well in factory and homemade versions, other devices are also used.
They are less productive, but interesting from the point of view of design and operating principle.
Image gallery
There are factory models that are not practical to make yourself. For example, equipment based on an impeller. Such devices are used in the industrial sector; they are not very convenient for the garden.
In addition, buying a compact metal device that looks like a can twister will cost no more than making it yourself.
None of the considered homemade pump designs suits you? Then we recommend that you look at more options for homemade products, the production of which we have considered.
§ How to make a drilling rig with your own hands
1. Purchase of drill rods and swivel (note that the parts have the same thread, or use an adapter). To begin with, you don’t need to buy a lot, focus on a depth of 30 meters.
2. Purchase of a motor-gearbox. These purchases take a long time and there are often delays beyond your control, so it's best to buy in advance.
3. Manufacturing of frame and drill. When making a frame, it is advisable to have a motor, a swivel and a winch on hand, since all this needs to be attached to the frame. Making a carriage without a motor yourself is also problematic, since the mounts for different motors may differ.
4. We purchase the remaining components of the mini drilling rig after installing the main components on the frame.
Video of a similar DIY installation in operation:
§ Mistakes when drilling for water yourself
It is recommended to start drilling for water from shallow depths in order to gain at least a little experience. Experience in vertical drilling is the most important! You can only learn how to drill water wells through practice. Learn to avoid the drill string wedge. Due to inexperience, beginners often “catch a wedge” and lose drill rods. Sometimes the drill jams so much that it is impossible to pull it out even with a crane; the structure simply comes off (usually at the welding points).
Mistakes are not cheap—an expensive tool is lost. Therefore, in hydrodrilling you cannot force things and immediately make deep wells. Approach this matter responsibly and carefully. Read literature, books and textbooks about drilling water wells. This work requires a lot of knowledge that cannot be conveyed in a nutshell, so self-education is mandatory.
§ Do-it-yourself drilling
To make a water well manually, auger or shock-rope technology is used. The hydraulic method will require a drilling rig. A collapsible model of a small-sized model can be made according to drawings from our website. And perhaps drilling water wells with your own hands will become your business.
Screw method
Working with an auger is the easiest manual method. It is used only to obtain shallow sources, the water from which will be used for technical purposes.
To perform independent drilling, you need a drill, which, when screwed into the ground, destroys the rock and grabs the soil with its blades. Periodic removal of the auger is necessary to clean it of sludge. This work is done without assistants.
In addition to the drill, you will need a tripod to which the auger is attached, and a lifting mechanism (manual with a winch or mechanized). Without these devices it is impossible to drill. Even several people will not be able to lift the drill with soil from a sufficient depth.
The greatest difficulty is drilling strictly vertically. Only a fixed drill will provide the necessary verticality, without which the pipes will be deformed. To ensure proper verticality, after passing 2 meters, you need to install a temporary metal pipe - a conductor, which will set the correct direction of movement.
A downhole conductor is an additional pipe with a larger diameter than the casing. The conductor in the upper part of the wellbore protects against wall collapse during drilling and does not allow surface water to pass through.
The auger method can be used in soft soils. If the auger hits a moraine, you will have to repeat the process in another place. Quicksand are also more difficult. Softened soil is difficult to pull to the surface. Only an auger with blades curved towards the top helps.
Types of devices for pumping water
Physical force alone used to lift water upward is not enough, since the process becomes difficult and labor-intensive. Therefore, mankind has long ago invented many devices that facilitate the rise of liquid from a well or natural reservoir to the surface.
All devices are united by a common operating principle, which is based on the interaction of the valve system.
There are many varieties of hand pumps, but four main types can be distinguished:
- piston;
- rod deep (varieties of piston);
- winged;
- membrane
For manufacturing at home, they usually choose the first type if it is necessary to service a well of shallow depth (3-6 m), or the second if it is necessary to lift water from a well from a depth of 10-12 m.
These models are considered to be the most productive, easy to assemble and install, and reliable. The rest have significant shortcomings, the biggest of which is considered to be insufficient productivity.
It is piston devices that have occupied the main niche among factory manual equipment; they are popular among home craftsmen.
A centralized water supply system in small summer cottages is a great luxury. That is why, sooner or later, the problem of organizing water supply falls on the shoulders of their owners.
Common design of a hand pump for a well
With a limited budget, the most rational way to solve the problem is to drill a well and install a hand pump. We will understand all the intricacies of the operation of such equipment, as well as its manufacture with our own hands.
Let's talk about technology
There are several main types of drilling applicable in our case. These are cable-percussion drilling and rotary drilling. Small rotary drilling installations with flushing are initially more complex and only drill normally in very soft soil, which has been proven in practice.
If you want more, then you need to meet the following conditions:
- weight in working order not less than 1500 kg
- implementation on hydraulics
- telescopic mast about 5 meters
Disadvantages: difficulty in implementation, cost, less mobility. Pros: the ability to work at an angle.
With impact drilling everything is much simpler. The technology itself appeared 3000 years ago in China and its meaning is as follows. A heavy, pointed bit is dropped into the well, destroying the rock. The bit is attached to a cable, to lift which, as you may have guessed, you can use any engine of sufficient power.
An example of the implementation of a cable-impact type drilling rig
In this case, a homemade drilling rig turns out to be quite compact, reliable and has a large margin of safety despite its simplicity. The work can be done independently, but we recommend inviting a partner. Sometimes, when removing soil from a drill, it will be better to work together. The depth, as practice has shown, can be large enough for drilling for water, on simple soils more than 100 meters. The technology is very simple and does not require any additional costs for pumps, drilling fluid, etc.
He threw the drill and knocked out the soil. In one blow, up to a meter of soil can be collected, but usually it is 20 - 40 cm. In terms of time, work on a 40-meter well takes about 7 days.
A homemade small-sized drilling rig consists of elements, some of which can be created with your own hands. All you need is a grinder, a welding machine, a drill and a set of tools. But the most important elements, such as the swivel and drill rod locks, are made on high-precision machines, so you still have to buy them.
Main stages of work
Regardless of which well it is decided to equip, the work must be carried out strictly in stages:
Drills for work
To make it easier to drill through the soil, there are several types of drills specifically designed for plumbing:
- For work in clay soil, an excellent option would be to use a coil (spiral drill);
- To loosen harder soil, it is better to use a drill bit;
- In sandy soil, a spoon drill is useful;
- A bailer is a tool that is useful for facilitating the lifting of soil to the top.
Important! If it is noticed that the rock that rises to the surface is wet and drilling is easier, you cannot stop. This means that the goal is already very close, and the desired depth will soon be achieved. It is unknown how much is left before the water layer, you need to be on your guard.
Which pump to choose for a well
In order to facilitate the construction of a well, you need to decide how powerful the pump is needed.
Well pump options
Be sure to take the following parameters into account:
- Depth indicator;
- Pipe diameter size;
- How far is the well from the house?
The power of the pump that is best suited directly depends on these indicators, as well as on how you decide to design it. If the depth is not very deep, you can use a self-priming pump. For greater depths, it is better to use a submersible mechanism.
Where is the very heart of the garden plot? “Somewhere near your own house, built with your own hands, or in that tree that was planted after the birth of the child,” you say. No, everything is quite more mundane. It is located near a source of water, because without it, the dacha plot is just a piece of land.
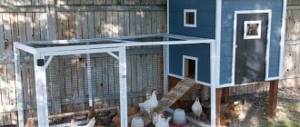
It’s good if there are no interruptions in water supply and your site is connected to a reliable source. But what to do when this very reliability is missing. Imagine that the water has disappeared for a whole week, and all the flowers and cultivated plants grown with such love are slowly dying before your eyes due to the lack of life-giving moisture. And if you had come to your senses in time and made a column right on the site, then everything would have been normal and you would have met the situation fully armed. How to make a column on a site? Everything is very simple.
Country water pump: device
The mechanism of the column is quite simple and can be easily reproduced by every second amateur gardener. The main part is a water riser pipe with a special filter. The upper part consists of a hand pump that raises the water. Particular attention should be paid to the joints - the structure must be completely sealed.
If a small space has formed between the water-lifting pipe and the earthen walls, then it is not worth filling it with any building material. It is enough to simply lay out the edging on the surface using clay or build something like a wooden circular clamp.
A well dug on the site on your own is not a panacea for the lack of water in a summer cottage. The water from it is suitable for watering plants or for primary hygiene procedures after excavation work. But it is better to avoid drinking liquid in food, since the quality of the water leaves much to be desired.
Country water pump: operating time
The column can only be used in the warm season. In winter it will freeze, and the pump may be seriously damaged. That is why the column is dismantled at the end of gardening work and stored in a dry place.
If the disassembly process seems too labor-intensive, and you don’t want to do such a procedure every year, then the pumping station itself can be hidden in the basement, and the pipe placed at a depth of at least 1.5 m.
In this case, the entire system must be accompanied by a self-regulating heating cable powered by electricity.
The pump on the garden plot should be insulated as much as possible. As soon as the pipe becomes clogged with ice, the column can simply burst.
During the winter season, the column should be given special attention and periodically inspected. If there is a danger of leakage or failure of the plastic valve, then repairs must be carried out immediately.
Column: insulation
When talking about emergency insulation of the column in winter, we mean work on the top of the column, since the underground elements must be properly protected at the installation stage.
Before you begin the insulation procedure, you should drain all remaining water and disconnect the water supply from the pump. After this, a wooden structure in the form of a box is built around the column, which is filled with any available insulation (ordinary sawdust will do, if available).
In villages, the upper part of the pump is usually wrapped with various rags. If you collect water carefully, this method is quite applicable. If you constantly spray the liquid, the fabric will get wet and, like an impenetrable shell, will stick to the top of the column.
If the column is modern enough and installed correctly, then insulation can be abandoned altogether.
A little theory
Boers are divided into:
- spoon drills
- coil drills
- drill bits (our case)
Spoon drill
They are used mainly for areas with plastic rocks (soil in the form of a mixture of sand and clay, or simply clay). Here you can use two options. The first option is when the bottom of the spoon looks like a bucket-shaped cutter. Moreover, on the left side it is in the form of a cutter, and on the right - like a transverse protrusion. The second option is to make a spoon from a pipe, choosing a pipe with the most suitable diameter for this.
Coil drill
The drill is similar in appearance to a wood drill. It is used for drilling dense loams. The action of a coil drill is similar to that of a corkscrew. Rotating, it is screwed into the rock. The cutting blade of the serpentine appears in the shape of a swallow's tail. It must be hardened. It will not be easy to make such a drill yourself, so you can simply adapt by replacing it with an ice drill or sections of screw augers.
Drill bits
Used for drilling hard rocks and rocky deposits. For the penetration of various rocks, the sharpening angle used is important here. For hard rocks it ranges from 110 to 130 degrees, for softer rocks – from 30 to 70. Also, bits differ in shape, again depending on the rock. These are the ones we recommend when creating a homemade water drilling rig.
The drill itself consists of a swivel, a drill rod and a bladed drill. The drilling fluid is supplied through the swivel to the hose located inside the rod. It will not be possible to make this part yourself, since this requires precise equipment. If the seal is not completely sealed, solution leakage may occur.
A rod is a device for transmitting rotation from hands to a drill, or from a motor to a drill. Also, as mentioned above, a hose for drilling fluid goes through it. These drill elements range in length from a meter to 1.8 meters. But the length can be increased. This is done using locks with rectangular threads.
A paddle drill usually has two blades and is used directly for drilling. It will also be interesting to know that there are still bailers. They are needed for drilling wells using the percussion-rope method on loose, granular, aquiferous soil layers. Bailers are also used to clean wells after the bit has been worked or from accumulated silt that interferes with the flow of water. On a cable, the bailer is dropped into the face, and soil enters its cavity by opening the valve. When lifted, the valve closes and holds the soil inside the bailer.
As for the tower. Its height is up to five meters. The structure is in the form of a tripod, with a rope block on top. When percussion drilling, a balancer is used here. In this case, the tool with rods is dropped into the face from a meter or one and a half meter height. The balance beam is a strong board or wooden beam.
This concludes our introductory article. As you can see, drilling with your own hands is not such an unsolvable issue. In the next material we will move on to the practical part with recommendations, drawings and approximate estimates.
Several photos and videos of homemade drilling rigs at work.
The process of working with a bailer
Each plot of land must have its own source of water. Typically, this problem is solved by drilling a well. However, this is associated with high costs for driller services. In search of ways to reduce costs, craftsmen are trying to carry out drilling work on their own and many have succeeded in this. The first thing to do is to make a drilling rig. Do-it-yourself drilling rig is not an easy task, however, it is completely solvable.
Popular handicraft pumps
To pump water from one place to another, all kinds of hand pumps are used. Their operating principle is based on the simplest laws of physics, according to which water can move through pipes and vessels due to differences in temperature, pressure, height, etc. Let’s find out how devices made by amateur craftsmen operate.
Option #1 - piston apparatus from casing pipe
The homemade product was invented by a master for a specific purpose - for. However, it turned out to be quite productive, so it was later used for pumping water out of the pond and as a backup pump during a power outage.
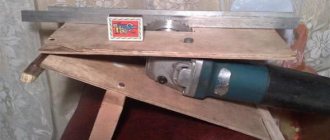
To make a pump, you will need a minimum set of tools: a grinder for cutting metal parts, a welding machine and a drill for drilling holes for fasteners
All work on cutting steel elements is carried out with an electric circular saw. If you use hand tools, the production will take a long time.
Welding experience is required to connect metal parts. If you are new to this business, we recommend that you familiarize yourself with.
Review of homemade pump parts:
Image gallery
For installation on the ground, a unique base is used - a structure made of metal pipes 20*40 mm and 20*20 mm. Thanks to the long welded pipes, the pump stands firmly in a strictly vertical position.
Option #2 – rod pump for a well
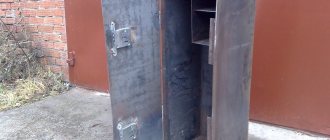
The model, made from a ready-made fire extinguisher body, differs from the previous one in reliability and greater performance.
A homemade “samovar” can be safely installed in a well up to 15 m deep. It does not have to be used constantly, however, in the absence of electricity or for cleaning the well, it will be simply irreplaceable.
The principle of operation is the same: thanks to the vacuum in the zone of movement of the piston, water flows from the well into the pump housing, and from there through the outlet pipe - out into the substituted container.
The device is suitable for servicing a well, borehole, pool, pond or other body of water. It can pump not only clean water, but also dirty liquid with silt, sand and contaminants.
For manufacturing, you will need a tool for cutting and processing metal parts, as well as a welding machine. Let's look at the distinctive features of the model in more detail.
Image gallery
On top, all metal parts are treated with a primer to protect against corrosion, since the pump will be located outside, in the open air.
On top of the primer, it must be coated with metal paint to make the protective layer as durable and airtight as possible.
This is what the piston looks like, which is responsible for the movement of water. This is a 5 mm perforated metal round plate + a thick rubber seal. Hole diameter – 10 mm
It is difficult to judge the exact performance of the device; testing is necessary. However, we can say that with one press of the lever, about 2-3 liters of water are pumped, that is, with just 3-4 presses you can fill a bucket.
If the given instructions for assembling a homemade product seemed complicated to you and you do not want to waste time on manufacturing, but you need a pump to pump dirty water, we advise you to take a closer look at ready-made models sold in stores. To make it easier for you to choose the right model, we suggest that you familiarize yourself with those presented on the market.
Option #3 – collapsible model for the summer season
If the well is shallow, an economical and easy-to-use plastic model can handle the delivery of water to the top.
A summer version of a hand pump, completely assembled from plastic pipes with a diameter of 20 and 50 mm. Only the check valve and filter are made of metal
For self-assembly you will need:
- sewer plastic pipes 50 mm - 2 pieces 3 m each;
- mesh filter for mounting on the end of the pipe;
- thin PP pipe 20 mm with thread for attaching a check valve;
- factory-made check valve;
- fastening the handle from a tee 25*20 mm with a soldered thread;
- metal tube for handle;
- fluoroplastic gasket for making a piston;
- clamps with dowels for attaching the pipe to the walls of the well.
The assembly proceeds as follows. First, a fluoroplastic piston is screwed onto a flexible PP pipe with a diameter of 20 mm, through which water will move, and then a check valve.
Insert it into a sewer plastic pipe with a diameter of 50 mm, close it on the side of the check valve with a nozzle with a filter. The result is a “pipe-in-pipe” structure that must be immersed in the well.
A hole for the pipe is made on the side of the well hatch. You need 2 or 3 clamps with rubber seals to fix the pipe to the wall of the well
A tee is screwed onto the other end of the PP pipe and a handle is inserted into it. To pump water, you need to hold the handle with both hands and move the pipe up/down.
In appearance and in the way the handle moves, the pump resembles a manual analogue for inflating bicycle wheels.
The outer part is supplemented with a spout made from a piece of sewer pipe and two fittings - a tee and a 90º angle. As the handle moves up/down, water pours out of the spout into the container underneath.
One of the advantages of a simple plastic model is that it can be quickly disassembled. With the onset of cold weather, the outer parts are removed, and the PP pipe is simply pulled out. As a result, only one element remains - the sewer pipe, but in the well shaft there is no threat to it.
If you change your mind about making a homemade pump, you can always purchase ready-made equipment in the store. Tips for choosing a pump for a well.
MGBU for percussion-rope drilling
To create such a drilling rig you will need to use the following devices:
- collapsible bed;
- impact cartridge (“glass”);
- bailer
To facilitate drilling work, a gear motor is connected to the installation, on top of which a cable is wound, to which a chuck or bailer is attached. To ensure effective operation, you will have to use a cartridge weighing approximately 80 kg. The bailer cleans the face of soil residues. It is also effective to use a bailer in areas with clay soils.
The main working element in such a drilling rig is a part called a cartridge or “glass”. To make it, you will have to use a thick-walled pipe, the diameter of which will be approximately 8-12 cm; the heavier the pipe, the better. At the bottom of the pipe, “teeth” are most often machined, designed to loosen the soil, although in this place the cartridge can be even. In addition, the lower edge in the “glass” is most often sharpened. Holes are drilled in the upper part to securely fasten the rope. The cartridge can be from 1 to 2 m in length.
Before starting work, it is better to drill a hole in the ground into which you will lower the “glass”. This hole should have a slightly larger diameter than the cartridge.
Auger MGBU (small-sized drilling rig)
A do-it-yourself auger drilling rig is built around the main working element - the drill. To make it, you should use a steel pipe with a diameter of 10 cm. An external screw thread is installed at the upper end of the pipe. The opposite end is equipped with a screw screw, the diameter of which is approximately 20 cm. You can limit yourself to one or two turns in the screw. A pair of steel knives are welded to the ends of the auger so that when the pipe is installed in a vertical position, there is an angle between them and the horizontal surface.
To ensure more convenient rotation of the drill, you should weld another piece of pipe (about 1.5 m) and a tee with an internal screw thread. The tee is screwed onto a collapsible rod. Such a rod should also be 1.5 m in length.
The drilling rig consists of: 1 – drill; 2 – knob; 3 – tee; 4 – collapsible rod; 5 – couplings; b – tripods; 7 – holes; 8 – winches; 9 – gear.
The drill is deepened into the soil, followed by turning it three times, after which it is removed to remove loosened soil. These steps are repeated until the depth of the hole approaches one meter. After this, the rod must be extended. To do this, another part of the steel tube is mounted on it using a coupling. To make a well whose depth exceeds 8 m, you will have to secure the structure to a special tripod tower.
The upper part of this unit must have a hole through which the rod can move freely. Since the bar will become increasingly heavy, the use of a winch will be required to lift it. The tower can be made of either metal or wood.
Such a drilling rig in working condition is shown in the video below:
Wells and wells: what you need to know
Well design diagram
A more acceptable option is to build a sand well, the depth of which, depending on the aquifer, can be from 15 to 30 meters.
Such a structure can produce approximately 1.5 cubic meters of water per hour, which is enough for a small house.
What is better, a well or a borehole?
Drilling a sand well is carried out using the auger method - the rock is extracted to the surface. This usually takes from 3 to 5 days. However, the sandy aquifer contains a lot of clay and sand, and therefore filtration equipment will be needed in this case.
Pumping water with a hand pump, of course, is not as convenient as its electric counterpart. The speed of work is not even close to comparison. However, there are situations when a hand pump for water is necessary, and sometimes the only possible solution. For example, as a temporary type at the stage of installing water supply at home. It is unwise to buy a device for short-term use. Do you agree?
We offer extensive information on options for making your own hand pumps. We present practice-tested methods available to home craftsmen in terms of costs and methods of implementation. A homemade product created according to our advice will reliably serve its intended duration.
The main purpose of using pump-type equipment is to pump water from a source to certain points: to a residential building, bathhouse, garage, garden. In suburban areas, the source most often is wells, less often - ponds and other bodies of water.
All residential or country houses can be divided into three categories: permanent, seasonal and periodic residence. Not all of them have electricity, and some are supplied irregularly.
If we summarize all these factors, we can draw the following conclusions:
- in permanent residences, electricity is used by default, so the main equipment for pumping water is an electric pump, and the manual model is a spare backup unit;
- if the cottage is used only in the summer and power lines are connected, then the energy-dependent option is also ideal, and the manual device plays a secondary role;
- a summer cottage without electricity most of all needs manual equipment.
To irrigate 2-3 flower beds, you can still draw water with buckets, but to ensure complete and daily watering of beds, greenhouses and lawns, a pump is needed. This is where a model that requires a pair of hands to operate comes in handy.
You can make a simple speaker yourself by using the skills of welding and assembling metal or plastic parts.
An example for making your own model can be a factory product assembled from durable cast iron or steel parts, with a comfortable handle for use
Some craftsmen build reliable equipment for wells and wells that serves well for years. We present an overview of homemade products, for the manufacture of which scrap materials were used.