Harvest beds Mushrooms
Author of the article: Igor Ilyin | Updated: 04/17/2019
Who doesn't love dishes made from aromatic mushrooms? But as soon as we want to enjoy mushroom soup, we don’t always want to go to the nearest supermarket for the main component. If only you could grow mushrooms right on the windowsill! Most of us become familiar with the concept of “mushroom mycelium” in school biology lessons. But many still fail to fully understand what mycelium is, why it is needed and how to get it yourself. These are the questions we will try to understand today.
- 1 What is mycelium
- 2 Main types
- 3 What you need to grow
- 4 Cultivation technology and necessary conditions 4.1 Grain mycelium
- 4.2 Mycelium from mushroom stems
What is mycelium
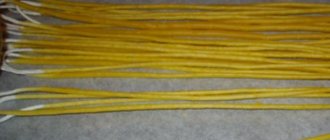
Oyster mushroom mycelium begins to grow
Mycelium is the vegetative body of a fungus, which changes its structure through the appearance of special organs. Under favorable conditions, numerous thin branches are born in the depths of the mycelium, forming a dense network of microfibers.
These fibers grow into non-living wood and extract nutritional compounds from there for development.
Oyster mushroom mycelium looks like a soft white fluff that covers the grain or wood substrate.
Mycelium is grown in laboratory conditions from spores that are extracted from mushrooms. So what prevents us from doing the same? Let's see what are the benefits of growing mushroom mycelium at home.
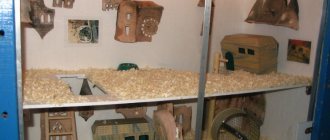
Substrate for breeding
To get a good harvest of tree mushrooms, you can use a loose substrate. It is prepared from chopped straw or branches, sunflower seed husks, and cotton towels. Nutrients can be added to this growing mixture. To prevent mold from growing in the substrate, it is subjected to heat treatment.
A good supply of oxygen is achieved due to the granular structure of the mixture. In such a mixture, mycelium growth occurs several times faster than in dense wood. Since mycelium requires a high concentration of carbon dioxide to reproduce, the substrate must be placed in perforated plastic bags.
The substance that makes up more than 50% of the total volume of the substrate is called its base. All components of the substrate are rich in nitrogen. The optimal nitrogen content in the mixture should be 1%, and the humidity should be from 45 to 70%. It is very important to avoid excess moisture, especially for oyster mushroom mycelium. If the mushroom nutrient mixture is too wet, it will create anaerobic conditions that can lead to the death of the mycelium.
Pros and cons of growing oyster mushroom mycelium with your own hands
Oyster mushroom mycelium is propagated in jars on grain
So, you were inspired by the idea of home mushroom growing and decided to first test your strength on a simple cultivated species - oyster mushroom. Where is the best place to get oyster mushroom mycelium?
I think cooking it yourself is preferable for three reasons:
- Often it is not possible to purchase the desired strain. This is a rather specific product, so the range of types and strains of mushrooms is not very large, even in large cities. What can we say about the countryside?
- Low quality of store products. Often the distribution of mycelium is carried out by wholesalers who are concerned only with receiving revenue and do not monitor the storage conditions of the “live” goods.
- The minimum order quantity is too large. Most professional companies work only with large mushroom farms and ignore the interests of ordinary amateurs.
In RuNet I found a lot of instructions on how to make mycelium for oyster mushrooms. But only one method gives a reliable result. Now I will explain why.
How to properly grow oyster mushroom mycelium
The appearance of shades of pink, yellow, green or gray on the oyster mushroom mycelium is an alarming symptom
At home, oyster mushroom mycelium is grown on grain and wooden sticks.
The most reliable option is growing mycelium on grain. The fact is that during the growth process, spores of “cultivated” fungi usually lose competition to mold fungi and bacteria. Therefore, the work of inoculating (infecting) the substrate requires ideal cleanliness: instruments, gloves, vessels, tables, and even air are sterilized.
It is easy to disinfect grain, but this is problematic with other nutritional substances. As a result, all efforts will go down the drain when, instead of white fluff, a dirty brown, green or black coating appears on the organic matter.
The full cycle of breeding oyster mushroom mycelium includes obtaining:
- Uterine mycelium. It is grown from spores or from part of a mature mushroom.
- Intermediate mycelium . At this stage, the royal mycelium is introduced into a nutrient medium - grain, cardboard, various types of organic substrate, and there it grows for several weeks.
- Seed mycelium. If you plan to grow mushrooms in small quantities, you can stop at the previous step. To cultivate for sale, you will need more mycelium, so it makes sense to propagate the seed mycelium.
If you already have some mycelium on sticks or grains, start immediately from the second point. This makes it much easier to obtain finished mycelium.
Video on how to propagate mycelium on sticks:
Tools
To make mycelium from oyster mushrooms, you will need simple tools and materials:
- rubber medical gloves;
- glass bottles with a volume of 250-300 milliliters with a narrow neck;
- sterile cotton wool, gauze and aluminum foil;
- tweezers or sharp knife;
- test tubes (or medicine bottles);
- litmus tests (preferably, but not required);
- pipettes;
- alcohol lamp;
- thermometer;
- nutrient medium (agar);
- UV lamp.
All equipment and work surfaces are sterilized with alcohol or a product like Whiteness.
The air in the room is burned with an ultraviolet lamp. This is a mandatory step! The environment contains from 5 to 20 thousand pathogenic microorganisms that can easily enter the grain and destroy the nascent mycelium.
Nutrient medium for oyster mushroom mycelium: 4 recipes
Gelatin and agar are the basis for the nutrient substrate for royal mycelium
To prepare royal mycelium, prepare a nutritional composition according to one of the recipes.
Oat agar. Dilute 17 grams of gelatin in the same amount of hot water. Heat half a liter of water to a boil in a water bath, add 75 grams of oatmeal and boil for an hour. Strain the broth and combine with gelatin.
Quality checking
And even if you followed absolutely all storage rules, you should definitely check the quality of the product before planting. There is a simple and very effective way to do this:
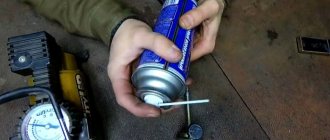
- Take a glass of boiled water and prepare syrup with one teaspoon of sugar.
- Fold clean toilet paper or a sterile paper napkin into several layers.
- This square of paper is generously moistened with the resulting syrup, wrung out and laid out on a Petri dish or on a clean earthenware saucer.
- A few grains are selected from the purchased bag, laid out on a napkin and covered with a lid from a Petri dish or a clean glass beaker. The cup or saucer is left for a week at room temperature.
If you purchased a good quality product, a white edge appears on the substrate - this is a growing mycelium. There should not be any dark or multi-colored spots on it. Sprouted mycelium of appropriate quality will not become moldy for several months. This method can be used to check not only grain mycelium, but also any other one.
Published on March 17, 2018 by samsonmain. The entry was published in the Storage section. Bookmark the permalink.
Description of varieties and growth periods of boletus mushrooms
Mushroom caviar recipes, preparing a delicious mushroom appetizer
How to make mycelium from oyster mushrooms: detailed step-by-step instructions
Royal mycelium
Before starting this important task, do not forget to thoroughly prepare the work area: remove dust, treat all surfaces and tools with a disinfectant and clean the air with a lamp. Make sure doors, windows and vents are tightly closed.
- Place tweezers (or a sharp knife), an alcohol lamp, test tubes with nutrient substrate and a mature oyster mushroom on the table.
- Wear sterile medical gloves.
- Remove the gauze stopper from the test tube and place it back in the jar in an inclined position.
- Cut the mushroom in half and use tweezers or a knife to remove a piece of mushroom tissue from the center of the cap. After each operation, hold the instrument over an alcohol lamp for 3-5 seconds!
- Take the test tube in your other hand, push the mushroom fragment into the vessel and return the stopper to its place.
- Do steps 2-4 for all tubes.
All actions must be carried out as quickly as possible to reduce the risk of pathogens entering the royal mycelium.
Bottles with mushroom material are placed in a dark place with a temperature of +18...24 degrees. The mycelium masters the nutrient substrate in 1-3 weeks.
If you notice dark or yellow-green spots in the test tube, it should be destroyed. The finished royal mycelium is stored in the refrigerator.
Intermediate mycelium
To breed an intermediate crop, you will need royal mycelium, grains (wheat, rye, millet) and bottles or jars with a volume of 0.3-0.5 liters.
- Pure grain is poured into a pan, filled with water in a ratio of 1:1 and boiled for 20-30 minutes until soft.
- The cereal is discarded in a colander, the water is allowed to drain and dried a little.
- Add gypsum and lime (chalk) at a rate of 30 and 10 grams per 1-1.5 kilograms of boiled grain.
- The containers are sterilized in the oven or in a kettle and filled 2/3 with a mixture of grains and growth activators.
- The royal mycelium is added - 3-4 small portions per jar.
- The jars are covered with foil, secured with a rubber band and disinfected for 1.5-2 hours in an autoclave or oven at 120 degrees
- The vessels are removed to a warm place.
The mycelium processes the grain substrate usually in 1.5-2 weeks. If you find suspicious bright spots inside the vessels, there is most likely a bacterial or mold infection.
In this case, the vessels are placed under a quartz lamp for 24 hours. This usually helps prevent further development of microorganisms.
Seed mycelium
The seed mycelium is prepared simply: repeat steps 1 to 7 from the previous instructions. But the containers they take are no longer half-liter, but liter or a little larger. Only a tablespoon of intermediate mycelium is added to each vessel.
But if you plan to grow mushrooms just for yourself, the intermediate mycelium will most likely be enough for you.
Preparing the growing site
To grow high-quality and productive oyster mushroom mycelium, it is necessary to properly prepare the growing site.
Most often, mushroom growing enthusiasts use several methods for creating planting material:
On cardboard
This method is considered simpler and cleaner. Its main advantages include:
- Prevention of the development of pathogenic bacteria, since it is impossible for them to develop on paper.
- Accelerated colonization of fungal spores.
- Better air supply to planting material if the farmer uses corrugated cardboard.
- Moisture evaporates more slowly.
- Constant sterilization of the growing area is not required.
- Availability for the consumer. You can buy sheets of cardboard at any office supply store for a low price.
- Large quantities of seed at low cost.
Step-by-step instructions for growing oyster mushroom mycelium on cardboard are as follows:
- Chop the leaves and pour boiling water over them. Keep them in this state for at least 60 minutes.
- Prepare plastic containers. You can use glasses or cut bottles. Make a small hole in the bottom. After this, pour boiling water over the containers to disinfect.
- Prepare the seed. Most often, elements of the above-ground part of the fungus or parts of the root system are used. Divide the stem and cap into fibers. For these purposes, you need to use a knife or blade, which is first disinfected with alcohol.
- Squeeze out excess moisture from the cardboard and mix it with seed material.
- Place the mixture in the prepared containers and compact it a little. Cover the neck with cling film or a plastic bag.
- Place the containers in a warm place out of direct sunlight.
- Water the seed daily with warm water using a spray bottle.
- Every day, remove the film for 5-10 minutes to allow air to enter.
- If all actions are carried out correctly, then after a few months a white fluffy coating will form on the cardboard.
Sources:
https://gryadki.com/griby/kak-sdelat-mitselij-19061/ https://www.sites.google.com/site/vyrastitbelyjgrib/home/kak-sdelat-ili-samostoatelno-izgotovit-kacestvennyj-micelij- belyh-gribov-v-domasnih-usloviah-proekt-shemy-sposoby-i-metodika-proizvodstva-micelia-svoimi-rukami https://fermer.blog/bok/griby/sedobnye-griby/veshenki/veshenki-vyraschivanie/13821 -vyrashhivanie-micelija-vjoshenok.html