The old masters made their own paints and brushes. The technology for making brushes is not complicated, but it is responsible and requires delicacy. This is an unusual business, so few people know the secrets of this craft. However, you can make brushes even at home. So, what is the technology for making art brushes?
1. Harvesting hair or bristles.
The hair of animals contains down and straight hair, which is thicker than down and stiffer. I wrote about what hair and what animals classic brushes for painting are made from. When harvesting hair, you need to sort it by length. The hair bundle should consist of hair of approximately the same length. The ends of your hair should never be cut. I wrote why this is important.
2. Forming the basis of the future brush.
Next, the hairs in the hair bundle are aligned in some small cylindrical vessel. The bottom of such a vessel should be flat. The hair descends with its trimmed part to the bottom of the cylinder. Now, it needs to be leveled by gently tapping the bottom of the cylinder on the table. The hairs will settle and become even. After this, they are tied into a bun and combed with a fine-toothed comb to remove unnecessary hairs.
3. Degreasing and tanning.
Degreasing is carried out by soaking the hair bundle in gasoline for 3 days. After this, it is washed with clean gasoline and dried. After which, the workpiece should be boiled in a 10% solution of potassium alum. This is called tanning. Tanning is necessary in order to make the hair non-hygroscopic, flexible and durable.
4. Hardening.
This procedure is necessary to give elasticity to the hair. The hair of a painting brush should be moderately elastic and hard, moderately elastic. To harden, the hair of the future brush is wrapped in thin paper, for example, newspaper and tied with thread. Next, the hair is hardened in an oven with hot air at a temperature of 150 degrees. This is done for about an hour. The time and temperature are not the same for different types of hair and depend on their type. The temperature can be determined by the color of the paper: if it turns slightly yellowish, then the temperature is insufficient. If it turns brown, the temperature is over 150 degrees. In this case, the hair will become brittle, so do not exceed the temperature. After the initial hardening, the hair is combed to remove unnecessary hairs and the hardening is repeated. The quality of hardening is checked by wetting the future brush in water. If the hairs on the surface of the bundle become curly, then the hardening is insufficient.
5. Knitting the brush.
After all procedures, the hair bundle is untied and placed in a cone of the appropriate size with the hair ends down. Next, tapping the cone on the table, you need to straighten the hair. The hair bun should take on a conical shape (if the brush should be round or elliptical). After giving the desired shape, short and unnecessary hairs are combed out of the hair. Then the hair bundle is finally tied with thread. The bandaged area is impregnated with glue.
6. Securing the hair in the capsule.
The capsule is a metal part of the hand that looks like a conical tube. The hair bundle is placed into the capsule on its wide side, after which the hair inside the capsule is filled with glue. (By the way, capsules can be used from old and damaged brushes, after first clearing it of glue and hair.) The length of the hair of the future brush must be adjusted depending on its purpose. Too long hair makes the brush soft and unable to hold its shape well, but it is flexible and holds a large amount of paint. On the contrary, short hair will make your brush hard and unyielding.
7. Securing the capsule to the handle.
Finally, the capsule is placed on a wooden handle. First, glue is instilled into the capsule. After this, the capsule is pressed onto a wooden handle. The brush handle can be tinted, painted and varnished.
If you do everything correctly, the brush will turn out no worse than the factory one. Therefore, I wish you success in this rare craft!
If you have firmly decided to become a nail art guru or at least learn how to perform some popular techniques, then you cannot do without brushes. After all, they are used for almost any design! From this article you will learn the basic truths: what types of manicure brushes there are, which ones are useful for what, and get the simplest lessons on how to use them.
Strength exercises to strengthen muscles
Raising from wrists to fists
Sit on the floor with your legs tucked under you. Place your hands on the floor on the back of your palm, fingers facing each other. Using the strength of your wrists, try to move your hands to fists. If this happens easily and without pain, transfer your body weight to your arms and try again. If pain occurs, reduce the load.
Do three sets of 15 reps. When your wrists get used to the load, you can perform the same exercise while lying down with your feet on your knees.
The most advanced option is in a regular prone position. However, it will take several weeks before you strengthen your wrists so well. Don’t chase results, your goal is to perform the exercise without pain (at first there will be discomfort in any case).
Dumbbell finger row
Place your forearm on a flat surface, such as a counter. Turn your wrist so that your palm faces the ceiling. Grasp the dumbbell with your fingers and begin lifting it with the strength of your wrist.
Start with light weights and gradually increase the load. Perform three sets of 8–10 reps.
Reverse grip bodybar lift
For this exercise you will need a body bar. Unlike the barbell, it is lighter, so you can exercise without overexertion and.
Take the bodybar with a reverse grip, bend your elbows at an angle of 90 degrees. Open and tilt your palms slightly so that the bodybar rolls onto your bent fingers. At the extreme point, the angle at the wrist should be 90 degrees. Using the force of your wrist, lift the bodybar back up. Perform four sets of 8–10 reps.
Raising a bodybar with a straight grip
Grab the bodybar with an overhand grip and bend your elbows at a 90-degree angle. Raise and lower your wrists. Perform four sets of 8–10 reps. If the exercise is easy, increase the weight.
Dumbbell hold
Grab the top with your fingers. Hold for as long as you can - 30 seconds or longer.
Arm rotation with dumbbells
Hold dumbbells in both hands, bend your elbows at an angle of 90 degrees. In the starting position, the back of the hand faces up. Turn your hands over so that your fingers are on top, and then return to the starting position. Turning there and back is counted as one time. Perform four sets of 8–10 reps.
Stretching exercises
Stretch on the floor
Sit on the floor on your feet, place your palms in front of you, fingers facing you. Move your body back, increasing the angle at your wrist. Hold at the extreme point for 3-5 seconds, come back and repeat. Perform 5–10 times.
Fist Stretching
Sit on the floor on your feet, place your hands in front of you with the backs on the floor, fingers facing each other. Keep your elbows straight and transfer some of your weight to your arms to better stretch the muscles. From this position, pull your fingers towards the middle of your palm, trying to clench your fists. Repeat the exercise eight times, rest a little and do three more approaches.
Perform these exercises 1-2 times a week to quickly strengthen your wrists, increase your grip strength, and protect yourself from injury.
Why pump your hands with the same diligence as your legs? For a bodybuilder, strong wrists and fingers may not be so important, but for strength athletes or wrestlers, they are a must. What is the secret to pumping up the muscles of the hands?
There is an opinion that grip strength depends on the size of the biceps and forearms. Biceps have absolutely no effect on the strength of your hands, while large forearms indicate a strong wrist, in addition, it also depends on how your forearms are trained and which muscles are more developed in them. Do you know how to pump up your hands with special training? After all, many forearm exercises do not always involve the hands. In addition, there are several types of grip strength, each of which has its own development method.
Let's look at several exercises and workouts that will allow you to effectively pump up your hands without complex and expensive equipment. You can construct most of the equipment yourself with minimal cost and effort. One thing you must remember is that there must always be a constant progression of volume, intensity or resistance. Follow the principles of strength training when performing these exercises.
Silicone brushes
Progress does not stand still, and now almost every brush from the standard set has a backup in a silicone version. The name of such brushes is shapers.
“New Shift” can boast several advantages:
- Durability. No hairs deteriorate or become brittle, and the silicone is very easy to clean.
- Convenience. It’s not easy for beginners to draw the same smiles on a long-pile French coat. And such a brush is no more difficult to control than a pencil. In addition, the varnish does not spread on it.
- Versatility. In addition to drawing patterns with shapers, you can rub in pigments, shape the molding, smooth out the decor, use a sharp tip to erase your own flaws in the work, and even put rhinestones on the nail.
In the video, the master will tell you why these brushes are useful:
Whether or not to use shapers is your choice. You can buy a futuristic set to play around with original tools. However, absolutely everything that shapers can do can be easily done with ordinary brushes.
Types of hand grip strength
- Compressive force: Like a strong handshake.
- Holding force: Thanks to it, you can squeeze an object and hold it for a long time. For example, high-repetition stiff-legged deadlifts use this type.
- Pinch Strength: The ability to hold an object between the thumb and palm. This type of grip requires thumb strength.
- Wrist Strength: For example, lifting a chair while holding it by the front legs only (legs perpendicular to the floor) involves wrist strength. Despite the fact that not exactly grip strength is involved here, it is nevertheless an essential part of strong forearms and another reason to pump up your hands.
Holding strength training
The holding force and the compressive force of the hand are closely related. However, endurance is more difficult to develop first. Using a thick bar and dumbbell handles provides excellent development for both grips. Undoubtedly, a wide bar makes the work more difficult, especially when you are swinging your wrists.
In general, a wide neck has incomparably many advantages. Thick bars are generally more difficult to control. Compared to an Olympic barbell with a 5-7 cm bar, it will seem like a log to you. Imagine what it would be like to do a deadlift or bench press with a telegraph pole! This is exactly the feeling you get from a thick neck. You won't be able to rely entirely on style, form, timing or technique when performing a press. Here pure effort will be necessary.
Yuri Spasokukotsky talks in detail about this technique and offers training with a thick bar to develop wrist strength, which will help pump up the muscles of the forearms and fingers.
Plus, with a thick bar, you're practicing your grip and swing all the time, without even having to do additional exercises.
Pinch strength training
Even if you have strong hand pinch force, you may find that you have difficulty grasping objects with your fingers because pinch force is related to the strength of your thumbs. When working on other grips, it is quite difficult to develop, because when squeezing, the load is distributed evenly between all fingers. The easiest way to train hand pinch strength is to pump up your thumbs using two smooth weights. Place them together and hold them with just your fingertips. The sign of true strength is holding two 20-pound plates. It's a lot harder than you might imagine. Start with 5kg pancakes and just try to hold them with your fingers for as long as possible.
When trying to pump up your hands, remember the progress. To add weight gradually, you can place weights on a wooden or iron stick until you are ready to use heavier weights. You can also hold the pancake with your fingers by the hole, while the pancakes should be without rims. This method of working on pinch strength is suitable for a heavy single or timed hold. Again, aim for the reference 20 kilograms.
You can also train your pinch grip using a homemade device. Take a small wooden block 5 cm x 10 cm and 10-15 cm long. Drill a hole in the center and insert a bolt with a loop on which you will hang the weight. The board is wider than the pancakes, so it is a little easier to work with. Hold the block with your fingertips only. To make the task more difficult, try working with a narrower block.
Makeup brushes: which one is needed for what?
To create an even complexion, apply a moisturizing BB cream. It will perfectly even out your skin tone, give your face a healthy tint, and also moisturize your face and protect it throughout the day. You can simply apply it with your hands, like a regular face cream.
The easiest and fastest way to hide small problems on your face is a 24/7 pencil corrector that will hide everything you need. Apply it to the area under your eyes for a more open and rested look. Simply massage the corrector with your fingertips onto the areas where it is needed. All!
To ensure that the shadows lie well and do not crease, apply a creamy primer to your eyelids. You need very little product, but you need to distribute it carefully and evenly so that the entire eyelid is covered with a thin layer. Choose a primer with mother-of-pearl: it visually enlarges your eyes and makes your eyelid skin stunningly beautiful. By the way, you can stop here: primer is a great alternative to shadows!
If you are not a supporter of half measures, move on to applying shadows. Try extraordinary shadows with a 3D effect! They are best applied with a finger, patting movements over the entire eyelid. If you want, take a pencil and highlight the edge of the eyelash with a light arrow.
Finally, you can use lipstick in your favorite shade to create a light blush. Apply a little lipstick to the apples of your cheeks and then rub it in lightly. And then apply the same lipstick on your lips - harmony is needed in everything!
How to pump up your wrists
Strong, powerful arms build wrist strength. While pumping up your hands, you can train your forearms with regular wrist curls. Try working with a thicker bar or dumbbells. This will take the exercise to a new level of difficulty. Do no more than 6-8 repetitions per set.
The option of bending the arms at the wrists is considered effective - with a plate, and not with a bar or dumbbells. Simply place your forearms on the bench as in a regular curl, but now you're working with a plate (palms up or down). You hold the plate with a pinch grip, so this exercise has the double effect of working your thumbs and hands. Take a 10-kilogram pancake and you will understand how hard it is. Another way is to curl your arms with a weight plate while standing. You can hold the weight vertically (as in the hammer exercise), or horizontally (as in a normal curl). The point is to keep your wrists in the same position throughout the exercise. Perform 6-8 repetitions.
Warning: Working in low rep ranges with heavy weights and a thick bar may cause wrist pain.
Another simple method for training your wrists, without using any fancy equipment, is to simply hold a dumbbell at one end (free of weights) and move your wrist back and forth, left and right. In this case, the elbows do not work. If you are doing the exercise while sitting, you can rest your forearms on your knees. In this case, work in the medium to high rep range.
Important: To avoid potential injury, heavy repetitions are not recommended. Do at least 6 reps.
Strong hands are very important for powerlifters. Excellent exercises that develop hand strength are one-handed plate lifts, a farmer's walk from extreme power - you can grab two heavy plates with your fingers and walk the distance with them. Stop only when your fingers loosen and the pancakes fall out of your hands. Try hanging from a weighted bar. Deadlifts with a direct grip without straps will also force the development of not only the muscles of the back and legs, but also the forearms, and most importantly, the hands.
In addition, you can do the following forearm workout at home.
Silk thread tassel with decoration
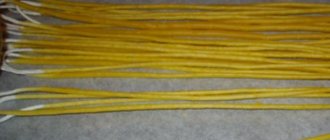
Let me introduce you to another master class on making a brush with your own hands from other materials. In this case, it is recommended to use silk or nylon threads for work ; they have a smooth structure and shine beautifully, so the finished product will look very elegant and expensive.
Material for work:
- Threads made of silk or nylon, any color.
- Scissors.
- Template (for winding threads).
- Super glue.
- Caps for beads.
Master class on making brushes
- Take the prepared threads and wrap them around a thick cardboard template. If you want the brush to be fuller, you need a thicker layer.
- Then you need to carefully remove the wound threads from the template. To do this, holding their middle part, lightly remove both ends from the cardboard and with a short piece of thread of the same color you need to tightly tie the middle of this workpiece. The resulting two loops of thread must be cut in the middle.
- Take a cap for the bead, you can use any one, but it is better if it is elongated. Insert small scissors into it and open it.
- Fold the resulting layer of yarn, knitted in the middle part, in half and thread it into the hat. Thread the threads well and hide the knot there. Here you can use a drop of superglue for strength . Then pinch the cap tightly using pliers.
- Trim the ends of the finished brush evenly, then shake it to fluff it up.
Here are some useful tips that will help you while working:
- If the threads that you selected for making crafts are wrinkled or lie unevenly, you can steam them and they will acquire the desired appearance.
- Treat the ends of the threads on the finished product with ink and they will acquire a vintage style.
- Instead of caps for beads, you can trim the brushes with beads or other decorative elements.
Other ways to pump up your hands
Many are familiar with the exercise made from a wooden pin. Despite all its advantages, a problem may arise during execution: the deltoids and other auxiliary muscles will get tired earlier
forearms. To avoid this, try working with a long steel handle.
Hand training can be combined with back training. Insert hand exercises after any back exercise. If you want to work your back, use bands, and in this case, stand further away to load your hands.
How to make a tassel from threads - master class
Tassels have been very popular as decoration for more than one season. They can be seen on fashionable bags, home curtains, and various decorations. We invite you to learn how to make tassels from threads with your own hands; the process itself is quite simple and will take very little time. Study our master class carefully and get to work!
Material for work:
- Yarn, any composition and color.
- Scissors.
- A small rectangle made of cardboard; an unnecessary plastic card can be used instead.
Making a brush with your own hands
- Unwind a little thread from the yarn you prepared and start winding it onto a rectangular template. If you want the future brush to be long, use the part of the cardboard that is larger in size, but if you prefer to make it small, wind the yarn around the smaller part accordingly. The more threads you use for this, the fluffier the brush will be . After completing this process, cut the thread.
- After the required number of threads has been wound onto the template, you need to secure them on one side. To do this, take a piece of yarn of the same color and carefully tie a knot on top. It should be tightened well to prevent the tassel from unraveling in the future.
- After securing the top of the brush, you need to trim it from the bottom using sharp scissors.
- The tassel is almost ready, to complete the work, you need to wrap a few more layers of yarn on the top knot and fix it tightly. To do this, you can use a needle and thread. To ensure that the bottom of the finished tassel becomes perfectly even, cut off the protruding threads with scissors.
- You can use a satin ribbon or decorative beads on top to secure the brush.
This is how simple and easy you can make your own brush. Such tassels and pompoms can be made thin and fluffy, short and long. You can use your imagination and use different types of threads, for example: wool, iris, floss, acrylic . Such a unique decorative element can decorate not only various clothes, but also household items: curtains, pillows, bedspreads. And handmade twine brushes will look like a fashionable and stylish decoration.
Records in hand exercises
For many old-schoolers, feats of strength are a thrilling spectacle. We will briefly highlight some feats of strength that are rarely seen anymore.
- Ripping a telephone directory in half
- Tearing a deck of cards into two parts (into four parts for very strong people)
- Bending nails (and this is really very difficult)
- Horseshoe extension
All this can be done with pumped up hands with our exercises.
Greatest feat of hand strength:
Hermann Georner became world famous for the strength of his hands! He deadlifted 327kg with one arm. This happened on October 8, 1920. Georner used a lock grip, where the thumb lies under the rest. This is the greatest example of a one-arm lifting feat in history.
This technique is still used by professional weightlifters and simply those who refuse wrist straps. If you need strong hands, don't use these straps!
Taking sports supplements - creatine, arginine, intra-workout, bcaa amino acid and pre-workout complexes will help you increase your strength. These sports nutrition products are specifically formulated to improve performance in sports and fitness for men and women. Just add it to your diet and go ahead to conquer new heights!
Arm Training Supplement Program
Basic set
Advanced
Basic set
Basic set
Advanced
Universal Nutrition | Ultra Whey Pro
1-2 measuring spoons are mixed with 200-250 grams of water or any other liquid.
Universal Nutrition | Daily formula?
One tablet immediately before meals (preferably before breakfast).
UN Daily Formula is a highly effective multivitamin and mineral complex that, in addition to the basic elements, contains a set of specially selected enzymes that promote the rapid absorption of essential nutrients.
Universal Nutrition | Amino 2250?
2 capsules before and after training.
Universal Nutrition Amino 2250 is a balanced amino acid complex that not only improves metabolism and promotes muscle growth, but also has a positive effect on the athlete’s body as a whole.
Universal Nutrition | Creatine Capsules?
The second cycle is 6 weeks, one teaspoon per day.
Universal Nutrition Creatine monohydrate contains 100% purified creatine necessary for a surge of muscle energy and normalization of water balance in muscle tissue.
Weider | Protein 80 Plus ?
You need to stir 30 g of powder in 300 ml of milk or water. The fat content of milk should not exceed 1.5%.
The drug provides peak amino concentration within the first 60 minutes after use and maintains it for 5 hours. Therefore, muscles quickly grow and recover, while the athlete’s strength and endurance increases. This protein shake is designed as a nutritional supplement to increase the amount of protein in your daily diet.
Ingredients: calcium caseinate, whey protein concentrate, milk protein isolate, dried egg white, flavoring, thickener: guar gum; sweeteners: acesulfame K, aspartame; calcium carbonate, antioxidant: ascorbic acid; vitamin B6. Contains a source of phenylalanine. Contains lactose. May contain trace amounts of gluten and soy.
Energy value of one serving (per 300 ml of water): 112 kcal. Nutritional value per serving (per 300 ml of water): fat 0.5 g, carbohydrates 2.3 g, protein 25 g.
Energy value of one serving (per 300 ml of milk 1.5% fat): 256 kcal. Nutritional value per serving (per 300 ml milk 1.5% fat): fat 5.3 g, carbohydrates 17 g, protein 35 g.
There is an opinion among people that pumping up your wrists on your own is unrealistic. But you don’t need to believe it, because there are many good examples where athletes with thin hands managed to develop them to enormous sizes. If you look closely at bodybuilders, you will notice that their hands look harmonious with the rest of their pumped-up body. At the same time, it becomes clear that they were not born with such wrists, but simply developed them. It is important to understand that the hands are a complex area of the body that is difficult to change. But there are many ways to enlarge your wrist.
LiveInternetLiveInternet
—Help for newbies
—Applications
- Postcards
Reborn catalog of postcards for all occasions - Rating buttons "Yandex.blogs"
Adds Yandex rating buttons to the profile. Plus, graphs of rating changes per month will appear soon - Blog catalog The
blog catalog allows you to organize the blogs of people and communities into categories, allowing you to quickly find the necessary and interesting blogs among the huge number of blogs on the site li.ru - I am a photographer
Plugin for publishing photos in the user's diary. Minimum system requirements: Internet Explorer 6, Fire Fox 1.5, Opera 9.5, Safari 3.1.1 with JavaScript enabled. Maybe it will work - always no analogues at hand
^_^ Allows you to insert a panel with an arbitrary Html code into your profile. You can place banners, counters, etc. there
-Music
—Tags
—Categories
- Accessories for dogs, cats (54)
- Houses, beds for dogs and cats (16)
- Clothes and shoes for dogs (31)
- Dog collars (3)
- Other useful things. (1)
- Carrying bags (3)
- Dog jewelry (2)
- Decoupage (895)
- Assistive technicians (183)
- Decopatch (7)
- Decoupage ideas (333)
- Materials and tools (88)
- MK on decoupage (411)
- Children (101)
- Children's parties (8)
- DIY for children (6)
- Pictures for creativity, illustrations (81)
- Crafts for memory (6)
- Collaborative crafts (7)
- Home ideas (465)
- Balcony, loggia, veranda, terrace. (12)
- Bathroom (8)
- All about lighting (38)
- Living room (4)
- Yard, garden (20)
- Cork decor (11)
- Wall decor (29)
- Details. (32)
- Children's (8)
- Storage Ideas (51)
- Like in the forest. (17)
- Fireplace (6)
- Book decor (21)
- Kitchen (31)
- Ladder. (3)
- Furniture (57)
- Nautical decor (6)
- Pillows (15)
- Hallway (4)
- Workplace, workshop (16)
- A variety of interior ideas (79)
- Bedroom (8)
- Window area, curtains (26)
- Watch. (48)
- Suitcase mood (8)
- Ideas, master classes (651)
- Beading (12)
- Cut with a jigsaw (24)
- Decor of bottles, glasses, plates. (97)
- Decor of frames, mirrors, panels, etc. (52)
- Decor of boxes, boxes, etc. (46)
- Other interesting techniques (101)
- Imitation stone (29)
- Imitation of old metal (43)
- Glass frosting (12)
- Mosaic (33)
- Soap making (12)
- Unusual and simple DIY decorations (30)
- About leaf skeletonization (5)
- Working with paper, background (101)
- Woodworking (27)
- Various tricks (13)
- Creating volume with epoxy (18)
- Creative uses of construction silicone (9)
- What to do with the money? (7)
- Sewing (92)
- Creative, curious and funny (81)
- Ribbon. MK and ideas. (138)
- Artichokes (4)
- Ribbon bows (12)
- Ribbon embroidery (46)
- Kanzashi (14)
- MK for working with tapes (99)
- Ribbon coloring, aging, etc. (3)
- Works with ribbons for inspiration (38)
- Tape storage (4)
- Flowers made of ribbons and fabric (72)
- My works (51)
- Children's creativity (8)
- My master classes (8)
- My works with tape (11)
- My decoupage (33)
- Dressing my dog (4)
- I try myself in different techniques (7)
- Felt (3)
- To my friends and readers (16)
- The Painted World (1373)
- Curbs (12)
- Letters, numbers, symbols. (41)
- Seasons (211)
- Geographic maps (8)
- Cities (89)
- Animals (359)
- Zodiac signs (8)
- Playing cards (5)
- Round pictures for decoupage (11)
- People (498)
- Monochrome images (74)
- Drawn money (2)
- Still life (236)
- Landscapes (257)
- Frames (19)
- Transport. (12)
- Patterns. (37)
- Fantasies and other visions. (273)
- Backgrounds (7)
- Photo paintings (36)
- Flowers (215)
- Dials (21)
- Labels (7)
- About styles. (46)
- Diary design (253)
- Animation, pictures for a diary (68)
- Comments (64)
- Answers to questions (37)
- Dividers (35)
- Frames (33)
- Emoticons (11)
- Arrows (9)
- Flash drives (9)
- Backgrounds (10)
- Holiday – February 23 and May 9 (12)
- Pictures (4)
- Postcards (6)
- Gift decoration and packaging (1)
- Holiday decor and accessories (1)
- Holiday – March 8 (18)
- Pictures (4)
- Postcards (8)
- Diary design (4)
- Gift decoration and packaging (2)
- Holiday decor and accessories (2)
- Festive - Halloween (74)
- Pictures (16)
- Postcards (2)
- Diary design (11)
- Gift decoration and packaging (3)
- Holiday decor and accessories (40)
- Traditions, history of the holiday (3)
- Holiday table decoration (1)
- Festive - Valentine's Day (44)
- Pictures (13)
- Postcards (3)
- Diary design (7)
- Gift decoration and packaging (11)
- Holiday decor and accessories (13)
- Holiday table decoration (1)
- Festive - for any occasion (209)
- Pictures (6)
- Postcards (48)
- Diary design (4)
- Gift decoration and packaging (139)
- Holiday decor and accessories (11)
- Holiday table decoration (10)
- Festive - New Year (422)
- 2012 - Year of the Dragon (30)
- 2013 - Year of the Snake (4)
- 2014 – Year of the Horse (13)
- 2015 — Year of the Goat (Sheep) (2)
- 2016 — Year of the Monkey (1)
- Pictures (147)
- Postcards (20)
- Diary design (28)
- Gift decoration and wrapping (26)
- Holiday decor and accessories (201)
- Traditions (7)
- Holiday table decoration (5)
- Festive - Easter (80)
- Pictures (15)
- Postcards (5)
- Diary design (2)
- Gift decoration and packaging (6)
- Holiday decor and accessories (55)
- Traditions (2)
- Holiday table decoration (5)
- Festive - Wedding (19)
- Pictures (4)
- Postcards (4)
- Gift decoration and packaging (3)
- Holiday decor and accessories (9)
- Traditions (1)
- Scrapbooking (179)
- Master classes (121)
- Materials and templates (35)
- Scrapworks for inspiration (42)
- Learning to draw (102)
- One stroke (3)
- Stained glass technology (4)
- Tools and aids (19)
- Paintings with spray paints (3)
- Palette of colors. (6)
- Contour painting (25)
- Painting objects in other techniques (18)
- Background creation techniques (20)
- Stencils and screen painting (21)
How to enlarge your wrists?
People often want to strengthen their hands and enlarge their wrists in these three cases:
- Sports activities that require heavy lifting. For example, if you have weak arms, it is impossible to pump up your biceps and other muscle groups.
- Martial arts fans and boxers always need constant development of their wrists. This is due to the fact that such training helps to perform strong blows.
- Natural weakness of the hands that prevents you from performing various daily tasks or any other heavy work.
During wrist development, you need to pay attention to a little warm-up, because you can very easily hurt your hands, even when using small weights. Frequent problems when performing various exercises are microtraumas of the tendons. They will make themselves felt very strongly in old age. To avoid such microtraumas, you should do a short warm-up. To do this, you need to fold your hands in a “lock”, and after that you need to perform waves using your hands. This exercise allows you to warm up your wrists very well. It must be performed for three minutes. Then you can switch to general exercises. However, you need to start with the easy ones and gradually move on to heavy manipulations. This will make it possible to avoid injuries and protect yourself.
It is important to be patient, because strengthening muscles requires a lot of time from a person. Having completed several effective exercises, the athlete will not be able to have powerful claws the next morning. An important factor in obtaining a positive result is consistency of training. You don’t need to give yourself “days off” simply because you’re lazy.
Many newcomers to the sport wrap elastic bandages around their arms to strengthen their forearm. However, this does not allow you to get the result from the training that you expect. Your wrists will not become stronger if you use these bands to lift different loads. It is better to do exercises with light weights to achieve good results. It is important to know that changes in wrist width are directly related to body structure. Therefore, you should not count on huge wrists if the person himself is thin by nature.
Tassel for knitted hats
In winter, many people wear hats decorated with pom-poms and fluffy tassels. We invite you to find out how quickly and simply you can make a brush that will look great on a child’s hat, and also very beautiful and original on a knitted hat for adults .
Material for work:
- Thick rectangular cardboard.
- Scissors.
- Wool yarn.
Making a tassel from wool threads:
- First prepare the thread on which the tassel will hang. To do this, you need to weave an ordinary braid from three threads. Tie tight knots at the ends; they will be needed to securely fix the brush.
- Take a cardboard base and wrap it tightly with thread. It is advisable to have more of them wound, then the tassel will be lush and beautiful.
- Now the resulting thread blank must be carefully removed and cut with scissors on both sides.
- Place the braid in the center of one of the buns so that its knot is slightly below the middle of the wool threads.
- Then this structure needs to be covered on top with another bundle of threads.
- Take a fairly long thread of the same color and tie it around the bun in the middle. It is necessary to pull it tightly, wrap it several times and tie it tightly.
- Find a pigtail in the resulting bundle and, holding its upper end, shake off all the threads down, while simultaneously pulling the pigtail up until the knot located below approaches the place of dressing.
- Cut another long thread from the skein of yarn and pull the bundle just below its top to form a ball.
- Now use scissors to carefully cut off all the protruding threads and shake the finished brush so that it takes on a fluffy shape.
Tassels are very original decorations that can be made from a large number of different types of materials. In addition, they are quite easy to make; the process does not require any special skills or abilities and any creative person can make them.
Wrist exercises
When deciding how you can enlarge your wrists yourself, you need to understand that you can’t do it without exercise equipment and sports equipment. A common device now is an expander. But athletes do not always manage to choose a model that allows them to pump up their wrists. For beginners, it is better to choose an expander with medium hardness, and after that you can gradually increase the load. It is best to purchase two expanders - one soft for warm-ups, and the second for performing basic manipulations.
There are several exercises on how to pump up your wrists:
Stretches
Stretching should be performed during all workouts, for this reason it is important to include it in the warm-up. If an athlete naturally has poorly developed wrists, then he needs to stretch before training. The stretching begins with the athlete needing to get on all fours and point his fingers in his direction. Next, you need to gradually move your torso back until you feel tension in the wrist area. It is important in this case not to overdo it. You can also stretch your wrist in cobra pose. To do this, you need to lie on the floor face down. At the same time, you need to point your hands towards yourself. This exercise is very effective.
Bend your arms at the wrists.
This exercise can be performed at home to increase the flexibility and strength of the forearm muscles. By doing curls you can enlarge your wrists over time. From the very beginning, you need to place your hands, palms up, on your leg. In this case, the forearms should rest entirely on the legs. You also need to take the load in your hand and gradually lower it down. Such exercises for the wrists take 5 seconds, after which the hands can be returned to their previous position. You need to perform 2 sets of 10 times on each hand. To get excellent results you need to do it 4 times a week.
Reverse stretch
Performing these stretches after exercise can reduce pain and the risk of injury. This should be done after any workout. To do this, the athlete needs to bend one arm at the wrist so that the palm is on the inside. With your other hand you need to press a little on the first one to increase the bending. This hold should take up to 10 seconds. After this, you can switch to the other hand and repeat all the manipulations.
Biceps Curl
Although this exercise trains the biceps, it also strengthens and enlarges the wrist. When performing this exercise, the athlete needs to keep his hands and forearms straight. First you need to take the barbell from below, using light weight. You need to stand straight and hold the barbell at hip level. After this, you need to try to pull the barbell with your wrists. You should perform the same number of approaches as with a simple biceps workout. This exercise should be done using a reverse grip.
Pancake Squeezing
Many people don’t know how to pump up their wrists, so they make a lot of mistakes and don’t give themselves the opportunity to get the result they expect. Squeezing plates is often used to tone the wrists, strengthen the forearms, and improve grip. You can lift not only pancakes, but also other heavy loads. The exercise begins by taking 1-2 weights in your hand and holding them perpendicular to the floor. First you need to squat down, and then get up. After completing the exercise with one hand, you can safely switch to the other hand. It is important to perform 3 sets of 10 times or any other number of times at your discretion. If there are no pancakes, you can take a thick book.
Workouts with a wrist roller
Often this projectile can be seen among athletes in gyms. If you wish, you can do it yourself. This roller is a short bar with a rope to which a weight is attached. The athlete should grasp the bar with both hands, palms down, and rotate it back and forth, as when riding a motorcycle. You need to do 3 sets of 10 times.
Fist push-ups
By doing this exercise, you can not only strain your wrists, but also strengthen your forearms. It is important for the athlete to keep his arms straight. For beginners, it is better to do 3 sets of 10 times.
Exercise for the wrist after a fracture
The most effective exercises after a broken wrist are done using twisting. By changing directions of movement, an athlete can easily use several muscle groups. You can even perform it at home as a set of rehabilitation exercises after injuries. The athlete needs to pick up dumbbells or any other heavy load. After this, you need to gradually move the dumbbells away from you and return them to the starting position again. You need to do two approaches 10 times. You need to train 4 times a week.
If a person wants to pump up his wrists, it is important to regularly perform all the exercises for this and not forget about warming up and stretching. You shouldn’t expect results immediately after the first workout, because you can notice them no earlier than after six months of regular exercise.
Video tutorial How to strengthen your wrist
There are special exercises that can increase the thickness of your wrists and the thickness of your forearms. I naturally have very thin hands and bones, so I am familiar with this problem firsthand. The exercises used in arm wrestling helped a lot, because there the wrist is the key point.
In general, many people think that the section of the arm from the elbow to the hand is... in general, they don’t know what to call it and are often called the wrist. In fact, this part of the arm is called the forearm, and from the elbow and above the shoulder. Study a school physics course and you will understand why this is so.
Therefore, we will talk to you about how to pump up your forearms, make your hands strong and your wrists thick.
Exercises to pump up your wrists and hands
It is not so easy to increase the thickness of the bone itself. Genetics has a very strong influence here. But even if you have thin bones, after a few years the thickness of the bone in the area of the wrist joint will definitely become greater, because bones grow in thickness throughout life.
Strength training has a particularly good effect on thickness growth. Of course, the inside of the bones is like a sponge and at first they thicken mostly from the inside, but the external thickness will also increase.
It is much faster to grow forearm muscle mass. And even if you have thin bones like a girl, massive forearms will make your wrists look great!
You need to do the following exercises:
- Barbell wrist curls (palms up)
- Reverse wrist curls (palms down)
- Bending on the top block with a thick handle
- Any work on the grip
- Standing barbell curls (heavy weight)
When working on works(). It rests almost entirely on the forearm, so it finishes off the shape of your arms and adds bulk to your hands and wrists.
How to strengthen your hand
You need to develop finger strength. They should be hard as a rock. To do this, you can do push-ups on your fingers, do handstands on your fingers while lying down. Some gyms and arm wrestling sections have special machines for pumping up your fingers and hands.
Even a regular heavy deadlift where the bar just falls out of your hands is great for strengthening your fingers, developing grip strength, and toning up your forearms.
I personally have never done deadlifts with one or three fingers, but I have heard that this also helps a lot, although you need to have the appropriate training so as not to tear the tendons. You can also do hangs or pull-ups on one, two or three fingers. To do this, you will have to buy or sew a special belt.
To pump up your wrists, hands and forearms, you need to do curls with heavy weights. Arm wrestlers do curls with a barbell weighing 100 kg and this is quite a common indicator. Lifting 40kg with one hand is normal for them. That’s why their hands are huge, and their forearms are strong and massive. In this regard, it is worth taking an example from them. Just don't make your workouts so long. Take exercises from arm wrestling, but apply them in a bodybuilding style, then the muscles will grow quickly, and you will see noticeable results in the first month!
How to strengthen your hands is a very interesting and important question for every man. After all, he demonstrates his grip strength not only when performing sports tasks, but also every day when he greets colleagues, friends or acquaintances.
What makes a strong brush
The strength of our grip is formed due to the total activity of the muscles of the hand and forearm. If you squeeze something in your hand, you will see which muscles tense at this time.
Take a glass in your hand and try to squeeze it slightly - note that not only the hand is tense, but also the muscles from the wrist to the elbow - forearm.
This means that in order to develop our hands, to strengthen them, we need to purposefully do exercises for all these muscles. Just squeezing a ring expander won't do it.
And the more comprehensive the approach to solving this issue, the better result you will get.
Let's imagine that you have a grip competition coming up. Let's train!
Are artistic brushes good for makeup? Test Drive
Today you will learn how to make your makeup brush last and learn how to use it like a real makeup artist.
Without makeup brushes, it is very difficult to apply makeup evenly and beautifully on your face. Of course, you can use “improvised” means such as cotton swabs or pads, but the result may be, to put it mildly, far from the desired one. And what can compare with the gentle touches of natural or artificial fibers?
There are many types of makeup brushes. Separate brushes are used to apply makeup base, foundation, and even such seemingly exotic products as bronzer and special foundation emulsions for décolleté area makeup.
We do not encourage you to use all products of the cosmetic industry without exception. Therefore, even a minimal set of brushes is perfect for modern girls. It includes:
– brush for foundation;
– blush brush;
– brush for loose powder;
– brush-comb for eyebrows;
– several applicator brushes for shadows;
– lipstick brush.
How to make a makeup brush durable and extend its life? It is generally accepted that any cosmetic products and accessories have their own service life, and nothing lasts forever. However, with skillful and competent care, makeup brushes will last you much longer than usual.
Exercises for developing hands
Don’t worry about how to pump up your hands at home – it’s quite convenient to do this at home. Exercises for arms and hands do not require special equipment. If you go to the gym, that’s great, but you can do without it in this situation.
Clenching and unclenching the palm
So, let's find out how to pump up your hands.
The very first and simplest exercise, which is performed, including as rehabilitation after serious injuries associated with rupture of muscles and nerves, is the usual clenching of the hand into a fist.
It is done like this:
- In any position (standing, sitting, lying down), clench your fists as tightly as possible. Hold the tension for 5-7 seconds.
- Open your palm, trying to straighten your fingers as much as possible.
Believe it or not, this exercise is difficult for some. After complex operations, a person learns to move his fingers again. It is with such exercises that rehabilitation begins.
If your hands are completely healthy and you have not received any injuries, work with a wrist expander. At the first stage, you can use a rubber ring, and then switch to a spring metal one.
As soon as you manage to perform 50 compressions of the selected wrist expander, move on to a harder one. The load must constantly increase.
Various types of expanders allow you to perform acupressure exercises for the hands.
Choose an expander to your liking - there are round-ring, V-shaped, with a shifted center of gravity, various balls, and with a dynamometer. The last option is interesting because you can monitor the growth of your grip strength.
This is the simplest option that allows you to pump your arms at home.
Horizontal bar
Have you ever thought that your grip swings on the horizontal bar? Why then does it become easier to hang on it every time? Do you remember when you first came to the horizontal bar, how long were you able to hang there, was it difficult to do? Yes. Now you just grab the bar and hang.
To pump up your wrists, you need to systematically hang on the horizontal bar for 60–90 seconds. This is also beneficial for the spine - it stretches, thereby reducing the compressive effect on the roots of the spinal cord. Try hanging like this every other day or every day.
By the way, if you hang a towel on the horizontal bar, grab it with both hands and train hanging in this position, you can pump up your hand even better. This technique is used by wrestlers because grip is very important to them.