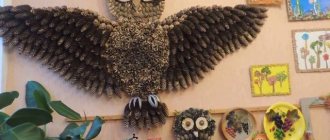
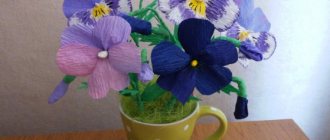
As you know, easy paper crafts are very useful for children of any age. The baby's first interest arises at the age of 1 year; it is during this period that you can begin to teach him how to properly make simple crafts from various materials.
Important! It is worth noting that such creativity develops fine motor skills in the baby, it has a positive effect on the perception of the surrounding world and the ability to think creatively.
Of course, in order for the child’s talents to successfully develop, parents should understand how to properly teach their child to perform a particular task.
Paper butterfly
The first rule that every parent should remember is that during the developmental period the child should be given only those tasks that will be within his strength. For example, easy DIY paper crafts will be very interesting and simple for a child. It should be taken into account that the main part of the work must be done by the baby himself, otherwise there will be no benefit from such an activity.
There are many interesting master classes that tell you how to make easy paper crafts with your own hands and at the same time spend a minimum of time on this activity.
Christmas trees made of paper
Below we will list some of them, and also talk about what age which craft is best suited for.
Materials and methods of their use
Paper is one of the most affordable materials and, in addition, it is presented in stores in a wide variety: colored, velvet, thick, thin, corrugated, etc.
Paper can be used in different ways in creativity - painted, cut, twisted, glued, there are many options.
How to sew a cardigan from knitwear
To sew a cardigan with your own hands, you will need:
- material (the quantity of which is calculated as follows: product length + sleeve length + 20 cm);
- threads;
- needle;
- scissors;
- sleeve pattern;
- chalk or special marker;
- sewing machine;
- iron;
- safety pins;
- tape measure;
- ruler.
Knitted cardigans can be sewn not only by experienced seamstresses, but also by beginners. There are many ways to create a new wardrobe item, from exotic models with many elements to options that do not require a pattern at all. But like any product, a women's cardigan also requires taking measurements:
- chest girth;
- hip girth;
- upper arm circumference;
- hand girth;
- length of the product.
Selecting a model and knitted fabric
Before starting work, you first need to prepare the material itself. To avoid shrinkage of the finished product, the fabric must be washed and ironed. Carefully inspect the cut and if there are defects on it, mark them with chalk or a special marker. It is necessary to mark the front and back sides of the fabric, the longitudinal and transverse threads of the material.
Cardigan fabric requires attention to the features of the figure. Knitwear has tight-fitting qualities that highlight not only the pros, but also the cons of the silhouette. Color is equally important, as it can make your appearance more expressive or vice versa. The preparation of the material is completed, after which you can begin to create an individual wardrobe item.
There are a large number of cardigan models, the most common are:
- Classic long model. Pairs perfectly with a short skirt or shorts. You can grab the jacket with a belt or do without a fastener. In this style, you can use raglan sleeves, which will refresh the sketch.
- Sleeveless shirt. The lack of sleeves adds confidence to the look. Good in combination with trousers.
- Cardigan with hood. This element gives the image a touch of romance. The hood can be made removable if desired by adding a zipper or buttons to the sketch. Versatile so you can wear it with anything.
- Boho style option. Dolman sleeves will add a unique charm to your look. This model is most often chosen by sophisticated girls.
How to quickly sew a knitted cardigan for a plump woman
For curvy beauties, loose-fitting models that do not include fasteners or even belts are suitable.
It is important to choose a style that will visually slim your figure. This could be a cardigan with vertical stripes
For plump ladies, a rectangle-shaped version can be an excellent option; this style most often comes without a pattern, is quickly sewn and fits any type of figure. This model will hide flaws and emphasize the advantages of the silhouette.
The only thing that will need to be done is to cut the sleeve. For size 46/48 you will need a piece of material 156 cm long and 60 cm wide, sleeves 140 cm long and 45 cm wide. These dimensions are shown without seam allowances.
The following cutting and sewing steps will help you sew a cardigan from knitwear:
- Fold the selected fabric in half, right side inward. From the fold line, use a ruler to mark the border at a distance of 25 cm, draw a dotted line. This is done so that in the future it will be easy to mark the line of the armhole and shoulder seam.
- You need to measure 24 cm from the top edge of the fabric - this will be the depth of the armhole.
- For the shoulder seam, measure along the top edge from the line 14 cm in both directions. The distance of 28 cm must be sewn later.
- Pin the sleeve pattern onto the fabric, outline it with chalk or a special marker, and add 1.5-2 cm to the seam allowances. Make a connecting seam and sew it to the armhole using a zigzag stitch. This will allow the sleeve to stretch if necessary.
- The final step will be stitching the shoulder seam. If the fabric frays a lot, then it should be processed using an overlocker or sewn with bias tape.
The product is ready and can be worn immediately.
How to sew a knitted cardigan in boho style with your own hands
Irreplaceable, without frames and restrictions - this is all boho style. It is cozy and practical and is a stylish part of a fashionista's wardrobe. To sew a product, you will need a piece of fabric measuring 1.5x2 m, chalk or a special marker, a sewing machine, scissors, threads to match the material and a little time.
Before starting work, you need to transfer a raster drawing of the model onto paper. The raster size is 10x10 cm; different templates must be made for the front and back parts. The pattern must be placed strictly along the grain of the material.
What benefits can you get from working with paper?
Working with paper with your hands stimulates the development of imagination, fine motor skills, and teaches you to work with concentration and accuracy.
It’s easy to learn how to make paper crafts with your own hands; all you need is the desire and the necessary materials. Below we will talk about popular creative ideas when working with paper.
Children are taught to make crafts from colored paper in kindergarten. But these are not just activities for preschoolers. There are ideas for adults too. There are complex and labor-intensive ones, using quilling techniques, as well as completely simple ones, where only basic skills are needed.
Photo gallery - DIY wigwam for children
Quick navigation through the article
For children, a wigwam (teepee, hut) is a secluded place in which reading books, gatherings with friends, games and sleep become much more interesting. And how stylish it looks in the interior of a nursery, living room or in the courtyard of a summer house! Today you can buy a ready-made hut in a specialized online store or from private craftsmen on Instagram. But if you have a free day and a desire to create, then it’s best to make a wigwam yourself.
There are several methods for making huts - from the simplest and not very reliable to quite labor-intensive, requiring sewing skills and a sewing machine.
- We know a way to make a wigwam with your own hands, which looks cool, can open and close, is easy to wash, fold and disassemble, but... done in just a couple of hours and almost without sewing!
DIY 3D paper painting
This example is a simple one. It suggests making a cute picture with your own hands, which will be a nice gift for Valentine's Day. It is a sheet of paper decorated with cut out voluminous hearts that look like butterflies wanting to flutter in a split second.
You can place many hearts on one A3 sheet; their size is chosen by the author of the craft. To cut out even hearts, you need to fold a sheet of colored red paper in half. Draw halves of hearts along the fold. Cut, unfold and get a full-fledged heart.
There is no need to smooth out the cut pieces. They shouldn't be flat. Glue the hearts onto a sheet of paper, mixing them. Let one be closed, the other unfolded. In principle, you can choose any color or even replace the shapes with stars, flowers, etc.
Drawings for making a boa constrictor hive for bees with your own hands
How to make an aqua print on a car with your own hands
Boa hives are not the most popular, but some beekeepers prefer them for keeping small colonies (Figure 8).
Figure 8. External features of a boa constrictor hive
In such houses, special thin and wide frames are installed, in the upper part of which a cut is made for foundation.
Housing assembly
To assemble the case, you need to make it exactly to size. Its width is 335 mm, length 300 mm, and height 135 mm.
Figure 9. Assembling the body of the boa hive
To assemble the finished structure, you need to make wooden blanks: front and back walls (width 13.5, thickness 3 and length 37.5 cm), side walls 13.5 wide, width 2 and length 34 cm. For connection, grooves are provided that ensure a tight fit of the elements to each other and maintain temperature.
One and a half centimeter cuts are made on the front wall, which will serve as tap holes. The lid and bottom are made separately (Figure 9).
Making the bottom for a boa constrictor hive is the most labor-intensive process. To do this, you need to prepare two side walls with a width of 9, a length of 34 and a thickness of 2 cm. Two vertical cuts 0.4 cm wide must be made in them, so that later the grille and bottom liner can be inserted into them.
A frame is assembled from 4 bars (two 3 cm wide, and two more 4.5 cm wide), and plywood with mesh is inserted between them, and the structure is attached to the remaining parts using folds.
Lid
The lid can be made of plywood or chipboard, leaving an air cushion of 30 mm between them. In summer, this air gap will provide support for an optimal microclimate, and in winter, a sheet of foam plastic can be inserted into the free space for additional insulation (Figure 10).
Figure 10. Boa constrictor hive bottom and cover: do-it-yourself drawings
In addition, the lid should have a vent with a lid so that it can be opened and closed as needed.
Pros and cons of the design
Although boa hives are not very popular, they do offer some important benefits. Firstly, it is easy to make from scrap materials. Secondly, there is enough space inside for the bees to move freely. In addition, they are lightweight, making them suitable for mobile apiaries.
Among the disadvantages are higher labor costs for care. Since a large number of small frames are installed inside, the beekeeper will have to spend more time maintaining them.
The video shows how to make a boa hive with your own hands.
Paper valley of cacti for the holiday
Today, decorative elements are expensive, but you can make them yourself. In this option, it is proposed to decorate a table for a children's party. Let the theme for the holiday be Mexico. The outfits are appropriate - giant sombreros! And the table should be filled with cacti, not real ones, but paper ones!
Note!
DIY paper crafts the most interesting: simple origami instructions + master class on creating creative crafts with your own hands (130 photos)
Paper sword - TOP-120 photos of creative solutions for creating a paper sword + simple instructions and diagrams for children
- DIY paper crafts - simple patterns for creating paper crafts step by step + original ideas for beginners with photo reviews
You can create these crafts from paper and cardboard. First you need to draw cacti of different sizes on paper. Let them be big and small, green and fantastically colorful.
You can even make three-dimensional cacti by connecting elements - the trunks of a paper plant - into each other's grooves or by gluing them together. Using pencils, you should paint the blanks with dashes representing spines. Now take small cupcake molds from the shelves and insert paper shapes into them; for stability and beauty, pour sand or small pebbles into the molds.
Drawings for making a beehive with your own hands
How to make daytime running lights with your own hands
To make the production process go quickly, we recommend using ready-made drawings. They immediately indicate the dimensions of each element and all you have to do is choose the appropriate material, make blanks and assemble them.
Figure 5. Drawing for making a beehive with your own hands
Figure 5 shows drawings of several of the most popular hives.
Making a lounger for 24 frames
Loungers with 24 frames are considered popular models: they are easy to care for, and the design itself allows you to comfortably accommodate both large and small families.
To produce the front wall, it is better to take one solid board 87 cm high and 37 cm long. You can also use several boards connected to each other. The back wall is the same in height, but its length is much larger - 44 cm. The dimensions of the right and left walls are 49 and 44 cm (height and length, respectively)
When making the bottom, you need to pay attention to thickness. It must be at least 3.5 cm, with a height of 84 cm and length of 54.5 cm
Further production is carried out as follows (Figure 6):
- We prepare the blanks, it is desirable that the thickness of the board is 3.5-4 cm;
- We attach the front, back and side walls to the bottom. The sides and back should fit snugly to the bottom, while the front should be 1.5 cm higher to form a lower entrance in the house.
- We assemble the roof from beams and wooden boards, and cover them with sheets of metal or other roofing material.
Figure 6. Drawing for making a beehive with 20 or more frames
In the upper part, one or several tapholes of rectangular or round shape are arranged. After assembly, the hive needs to be primed, painted and dried.
Homemade beehive bed with 16 frames
The technology for producing a 16-frame sunbed is the same as in the example above. The dimensions of the components remain the same, but the beekeeper can install an arbitrary number of frames, up to 20, in the finished house.
Since the lounger is the simplest and most convenient design for the beekeeper, we present several options for drawings for making it yourself (Figure 7).
Figure 7. Drawing for making a beehive with 16 frames
Origami as a way to work with paper
The term "origami" combines two words. The first - “ori” is translated as “folding”, the second - “kami” is translated as “paper”. Literally it is folding paper. This art is more than five centuries old. It originated and developed in mysterious Japan, where they can make from simple paper figurines to complex masterpieces. Today, origami is popular all over the planet, thanks to books and the Internet, everyone can learn how to make paper crafts using the Japanese method.
DIY trailer awning
In order not to purchase excess material, you should know the exact size of the awning being created. Initially, for this it is necessary to prepare a frame, of course, if the car enthusiast has planned this particular option. The most popular type of frame system for passenger car trailers is the so-called “house”. Making it is quite simple - if a person has skills in welding - three elements are usually installed: in the center and on the front/rear side of the trailer.
The next step is taking measurements. To do this you will need:
- Measure the length and width of the trailer;
- Find out the dimensions of the vertical posts in the frame;
- Find out the distance from the highest point of the metal frame (ridge area) to the side.
After this, using the simplest mathematical calculations, known from the standard school course, the area of the entire tent and the dimensions of each of its parts are calculated. Naturally, it is advisable to use paper for the pattern, which will allow you to easily make changes and initially wait to purchase the material itself - to further save it.
When creating a cut, it is also very important not to forget to make seam allowances:
- On the lower part of the future awning for a passenger trailer - four centimeters each - there is a specially compacted place for installing metal rings;
- On other seams, two centimeters is enough.
For direct sewing you need to have:
- Actually, a sewing machine;
- Strong needle (120-130);
- Strong thread. It is advisable to take reinforced or polyester options.
It is recommended to attach the front and back parts of the “house” to the main surface of the awning using a double seam. Be sure to remember to seal the bottom of the material for subsequent installation of the rings.
Before the next stage, the awning is temporarily placed on the frame so that it is possible to accurately mark the locations for the eyelets. To install these elements you will need a special machine, which can be found in any good shoe workshop - you will have to carry the material there, and, unfortunately, pay a certain amount of money.
Before the final installation of the finished awning in its place of further use, a previously purchased rubber band is inserted into the eyelets. Fixing the product to the trailer itself is best done with a strong (at least eight millimeters) rope or cable (about three millimeters) made of metal.
Everything is ready - you can use the results of your own work!
How to make a paper puppy: origami technique
While adults don’t often sit down to make crafts, children are big fans of tinkering with paper. And so that their labors do not involve a lot of cleaning for adults, learn how to create paper crafts for children without using glue. The best option is the ancient art of origami.
In this short master class, an option for creating a paper puppy is presented.
Note!
Paper star - TOP 110 best photo instructions for children. Master class with a full description of the stages of work + reviews of creative craft ideas
Paper craft templates - TOP 100 photos of the best templates. Master class with simple diagrams and drawings for creating with your own hands
- How to make a paper swan: simple instructions with step-by-step guide for beginners. Secrets of craftswomen + photos of finished works
First you need to choose the color of the future puppy. It doesn’t have to be classic, the dog can be anything. The next step is to cut out a square from a piece of paper. Now you need to make a triangle out of the blank. While it doesn’t look much like a puppy, but by turning the side corners down, you get ears!
And if you turn the bottom corner up, you get a chin! So the dog's head appeared. To give her her appearance, you need to draw eyes, a perky black nose, a mustache and a tongue! The puppy is ready!
Master class on making a wigwam with your own hands
Today we invite you to make such a children's hut.
Materials and tools.
For the frame:
- 6 wooden slats, 2 to 4 cm thick and 2 m long. Instead of slats, you can take bamboo sticks - they are light, inflexible and look nice.
- Twine or other strong rope.
- Roulette.
- Drill and drill bit (optional, but recommended).
- A strong rubber band (not needed if you have a drill).
For the "awning":
- A piece of cotton or linen fabric 3 m long and 1.2-1.5 m wide. It is desirable that the fabric be dense.
- 6 strips of fabric (cords, ribbons or ribbons) 30 cm long.
- Needle and thread to match the fabric.
- For finishing edges: threads to match the fabric and a sewing machine (if you have one) or self-adhesive tape with an iron. If desired, the edges may not be processed at all.
- For the door: small diameter eyelets + lace or any other accessories (buttons, rivets, laces, etc.).
- Pencil.
- Pins.
Instructions:
Step 1: First we need to “build” the frame of the teepee. You can do this in two ways:
- Method 1:
Gather all the poles together and tie them tightly with an elastic band, retreating 10-25 cm from the top edge. Then space the poles wide apart with roughly equal spacing and one wider run, as shown in the diagram below. Make sure the frame is installed securely.
- Method 2:
Use a drill to drill a through hole in each pole, 10-25 cm from the top edge. Then tie the poles loosely enough to each other as shown in the following photos.
Step 2. Now let's work on the canopy of the hut. Lay the fabric on the floor and fold it in half to form a 1.5 x 1.5 meter square (see step A in the diagram). Make sure the fold line is on the left side of the square. Fold the square diagonally, connecting two opposite corners to form a triangle (see step B in the diagram).
Step 3. Let's start cutting. To do this, first draw a marking: draw an arc from the base of the triangle (fold line) to one of its sides, starting about 5 centimeters from the edge of the fabric. Next, draw a second arc with a diameter of about 8 cm at the very tip of the triangle. Cut the fabric according to the markings, and then spread it on the floor - you should get a “tent” in the shape of a rainbow.
Step 4. Wrap the frame in fabric, wrong side out, and pin the ends together. Mark where the fabric meets each pole about 20cm above the floor.
Step 5. Remove the fabric from the frame and sew ribbons or pieces of the same twine 30 cm long on the wrong side in place of the marks.
Step 6. Process all sections of fabric: fold the edges twice and stitch (by hand/using a sewing machine) or glue them using a special tape and an iron. The next photo on the left shows a method for quickly processing the upper rounded part of the canvas.
However, this stage is not necessary if you want to make the hut artistically careless.
Step 7. Now you need to figure out how to “fasten” the edges of the awning. In our project, small eyelets were used, which were simply laced after installation. You can come up with your own way. For example, snaps, buttonholes, or ribbons work well.
Step 8. Cover the wigwam with an awning, fasten its top, and simply fold the “doors” back. If desired, they can be set aside and secured with Velcro or ribbons.
Step 9: Place a rug or blanket inside and throw in some cute pillows. Decorate the outside of the wigwam with fluffy pom-poms, yarn/paper tassels, and/or LED garland. You can put flags on the sticks. Well, that's all, the wigwam is ready!
Thanks to the fact that the tent is quickly assembled and put away, it can be placed outdoors. For example, in a summer cottage to hide from the sun and mosquitoes. If the awning gets dirty, you can easily remove it, wash it and hang it back on the frame.
European art - quilling
Quilling is a technique for working with paper, also called paper rolling. If you master this skill, you can create amazing crafts, both voluminous and flat. But this direction requires a lot of endurance and patience. In order to create interior items or even simple figures, you need to twist not just a single spiral, but dozens, hundreds, sometimes thousands.
The resulting spirals are folded into various shapes that form modules. And you can use them to make photo frames and decorate albums, greeting cards, even beads and necklaces!
This direction came from the Mediterranean. In coastal Europe it was mastered back in the 15th century! And it gained popularity because of its availability and low cost. But even royalty did not disdain this direction; even Queen Elizabeth of England was fond of quilling at one time.
Wigwam Decor Ideas
If you can choose almost any stick for the frame, then you should approach the choice of fabric responsibly. After all, how the wigwam will fit into the interior and how much the child will love it depends on its type. Further in the selection we presented several interesting examples of huts for boys and girls.
The most versatile and win-win wigwam is made of white or beige fabric. It will not overload the interior and will be combined with any decor, and there will always be pleasant lighting inside it. True, you will have to wash a white awning a little more often than a colored one.
A white tent can be decorated with fabric paints, embroidered with appliqués, or covered with tempera stickers.
Tools for quilling
The main thing you have to buy is paper. You need a lot of it. Cut the strips in advance. They shouldn't be short. By the way, stores sell ready-made sets of strips. You can’t do without glue; it is desirable that it is of high quality and does not leave a lot of dirt. The shopping list will also include small scissors, tweezers, and an officer’s ruler. To curl the paper, you still need special rods (they can be replaced with simple toothpicks).
Note!
- Paper shuriken: TOP-140 photos of the best DIY origami ideas. Instructions for children step by step with simple diagrams
How to make paper claws - detailed instructions with simple origami diagrams. Creative creation ideas + photo and video reviews for children
Cardboard crafts - TOP 130 best photo instructions for children. Master class with a clear description of the stages of work + reviews of creative cardboard products
Wigwam with five slats
A children's hut can stand on different support points. The number of sticks depends on the area that should be inside. Using five slats, you can make a beautiful and spacious wigwam with your own hands.
For it you will need:
- five long wooden slats;
- a ball of twine;
- from four to five meters of fabric in two colors: cotton and lace;
- set of push pins.
This type of wigwam is less durable than the previous one, but to create it you don’t need to bother with patterns and sewing.
Technique:
The slats must be the same length. To avoid confusion, you should first consider options for crossing the slats. The first pair is tied with twine, securing it tightly. Then the same thing needs to be repeated with the second pair of slats. The fifth rail should be inserted between them. The finished structure is once again tightly tied with twine, connecting all the sticks together
It is important that all elements are firmly fixed. You need to cut a narrow but long piece of cotton fabric and tie it around the junction of the sticks
It is pulled between each rail, and the end is hidden inside the structure. Paper clips will help secure the fabric. Their advantage over nails is that they do not harm the fabric, so the hut can be assembled and disassembled, maintaining a good appearance of all its elements. A piece of the same size as the previous one is cut from the lace fabric. It is tied just below the joint of the sticks in a similar way, also secured with paper clips. Subsequent steps consist of alternately wrapping pieces of two types of fabric around the slats. The direction can be arbitrary. You need to allocate a place for the entrance: there is no need to wrap fabric between the first two sticks, that is, you need to make an unfinished circle from the fabric. All cuts should be wrapped around each rail, securing this place with paper clips. The finished hut can be decorated with flags or paper garlands. This wigwam will fit perfectly into. In the middle you can put a sheepskin or a blanket and pillows to make it comfortable for the baby to play.
Having found out how much a store-bought wigwam costs, many parents do not dare to overpay for a lightweight structure and create it themselves.
If you are among them, consider the following:
- The ends of the sticks should always peek out from above, opening a hole for fresh air.
- The decor of the wigwam depends on personal preferences. If you make a hut like the American tribes, you will need feathers, stones, leather straps, and ornaments on fabric. The modern design can be decorated with pompoms, paper garlands and fashionable prints.
Wigwam... We are sure that this word is not known to everyone, if we look at it through the prism of children's things. But recently it has become popular enough to warrant a whole article dedicated to it.
Previously, this term was used only when talking about the home of the Indians of North America. In the forest they built a small hut, the shape of which resembled a dome. These dwellings varied in size. Some accommodated 25 to 30 people.
For modern mothers, the word “wigwam” is also associated with housing, but only for their beloved, little “Indian”. Another name for a children's wigwam is tipi or hut. You can place it not only in the children's room, but also in any other place: in the living room, in the country house, in the yard or indoors.
Basic Quilling Skills
All large quilling paintings are made up of small patterns. Below is a description of the basic figures. White paper is suitable for learning.
The basis of the basics is spiral winding. You need to arm yourself with a rod or toothpick. Then start winding the strip of paper, doing it very tightly. Then glue the edge of the spiral and remove it from the rod. It's a tight spiral.
You can also make the next element - a “cone”, but adding each new turn like a ladder.
The basic skill for all other figures is called "light spiral". We make it tight, but at the end we loosen our grip and only after that we glue the edge. Then from this you can make an oval, a drop, a triangle, a heart, a flower, etc. They are easy to shape with your fingers because the spiral is not tight and allows you to change shapes.
If you glue such figures together and place them on a sheet of paper, you can get bouquets, butterflies, beautiful meadows of charming sheep. A themed paper craft for summer will be ready if you put in a little effort and use your imagination!
Master class on making a wigwam with your own hands
Today we invite you to make such a children's hut.
Materials and tools.
For the frame:
- 6 wooden slats, 2 to 4 cm thick and 2 m long. Instead of slats, you can take bamboo sticks - they are light, inflexible and look nice.
- Twine or other strong rope.
- Roulette.
- Drill and drill bit (optional, but recommended).
- A strong rubber band (not needed if you have a drill).
For the "awning":
- A piece of cotton or linen fabric 3 m long and 1.2-1.5 m wide. It is desirable that the fabric be dense.
- 6 strips of fabric (cords, ribbons or ribbons) 30 cm long.
- Needle and thread to match the fabric.
- For finishing edges: threads to match the fabric and a sewing machine (if you have one) or self-adhesive tape with an iron. If desired, the edges may not be processed at all.
- For the door: small diameter eyelets + lace or any other accessories (buttons, rivets, laces, etc.).
- Pencil.
- Pins.
Instructions:
Step 1: First we need to “build” the frame of the teepee. You can do this in two ways:
- Method 1:
Gather all the poles together and tie them tightly with an elastic band, retreating 10-25 cm from the top edge. Then space the poles wide apart with roughly equal spacing and one wider run, as shown in the diagram below. Make sure the frame is installed securely.
- Method 2:
Use a drill to drill a through hole in each pole, 10-25 cm from the top edge. Then tie the poles loosely enough to each other as shown in the following photos.
Step 2. Now let's work on the canopy of the hut. Lay the fabric on the floor and fold it in half to form a 1.5 x 1.5 meter square (see step A in the diagram). Make sure the fold line is on the left side of the square. Fold the square diagonally, connecting two opposite corners to form a triangle (see step B in the diagram).
Step 3. Let's start cutting. To do this, first draw a marking: draw an arc from the base of the triangle (fold line) to one of its sides, starting about 5 centimeters from the edge of the fabric. Next, draw a second arc with a diameter of about 8 cm at the very tip of the triangle. Cut the fabric according to the markings, and then spread it on the floor - you should get a “tent” in the shape of a rainbow.
Step 4. Wrap the frame in fabric, wrong side out, and pin the ends together. Mark where the fabric meets each pole about 20cm above the floor.
Step 5. Remove the fabric from the frame and sew ribbons or pieces of the same twine 30 cm long on the wrong side in place of the marks.
Step 6. Process all sections of fabric: fold the edges twice and stitch (by hand/using a sewing machine) or glue them using a special tape and an iron. The next photo on the left shows a method for quickly processing the upper rounded part of the canvas.
However, this stage is not necessary if you want to make the hut artistically careless.
Step 7. Now you need to figure out how to “fasten” the edges of the awning. In our project, small eyelets were used, which were simply laced after installation. You can come up with your own way. For example, snaps, buttonholes, or ribbons work well.
Step 8. Cover the wigwam with an awning, fasten its top, and simply fold the “doors” back. If desired, they can be set aside and secured with Velcro or ribbons.
Step 9: Place a rug or blanket inside and throw in some cute pillows. Decorate the outside of the wigwam with fluffy pom-poms, yarn/paper tassels, and/or LED garland. You can put flags on the sticks. Well, that's all, the wigwam is ready!
Thanks to the fact that the tent is quickly assembled and put away, it can be placed outdoors. For example, in a summer cottage to hide from the sun and mosquitoes. If the awning gets dirty, you can easily remove it, wash it and hang it back on the frame.
Paper creativity is the basis of creative thinking
This material describes only a few areas of paper art. In fact, there are many more, you just need to let your imagination run wild. It is useful for people of all ages and professions to engage in such art.
It not only brings aesthetic pleasure, but gives inner harmony, develops thinking and allows you to calm down and forget about the bustle of everyday life.
How to make a wigwam in an apartment
Making a wigwam for a child is as easy as shelling pears, and you don’t need any special skills, just materials, time, and desire. Prepare:
- slats with a round cross-section - at least 4 pieces. Determine their length yourself, the main thing is that the children can freely, at their full height, be in their home;
- a skein of rope for tying support elements;
- fabric that will cover the future playhouse;
- decorating elements in accordance with the chosen style.
Let's start building a wigwam.
- Place one rail vertically. Attach the next one to it at an angle, crossing both at the top. Fold all the supports so that the top of the hut resembles a bouquet of twigs.
- Tie the slats with ropes and reinforce the cross bars at the bottom of the frame.
- Wrap the base sticks with pieces of fabric of different colors, securing them with buttons.
You can make a removable cover for the house, but it will take more time.
- Measure the height of the frame and the width of each of its triangle parts.
- Cut out a number of triangles from fabric equal to the number of sides of your structure. Cut off the tops of the triangles by 15 cm to get trapezoids - this will make it easier to pull the slats through the pockets. Add allowances to the sides for pole pockets. Cut one figure in the middle to get a door. Sew on a couple of Velcro strips and the lock is ready for it.
- Sew the trapezoids together, sew pockets along the diameter of the sticks. Stretch the fabric over the frame and tie the top of the slats with ropes.
- Decorate your home with whatever you want: flags, ribbons, lace. You can give the house an Indian flavor by decorating the building with feathers, and painting the fabric walls with animals and birds. Place pillows, blankets, toys inside.