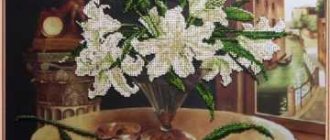
A painting, regardless of whether it is on cardboard or canvas, can be framed in any frame if there are special fastenings - petals or corners.
Petals are small and large. The former are built into the frame, and the latter are attached to it with screws. The corners are attached with screws and come in several sizes.
Use at least two fasteners, placing them on opposite sides of the frame, preferably 3 or 4.
Deciding on the design choice
What you need to pay attention to when choosing a design for a frame:
- will it fit into the overall interior of the room;
- the frame should be in the same color scheme as the image, and not with the walls;
- the frame should complement the image.
To achieve the desired result, you need to carefully consider the material from which the frame will be made.
Basic rules for placement
Before attaching an exposition, you need to familiarize yourself with several rules:
- We select a size that matches the size of the room and furniture. If the canvas is large and the room is very small, it will look as awkward as if you hang a small one on the wall in a very large room;
- It is important to consider that the center of the image should be at eye level;
- If you use correctly selected exhibits, you can visually change the length and width of the walls. Vertical panels will add height, horizontal ones will add length.
Material selection
There are no special restrictions on the material. The only thing that remains unchanged is the base on which the decorations will be glued. It should be dense, strong and not get wet from glue. Thick cardboard and, of course, wood work well for the frame. Moreover, the wooden frame itself is already a completed craft. It can be varnished and will be appropriate for any interior.
You can decorate the product with any available means. This could be pasta, pebbles, clothespins, buttons, beads. But do not forget that the chosen material should complement the picture. So, for example, shells will go well with a seascape, and a frame of pasta with the addition of cereals will be perfect for the kitchen.
Let's look at the two main materials from which frames are most often made - wood and polyurethane foam.
Height
You should not hang pictures too high, otherwise it will be impossible to admire them. The following universal technique will help you correctly determine the location of the canvas. Draw an imaginary line, step back 3 cm from the bottom edge of the horizontal picture, and hang the canvas so that the line is at eye level. The same principle applies to vertical canvases. But if the apartment has low ceilings, then the distance should be 6 cm from the edge.
Important! It is also necessary to take into account the distance between the walls. There is a separate rule here. The size of the larger side of the canvas must be multiplied by 3 - this is the minimum recommended distance for viewing the canvas.
Wooden frame
Wood is a classic material used to make picture frames. Such designs are durable and fit almost any picture and room design.
To make a wooden frame, you don’t have to go to the forest to get wood, then process it and cut out the planks. You can go to a hardware store and purchase wooden skirting boards there. They are perfect for a product like this.
What you need:
- Wooden plinth. Its length and width should correspond to the size of the picture. Therefore, be sure to measure the picture before buying a plinth and do not forget that the frame will be longer than the canvas.
- Well sharpened knife.
- Scissors.
- Sandpaper.
- Furniture glue. PVA will do.
- Hacksaw.
- Small nails.
- Hammer.
- Ruler. It would be better if it was angular.
- Cardboard or plywood.
What to do:
For a richer look, you can use carved wooden baseboards. Their price corresponds to their appearance, so you will have to pay a decent amount for such material for the frame, but upon completion of the work it will be worth it.
Toly hooks and regular hooks
Toly spider hooks are sold at hardware stores for a small price. They are a plastic product with sharp, hardened steel nails at the base. A few blows of the pullet and the product hangs on the wall. They were originally intended for fastening to concrete and brick walls, but in practice they can be used on any surface. The spider hook is easily dismantled, leaving behind 4 small punctures. The defect can be masked by rubbing your finger on the wall.
Polyurethane foam frame
For women, “polyurethane foam” sounds threatening, but there is no need to be afraid, because it is ordinary polystyrene foam, only stronger. Ceiling plinths are made from it, which are now used to renovate apartments. Their price is low, but the variety of patterns is impressive. There is no difference in manufacturing with wooden baseboards. But don’t forget that this is not wood, so you should handle polyurethane foam more carefully. Any blow can lead to dents, or even break the entire structure.
What you need:
- Ceiling plinth.
- Hacksaw or sharp knife.
- Glue.
- Ruler.
- Plywood or cardboard (depending on the size and strength of the catrina).
What to do:
Even in an interior imbued with the spirit of minimalism, there is always a place for several decorative elements. For example, a replica of a painting by a favorite artist or even a creation by a family member will not make the room visually heavier at all. But any painting needs a worthy frame - a frame that will be the finishing touch that emphasizes its uniqueness and connects it with the overall design idea of the room.
Grouping
If there is a large wall in the kitchen, and the paintings are small, it is better to place them in groups, around one canvas that you like the most. The group should include paintings similar in style or color scheme. For example, a series of batiks, united by one theme.
Important! In a group of three paintings, the middle canvas is the main one.
Canvases of the same size are most often hung in one row at an equal distance from each other. But they look more interesting when they weigh at different levels.
Often people perceive canvases as elements of classical painting that require a large amount of space on the wall. They should not be covered with furniture or other decorative items.
How to make a picture frame?
Sometimes making a picture frame with your own hands is much easier than ordering it from a framing workshop. Firstly, it is not so burdensome financially, and secondly, there is always a risk that even the most qualified master will not take into account all your ideas, and your vision will diverge from his at a certain moment. In addition, the process of such creativity is a great way to spend time with your family, if you involve children or other household members in it.
To decide what the frame for your chosen painting will look like, what materials to create it from and in what form, you need to take into account 2 main points. The painting itself and the design of the room in which the painting will subsequently be placed. Due to the fact that the painting is already a fairly bright spot of color, you should not make a frame that is dissonant with it: its task is to highlight, but not to put into shadow what is written on the canvas. Therefore, it is advisable to give preference to monochromatic options, as well as those not overloaded with small and complex details. If there is a pattern, it should not be knocked out and change constantly. The same goes for the form - the simpler it is, the more universal it is.
A classic picture frame is a monochromatic frame around the perimeter, medium width and neutral colors. Traditionally, such frames are made of wood or its imitation, but sometimes soft materials are used - for example, fabric. However, under it, to give rigidity to the entire structure, there must still be some kind of frame. What it will be made of depends on what is more convenient for the master to work with, or what seems more appropriate for a particular instance.
For example, for small pictures placed in a child’s bedroom, frames can be made from cardboard covered with fabric, inside of which cotton wool or other filler is stuffed for volume. In the case of large paintings for the living room, of course, the same technique will no longer work - here you need wood, plaster or metal.
Various Velcro
Light weight paintings can be hung using double-sided tape. The fastening is suitable for any surface, but there is an important condition - the walls must be even and smooth. It is better to choose fabric-based masking tape: it is more reliable. The principle of its use is approximately the same as adhesive fasteners.
Secure a strip of tape around the perimeter of the back of the painting and peel off the protective layer. Press the canvas firmly against the wall. This method is suitable for all walls, including plasterboard. However, after removing the tape, there is a danger that a piece of the wall covering will come off along with it.
Miss Clean magazine advises: to avoid damaging the walls during dismantling, use a little trick: peel off the tape at a 90-degree angle.
An alternative to tape is Velcro from a sewing store. They are designed to secure shoulder pads and pockets on clothing, but can also be used for other purposes. One side of the tape is glued to the photo frame using glue, and the other side is glued to the wall. The method is convenient because you can change the location of the picture as much as you like. The number of Velcro depends on the size of the canvas.
DIY picture frames made of wood and glass
Working with wood at home requires a saw or a special machine (if the parts are large and thick, or if there are many of them), a hammer and special glue for joining parts of wood. Means for subsequent processing of products - varnish, paint, etc. — are selected optionally, depending on whether you plan to further decorate the resulting frame, or whether you want to leave it in its natural form. And, of course, you can’t do without a standard set of tape measure, pencil and ruler. It is desirable that the latter be angular - this will make it easier to make the necessary cuts on the parts.
A long wooden strip of pre-selected width is cut into 4 parts, where they are equal in pairs. Their sizes are determined by the parameters of the picture for which the frame is being prepared. The inner edge of the tree will have to overlap the canvas by 3-5 mm to prevent it from falling out. Or, if you are afraid of losing these 3-5 mm of the design, then the frame should be made with glass: in this case, a sheet of plywood and a sheet of glass are additionally prepared. The dimensions of the latter should be slightly smaller than the outer perimeter of the frame, as well as the dimensions of the picture, so that its edges are completely aligned with the edges of the plywood that will cover the picture from behind. So, if your picture is 30 cm wide and 20 cm high, then the parameters for glass will be the same, and for plywood and the outer perimeter of the frame - 33 and 23 cm, respectively.
Under the glass, on the inner surface of the wooden slats, you need to make a recess: after an indentation of 3 cm from the outer edge to the inner, a flat area is cut out, recessed by 2-4 mm (depending on the thickness of the glass and canvas). Then the top of each slatt is cut with a saw at an angle set using a diagonally placed ruler - this will make it easy to join all the parts into a single rectangle. Before gluing them, the joints are treated with sandpaper. After which the frame is put aside - the glue must dry completely, which can take up to 4 hours. If you have a special stapler for wood, it is recommended to strengthen the fixation of the pieces of wood to each other by placing several staples on the inside of the product. If necessary, you can decorate the frame - paint and varnish it, not forgetting to give each layer the opportunity to fully dry.
The next stage is a kind of sealing of the picture. To do this, the frame is turned face down, the canvas is laid clearly on the glass and carefully leveled. It is advisable to make a press on top from a thin sheet of cardboard, and place plywood on it, pre-cut to the size of the frame. It should align with the edges of the wooden parts and not protrude beyond them. If everything is correct with the dimensions, the frame is treated with glue around the perimeter, after which the plywood is finally laid on it. It is advisable to hammer a small nail into each corner for better fixation of wood and plywood. This completes the creation of a wooden frame with glass for your painting.
Command Wall Fasteners
Looking for a way to hang photo frames? Fasteners with adhesive tape will come to the rescue; they can be used without the help of a drill or hammer drill. The products are easy to remove and do not damage the surface of wallpaper and walls. They are Velcro, covered with a protective film on top. The set contains 4 pieces, they need to be separated from each other before use. Next, follow the instructions on the packaging:
- connect 2 Velcro strips together and peel off the protective film from one of them;
- fix the adhesive layer on the back of the frame and press firmly;
- repeat these steps to secure the remaining strips to the frame;
- remove the films from all Velcro and attach the frame to the wall;
- press firmly and hold for 30 seconds.
To remove the fasteners, just move the bottom edge of the frame away from the wall, then pull the tab of the strip strictly vertically until the Velcro comes off completely.
Hanging a frame this way can be quite quick and convenient, but there are some disadvantages. As reviews show, the fasteners do not adhere well to vinyl and non-woven wallpaper, but they are firmly attached to paper coverings. The price of the product is also quite high and amounts to about 200 rudders. The fasteners can withstand a weight of 450 grams, therefore, they are not intended for fastening larger paintings.
Making picture frames for a children's room
- For children's paintings, as already mentioned, the frames may not be wooden, but soft. Volumetric options can be easily created using thin narrow wooden slats, a certain amount of fabric, as well as cotton wool or other filler. In addition, you will need thick cardboard, a ruler, a pencil, scissors, a needle and thread, tailor's pins, and a glue gun. Initially, you will need to prepare the frame - its role will be played by wooden slats connected into a rectangle. Since they will be inside the frame, there is no need to worry about their appearance. You can put their ends on top of each other, subsequently fixing the joints with a glue gun or small short nails. As for the dimensions, this shape should also be slightly smaller along the inner edge than the perimeter of the painting itself.
- Now you need to cut out a template of exactly the same frame from a free sheet of cardboard, and then cut it into 4 parts: at the same time, from the corners of the cut line, draw diagonally to the center. The resulting template is transferred to the fabric, where its dimensions change slightly: you will need to add 1 cm to the seams from each edge, and also increase the width of the fabric frame itself by 2 cm - because it will greatly increase in volume.
- Each piece is folded right sides inward and stitched along the long side to create tubes that can be turned out and placed on the frame frame. After this, the empty space in them is filled with cotton wool, scraps of fabric or other material. As soon as the required density is achieved, the parts are sewn together along the short sides, the seam is made hidden, neat, since the work is already being done on the front part. You should try to move the threads to the wrong side, which will lie on the picture. All that remains is to secure the frame with thick cardboard glued to the back, and the work on it is completed.
- In addition, you can make a picture frame with your own hands from a basic wooden blank, which can be purchased at any hobby store. It costs a penny, but it can be decorated so skillfully that no one will guess what the base was. In addition to the usual painting of wood, decoupage, gluing with any small, non-garish materials (leaves, dried flowers), and covering with fabric are used. And if you are interested in more non-standard frames, you can even crochet or knit them.
Attaching to wallpaper using a paper clip or sewing needle
If you have practically nothing at hand to attach the picture, a regular paperclip or even a sewing needle will do.
The only limitation is the need for dense, preferably embossed, wallpaper and
To fasten with a paper clip, the following manipulations are performed:
- Using a sharp knife, make a horizontal slit in the wallpaper.
- A narrow, thin object (for example, a steel manicure file) is inserted into the gap from top to bottom in order to carefully tear the wallpaper off the wall to the length of a paper clip.
- Then the paper clip needs to be bent a little and, generously coated with PVA or Moment glue, inserted under the wallpaper, and then pressed tightly.
With a needle the situation is simpler. It needs to be bent, inserting halfway into any narrow gap in the house. The deflection angle is about 15°. After this, insert the needle from top to bottom into the wallpaper, leaving an end 1-1.5 cm long outside.
DIY picture frames: video
There are many possibilities for decorating your favorite paintings. Even if you have never tried yourself in making picture frames before, from all the variety of methods you can easily find the one that suits you. And with practice, you will be able to master even those that once seemed subject only to masters.
Offers ideas for those who are constantly looking for original projects to creatively recycle things lying around into something new. Today these are old frames for paintings and photographs. The unconventional use of such frames is amazing! These are organizers, hangers, key holders, flowerpots, panels, chessboards and even furniture.
But, before you start implementing your idea, you need to transform the old picture frames. Think about your future idea, choose a color and style, select tools and materials, and decide on a technique. If the frame is wooden, then be sure to remove any remaining paint, burrs, or unevenness. Plastic frames just need to be washed and degreased. Sometimes it is enough to paint the frame with acrylic paint, but more often it turns into an interesting creative process: aging the surface, decoupage, mosaic, painting, applique, inlay and more.
trucsetbricolages
To decorate book shelves, glue finished frames to the shelf. Such decor will look very impressive on furniture if you glue them around the entire perimeter.
changeofsceneries.blogspot
Choose beautiful handkerchiefs, scraps of fabric or embroidered (knitted) motifs and decorate them with frames and glass. Depending on the selected images, such a composition will be appropriate in both the living room and the kitchen.
dwellingsanddecor.tumblr
An original shelf for cups, spices, tea or coffee. You can also place collectible cups or other items in this style.
kitchenisms
The tray is beautiful, simple and accessible even to a person who has never been involved in creativity and handicrafts. Don't forget to place a picture on the topic under the glass. It can be changed depending on the holiday.
nanaluluslinensandhandkerchiefs
The coffee table top is an old picture frame. For the legs, buy wooden balusters for stairs (sold in hardware stores). Under glass - all your imagination.
joann
Old picture frames are also popular as wall decor. They can be used either one color or multi-colored.
makelyhome
This composition with paper flowers also looks great as wall decor. But here you need to think about where such decor is appropriate. Or it will be a narrow hallway, a cottage, or a holiday decoration.
indulgy
In this example, the frame is used as a towel rack in the bathroom.
robolady.blogspot
Miniature key holder. The frame is aged. There are hooks at the top for placing keys. A very convenient thing.
hometalk
Classic - a TV in a good frame. Everything here should correspond to the chosen style.
buzzfeed
A desktop organizer consisting of a frame and strips of thick fabric. Here you can place pens and pencils, note paper and photographs, greetings to your loved one and wishes to the children.
wishfultinker.blogspot
Decorate the panels using old picture frames. Glue wallpaper, newspapers, or make drawings inside the frame using a stencil.
thehouseofsmiths
Set up a chessboard. Hang it on the wall. This will be a favorite place not only for children, but also for adults.
toysgadgets
ourfinehouse
Another organizer. Cover the cardboard with fabric and sew on pockets from old denim trousers. And you will get several pockets for pencils, scissors, knitting needles, hooks, rulers and other necessary handicraft tools. And also make a cosmetics organizer.
decozilla
Create a cozy place for your shoes. This design is easy to move to any place. And most importantly, it does not take up much space.
Watch, learn, fantasize and create your own masterpieces and give new life to old things. Good luck everyone!
Today, a frame for any picture can easily be purchased at a nearby store. And it doesn’t matter what you are looking for a frame for: for a painted picture, embroidery, a child’s drawing or a photo collage. However, some masters believe that a good painting requires a special frame. Therefore, it is best to make it yourself. And the question “how to make a picture frame with your own hands” should be approached with all responsibility.
You can make a canvas frame at home. To make it, you will need the following material: a baguette or interior molding more than twenty millimeters wide, of the same cross-section, a construction stapler, superglue and a tape measure.
How to make your own picture frame on canvas
First, you should take measurements from the painting and, cutting the ends of the bars at an angle of 45 degrees, cut them into the required lengths. The bars are fastened together using a stapler and superglue. It is important that the painting fits smoothly into the stretcher, without distortions or gaps. Next you need to make the frame frame. To do this, glue a baguette or molding onto a wooden frame. The finishing material must completely hide the frame and protrude at least one centimeter from its outer side.
To install a picture in such a frame, you need to attach it to a wooden frame using If the size of the picture is more than 40 centimeters on one side, you will need to make additional holders. They are often made from plastic bottles and stapled to the inside of a wooden frame frame. When inserting the canvas, be sure to attach it to the stretcher.
How to make from paper
The option of making homemade paper frames is also very popular. Most often, such simple designs are used for children's drawings. So, how to make a picture frame with your own hands? Very simple. According to the size of the painting, you need to cut a frame from cardboard or whatman paper. In this case, the paper frame design option plays a special role. You can get creative with the shapes by making the frame not the traditional square, but round, oval, or in the shape of a star or heart. You can decorate such a frame in the same style as the drawing that it will soon frame. For example, if this is an applique, then the frame should be covered with cut out figures, and a watercolor drawing will look great in a brightly colored frame. It should be noted that paper “frames” are essentially disposable, as they are glued to the drawing.
Making picture frames with your own hands involves many design options for paper frames. For example, “frames” covered with wallpaper or textiles will look very interesting. If you intend to make a paper frame for a photograph or panel, you can turn to decorating it in scrapbooking style. Using a sewing machine and cardboard, you can get a spectacular frame that will not leave any of your guests indifferent.
How to make a picture frame with your own hands: finishing ideas
To make and decorate such a product, you can use any available materials: from pieces of lace to building stucco. It is good to decorate wooden frames with lace; for this, pieces of material are glued in random order with PVA glue. After varnishing, this composition takes on a sophisticated colonial-style look.
Using gypsum ceiling molding, you can get an equally interesting frame. This material is very easy to work with, and if you paint the stucco first with black paint, and then add strokes of bronze and gold, you will get an excellent antique-style frame.
Making a frame for a painting, poster, photograph or drawing is quite possible.
You probably immediately have doubts that you will really be able to create something worthy that will not spoil the work of art, and that such a frame will not be embarrassing to hang on the wall. And it’s completely wrong to think so. If you are one of those whose hands are certainly not from the back, then everything will definitely work out. You just need a little effort, patience and knowledge, which I will gladly share with you.
Backlight
Lighting of canvases is of great importance. But if in a museum they can be placed along one wall and lamps installed above each, then in an apartment it is better to use good natural lighting. Additional lighting can be useful when glare appears or you want to focus attention on the wall. For these purposes, it is better to use LED lamps that do not heat up and create a directional ceiling of light.
Important! The maximum permissible illumination for painting is 150 lux. You can use a 100W incandescent lamp or a 20W fluorescent lamp. They should be located at least 1 m from the canvas.
Why does it make sense to make your own picture frame?
There are three arguments in this regard:
Firstly, not every locality has framing shops where you can order a frame, which is generally not cheap.
Secondly, it is not always possible to buy a ready-made picture frame of the size you need. Otherwise, you will have to crop the poster or photograph, which is also not good.
And thirdly, a product successfully made with your own hands will look more original and will bring you moral satisfaction.
At the beginning, you need to clarify that there are many options for making a frame. But half of them require the necessary equipment, which not everyone has, especially if you don’t do this all the time.
Therefore, we will consider the three most available options.
Making a frame from a wooden plinth
What should you stock up on before starting work?
Well, the materials and tools, in general, are not complicated, but you will still need to prepare some things in advance.
And so, the materials you will need are wooden plinths or well-planed bars. Both can be purchased at building materials stores. You don't need much length, so
it won't cost much at all.
In addition, you will need a small sheet of thick cardboard or fiberboard with a thickness of about 2-3 mm.
You will need wood glue, staples or small nails, stain and varnish.
The tools you will need are a small hammer, a fine-toothed hacksaw, a miter box or square, a tape measure, sandpaper and a pencil.
In accordance with the size of your painting, measure out four pieces of plinth.
It’s good if for some reason you have a miter box available. In this case, you can easily saw off the workpieces at the desired angle. If you don’t have one, and this is most likely the case, then you will have to use a square or a protractor. Mark the workpiece at an angle of 45 degrees and carefully saw it off, trying to prevent the wood from chipping.
If you don't have a fine-tooth hacksaw, you can use a metal hacksaw.
Just cut in this case slowly and without pressing, because the narrow blade of the hacksaw can move to the side, and the cut will turn out oblique.
After sawing, the ends need to be sanded and the wood dust removed with a slightly damp cloth.
Now you need to fasten the pieces together. This can be done in two ways.
In the first case, we coat the ends of the blanks with glue and glue them together on a flat surface. We check the correct gluing with a square and secure the corners on the back side of the frame with wood brackets. After this, let the glue dry completely.
In the second case, we proceed in exactly the same way, only we fasten the corners not with brackets, but with pre-prepared triangles made of cardboard or fiberboard with a side of about 5 cm using nails. You can also use metal corners.
When the glue has completely dried, we sand the joints with fine sandpaper and remove dust. After this, we cover the frame with a stain of a suitable color. After a few hours, we varnish the frame, dry it and enjoy the result.
Making a frame from slats with subsequent decoration
To do this, you will need planed wooden slats, which we saw off at an angle of 45 degrees in the manner described above and fastened with corners made of cardboard or fiberboard.
Before nailing the corners, they should be coated with glue.
After the glue has dried, we paste the picture frame on the front side with decorative material and paint it in the desired color or varnish it.
Such material can be pieces of brushwood, shells, small flat pebbles, various buttons and much of what comes to your mind. Such frames look quite original, but you just need to take into account the style of your painting or photograph.
Liquid Nails
This method allows you to securely attach the piece of art to the wall, but it’s worth noting right away that you won’t be able to change the position of the painting without damaging the surface.
If you decide that the canvas will hang in this place for many years, follow the following algorithm.
- Outline the intended location of the product with a pencil on the wall using a level.
- Before using glue, the surface of the wall and painting must be degreased.
- Apply Liquid Nails around the perimeter of the frame, leaving a 5cm gap between the dots.
- Glue the picture along the marked markings and press firmly. Hold for better fixation until the glue dries.
Instead of Liquid Nails, you can use polymer glue or Super Glue. If it becomes necessary to dismantle the painting, it must be removed very carefully. There is a high probability that you will have to change the wallpaper or re-plaster the surface.
Home craftsmen offer an original method. You can hang the product not on the wall itself, but on a bottle cap. It is carefully cut across to create smooth rounded parts 0.5-0.9 cm thick. They are glued to the wall, and then secured with a screw.
Subject VS Color
What comes first: palette or content? If the interior has a distinct stylistic theme, then you should select the canvas according to its content. In such cases, thematic and stylistic inconsistency is not acceptable.
For example, if the living room is decorated in an African style with a predominant beige and yellow palette, then an African woman with a blue turban would look more appropriate than an autumn forest. Color imbalance can be corrected with accessories. For example, hang a picture on the wall above the sofa, and put blue pillows on it. Even if color comes first, the plot remains important.
Advice! Paintings with abstractions, portraits and plants are universal. They can be used in any room and even in the kitchen.
What to avoid
Today, paintings in the interior are a tool for decorating the environment. The perception of the entire room depends on the size and location of the painting on the wall. Their very presence can change the usual way of life. According to Feng Shui, for a painting to bring happiness, you need to fall in love with the image.
Therefore, in interior design you should avoid:
- Aggressive subjects in the form of floods, fires, wild animals - such paintings change the positive energy.
- Images of elderly people and broken dishes will bring destructive energy into the house.
- In the kitchen or in any other room, you should not hang radically different images. Mixed energy will also not bring comfort.
- You can hang pictures of water in the kitchen. According to Feng Shui, such images attract financial flows. In the living room you should hang dynamic paintings with an active plot. If the room or kitchen is used for frequent gatherings of friends, then images of noble animals would be appropriate.
Advice! It is advisable to select solutions in blue and blue colors.