A decorative well is a traditional decoration for a garden, courtyard of a private house or dacha. They build such wells of different types, there are simply magnificent ones, decorated with mosaics and carvings, lined with tiles, stone, etc.
The owners usually show their abilities in decoration. But if the owners of the farmstead do not have any special artistic talents, there is little time for crafts for the garden, but you want a beautiful decorative well? Here are three options for very simple wells, which, moreover, can be made very quickly, and the investment in them is minimal. It may even be possible to make do with improvised materials.
ParaPhrases for craftswomen
- 10.09.2017 10.01.2018
Materials:
- Large jar (house) and small jar (bucket)
- cheese box (trolley)
- thick cardboard
- large wooden skewers
- cocktail straws
- leg-split,
- plumbing linen or sisal
- champagne corks
- salty dough
- green fabric, burlap, synthetic padding
- coffee beans, cereals
- gouache and acrylic bronze paint
- PVA glue, Titan, hot glue
- foam sheet
- corrugated paper
- stones for the path
- figurines of animals and people
Salt dough : 1 tbsp. flour, 0.5 tbsp. “Extra” salt, 125 ml. water.
Manufacturing:
Glue the jar with twine using Titan glue.
Make a cone out of cardboard and also cover it with twine.
Make the wings of the mill from wooden skewers.
The required dimensions of the blanks are 8 pieces - 7 cm each; 4 things. – 6 cm each; 4 pieces - 4 cm each and 4 whole skewers. Slice.
Tie 4 whole skewers and glue the blanks on hot glue in order 7 cm, 6 cm and 4 cm, glue the blank 7 cm horizontally. Connect the two blades.
Cut corks into bricks and decorations for the blades.
For the roof, wrap the twine like tassels.
Then spread glue in places on the cone and glue the brush, carefully straightening the twine.
Tie the roof in three places.
Glue the base to the roof and glue the blades.
Use salt dough to make a door, horseshoe, pepper, bird and pumpkins.
Dry all products at room temperature (you can also dry them in the oven at a minimum temperature), and immediately glue the door onto the mill with PVA glue so that it takes a curved shape.
When the dough parts are dry, paint them with gouache or acrylic paints.
Glue the horseshoe, pepper, bricks to the walls of the mill.
Place the bird in a nest on the roof.
Decorate according to the photo with coffee beans.
Cut cocktail tubes in quantity - 40 pieces - 6 cm each.
Wrap the pieces with twine, securing them at the beginning and at the end with glue.
Cut a strip of cardboard 6 cm wide, a sheet of A-4 format long, and staple it into a ring.
We cover the well blank with tubes.
Cut out the parts from thick cardboard: a circle with a diameter of 11 cm - 2 pcs. (this will be a design to cover the tubes from above and below), a circle with a diameter equal to the bottom of the well - 1 pc., a circle for the wheel - 1 pc., a rectangle 6 X 12 cm - 2 pcs. for the roof, “pegs” 10 cm high, 2.5 cm wide and with a hole in the middle - 2 pcs.
Wrap circles with a diameter of 11 cm with twine and glue them to the top and bottom of the well.
To hide small errors, crochet (or braid) a pigtail from twine and glue it to the bottom and top of the well
Wrap the “pegs” with twine and glue them to the well.
Insert the skewer into the “pegs” and wrap part of the handle first.
Then wrap the rest of it.
Make a wheel for a well from bent pieces of tubes and a cardboard circle.
Cover a “bucket” made from a small jar with twine and attach a handle.
Now you need to measure 20 cm of twine and connect the bucket to the handle of the well.
Glue the wheel to the well handle.
Add coffee beans as decoration.
Cut the foam into the desired shape for the patio.
Cover the foam with green jersey fabric.
Insert skewers measuring 10 cm, at a distance of 2 cm from each other - a fence.
Use twine to create a wattle fence.
Paint plumbing linen with green food coloring or use sisal, and decorate your patio with this “grass.”
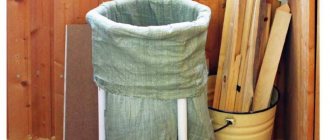
Sew fabric bags and fill them halfway with padding polyester.
Mix the cereal with PVA glue and add to the bags, tie with twine.
Make a cart from a plastic jar (from cheese) by covering the body with twine.
Make the wheels from thick cardboard and glue them to the right places.
Add cereal mixed with PVA to the cart.
Cut out sunflowers from corrugated paper. Make the centers from coffee beans.
Make tools from skewers.
Place all the crafts on the patio. The mill and the well can be glued to the base and a path made of pebbles can be laid out.
The remaining details of the composition can be left movable in order to change the scene, add and move objects, etc.
If the model is intended for an exhibition, then it is better to secure the parts by gluing them with hot glue.
Author MK: Stol Oksana Vladimirovna
How to do it? Step-by-step instruction
Let's pay attention to the universal drawing:
- In Japanese style.
- In a rural style.
- Antique.
- Flowerbed.
- Small/childish.
- Mill.
- Hexagonal.
- With a crane.
Let's look at the manufacturing features of each type.
With a crane
Wood is used as the basis of the structure. The above-ground part is made of stone, brick, reinforced concrete rings, square/round timber as follows:
- Timber and boards of a given size are prepared.
- A frame is formed.
- The wooden elements are connected to each other with fasteners.
- Additionally, a folding or removable decorative cover is equipped.
- Afterwards, a frame and support for the crane are formed from a pipe, thick timber, channel, etc.
- If wood is used, all material is treated with an antiseptic, which will prevent the formation of corrosion and rot. This also applies to the processing of metal parts.
- Part of the support under the crane should be immersed in the ground. This part must be treated with bitumen or protected from direct contact with the soil using rolled roofing felt.
- If metal is used, then a crane is formed according to a given pattern using welding, and then the entire structure is immersed in the ground.
- When installing, it is important to maintain verticality.
- If this is an imitation of a crane, then the arrow will be motionless. To create an additional effect, it is better to install a mechanism by which the arrow is driven.
You can use available material to give the structure individuality.
Hexagonal
Only wood is used to create the hexagonal shape. The simplest solution is boards. The size of the structure is preliminarily determined. Below are step-by-step instructions:
- The boards can be installed both vertically and horizontally.
- Prepare several preparations. Take 2-3 boards and connect them together with a block and self-tapping screws. The fastening bars will eventually end up inside the decorative well.
- A total of 6 such blanks are needed: 2–3 boards knocked down.
- Next, they should be combined into a single structure. A beam is used from below and above for strapping. It can also be fixed on the outside to give the shape a special appearance.
- Additionally, the header is formed according to the general style.
- You can simulate a drum and a rotary handle to create a special effect.
Mill
Imitating a large mill is not an easy task. The main difficulties will be in the manufacture of the structure itself. The head can be based on different materials: brick, wood, stone, etc. First of all, a drawing of the future structure is prepared.
Advice! Decide in advance whether the mill will be rotary or not. To set it in motion, you need to demonstrate construction skills.
The blades and the entire structure can be easily made from plywood or wicker material, as in the photo. The given shape is cut out with a jigsaw. So, there should be four blades in total. Prepare a template and cut out identical parts using it. Next, the blades are combined with each other. At the same time, they should have an angle of 90° in the center. To set the blades in motion, a rotating mechanism made of a pipe or round block is fixed.
The base of the mill is also formed from plywood. You can give this part of the product a hexagonal shape. To prevent direct contact of plywood with the soil, brickwork or other moisture-resistant material should be laid in the base.
Important! Plywood should be protected from the negative effects of moisture with paints and varnishes. They can be used to treat the blades, and cover the base of the mill with bitumen shingles.
Small/child
The children's well is made small, but at the same time it must be durable, because children can subject it to various “tests”.
The manufacturing principle is no different from large standard sizes. It completely imitates the shape of a conventional structure, only in a smaller form. For the above-ground part, a square beam is used. You can also build a rotating mechanism with a handle so that you can raise and lower the bucket. Be sure to attach a chain and a small children's bucket, preferably metal.
Flowerbed
In this case, the dacha tower will perform two roles at once: decoration and flower beds. It is recommended to use a material that is resistant to corrosion as the base.
The optimal solution is to lay out a round structure made of stone or brick.
Important! The soil will be filled inside the well, so the walls must be strong and resistant to moisture. Flowers need to be watered, so a tree would not be a suitable solution.
Additionally, a gable roof is constructed to protect the planted flowers from direct sunlight.
DIY decorative well. Master Class
Such a decorative well at our dacha will be an excellent original decoration, a wonderful touch and a bright stroke in the overall landscape picture that we constantly and lovingly create on our site.
Such a well can also have a huge practical purpose: to hide, for example, a well column, a sewer hatch and much more))
It is not necessary to buy such beauty, especially since it is not cheap. And we can easily do it ourselves. To do this, today we have a master class with a lot of photographs and several clear and useful videos on this issue.
Since this homemade product has purely decorative functions, you can take the dimensions at your discretion; it is not at all necessary to make a life-size decorative well, and there is no need for this, a small copy is enough.
To make a well you will need:
• Planed boards. • Screws. • Wood glue. • Varnish and stain. Tools: • Wood saw. • Planer. • Sandpaper. • Curved screwdriver or screwdriver. • Clamps (optional). • Drill and wood bit.
Let's start making a decorative well. Let's make a bottom box for the well from boards, fasten the boards with screws.
Now let’s make supports for the roof of the well; to do this, we attach two boards to the inner sides of the box with screws; for a more durable connection, you can also use wood glue to allow the glue to set; we fix the joint with clamps.
We will make a roof for the well, make the roof frame from bars, and cover the roof itself with boards. We smooth out all the unevenness on the wood with sandpaper.
Decorative tire well - painting
Decorative wells from tires are made using almost the same technology. There are differences, but not dramatic ones. It is worth talking about how to paint tires - the main component of such wells.
We select paint.
It can be oil paint that adheres well to rubber, although the coating will not last long. Most likely, a well that has stood in the sun/rain for a year will need to be renewed.
Enamel paint, bitumen, acrylic - all these are options for painting. Rubber paint is very good in this regard. There is no rubber in it (as you might think, based on the name), but the coating has the ability to stretch and shrink a little depending on the temperature of the object, which, as it heats up and cools down, also changes its parameters, albeit minimally. The rubber of tires gets very hot under the sun, but the plastic coating does not crack.
There may be quite a lot of oil residue on a car tire, and it must be removed, otherwise the paint will not adhere well.
- Before painting, rinse the surface thoroughly with water and detergent. Dry.
- Degrease. It is most convenient to use acetone, gasoline, and alcohol for this.
- Background painting is done with a brush or spray gun. Aerosol paint in cans is the most convenient option.
- Let the craft dry for a while.
- We paint small details with a brush - paint that contrasts with the background.
A well made of newspaper tubes. Step-by-step master class
This well almost looks like a real one, with a miniature bucket and a working drum. And it is made just from newspapers with the usual help of a glue stick and acrylic paints!
There are no special skills to create it; it requires the simplest materials and, of course, the imagination and work of the author.
We will need:
- newspapers (approximately a sheet of 25x30 cm)
- cardboard (any unnecessary cardboard, a box, such as a cereal box or a “To Do” folder)
- pencil-glue (high-quality, sticky)
- wooden skewer
- round stick with a diameter of 0.6-0.7 mm and a length of 20-30 cm
- pliers
- paper hard
- tape wire;
- acrylic paints in beige, steel and brown colors
- hard flat brush (a brush suitable for glue)
- simple pencil
- ruler
- scissors
- gypsy needle
- brown, blue and colored yellow paper (optional)
The photo does not show all the tools, since the plan had to be supplemented and modified as the work progressed.
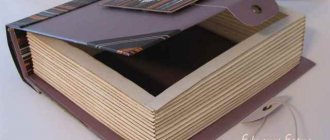
Step 1: creating a cardboard frame
As a basis for the well, you will need to glue two cardboard parts: the shaft and Mark. roof on a sheet of drawing of a rectangular element with a base of 8x8 cm and walls of 7x8 cm. An A4 sheet is not enough for a “pattern”, so one wall will have to be cut out separately.
We cover the inner surface of the shaft with brown paper or paint it brown. You can. Use paint to glue blue water with stars and a month to the “bottom”, but this is optional.
We glue the corners with paper tape. For the roof, draw a figure, see photo for how, cut out one triangular wall, bend the rest along the lines. We glue everything together with paper tape. The first frame parts are ready.
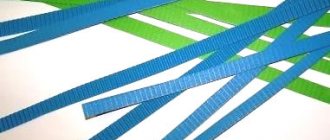
twist 2: Tube step!
Don’t worry: even if you’ve never twisted newspaper tubes, this job is so simple that you can do it at first. the student's pipes will come out uneven, but soon the fingers themselves will begin to deftly roll the newspaper into elements of an ideal shape.
For the well design shaft we will need large ones. To make tubes, take a stick 0.6-0.7 mm thick. newspaper We tear the sheet into 8 parts. We put the newspaper in our left hand (if you are right-handed), place the stick on the lower left corner of the sheet at a slight angle and begin to roll it up.
The newspaper should fit snugly and evenly along the entire length of the stick. opposite to the edge. Having reached the edge, apply glue along its entire length and seal it securely. Your hands and stick will have to be washed from time to time to remove glue.
For the shaft you need to make 32 elements, 8 on each side. you have If the stick has a different diameter than the quantity, theirs may be different. You also need to make 2 long tubes (25-30 cm) - supports for the roof well. Here's what happened:
Having twisted the necessary elements, wait for the glue to dry completely. Please note that a spiral is visible at one end of the newspaper tube, and the tube itself is thinner in this place. This spiral needs to be cut off from all the tubes with scissors. Now they look much more like real logs.
To imitate log masonry, cut half of the tubes (16 pieces) to the second 8 cm, the length of half to 10 cm.
You need to cut off the uneven second end, and not the one that is already glued. The logs are cut onto cardboard from the bottom up, alternating short and long elements.
Step 3: twist the tubes again. We design the roof
For the roof we are preparing a well with tubes of a smaller diameter. For this we will need a wooden skewer and newspaper sheets divided into 16 parts. It is difficult to say the exact number of elements, about 50-60 pieces. The spiral ends also need to be cut off to give everything a uniform appearance.
Start gluing the triangular roof with better gables. Glue the first tube along the edge of the lower gable, the second - exactly in the middle of the first, perpendicularly. Make sure the angle between the degrees is 90, this is important.
Then fill the triangle with tubes in both directions. When the glue is carefully dry, trim off the excess with sharp scissors.
proceed then to the second pediment. Roof slopes are much easier and faster to lay. After drying, cut off the protruding ends of the glue.
Step 4: Connect Now
frame we take the long, long 2 thick tubes that were lying around for the time being - roof supports. necessary to cut them to length (in the photo the length of the finished Gusto is 23 cm). We lubricate the supports with glue 8 cm from the edge and glue the shafts inside the well. For reliability, you can additionally secure them with pieces of tape, and then paint the tape itself with brown acrylic.
Before attaching it like a roof, we make something like a countertop for the well. We cut out a square of cardboard, make it cm, 8x8 rectangular hole in the center and 2 round supports for the hole.
We put the table on the supports and lower it right down to the log frame, having previously applied glue to the top of the logs. Now you can place a bucket on the edge of the well.
All that remains is to attach the roof of the supports to the top. The inside of the roof can be painted immediately, or later. My roof width turned out to be slightly larger than the distance between the supports. We solve this problem by simply gluing it: easily add an additional pair of tubes to each support in the upper part, thus expanding the roof, and attaching the gap to them.
Useful video
Full cycle of work:
If you want to decorate your interior with an unusual, exclusive item, then a well made of paper, or rather, made of paper tubes, is the optimal solution. Despite the simplicity of the materials from which it is made, it can become a real decoration of the room. It just takes a little time and a little effort. A beautiful craft that can be complemented with a sign with a wise saying or quote will surely attract the attention of guests. To make this craft we will need:
- Newspaper
- Cardboard
- Knitting needle
- Regular glue
- Super glue
- Wooden skewer
- Wire(hard)
- Pliers (pliers)
- Paper tape
- Acrylic paint in sand, brown and metallic colors
- Simple pencil
- Glue brush
- Scissors
- Ruler
- Colored paper
- Paper knife
- Thick cotton thread
Well base
On a thick sheet of cardboard of sufficient size, draw a drawing of the well shaft, as in the diagram in the photo above. The optimal size of the well will be with a side length of 10 centimeters in all dimensions. We leave a margin on each side for gluing. Cut out the template and glue it together. To strengthen the fixation of the gluing area, we additionally glue it with paper tape.
It should look like this
We should end up with a hollow cube like this without a top. This is the base of the shaft of our future well.
Roof layout
On a thick sheet of cardboard, similar to the one from which we made the base of the well shaft, we draw a drawing of the well roof. Then we cut, bend and glue to form the roof slopes. To enhance the bonding strength, we also additionally glue the gluing areas with paper tape.
DIY crafts from matches
It is worth noting that working with matches not only develops imagination
, but also
perseverance, tolerance, accuracy and attention
.
Crafts from matches can be made with or without glue
. If you use glue, you can attract children, since such work is easier than making crafts from matches without glue.
The matches stick together very quickly and well, so you won’t have any big problems during the assembly process.
You can also use whole matches, or carefully separate them into smaller pieces.
Using matches you can make both two-dimensional and three-dimensional images
, including animal figurines, furniture and houses.
For beginners, it is best to make crafts using glue.
, and when you gain experience, you will be able to create crafts from matches without glue.
* The place where you will work with matches needs to be prepared. First you need to cover the table with oilcloth.
* Prepare glue and a saucer into which you will pour it.
* For convenience, it is advisable to take the glue with a sharpened match or toothpick.
* For the front side of the craft, it is better to select matches with a smooth edge surface.
* If desired, you can cut off the match heads (with scissors or a stationery knife) - this way you will get a more even craft. Such work should be done by adults and children should not be allowed near sharp objects.
DIY autumn crafts for kindergarten
So, what do we need for work:
- Willow twigs, not dry, but plucked from a tree, you need a lot of them, I didn’t count exactly, but it will also depend on the perimeter of your fence.
- Rectangular board made of
- Dry branches, of different thicknesses, preferably even ones
- Yellow leaves, beautiful grass
- Rowan berries
- A piece of thin tin
- A piece of wire
- Two pieces of rope of small thickness and about 20 cm long each piece
- Plasticine gray or brown small piece
- Glue gun
- Glue moment-joiner or other
- A file for sawing twigs
- Stationery knife
- Screwdriver
- Different tweezers, wire cutters may also be required
- Blue paint, white paper square
- Small branched branches (oil turned out) - this is for creating apple trees
How to make a house from matches
To make such a house you do not need to have any special talent, you just need to know the stages of assembly, be careful and have patience.
– 7 boxes of matches
— 2-3 coins of large diameter
1.
Prepare a base for the craft - it could be, for example, a CD box - and place 2 matches parallel to each other on it.
2.
Place 8 matches perpendicularly on the lying matches (the foundation of the house) - this must be done so that there are gaps of the same size between the matches.
3.
Place 8 more matches perpendicular to the previous ones (using the same principle).
4.
Now start laying matches around the perimeter as shown in the image. You need to make 7 rows (the heads of the matches should go in a circle).
How to make a well out of matches
- a cloth to wipe off the glue
1.
First. What needs to be done is to glue the base of the future match well. It consists of 4 matches (you can cut off the heads of the matches).
2.
On top of the base of the well you need to stick another row of matches, and the matches need to be moved in the opposite direction. All subsequent rows should be done in the same style until the desired height is achieved.
3.
Now glue racks of three rods to the inner opposite walls of the well (see picture) - two rods at the same level and one in the middle - a few millimeters lower.
4.
Glue two rods to the back of each of the rods made in step 3. You will attach the roof of the well to them. Now you can insert the goal post from the toothpick.
5.
Prepare a thread and wind it onto a toothpick, having previously coated it (the toothpick) with glue. If desired, you can break the end of the toothpick to make a handle.
6.
Glue 2 supports to the posts so you can attach the roof to them. Also insert a beam on top.
7.
Before you start gluing the matches on top to form the roof, glue 4 beams to the end of each support and then attach the roof matches to them.
8.
You need to spread glue on all the inclined beams and make a well roof, into which you can then lower the thread as a final touch.
Stage one: creating a well
The first thing to do is to make the base and rim of the well. To do this you will need thick plain cardboard, a pencil, a compass and scissors.
You need to trace the circumference of the cylinder with a pencil, and then use a compass to expand the diameter of the circle. You need to draw three such circles. In two of them, you should cut a circle with a knife along a line corresponding to the size of the cylinder.
Thus it turns out:
- one large whole circle is the base of the well, its bottom;
- two hollow circles are the rim.
The rim parts are glued together, and while the glue dries, it’s worth working on the well itself.
The cardboard cylinder needs to be decorated. This is what river sand is for. But before you use it, you have to do the following:
- cover the top of the cylinder with masking tape to the width of the rim;
- stick thin strips of adhesive tape in random order onto the cardboard sleeve so that the lines form an imitation of mosaic or stonework.
After this, each area limited by the strips should be generously coated with glue. The cylinder treated with glue must be rolled in river sand and left to dry. The product should not be shaken; unadhered grains of sand will fall off on their own after the glue dries.
The newlyweds traveled all over the world and took wedding photos in every country
Sometimes we wear a bra incorrectly: ways that are harmful to health
Only on a soft spot: Russian Domostroy forbade punishing children in any other way
The next step is to fix the rim and the bottom of the well. You need to remove the masking tape, apply glue to the top of the cylinder and put the rim on it. It is more difficult to glue the bottom - PVA glue will not fix the ends of the cardboard sleeve. Therefore, you will need superglue or you can use liquid silicone.
The surfaces of the base and rim, if desired, can also be treated with sand before decorating. This must be done if you want the well to look solid. But if these elements are not covered with sand, but simply painted in other colors, the craft will look no less original.
Wheels made of matches (schemes)
In this example, NO glue is used, and the strength of the product is provided by internal tension and friction.
There are several options for the wheel: with laying through 1 support match (it has 15 vertices, and 105 parts are used for it), through 2, 3 and 4 support matches, respectively.
Laying through 2 support matches.
The product consists of 95 parts, has 19 vertices and a small diameter that allows it to fit inside a wheel with a larger diameter.
Laying through 3 support matches
The diameter of this design is even smaller. The wheel has 21 points and is made of 84 matches.
Laying through 4 support matches
This design is the most difficult to assemble. The wheel has the smallest diameter and can fit inside the old match wheels. The design has 22 vertices and contains 66 parts.
Matchstick wheels (instructions)
1.
First you need to make an auxiliary tool. To prepare it, arm yourself with a notebook, a simple pencil, a ruler and a compass. You can use a protractor, but this is not necessary.
2.
Draw a template for the machine. In this example, the drawing will help you create a wheel of 15 links. Draw a circle whose radius is 42 mm. Next, divide this circle into 15 equal sectors (each sector has an angle of 24 degrees).
* If you do not have a protractor, make the distance between the legs of the compass 34 millimeters and draw notches on the circle.
3.
Once you have drawn the assembly panel drawing, start making the actual panel itself. A hard cover from an unnecessary book or thick cardboard will help you. In the places indicated in the picture, you need to punch holes in the cardboard using a hammer and nail.
Cut out the drawing and glue it to the cardboard. Choose a nail whose diameter is slightly larger than the thickness of the match. Place an unnecessary book or several sheets of cardboard under the cardboard (so as not to spoil the floor with a penetrating nail).
4.
Once you have the assembly panel ready, start assembling the wheel - if it has 15 links, you will need 90 matches.
* It is advisable to choose matches without defects.
Insert support matches into the panel.
4.1
Now fill the gaps with matches one by one. It is worth noting that each subsequent match in each ring must be placed overlapping the previous one.
4.2
Raise the first match in the ring in advance so that it overlaps the penultimate and last supporting matches.
4.3
Insert and secure the penultimate match, and then do the same with the last supporting match.
4.4
The first two matches need to be pressed back down, and the first created circle of supporting parts then needs to be carefully pressed down so that it lies tightly.
4.5
Using the same method, create a second ring of carrier matches, a third, a fourth and a fifth.
In these images you can take another look at the penultimate and final bearing matches.
* Raise the first match.
* We insert and secure the penultimate match.
* We insert and secure the last match.
5.
Now you need to carefully push the entire structure down. You need to do this several times, and then you can lift the working panel, turn it over and use a match to start squeezing out all the supporting matches one by one.
The diagram shows how to do this one by one in order to eventually pull out the wheel.
To further understand the assembly process, watch the video tutorial:
DIY gift box
Until the beginning of the 20th century, the well was made in the form of a wooden frame, usually oak. So in my case the well will be wooden.
Only I started making it with a completely different base, then I tore the sticks back, then I first used yellow paper, and, in the end, I remembered that the well needed a lid, a bucket and much more. Therefore, not everything is shown in the photo. Forgive me here.
For work we will need:
- Box (base for well
- CD disk
- Corrugated cardboard
- Glue
- Ice cream sticks
- Sushi chopsticks
- Rope or tape
- Scissors
- Decorations (flowers, rhinestones, etc. at your discretion)
Initially, I took a sleeve from under the tape, covering it a little with sticks, I realized that it was too small for the well, and the bottom would also have to be tinkered with. I still had a sleepless night, so I began to rummage through my closets. My choice fell on a box of Raffaello chocolates.
DIY box step by step
At the beginning of the work, everything is very simple, we take and glue our round box. Here you can also involve the child, for example, by serving chopsticks. It turns out like this.
Then we glue our sushi sticks inside.
The matter has come to a close. Here I had a long pause, about several hours. I didn’t know how to make it, and the original lid was just too soft and no good, and the lid from a baby food jar didn’t work either.
In the end, I came up with a computer disk; it just fits perfectly on our base - the box.
Therefore, we take the disk
We outline it on colored cardboard and cut it out. Then we glue it on top and make a hole in the center like on a disk.
We take scissors, but not simple ones, but for example a kitchen pruner and make these square cuts so that the lid fits perfectly on our well.
I made the holes with wire cutters from my husband's tool case.
The cover for the well is ready, let's proceed to the roof of the well. Cut a rectangle from the cardboard and bend it in half, gluing ice cream sticks to the edges.
In the corners where the sticks are connected, pour glue and put our roof on the sushi sticks.
I present to you one of my match crafts - a do-it-yourself matchbox well. Once upon a time I already tried to make . Making any crafts, including matches, is very exciting. Check it out for yourself. The process of making them is always creative. After all, when making a craft, you can always make your own adjustments for any master class and get your own unique work.
In order to make a well from matches we will need the following materials:
- matches,
- PVA glue,
- pencil,
- tassel,
- brown and green gouache,
- white paper,
- skein of woolen thread,
- scissors,
- compass,
- thick white cardboard,
- green paper,
- semolina,
- a piece of wire.