The first means of preventing scoliosis among children is a properly selected children's desk. She spends a lot of time at school and at home. In educational institutions, specialists monitor the quality of children's jobs; at home, this is the responsibility of parents.
Comfortable children's adjustable desk for home study
The ideal school desk is comfortable, safe, and environmentally friendly. But these indicators alone are not sufficient, because each child is individual.
Children's home "growing" desks
Making your own will help you get the perfect desk. The main advantage is not so much the cost savings on buying a ready-made item, but the importance of matching the furniture specifically to your child.
DIY children's table and chair made from furniture board
Adjustable desk with storage box and chair
The first question: design and construction features. There are several options:
It is important to have drawers or a separate cabinet. They are convenient and necessary for storing writing instruments and educational materials. One drawer can be equipped with a lock; the child will be happy to hide his little secrets there.
Children's desk-transformer with drawers
Adjustable desk with pull-out cabinet
You can make a schoolchild's corner yourself. The design is equipped with a bedside table, drawers, shelves, which do not have to be additionally hung on the wall, spoiling the coating by drilling holes.
DIY wooden corner for a child with a table
Not easy to make, but the most functional version of the “transformer” type table. This DIY desk will last for many years because it “grows” with the child: the height of the legs and the tilt of the table top are adjustable.
A universal model of a children's table with height and tilt adjustment options
Preparation, assembly
Diagram of a small children's table and chair
The first step after determining the design and construction is to search for the appropriate assembly diagram, drawing on the Internet. Having selected the necessary documentation for making a desk with your own hands, prepare the necessary materials, components, and fittings.
Detailing drawing for an older student's desk
It's time to start the assembly process. An example is a desk consisting of four parts. Advantages: simplicity of design, strength, stability, significant savings in materials.
A simple non-adjustable desk for a student
It can be assembled from sheets of laminated chipboard, MDF or solid wood.
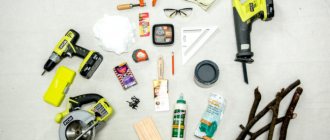
Having determined the material, prepare the tools. You will need:
- finishing for the ends, special glue (when using chipboard);
- screwdriver;
- furniture screws, decorative masking of screws;
- electric drill, set with drills;
- yardstick;
- sandpaper/sanding machine (when working with natural wood);
- paint, painting machine (MDF/solid).
Tools for making furniture at home
Tools and material for making a plywood table
Tool:
Jigsaw Screwdriver Grinding machine Construction angle Construction tape (meter) Pencil or pen Construction ruler Wood drill - 5 mm. diameter
Material:
Sheet of furniture plywood - 152x152 cm. Masking tape Furniture bolts Furniture corners Wood screws
As for the table drawing, everything is simple. We make: 2 legs measuring 76 cm high, 46 cm wide, a table top measuring 100 cm long, 60 cm wide and a stiffening bar measuring 77 cm long, 52 cm wide.
Making a countertop
To make a tabletop, we need to cut a sheet of plywood in half into two parts. As you remember, we took a sheet of plywood measuring 152x152 cm. Dividing the sheet in half, we got two rectangles measuring 152x76 cm. Here, one of the squares will go on the tabletop, measure 100 cm in length and 60 cm in width, draw lines pencil or pen.
By the way, many people wonder how to cut plywood without tearing it. We answer this question, if you remember, then in the list of materials we mentioned molar tape. So, take this tape and glue it tightly, then rub it against the line that we drew, look at the photo:
If you still have questions, you can watch a video on this topic at the bottom of the page. There we show in detail how to prevent plywood from tearing when cutting.
We take a jigsaw and cut along the lines that we drew. Peel off the remaining masking tape from all sawed sides. Now, take a round shape, we took a metal bowl, you can use whatever you like. And we put it on the corners of the tabletop, so that we form a semicircle, that is, we round off the sharp corners, something like this:
We make curves on all four corners and also tape along the lines. Carefully saw off with a jigsaw.
After sawing and removing the remaining masking tape, you need to take a sander, put a sanding belt with a grit size of No. 100 on it and sand the rounded corners.
The tabletop is almost ready, all that remains is to sand down all the unevenness on the surface of the plywood. Taking into account the fact that the plywood is more or less even, it won’t take much time, this is how the tabletop will ultimately look like:
Let's start making the table stiffener
Stiffening bar or otherwise called lateral stability. It plays the role of a support for the table, thanks to this strip we will fix the legs of the table and the table top, thus eliminating the instability and the structure will become stable.
We take the second half of the sheet and mark the rectangle - 77x52 cm. We also cover the lines with tape and cut them with a jigsaw.
As for the pattern of the cross bar, you can watch from the video how to make markings in the shape of a wave. After the markings have been applied and sawed off, you should end up with a table rigidity bar like this:
Thorough preparation is the key to quick and efficient assembly.
It can be done in just 4 steps.
If the final testing showed that the height of the furniture was not 100% correct, the excess can be corrected with the help of a suitable chair.
DIY assembled tables and chairs for children
You should buy a chair with adjustable height and raise the seat to the desired level.
Children's chair, height adjustable
The elbows of a sitting child should be freely placed on the tabletop, the legs should reach the floor (another support), and the knees should be bent at an angle of 90-100 degrees.
Correct seating at a desk
Follow sanitary standards, and then you will keep the student’s posture healthy!
Homemade adjustable desk for a schoolchild
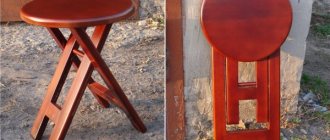
Coffee table
To make a small plywood table with your own hands, drawings are not required, but a template will be very useful. The table, which is described below, is attached to the wall.
Important! Your future product may be of different heights; in this case, it is not at all necessary to comply with sanitary standards that prescribe how to sit at the table and how your feet should stand. There is a magazine on it, some kind of figurine and a table lamp.
Rummage through your bins and see if you have:
- a piece of plywood for the tabletop;
- a small but whole sheet of plywood or thick cardboard - it is needed for the template;
- carpentry or other moisture-resistant glue;
- jigsaw;
- a circular saw;
- pencil;
- vice;
- sanding machine (you can just use sandpaper, but it will take more time);
- fasteners;
- remnants of wallpaper, a sheet of Whatman paper or graph paper;
- long ruler;
- varnish, wax or oil.
Assembling the legs and preparing the parts
We start making the table with a sketch:
- Think of the shape of the tabletop - it can be rectangular, square, round, oval, with a recess, or even a weird shape.
- Think about the shape of the legs - you can make them straight or curved.
- Draw it all on a piece of paper.
- Estimate the dimensions. The table is small, so the main parameter you should focus on is the size of the plywood sheet, unless, of course, you plan to make a stacked tabletop from pieces.
- Draw full size legs on a large sheet of paper.
- Transfer the drawing onto thick cardboard.
- Cut out the legs according to the template - if the shape is complex, you can use a regular hand jigsaw rather than an electric one.
- If the plywood is not thick enough, make the legs two-layer.
- Glue the layers together.
- Remove excess glue and let the pieces dry.
- Place the legs on a flat surface.
- Align them according to the template.
Important! The model that is attached to the wall has only two legs.
Tabletop
If the countertop is simple and made from a single piece, there is no problem. It's simply cut out. It's a different matter if you only have pieces of plywood or if you want to make a typesetting design from different types of wood. In this case, the fragments are cut at an angle so that they can be made into a flat surface and the seams are not noticeable. First you need to glue the pieces into a single whole, and only then cut the tabletop according to the template. After the blanks appear, do the following:
- We sand the surfaces of the legs and table top - we get rid of splinters, sharp corners, etc.
- On the underside of the tabletop we mark places for screws.
- We screw the legs using furniture corners.
- We mark a straight line on the wall for fastening.
- We fix the table on corners or on a metal profile.
Important! The corners need to be attached from below under the tabletop so that they are not visible from the outside.
Video: Child's table without effort
When a child goes to school, having a special place in the house where he will now do his homework becomes a necessity. It should be a comfortable, always separate, table or desk, located in a well-lit place, preferably near a window.
There is absolutely no need to use a bulky design. In a student’s life there should be room for games, sports, hobbies, and creative activities. The fewer unnecessary items a desk can accommodate, the better the student will be able to concentrate on a particular activity.
When choosing the best option for your conditions, consider various tables made of chipboard, plywood, and wood. There are folding, retractable, corner, and straight designs. Anyone can make a simple and functional desk for a schoolchild with their own hands. It will be enough for a junior high school student. As the child grows and the number of subjects studied increases, the desk can be supplemented with hanging shelves, separate bedside tables, and shelving.
LiveInternetLiveInternet
Furniture itself
Finally completed my project for a growing children's desk made of plywood . How often does this happen - everything was put off until later, and then everything was done in a hurry. But the rush gets in the way...
Since the project had been conceived for quite some time, I went through the drawings again. Double checked. Found a few minor errors. Redrawn the chair again. The shape remains the same, but the outline of the lines has changed a little. I only completely redesigned the shape of the back of the chair. I wanted the back to look “childish”, and also to remove a little extra weight due to the cutouts.
I made some minor changes to the desk drawings. This mainly affected the sidewalls. Again I added through cuts. In addition to reducing weight, the goal was to add a little “lightness.” These holes also have a practical use - they are handles that make it convenient to carry the desk. The desk box also underwent a slight alteration. Mainly because during the initial design I did not take into account that the center of the rotation axis of the back of the tabletop needed to be shifted by the radius of the hinge. Based on assembly experience, I think it’s worth further simplifying the box design. But more on that later.
I made the cutting map in OptiNest . The map obtained after this program was slightly corrected manually. The goal was to get the remaining plywood to the required dimensions.
For some reason, there were problems opening a file with drawings in Corel. When opened in Corel, all the details lost a little in scale. But this is not critical. We scaled it to the required size in Corel. There we also prepared a file for ArtCam. After all the modifications to the drawing, the total length of the cut increased to 50 linear meters.
For manufacturing, I bought a sheet of plywood 2500 * 1250 mm of a good grade - a face without knots on both sides. Designed for making furniture. As I now understand, I could have easily taken a simpler variety. The difference is approximately three hundred hryvnia. In fact, the thickness of the plywood turned out to be 17.4mm. To cut out the parts, a cutter with a diameter of 3.17 mm was used. The cut map was created for this cutter. The choice of this particular cutter is related to the specific tasks of the CNC machine on which all this was cut. The parts were cut in three passes. Here's the start of the process
But all the details have already been cut out.
What's left of the plywood sheet:
The resulting parts could be milled with a hand milling cutter and polished with a machine. Which is what I took advantage of.
Initially I thought only to slightly round the edges of the parts - with a radius of 3 mm. Then they advised me to take a larger cutter - 6 mm. Actually I did just that.
When the parts were cut out of plywood on a CNC machine, the cutter burned the ends a little during the second and third passes. Therefore, in addition to polishing the plane of the parts, we also had to polish the ends. It turned out that it took a little longer than I expected. And since I had to be distracted by phone calls and solving work issues (I did this during working hours))), I missed sanding some of the edges. You can see it in the photo. During assembly, the most important, most important point was to assemble the tabletop box. It consists of 7 parts (this does not include tabletop parts): two sidewalls, and jumpers between them. The sides are tightened with the jumpers using four screws + barrels and several dowels. The jumpers are connected to each other using dowels. I really wanted to avoid visible confirmation heads or self-tapping screws. Then, after all, I added a couple of confirmants for reinsurance. There was no particular need for them, but I made them for a child, so I was on the safe side. Added them to invisible places.
If there was time, it would be possible to put everything on glue and tighten it with clamps. It would work - you won’t tear it apart! But there was no time (((So I didn’t even glue the dowels. But even so, the assembled box turned out to be very durable.
Honestly, they helped me assemble the dowels. In this regard, those who do not have the knowledge/skills/cores should either collect for confirmations or improve the assembly scheme. Or look for someone who knows how.
To fasten the front part of the tabletop I used overhead hinges, and for the rear part I used window hinges.
Another important point was to drill holes in the ends of the parts.
I did a large-scale assembly in the workshop. This is the box itself with the tabletop and leg supports))) All other parts were packaged separately. Everything fit into two packages. Stretch is an irreplaceable thing.
The final assembly was carried out at home. Fortunately, I needed one more day of work in the workshop. But there were three days of weekend ahead - I wanted to finish it and solemnly put it into operation.
I was driving it home and was very worried that somewhere the holes might not line up, something would need to be trimmed, etc., but it wouldn’t be possible at home. But it passed)))
There were a number of points that I still did not take into account. This added work, but it could have been done at home.
All holes matched. Of course, during the hasty assembly in the workshop, not everything was assembled perfectly. Not all edges were passed by the router, and in some places extra edges were passed))). But all these points turned out to be not critical. I did not want to cover the product with stain. I like the light colors and natural color of the plywood. Perhaps I'm wrong. How the product looks in the end is my conscious decision. I covered all the parts with clear acrylic varnish. Still, it is the most environmentally friendly.
But I didn’t take one point into account. My son loves to “draw” with paints. He produces mostly blots of red-brown-blue-raspberry color. But he really likes the process itself. But acrylic varnish is water-based. And children's colors cling to it well. Therefore, it is still worth at least covering the details of the table top with some kind of strong parquet/furniture/yacht varnish.
Due to my son’s passion for paints, the tabletop was installed in a horizontal position. Then, when I go to school, I’ll definitely tilt it. The reclined position is better for your posture/spine.
The main fastening element of my children's desk is ordinary inter-sectional furniture ties. Cheap, beautiful and cheerful. Another 8 self-tapping screws, several M6 screws of different lengths, barrels and dowels. Of course, you could use special furniture screws, but they cost 2-3 times more. I didn't see the point in using them.
When all the parts are fitted, assembly from the box takes about 20 minutes.
I conducted the photo session on the street on purpose - so that I could walk around the desk from all sides. Unfortunately, at the most opportune moment, the memory card on the phone blew up - it fell down and killed half of the photos. Mainly the part where there were close-up shots.
Those files that are posted for downloading are, in principle, suitable for making such a desk. But here you need to have some experience working with plywood, and even with assembling furniture. You need to imagine how and what will be connected, in what sequence and using what fasteners. In principle, I can prepare a detailed manual for making such a desk based on the final drawings and the experience gained during the assembly process. But it will no longer be a thank you. If anyone is interested, please contact us. Don't think that I want to make money. As they say, experience is the son of difficult mistakes. If you are planning to make the same desk, I will save you time and nerves. In addition, preparing such a manual is still a piece of work. But that's not even the main thing. There are also ideas for plywood furniture. And to bring them to life, finances are needed. For those interested - my mailbox
In general, this is what I got
Please don't kick too hard. I'm not a professional furniture maker. Fraser held it in his hands for the second time in his life. But, in my opinion, as for office plankton, I did well.
Z.y. Who will say “why all this? It’s easier/better to buy a ready-made solution.” My answer is this: I wanted to do it. It was interesting to me. This is a new experience and new skills. This is a thing created from scratch with your own hands (and head))).
Materials and tools
- Laminated chipboard sheet.
- Edge for ends.
- Iron.
- Furniture screws.
- Electric drill.
- Drill.
- Wood glue.
- Square, tape measure.
- Screwdriver.
- Decorative plugs for screws.
In accordance with the dimensions contained in the drawings or your data, cut the necessary parts from chipboard. If you have experience in such work and the appropriate equipment, you can do it yourself. An easier option is to order cutting at the place where you purchased the chipboard. They will also help you with gluing the ends with a special edge.
A place to study and write
Time goes by quickly, and now you need something more than just a children's desk. An interesting model for middle and high school students would be a compact table made with your own hands. You can not only do your homework behind it, but also put your student’s writing materials, notebooks, and first scientific projects in numerous drawers and compartments. The option we propose is more suitable for a classic interior.
This desk has a height of 90 cm, a width of about 94 cm, and a depth of 55 cm. If such a product is too tall for you, the length of the legs can be adjusted when making it yourself. This piece of furniture can be classified as furniture of medium complexity. Be attentive to details, and the job description and drawings will help you complete the job and be satisfied with its result.
Materials for making a desk
To get started with your DIY work, prepare the following materials:
- The main material is 18 mm thick hardwood furniture board. Instead, you can take laminated chipboard, gluing the ends of the parts with edge tape.
- Plywood 10 mm thick.
- Wooden dowels.
- Self-tapping screws.
- Finishing nails.
- Wood glue.
- Acrylic lacquer.
Tools you will need:
- Jigsaw.
- A circular saw.
- Electric drill.
- Milling machine.
- Grinding machine, nozzles of different grain sizes.
- Clamps.
- Hammer, hacksaw.
- Tape measure, square, pencil.
A detailed drawing of the table will provide the dimensions of the necessary elements and demonstrate their installation locations.
Description of the work procedure
Attention! A handmade desk should turn out neat. Therefore, any protruding excess glue must be wiped off immediately with a dry cloth.
First of all, connect the drawers and legs along the short sidewalls, after the glue has dried, add longitudinal drawers. Tighten the joints with clamps until dry. The base for the desk is ready.
- Cut a slab of furniture board (or chipboard) 936x550 cm for the table top and the top cover of the shelves. Select the slots to install the right compartment divider. Use a thin cylindrical router bit to cut the grooves. Also make the outer edges of the parts smooth.
On a strip of plywood (10 mm thick), make markings with your own hands for 4 vertical partitions 150x135 mm. Cut them out and glue the front edges of the wood.
- Using a special cutter, we select grooves 10 mm wide in the top cover of the shelves. They will help secure the partitions with the top cover. To make the groove even, while working, move the cutter along the block held by the clamp.
- Cut grooves for dowels in the edges of the side walls, partitions, and top cover. Use glue to connect all these parts.
- From plywood (10 mm thick) you need to cut out the components for the drawers. Assemble the boxes by gluing the joints, and additionally fasten them with finishing nails. Attach the facing panels to the front walls from the inside with 2 self-tapping screws.
- Our desk has figured side walls. Prepare a template from cardboard. Using an electric jigsaw, use it to cut out both panels, which will assemble the entire desk. Remove the chamfers from the edges and sand them.
- Cut out all intermediate partitions and shelf. Assemble the entire shelf structure and curly sides using glue. Tighten the structure with clamps and leave until completely dry.
- Secure the table with self-tapping screws to the base.
- As a final finish, coat the product with 1-2 layers of furniture acrylic varnish.
Children's growing desks are the result of technological progress that has been observed in the furniture industry for many years. Previously, users were forced to buy models developed, relatively speaking, decades ago. These are the most primitive tables with a slight slope of the tabletop and, at most, stands for textbooks.
However, today the situation has changed radically. Desks have become multifunctional, variable, offering a wide range of possibilities to their owner, and with them, efficiency. After all, with the parallel “growth” of the table along with its owner, parents no longer have to regularly update the furniture, taking into account the gradual maturation of the child, and once purchased, the model is able to pass all the tests with him from the first to the last grade.
In our online store you will find a wide range of products from the most famous manufacturers around the world, you can consult on questions that interest you and get help in choosing a specific item. All products are genuine and come with an official guarantee.
Work principles
The main advantage of new generation desks is the ability to adapt to current operating scenarios and the needs of specific users. The most common and popular options include:
- tabletop height adjustment;
- changing the angle of its inclination;
- setting the desired height of each of the support legs.
By setting the desired angle of the working surface, you can prepare it for comfortable reading of books, exercises in fine arts, calligraphy and other aspects. And even if the flooring in the room contains differences, unevenness compensators will correct this situation.
Selection of materials
Technical progress has not bypassed the raw material base on which “growing” desks are produced. Previously, only wood and its processed products were used for such purposes. Now these can be modern polymer compounds, various metal alloys and even glass. Of course, there are also wooden analogues, and they are also in high demand. Only the processing procedure has become cheaper, which is reflected in the final cost of the final product. So feel free to study our catalog and choose the best furniture for yourself and your child for many years to come.
Cute plywood table for the nursery
Children grow up quickly and try to imitate adults in everything. To develop perseverance and acquire the first drawing and modeling skills, the baby will need a small table. Plywood models are not only safe for installation in a child's room, but also have an attractive design.
In terms of shape, it is better to choose a model with a round tabletop or with rounded corners. This will help avoid injury. The color of the table can be very diverse. The main thing is that it attracts the attention of the restless person.
Made with your own hands - priceless, heavy, powerful tabletop and storage space for yourself - also 5 points. Of course, sawing/drilling on the knee is not worth the possible savings of 1000-1300 rubles, but only if the cutting is done in a normal workshop. If there is the same guy there, who has no idea about disks and other basic knowledge, also on a shaky, trashed “like table” in “like a workshop”, sometimes even with an amateur jigsaw, it’s easier to cut it yourself. I’ll share my vision of the shortcomings, I have a table from scratch in the foreseeable future, now I live with a monster “from the store” that was radically altered for myself and received for free. 1. The system unit is on wheels, or rather I have on powerful casters; good wheels with movement in all directions were not at hand, and it is not necessary, as experience has shown - back and forth is enough. Firstly: it’s more convenient to clean around and under the SB. Secondly: access to the back of the system unit is greatly facilitated (it generally needs to be moved to the left, since the cabinet is on the right), it just seems like you plug it in once and forget it, USB extension cords do not always solve the situation completely (or rather, they never solve it). Don’t forget to provide, along with the rollers, a locking and safety bracket at the back from any available material, so that during a sudden movement towards the wall, the system unit does not drive the protruding plugs into its ass with all its might. 2. The mess with cables needs to be resolved immediately and radically. Above the tabletop, you can use cheap ties, but they still collect dust, it’s better to come up with something with a cut of a box or pipe along the far edge of the tabletop. Below the tabletop, the horizontal is solved by U-shaped corners on the back wall (the cables are again tied, preferably in separate bundles for their intended purpose), the vertical is made of plastic ties as a completely temporary option, optimally, ties made of pieces of Velcro sewn or glued to a rigid braid. One edge of the tape can be screwed to the side wall, or you can hang these rings with a cable on the nearest U-corner. Electricity needs to be solved by two pilots with the maximum number of seats (there are never too many of them, 6+7 is not enough for me). We go from the outlet to the first pilot (you can even extend it), which we hang on the side wall, between the table top and the system unit, closer to us. Be sure to leave 2-3 free cells, in the rest we plug in something that can be easily switched off, such as charging and lighting, and most importantly, a co-pilot, of good quality and with good protection (normal filter). It can be hung on the same wall, but further away, we turn on the power supply for the solar system, monitors, printer, whatever else is rarely pulled out. You can also use a router, but ideally it should be plugged into a separate outlet so that you can turn off the entire table and the router will still work. And it doesn’t belong on a system unit, it’s better to live on the top shelf, all you need to do is change the standard meter short one from the kit for a longer cable. If you catch an installer carrying the Internet to neighbors or friends, it won’t cost a penny, a sincere “thank you” is enough.
