There was a dystopian story by Sheckley called “This Mad, Mad World.” It described the world of the future, where “disposable” things reigned. Costumes falling apart, food turning sour in fifteen minutes, furniture falling apart within a week. And the action revolved around a man who gave his wife a real wooden stool as a gift. Today we will try to make a beautiful and durable folding stool for ourselves and our loved ones with our own hands.
The appearance of a do-it-yourself folding stool
This is not so easy for a beginner, but the main thing is desire.
Types of folding chairs for relaxation: materials
Wooden picnic
Wood products are high quality, reliable and aesthetically beautiful. This is how wooden folding chairs can be characterized. There are models with a backrest - it’s comfortable to sit on them, your back rests. They are durable and stable. Although more expensive and heavier in weight than, for example, aluminum or plastic. They do not tolerate moisture well.
Plastic
Plastic products are very common due to their affordable price. The downside is that they are not very durable. But with careful use they will last for several seasons. To extend their service life, it is better not to use them outside in winter; they need to be hidden indoors from frost. When planning to buy such a chair, ask how many kilograms it can support.
Crafts made from old tires for the playground will delight your children.
Leroy Merlin offers a selection of garden benches for your garden.
In Leroy Merlin you will find awnings and tents for your summer cottage:
Aluminum
An aluminum chair can be a good alternative between heavy wooden ones and light but fragile plastic ones. It is lighter than wood and stronger than plastic. Legs, frame - made of aluminum or alloys. The seat and back are made of fabric. It is very comfortable to sit on such a chair. Heat, frost, and precipitation are not scary for him.
A separate type – chairs for fishing
Fishing chairs can easily be distinguished as a separate type due to their special purpose, because fishermen have to sit a lot, so the chairs must be especially comfortable. Many of them are suitable not only for fishermen; they will also be appropriate in other cases.
There are offers from the simplest models to comfortable ones - with a backrest, armrests, a stand for fishing equipment and telescopic legs. The materials used for their manufacture are light, practical, and durable. For example, metal and waterproof fabric. Thoughtful bags or backpacks for them will lighten the load.
Requirements for fishing chairs:
- a light weight;
- reliability;
- compactness;
- Possibility of installation on uneven surfaces;
- sufficient height (if the seat is very low, the legs quickly swell);
For greater comfort, you can choose a chair with a backrest, so your back will not be strained. There are also models with armrests. But each fisherman notes their feasibility differently.
Evaluate the supporting surface of the legs; thin legs enter the ground under pressure. In high-quality models with legs, the bases are well thought out.
There are fishing chairs equipped with:
- rod holders. Their advantage is that your hands are free, and there is no need to carry an additional stand with you or look for it on the spot;
- containers-pockets for bait, baits, etc.;
- handles for easy carrying. It is convenient to carry a backpack chair on your back. In bad weather you need to be careful with it; while sitting on it, the straps or the entire backpack can get dirty on the ground.
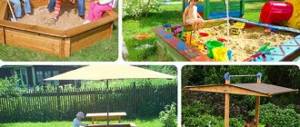
Use folding chairs for outdoor recreation.
The rubber covering for the porch will create an anti-slip effect.
Here you can see approximate prices for flat plastic shower tanks:.
Preparing the necessary tools
To make a wooden product you will need the following carpentry tools:
- a manual router, complemented by a set of cutters that allow you to process the edges of timber, boards and plywood, drill holes of the required size, or carefully select grooves and grooves on parts;
- a grinding machine equipped with interchangeable wheels of different grain sizes, which allows you to quickly make the wood surface smooth;
- an electric jigsaw, which can be replaced with a manual hacksaw, although with a decrease in efficiency;
- a screwdriver used for screwing in fasteners and drilling holes in parts, for which a set of drills and screwdriver bits of different diameters is useful;
- clamps of different sizes, designed for strong compression of parts during gluing;
- hammer;
- chisels of various sizes;
- plane, manual or electric;
- marking and measuring equipment - construction square, tape measure, simple pencil, surface planer, etc.;
- durable workbench.
To make a stool you will need tools.
How to make a chair with your own hands
If you have even the slightest skills in working with a drill, hacksaw and hammer, then you can make a small folding chair yourself. You can select a drawing online. Choose according to your preferences: with or without a back, a simple model or a complex one. Based on your skills, abilities, availability of tools and financial capabilities to purchase materials.
General recommendations before choosing a modification:
- A novice master should choose a simpler model. Perhaps it will be a small chair without a back.
- For more experienced craftsmen, the option with a backrest will be more interesting, because such a chair will be much more comfortable.
- It is imperative to take into account the height and weight of the person for whom the product is intended. For children, chairs may be less durable - the child weighs little. The highchair should be well polished to avoid scratches and splinters. And if the chair is made, for example, for a large man, then the material should be chosen more durable: hardwood, thick plywood, etc.
- Set a comfortable height for the product. The best option is when your feet are on the ground, knees bent at right angles.
- Remember to protect the wooden object from moisture. To do this, the chair needs to be painted or varnished.
How to choose the right material
Before you make a stool, you need to decide on the appropriate material. The options may be as follows:
- Solid wood and beams. This is the best option for home construction, with good aesthetics and durability. The disadvantage is the complexity of processing, since the product must not only be sanded, but also coated with paint or varnish. It is recommended to use material up to 5 cm thick.
- Chipboard. The most popular material for the manufacture of children's stools, for which moisture-resistant chipboard with a sheet thickness of 10 mm is most often chosen. For work, three workpieces are required, having dimensions of 300 × 300 mm (seat), 400 × 300 mm (legs) and 200 × 120 (lintel).
- Plywood. This material is easy to process; it does not need to be sanded or simply painted. When choosing, you should give preference to sheets of the FSF-TV, FSF and FK brands with a thickness of 10 to 18 mm. Plywood must be at least second grade. For construction, a sheet with dimensions of 1250×1250 mm will be sufficient. It is better to use moisture-resistant plywood for a children's chair.
Note! It is not necessary to use only one type of material. Structures consisting of plywood, timber and chipboard are quite convenient.
Materials for the stool can be combined.
Materials and accessories
I did not set out to set up production, but only researched the question: How to make a folding stool with your own hands. Therefore, I did not purchase materials separately, but purchased a beech furniture panel measuring 1120x400x24 millimeters, from which I cut out the necessary parts. The thickness is quite suitable for all parts - we leave it as such.
Fastening is also minimal:
- Butterfly loops 35x35 millimeters in span, 4 pcs.
- Stud 8x250 mm with double threading and end nuts.
- Dowels or in other words “dowels” 8x50 mm.
- High-quality wood glue or PVA emulsion.
- Tinting varnish - beech wood looks especially “juicy” under it.
The dimensions of the entire sawing are clear from the drawing, so there is no point in listing the details as separate items. But processing them requires some concentration.
Drawing of a folding stool
Methods for making stools at home
Classic wooden stool
A drawing of a simple stool includes the following elements:
- legs;
- footstools;
- seat;
- kings;
- connecting grooves;
- supports for fastening the seat.
An ordinary stool consists of several parts.
To make a traditional 50 cm high stool with a 45x45 cm seat and straight legs, you will need the following:
- Four smooth beams for the legs, having a cross-section of 0.5×0.5 cm, a height of 48.5 cm and can be either straight or narrowed downward, which is ensured by cuts located on the inside.
- Two or four boards with a thickness of 12÷20 mm and dimensions of 45×22.5 (11.2) cm or a plywood panel with dimensions of 45×45 cm and a thickness of 12÷20 mm for the seat.
- There are four legs and drawers required to ensure strength, for which a beam with a cross-section of 0.3×0.3 cm and a length of 44.1 cm is used.
- Additional connecting elements in the form of pieces of bars, fixed in the center of the drawers on the inside.
Note! These elements do not need to be used if bars of sufficient thickness are used for the base of the seat. - Four wooden dowels (dowels) with a diameter of 8÷10 mm and a length of 30 mm, used to attach the seat to the base.
- Wood glue.
- Self-tapping screws.
To make a simple stool, you need to prepare the necessary materials and tools.
The instructions for making a stool with your own hands from wood are as follows:
- Glue the boards intended for the seat if it consists of several elements. To do this, the fitted and sanded ends of the boards need to be coated with glue, connected and tightened with clamps.
- Prepare bars for the legs. Their cuts should be perfectly even and the height should be the same.
- Mark the legs and determine the location of the connecting grooves.
They will have spikes on the legs and tsars. Holes should be selected using a router or chisel. Note! Legs can be excluded from the structure, and then only drawers are used. - Process the edges of the legs and drawers. It is necessary to cut tenons on them, the height, width and depth of which are 1÷1.5 mm less than the holes of the grooves intended for them. The spikes should fit freely, but tightly enough.
- Assemble the legs in pairs, fastening them together using pegs and drawers. The tenon parts of the latter need to be glued into the grooves of the legs.
- The resulting frames are tightened with clamps.
- After drying, connect the legs in pairs with legs and drawers into a single base structure, then compress it in clamps and leave until completely glued. After drying, all connections must be additionally secured with self-tapping screws.
- Mark and secure the seat. To do this, apply glue to the underside of the panel according to the markings, then lay it on the finished base, align it and press firmly.
- Drill a hole through the seat panel in the corners, the diameter of which should exceed the prepared dowels by a couple of millimeters, and the depth should be five millimeters less than the height. Pour glue into these holes and hammer in dowels.
- The top of the dowel must be cut off using a router, and the cut area must be sanded until smooth.
- Tighten the seat with the drawer using clamps and leave until completely dry.
Note! Exposed glue must be wiped off immediately.
From plywood
To make a stool from plywood with your own hands, you need a drawing and the following tools and materials:
- pencil;
- ruler;
- eraser;
- stationery knife;
- triangle;
- electric jigsaw;
- hammer;
- screwdriver;
- hand jigsaw;
- wood file;
- two clamps;
- pattern;
- fine and coarse sandpaper;
- second grade plywood sheet with a thickness of 15 mm;
- Whatman sheet.
To make a stool from plywood you will need a drawing.
The work order is as follows:
- Prepare a template. On a sheet of whatman paper it is necessary to draw sketches of the parts that form the stool - the sidewalls and the parts of the seat connecting them.
- Cut out the template. Parts must be cut out using a stationery knife, maintaining high accuracy.
- Mark the plywood. The templates should be placed on a sheet of plywood and traced around them. You will need two large parts, and eleven small ones.
- Cut out the details.
To do this, a jigsaw is used along the outlined contours. Note! The lower boundaries of the grooves should be cut out with a hand jigsaw, since special care is required in these places. - Perform grinding. The parts need to be given a pleasant aesthetic appearance, which can be done by clamping the crossbars with clamps and leveling them first with a file and then with sandpaper.
- Assemble the stool. Using a wooden block and a hammer, you first need to hammer in the two lower crossbars, and then the remaining upper ones. Since the grooves are cut to a width that is less than the thickness of the plywood, the crossbars will fit very tightly.
On three legs
A three-legged stool is made similarly to its classic counterpart, but is more stable. The works look like this:
- Cut out the round seat and legs with a jigsaw.
- Make holes in the seat. To do this, using a compass on the bottom of the seat, you need to draw a circle, divide it into three equal parts and determine the points for the holes.
- Drill holes at an angle, maintaining high accuracy. To make the work easier, you can use a block on which the seat rests while drilling.
- Insert the legs and sand the surface.
How to make a step stool with your own hands
To create a step stool you will need the following:
- sandpaper;
- screws;
- dowels/dowels;
- glue;
- self-tapping screws;
- hacksaw;
- electric jigsaw;
- plane;
- clamps;
- piano loop;
- drill with drills;
- a couple of sets of guides.
The step stool has a stepped design.
The work process is as follows:
- Draw patterns for blanks.
- Sand the parts thoroughly. Sharp ends should be processed using a router.
- Form the back. It can either consist of slats or be solid.
- Attach the back to the sides using self-tapping screws.
- Connect the seat and steps to the sides using grooves. They should be selected with a chisel, using a half-wood cut. During the assembly process, the joints must be lubricated with glue and reinforced with screws that are screwed into guide holes drilled in advance.
- Connect the two parts of the structure using a piano loop of a suitable length.
Before you make a wooden stool with your own hands, you need to competently and accurately draw up a diagram and select high-quality materials. With careful work, you can get an original and reliable product.
Where to begin
You can make absolutely any piece of furniture yourself. It all depends on the skill, experience and capabilities of the master. It is best to start mastering this business with simple things. One of the best options is a stool.
There are many types of stools, as well as the materials from which they are made.
The most common are wooden and metal stools (they are best suited for houses and apartments), as well as plastic ones (this type has proven itself in garden plots and other open spaces).
What do you need to know?
To make a beautiful, comfortable chair with your own hands, you don’t have to have a lot of experience. All you need are drawings, the necessary list of materials and tools. By following the detailed instructions for action, it is possible to do such a thing yourself.
The manufacture of any piece of furniture must begin with a drawing. On a blank sheet of paper, draw how you see the folding chair. It is also important to decide where it will be placed: in the house, on the balcony, in the country house, for outings into nature, or all together.
It is also important to decide on the material for production. Most often used:
To make a product with your own hands, it is better to choose wood. This is an environmentally friendly material, easy to use, and sold at an affordable price. Pine is the cheapest; it can be treated with a mahogany wood stain. You can also give preference to oak, ash, birch - hard wood varieties.
When it comes to the seat and backrest, there are several options. You can make them completely wooden (from slats), cover them with fabric or use foam rubber. When choosing a fabric, you should pay attention to its density, because the material must withstand the weight of a sitting person. Also, the fabric should be easy to clean and have a pleasant color. Perfect for: mattress teak, tarpaulin, denim, camouflage, canvas.
Homemade stool
The vast majority of homemade furniture is made from wood. This is due to the availability of the material and the ease of its processing compared to metal and plastic.
Fabric chaise lounge on frame
A fabric folding chair is one of the simplest and most convenient options for making it yourself. This product is lightweight, does not take up much space, and is convenient, which makes it a fairly good option for country use.
You should prepare the following materials in advance:
- Bolts and nuts for furniture with size D
- Round slats: 1 – 650 mm, 2 x 500 mm; 2 x 600 mm.
- Slats with a rectangular cross-section: length – 650 mm, 25x60 mm.
- Durable seat fabric: 200 cm long and 50 cm wide.
- Fine-grained sandpaper.
- Round file.
- PVA glue.
When all the necessary materials have been collected, you can move on:
- Cut the slats to the required length and sand them thoroughly using sandpaper.
- Count 40 and 40 cm from the corners and drill holes, then be sure to sand them using a needle file.
- To change the position of the backrest, make 3 or 4 cuts at a distance of 7-10 cm (frame B).
- Step back from the slats and drill holes for arranging the seat.
- Take the round slats, coat them with glue, and install them in the holes.
After the assembly of the frame is completed, you should cut out the fabric for the seat. The length of the material is calculated taking into account the possibility of folding. To understand what length is required, you need to fold the structure and take measurements of the fabric. It is important to remember that the material should be slightly stretched. After this, nail a piece of fabric with pre-processed edges with round slats located on parts A and B. Then wrap the edges of the cut and fix it with small nails with thick heads.