In Western European countries, clothes that have gone out of fashion and accumulated at home are donated to charities for distribution to those in need. But is there so much of it there that most of it is taken from there to us by smart Russian businessmen. And here it is no longer sold for free at bazaars or second-hand stores.
If only they would adopt our experience of re-purposing clothes that are no longer worn! They would give a second life to a very stylish attire. Below we will tell you how to bring to life creative ideas for repurposing old things with your own hands.
Purpose of the hanger
The main functions that this multifunctional interior item performs:
- Clothes storage. Thanks to her, it does not wrinkle, looks neat and hangs neatly in its place;
- Save time. You can immediately visually assess where and what is located, which allows you to save time and not waste it searching for this or that wardrobe item;
- Proper organization of space in the hallway or corridor, if they do not have a large area, and compact distribution of things in closets.
Save space and time with a hanger in the hallway.
If there are built-in shelves, you can store items in them; there are also options with shelves for shoes and hats.
In addition, there are models that are used as a decorative element, to decorate and give a certain charm to the interior. They are not used for their intended purpose and are made from fragile, impractical materials.
Requirements for a homemade hanger
Despite the simplicity of the design, any hanger made by yourself takes on very serious loads. Based on the above, the first requirement for this piece of furniture is reliability.
In addition, the hanger must:
- provide free access to clothing;
- have small weight and size parameters;
- be functional.
A handmade hanger in the hallway is the first to greet visitors. That is why, when creating it yourself, you should never forget about the design, which should fit perfectly into the interior of the room.
Types of design and construction
There are 2 types of structures: designed for storing wardrobe items inside the closet and outside it. The first type is the so-called “standard model,” that is, hangers with a hook. They fit in the closet, the hook is placed on the crossbar, and things hang on hangers. In this model, a crossbar is made between the sides so that trousers (skirts) can be hung over it, which makes it more multifunctional. Some are made with notches so that you can hook clothes with eyelets and straps onto them.
The second type includes those on which coats, jackets, raincoats, and fur coats are usually left:
- Floor-standing – they are a rack with hooks located at different levels. They can be on several legs, with wheels, special places for hangers;
Floor hanger for clothes. - Built-in - represent a single unit with the rack. Differ in functionality;
Built-in hanger in the closet. - Wall-mounted – this model is usually supplemented with mirrors, shelves, and various accessories. All structures located outside the closet must be able to support the weight of heavy clothing.
Wall hanger in the hallway.
The appearance of the structure itself is very important in the interior of a room. It should not only fit into the overall concept, but also be pleasing to the eye. A special atmosphere in the hallway will be created by wooden wall hangers made from improvised materials with your own hands. To make them, you don’t have to be a master - just show a little creativity, imagination and desire to create.
A wooden hanger made by yourself will look attractive and original, which guests will certainly notice.
You can make the device from any available materials: wire, perfume caps, bottle caps. Also from natural materials, be it an original tree branch or antlers of a deer or elk.
The creator does not need any special skills - anyone can do it.
Before making a hanger, you need to pay attention to the features of the hallway and its shape. For simple rooms, any model is suitable. If the corridor is long enough, it is better to give preference to a long hanger.
The simplest and most common type of construction is considered to be a wooden board with hooks located on it, attached to the wall of the room. There may be shelves designed for hats.
The base of the structure can be made of two or three smaller boards fastened together.
Wooden wall hangers are used not only in the hallway, but also in the bathroom, children's room or kitchen. To add creativity to the interior, you can do it yourself.
The main requirements are strength, lightness, simplicity, compactness, and availability of materials.
Depending on the type of installation, the structure can be ceiling, wall or mobile.
In the wall-mounted version of a do-it-yourself wooden clothes hanger, it is possible to use a corner design. A floor-mounted device can hold more weight than a wall-mounted one. But it should be borne in mind that the floor structure takes up a lot of usable space, so they are not used in the bathroom or kitchen.
An integral part of any corridor, as well as an item that is simply necessary in every apartment.
You already know how to make a simple wooden wall hanger yourself. But designs may differ. The same metal hanger is usually much more complicated, but not always.
For a simple metal hanger, we need almost everything the same as in the previous case, but the bar will already be metal.
A black hanger made of a metal strip will fit into a modern design without any problems. Of course, you choose the color, and then do the same - hooks, assemble and fasten.
But some people want to make their own copy of what they saw in the store. Most likely, in this case, you will need do-it-yourself drawings of a wall hanger, which you will either find online or make yourself.
Dreamers with scissors, needles and threads in their hands
All Russian women, young and old, dream of looking creative, in other words, creative. And not so much from significant savings on new things, but from imagining with materials, getting original things when refacing them.
And most importantly, they are always strictly individual, you won’t see them on the street anymore. Moreover, alterations are carried out for both women and men, and children as well.
The latter quickly outgrow clothes, but if you take several samples with a difference in wear of a couple of years, then converting things from old to new with your own hands, even for a dramatically grown child, will make it possible to cut out an original item with scissors for another year or two.
So chests of drawers, closets, shelves will be emptied, not only with old sweaters, dresses, jackets, trousers, but often with new ones, but bought a long time ago; it was never worn. And throwing it away is not the rule for Russian women.
—Categories
- (0)
- AUDIO RECORDINGS (118)
- APHORISMS, QUOTES (93)
- LIBRARY (114)
- Favorite pages (2)
- VIDEO (703)
- Videos (187)
- Cartoons (1)
- Movies (277)
- EVERYTHING FOR THE BLOG (855)
- Earnings (7)
- Cliparts (163)
- Comments, postcards (138)
- Dividers (66)
- Frames (256)
- Emoticons (8)
- Lessons for a blogger (46)
- GRAPHICS (92)
- COUNTRY IDEAS (87)
- DECORATIVE ARTS (90)
- CHILDREN (150)
- DESIGN (424)
- FOR LOVELY LADIES (544)
- Everything for beauty (206)
- Horoscopes (11)
- PAINTING (3255)
- Watercolor (490)
- Animalistics (251)
- Hyperrealism (6)
- Children (290)
- Genre painting (94)
- Female image in painting (1097)
- Illustrations (102)
- Impressionism (45)
- Interior painting (7)
- Historical painting (22)
- Marine painters (12)
- Still life (388)
- Landscape (939)
- Pin-up (15)
- Portrait (277)
- Surrealism (24)
- Fantasy (55)
- Flowers (705)
- CELEBRITIES (663)
- Actors, directors (44)
- Crowned persons (178)
- Famous women (165)
- Composers, musicians (12)
- Singers, performers (8)
- Writers, poets (158)
- Scientists (2)
- Artists (140)
- INTERESTING (237)
- GREAT LOVE STORIES (100)
- HISTORY OF FOREIGN COUNTRIES (39)
- RUSSIAN HISTORY (170)
- COOKING (1508)
- Mushroom dishes (14)
- Meat and chicken dishes (170)
- Vegetable dishes (110)
- Fish dishes (17)
- Side dishes (4)
- Desserts (76)
- Snacks (175)
- Carving, decoration of dishes (112)
- Canning (124)
- Drinks (23)
- First courses (7)
- Bread machine recipes (4)
- Salads (188)
- Sauces (3)
- Cakes, pies, cookies (674)
- MASTER CLASSES ON DRAWING AND HANDCRAFTS (220)
- PRAYERS, CONSPIRACIES (31)
- MUSIC, SONGS (389)
- EDUCATION (21)
- USEFUL TIPS (362)
- House (56)
- Health (139)
- Needed links (37)
- POLITICS (44)
- HOLIDAYS (476)
- Gifts, decorations (207)
- Congratulations (34)
- Wedding (14)
- Links (1)
- Script materials (13)
- NATURE (139)
- Animals (41)
- Flowers (78)
- TRAVEL (505)
- Cities (105)
- Attractions (368)
- Countries of the world (69)
- HANDCRAFTS (11781)
- Applique (52)
- Batik (112)
- Beads, jewelry (1520)
- Candy bouquets (79)
- Felting wool (104)
- Vintage (39)
- Stained glass (27)
- Sundries (useful) (438)
- Embroidery (574)
- Bead embroidery (111)
- KNITTING (3392)
- Knitting + fabric (33)
- Knitting accessories (15)
- Knitting Bruges lace (52)
- Knitting for children (167)
- Knitting for home (14)
- Knitting Irish lace (365)
- Knitting motifs, patterns (30)
- Knitting dresses (52)
- Knitting. Tops, blouses, blouses (85)
- Guilloche (6)
- Decorating items (703)
- Decoupage (504)
- Making flowers (489)
- Paper products (478)
- Leather goods (99)
- Isothread (5)
- KANZASHI (27)
- Quilling (101)
- Collection of pictures (218)
- Author's dolls (106)
- Dolls, toys (1716)
- Mosaic (32)
- Soap (2)
- Patchwork (109)
- Newspaper weaving (35)
- Polymer clay (355)
- Scrap (239)
- Salt dough (23)
- Packaging, boxes (25)
- Floristry (40)
- Shibori (9)
- Sewing for children (34)
- Sewing for home (31)
- Sewing, fashion (480)
- Sewing, alterations (83)
- Curtains (93)
- SCULPTURE, ARCHITECTURE (94)
- POEMS (904)
- ARTISTIC LESSONS (115)
- FLASH GAMES (27)
- PHOTO (243)
- Women, men, children (2)
- Collages (28)
- Nature, flowers (6)
- Still life photographs (37)
- Photoshop (83)
- Etiquette (3)
- HUMOR (252)
Wooden hangers
Wall hanger is a simple design. However, its manufacture should be approached with the utmost seriousness - then it will serve you for a long time.
The main key to success is strong, dry wood without cracks. A piece of timber or a board is perfect. The length of the workpiece depends on the length of the future hanger. Before starting work, it would be a good idea to treat the wood with an antiseptic.
Panel fastenings are arranged on the board in one, two or three rows as desired.
Such a hanger belongs behind the door in the bedroom, as well as in the bathroom, pantry or bathhouse.
Accuracy is cultivated from childhood. Equip your children's room with a simple hanger. And if it is decorated with images of favorite cartoon characters, the child will be happy to take care of his clothes.
Note!
- Do-it-yourself tabletop: 65 photo ideas for making original interior items
- Do-it-yourself ottoman: step-by-step instructions with 77 photos for creating original ottomans
- DIY rocking chair (59 photos): drawings, convenient options, tips for creating
Do not attach the hanger directly to a plaster wall. Otherwise, you risk “whitewashing” your clothes. And a jacket or raincoat that gets wet in the rain will leave unsightly stains on the surface of the wall. To avoid this, you need to attach a sheet of plywood, thick paper or polyethylene under the hanger.
Panels for hooks can be given any shape - waves, ovals, hearts, suns, etc.
For fastenings, use empty spools of thread or ready-made hooks of any shape. And if you turn on creativity, dried twigs or plant roots will be used. Trim them, remove the bark, sand them, varnish them - and here you have the hooks. You definitely won't find these in the store.
A simple wall hanger can be made from ordinary wooden planks. Nail them parallel to the wall - this is both a basis for fastenings, and protection of clothes from whitewashing, and interior decoration.
Note!
- Original do-it-yourself shelves: how to make bookshelves, hanging shelves, kitchen shelves (90 photo video)
- DIY wardrobe: how to make an inexpensive but stylish design project? (93 photos, drawings and diagrams)
- DIY chair - 63 photos of options for creating chairs using wood and textiles
Of course, you can’t make such a hanger in half an hour. But the end result of your labors will be a real hanger. All that remains is to attach a shelf at the top for storing hats.
If you want to show your creativity, you can combine different options. For example, you can design a wall hanger with reinforced, supplemented floor support. You can also create an excellent design for the nursery by making the main part in the form of a cloud or a tree.
An original do-it-yourself fence or antlers hanger will fit into the hallway.
These devices are divided according to the type of hanging clothes:
- with hooks;
- with a barbell under the shoulders.
In the first case, a hanger with hooks takes up less space, but clothes on it may wrinkle. In the second, you can hang any outfit on hangers, and at the same time it will remain neat and not wrinkled.
You can build a wall hanger yourself using all the necessary tools.
The product can be given an original appearance and completeness using various decoration methods:
- decorate with decoupage;
- cover with craquelure or glissal;
- paint.
The material option may be different, the best of course is wood.
First, using a wire brush, you need to clean the wooden surface of the hanger from dirt, dust and grease. After cleaning, using a spray bottle or roller, you need to apply a layer of primer, very carefully filling all the cracks.
Using the decoupage method, it is possible to create products that will fit original into any interior.
You can recreate pattern elements on furniture with an antique effect.
For work, use blanks with drawings and scissors. The wrong side of the picture is smeared with glue and placed on a wooden surface and leveled to avoid the formation of air bubbles. After the glue has dried, the surface of the product is coated with furniture varnish. It is better to complete the work using craquelure.
There are more interesting options for this craft.
Glizal is a transparent paint that forms a textured surface. It is diluted with water and applied to the surface using a textured sponge, creating the desired pattern. This must be done quickly, as everything will harden within half an hour.
Craquelure is a type of varnish that is used to achieve the effect of artificially aging wood.
Floor and wall hangers are considered a kind of classic.
A wall hanger is a fairly simple design. However, you need to take its creation very seriously, and then it will last a long time.
Additionally, there is an option to make a shelf so that you can place a scarf, hat, and other small things there.
The base for the hanger should be chosen from dry, strong wood without cracks. An excellent option is a board or edged timber.
The length of the workpiece must correspond to the length of the structure. To begin with, the wood is treated with an antiseptic. Then it should be treated, for example, with sandpaper to avoid splinters during operation. Afterwards, hooks are attached to the panel in two or rows.
Using different types of hooks you can emphasize a particular interior style.
In the photo you can see drawings for a hanger in the hallway.
Drawing of a wall hanger.
This design is suitable for a hallway, bedroom, pantry or bathhouse. And if you decorate the hanger with images of your favorite fairy-tale or cartoon characters, it will become an excellent addition to the children's room, and children will be happy to look after their clothes.
The word “wood” often means not just wooden material, but pieces of real natural wood.
You should not attach the hanger to a wall covered with plaster, so as not to stain your clothes. It is better to place a sheet of plywood, polyethylene or thick paper under it.
We invite you to read: How to make a brick chimney with your own hands: diagram, device, etc.
If you approach the creation process creatively, the panel can be made in the form of a sun, heart, oval or wave. Use spools of thread, dry branches or roots as homemade hanger hooks. The finished product is varnished.
An original hanger can be made not only from expensive materials, but also from improvised means. You can use an old floor lamp, removing unnecessary elements from it in the form of a lampshade and wires, and then screwing hooks to the stand. The result is a simple and uncomplicated design.
An example of a floor hanger from a floor lamp.
An interesting solution would be a designer hanger. It may differ in the number of parts and design. This design is easy to fold and transport. Regardless of the material from which the hanger is made, it will look extraordinary and stylish.
An example of an assembled designer hanger
Unneeded construction supplies can be the perfect option for a designer hanger. To do this, you can use a wooden one:
- stand;
- stairs;
- stepladder.
By using your imagination, you can turn such a seemingly useless thing into a stylish interior element that is convenient for storing clothes.
Even an old staircase that has been lying around in the garage for a long time can become part of the interior
To create a stylish piece of furniture and a functional hanger, you need to use old, dried wood.
Example of a finished design
Step No. 1 – preparing the material
To get a beautiful hanger you need to process the tree trunk. In order for the structure to have a presentable appearance, it is necessary:
- remove unnecessary branches and twigs;
- remove the bark;
- sand the surface of the barrel.
All parts of the hanger must be smooth. This is necessary to protect clothing and floor coverings from any damage.
Treatment of the barrel will protect clothes from damage
Step No. 2 - structural stability
Good stability can be ensured with a low center of gravity. To do this, the treated barrel must be attached to a wooden or metal circle or cross.
You can attach the support to the trunk using self-tapping screws and a screwdriver
Screwdrivers
It is important to cover the base with soft material that:
- will protect the floor covering from damage;
- will allow you to move the hanger freely around the apartment.
Step No. 3 - processing the barrel
To protect the hanger from negative external factors and give it an attractive appearance, the trunk must be treated. To do this, you need to use varnish or paint of a suitable color. This design can completely transform the interior of a room.
You need to choose only a high-quality wood treatment product; cheap options will negatively affect the condition of the structure and its service life.
Anyone can make such a hanger, even without any specific knowledge. You just need to prepare the following materials.
- Four crossbars with a diameter of 2 centimeters and a length of 180 centimeters.
- Rope for tying sticks. It can be replaced with any durable decorative thread.
- Gold spray paint for painting legs.
- Four types of paint for each leg. You can choose any color.
- Masking tape.
To create an original hanger you will need a minimal set of tools
Step No. 1 – painting the legs
You need to start by painting the legs. When the paint has dried, you can continue working according to the following algorithm.
- Apply masking tape to the place where you will begin painting the golden color (approximately at a height of 30-40 centimeters).
- Carefully spray the area with spray paint.
Masking tape can be removed after the paint has dried.
Step No. 2 - shaping the hanger
Once the paint on the boards has dried, you can begin assembling the structure. To do this you need:
- tie all the supports with rope
- push the posts apart, giving them the shape of a wigwam.
It is better to space the legs wider, otherwise the design will:
- inconvenient to use;
- shaky.
You need to tighten the rope tightly, otherwise the hanger will simply fall apart
This hanger is ideal for placement in the corner of the room.
We process the board with a burner.
- Attach metal ears to the back side. To fix it with long screws, drill holes in the fastener;
- Fasten the workpiece directly to the wall by drilling through holes.
From copper pipe
Copper products are always relevant and have a decent appearance. To do the work yourself you will need: copper pipes: 60 cm - 4 pcs.; 150 cm – 2 pcs.; 90 cm – 1 piece; copper tees – 2 pcs.; epoxy adhesive; copper corners – 2 pcs.
Copper tubes for hangers.
To make the base, you need to connect 2 copper pipes (60 cm) with epoxy glue using a tee. Do the same for 2 other pipes of the same size.
Attach 2 corners to the pipe (90 cm) (later it will serve as a crossbar on which you need to hang clothes). The next step is to insert 2 pipes (150 cm) into the tees and connect the upper part of the pipes with the corners.
After the glue has dried, the product can be used for its intended purpose. It is also possible to add a wooden stand, attach the legs to it and use it to store shoes.
DIY copper hangers.
DIY photo hangers
White hanger in the hallway.
Expert Yulia Kovtunova (Author, content manager) Work experience: 3 years, since 2020.
When making a coat hanger for your closet with your own hands, you will need large-section wire, a small plastic bottle placed on a wire base, a metal plate bent at the corners, and a cut-off branch of a suitable shape.
The hanger will undoubtedly attract attention and also brighten up the boring atmosphere of the room.
First you need to wrap the base of the hanger using thin foam rubber. Then cover this base with fabric of a matching color. Then they pick up a hook and hang it in the closet. You can decorate a children's hanger with your own hands using a funny face or decorate it with ribbons and lace.
There are many different ways to make DIY clothes hangers. This design can be made in half an hour.
For a hanger made of plywood, you will need: whatman paper, sandpaper, a pencil and a jigsaw, and the material itself.
A drawing is made on a sheet of A2 size. The width of the hangers is 40 cm, it is better to use plywood with a thickness of 15 mm.
It is necessary to cut out a template, which is then transferred to a plywood sheet. After this, the pattern applied to the plywood is cut out with a jigsaw. The resulting workpiece is treated with sandpaper - first coarse, then fine.
The finished chipboard hanger can be varnished.
A good hanger for the hallway should be durable, beautiful, and at the same time as spacious as possible. In the limited space of the hallway, outerwear, shoes and numerous accessories should fit.
This should not be forgotten when designing a hanger. There should be enough compartments and shelves near the hanger in the hallway to accommodate everything you need.
For a standard apartment, a hanger of this size is quite suitable: width - about 1 meter, height - slightly more than head level. Fastenings for clothes are placed on the panel in 2-3 rows.
Note!
- DIY wardrobe: how to make your own wardrobe? Drawings and interesting project options (74 photos and videos)
- DIY coffee table: steps to create a masterpiece! 64 photos of instructions
- Do-it-yourself rack - creating storage space easily and simply (62 photo ideas)
A shelf for hats is needed at the top of the hanger. The strength of the structure will be given by the slats.
They are attached to the sides of the structure, connecting the shelf to the panel at an angle of 45 degrees. It is best to secure the hanger to the wall using dowels.
Making a hanger hanger with your own hands is very simple. There are many ways to make such hangers. You will need: large-section wire, a piece of branch of a suitable shape, small plastic bottles placed on a wire base, a metal bar or plate bent at the desired angle.
Wrap the base of the hanger with thin foam rubber or other similar material. Then choose a fabric that matches the color and sew around the base. Give the resulting cute little thing some charm with ribbons, beads or lace.
If the hanger is intended for a baby, decorate it with a funny face or applique. Pick a hook and hang it in the closet.
Advantages and disadvantages
A hanger is an integral part of any hallway and dressing room. The dimensions of these visits do not always allow for the painless placement of a full-fledged wardrobe. A wall-mounted or compact floor-mounted homemade hanger for the hallway will be an excellent solution in such a situation.
A self-made structure will not require the creator to have special carpentry skills, specialized tools or expensive materials. A very attractive and functional hanger can be made from what is left after the renovation, using tools that are in the arsenal of any home craftsman. An important advantage of a homemade hanger is its relatively low final cost, which, even if you buy materials at the nearest construction supermarket, will be several times lower than in furniture stores.
As for design, a drawing of a clothes hanger can be easily downloaded from the Internet, since this service is available on specialized resources. You can take a simpler route: come up with a design and calculate the dimensions yourself. The main thing is to know the technology, the specifics of the materials used and the principles of finishing work.
From leather belts
A belt can serve not only as a stylish accessory, but also as an interior item. To make a hanger from an old leather belt, you need to cut off its fasteners, giving the ends an oval shape. Then combine the 2 ends of the belt and use an awl to make a hole at a distance of approximately 3-5 cm from the edge.
We suggest you read: How to glue wallpaper on drywall; gluing technology; choice of wallpaper
You can also make 2 such loops at a symmetrical distance from each other and thread the crossbar through the loops. Clothes can be hung either on the loops themselves or on pegs or a crossbar. This hanger looks very stylish and can be improved in many ways by adding bright appliqués, decorations, additional elements, etc.
Hanger made of leather belts.
From branches and cuts
The simplest and most financially profitable model is made from wood branches and trunks. Such a hanger will bring an element of living nature into the design, giving it the atmosphere of a cozy country house; the work will not take much time and effort. Materials can be found in a park or forest. Using pruning shears, it is enough to trim off the excess branches; the remaining ones will act as hooks.
A solid piece of wood is suitable as a support for a floor hanger. The bark can be peeled, painted any color, or left unchanged. A trunk with branches can be cut into sections. Next, you should hang them on the wall on a board or frame. The result is a multifunctional, convenient interior element. The trunk can also be hung near a window or under the ceiling as a support and a kind of crossbar for hangers.
Hanger made of tree branches.
Wall-mounted
A wall hanger differs from other types in that a vertical surface (usually a wall) acts as a supporting plane for it.
As a rule, such hangers are hung on the wall. It is customary to distinguish the following types of similar hangers:
- With direct installation of the main elements into the wall. The hooks are attached directly to the wall using anchors and special brackets.
- With fastening of the main elements to the supporting structure. Hooks are installed on frames, profiles or wooden boards mounted into the wall.
Wall hangers can be attached in various ways. Wall hangers can be placed in the hallway, bedroom, bathroom, or nursery. Currently, this is the most popular type of hangers.
This type of hanger is considered the most popular and convenient.
From perforated sheet by yourself
A hanger made of perforated sheet will, in every sense, reflect the phrase “I can also cross-stitch.” It will reveal talent and creativity and will become an original decoration for your home.
Materials for production:
- metal or plastic panel with perforation;
- hooks (4 pieces);
- multi-colored floss threads (you can use yarn for knitting);
- scissors.
Perforated sheets can be purchased at any construction or furniture store.
Material of the required size is purchased and cross stitch is performed using embroidery threads. A simple drawing or a word you like will do. The main thing is to calculate everything correctly so that the spaces between the letters are the same, and also not to go beyond the contours of the sheet. After completing the embroidery, you need to secure the hooks in the finished holes of the panel. All that remains is to hang the hanger, again using the already prepared holes in the panel.
From pallets
The main item for this idea is a wooden pallet. Before you start manufacturing, you need to remove all unnecessary elements (bottom, side wall) using a saw. You will need a part consisting of 4 long planks, fastened on the sides. The pallet must be thoroughly cleaned of odors, and all irregularities must be removed with sandpaper.
After the surface is smooth, the product must be painted with wood paint and varnished on top. Use a marker to mark the places where the hooks will be attached. The pallet hanger is quite massive, and you need to choose a reliable fastening. Attach the hooks to the pallet, then use self-tapping screws and a drill to hang the pallet on the wall. Additionally, you can nail the shelves and holders.
DIY pallet hanger.
How to choose material for making hangers
Even at the development stage, the master must decide in advance which materials are best suited for the hanger. For example, hooks are easily mounted to wooden planes and beams.
Attaching hooks to wooden surfaces is quite easy. In metal cases and rods, you will have to carefully drill through holes for fastening hooks or weld them in place.
With a metal case, holes for fasteners will have to be drilled. Plastic elements (hooks, bars) are well suited for the bathroom. They are able to withstand the light weight of towels, but the plastic is indifferent to the conditions of a humid environment. In contrast, wood and rusting metal are afraid of moisture.
Hangers with plastic elements are great for the bathroom.
Extraordinary ideas for a wooden hanger
It is important to maintain the correct temperature. If a hanger is exposed to a heater for a long time, it will soon become deformed. Also follows:
- eliminate the possibility of exposure to direct sunlight;
- prevent various mechanical damage.
It is necessary to regularly inspect the structure if connections need to be tightened. To remove contaminants on the surface of wood, you can use:
- walnut poison;
- paraffin;
- hot knife;
- petrol;
- raw potatoes.
The choice of product depends on the type of contamination
Impregnation for wood
For preventive purposes, it is important to carry out monthly maintenance. To do this, you can use the following recommendations.
- A vacuum cleaner with a soft attachment will help you dry clean shelves.
- Using a soft cloth, wipe the surface in the direction of the wood grain. This way dust will not accumulate in the pores.
- If any defects, such as scratches, are found on the hanger, they must be repaired with a special mastic. It must completely match the color of the wood. The procedure should be carried out only on a dry, clean surface.
Preventative care will help maintain an attractive appearance and extend the life of the hanger.
Based on the technology of making a hanger from scrap materials, we can derive a single formula for the creativity of creation. The base can consist of any elements - from a finished board to the use of old items.
It is not necessary to buy standard factory hooks for hangers - you can make them yourself from improvised materials or remove them from clothes hangers.
Attached individual hooks on the wall should look like decorative elements.
Hangers for children's clothes in the shape of animal figures can be cut out of plywood (chipboard) with a jigsaw with your own hands and painted with bright colors and decorated with applique.
Old or broken toys can be repurposed to make hooks. This hanger can be made using a couple of screws and a glue gun. It will decorate the hallway or children's room.
Perfume lovers can use caps from any perfume as hooks on a hanger.
This hanger is a very creative solution.
Sea pebbles, which are usually brought from the sea and then don’t know where to put them, will look very stylish on the wall. To assemble such a hanger as easily as possible you will need: a board, screws and metal cylinders (should be a little wider and a little shorter than the screws). They must be inserted into the cylinders and screwed into the base of the board. Then universal glue is applied to the screw heads and the stones are glued.
Scandinavian-style wooden hanger hooks can be made from thick forked branches, collected from the park or yard. Such designs are perfect for scarves and hats.
There is nothing easier than picking up a few screws and attaching several wooden spools of old thread to the board.
Give your cutlery a second life and yourself a wonderful, unusual hanger.
An excellent solution for homemade hooks is to use old wrenches. True, in order to bend them, you will first have to heat them red-hot over a fire. A hanger with such hooks will be an excellent decor for a garage or technical station.
Before you start making a new hanger, you should pay attention to the interior style of the hallway or room. Using different types of hooks, you can enhance the emphasis. An extraordinary hanger will undoubtedly attract attention and become a decoration of the room.
Material selection
A few words about materials. For self-assembly of hangers, natural wood, chipboard, plywood and metal are most often used.
The most rewarding material is solid natural wood:
- Wood is decorative, highly durable and environmentally friendly, and can withstand mechanical loads and a wide variety of decorative coatings. However, before making a wooden hanger, each piece must be thoroughly dried, sanded and treated with an antiseptic.
- Laminated chipboard is a very inexpensive material made from wood products. Laminated chipboard has a lot of advantages: low cost, perfectly flat planes, a wide range of colors, minimal preparation (gluing the edges) of the blanks before assembly. Disadvantages include: moisture intolerance (cannot be installed in rooms with high humidity levels), low strength, possible release of phenol into the air (when using low-quality material).
- Plywood hangers are highly durable and light weight. This is where the advantages end. The main disadvantage of the material is the difficulty of finishing. Before varnishing, the workpieces require putty, high-quality sanding, priming and stain impregnation. In addition, waterproof plywood, with a thickness of 18 mm, is very expensive and has an impressive weight.
- Metal is an excellent material for making a hanger, but only if the craftsman owns his own metalworking workshop or has artistic forging skills. An antique hanger created with your own hands will become a true decoration of the home and the pride of the owner. The main rule: the product must fit perfectly into the style of the room.
Next, we will consider in detail several options for making a hanger that are most suitable for self-assembly.
From longitudinal and transverse boards
This roomy model will fit shoes, hats, and jackets. To begin, fix 2 longitudinal planks on the wall: bottom and top. The length is determined depending on how wide the shelves you plan to make. Using self-tapping screws, attach transverse bars to the longitudinal boards. The interval should be sufficient to store clothes, the quantity can be any - choose at your discretion.
In order to make even fastening of the elements, use a level. To construct the support, use bars (in the future this will be a shelf for shoes). Use metal corners to secure the connections. Also, with their help, secure a shelf on top (for hats, hats, gloves) perpendicular to the longitudinal boards. The final stage will be attaching the hooks and decorating.
Hanger made of longitudinal and transverse boards.
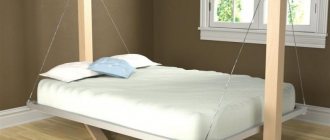
Hanging
This type is non-standard, but the ease of assembly of the hanger allows you to make it yourself. The basis of the structure is a horizontal pipe for hangers, suspended on ropes, cables or chains.
Such models are non-standard. For stability, the crossbar pipe is often mounted in a frame supported by furniture or a wall.
Decoration
Unusual design solutions can transform any, even unsightly, hallway. To maintain a classic style, the hanger can be covered with leather (leather substitute) or preserve the natural beauty of wood, if that is what was used. Paint the hooks with bronze or gold paint. Upholster the hangers with velvet and satin fabric.
For country music, use additional accessories in the form of horns; they can be cut from wood. For a retro style, the color can be artificially aged; the decoupage technique is used for Provence. Glue or draw flowers, images of birds, landscapes as prints. In a modern interior, experiments, unusual shapes, original accessories, silhouettes, and complex intricate patterns are acceptable.
Adviсe
- To avoid cracks in the wood, it is recommended to drill holes with a drill before screwing in the screws.
- The diameter of the screw must be larger than that of the drill. Fill the holes with glue in advance, and then screw in the self-tapping screw - this way the product will be able to carry a lot of clothing weight and will be more wear-resistant and strong.
- For metal hangers, use paints and coatings that resist corrosion.
- At the planning stage, it is definitely important to take into account the dimensions of the wall, think about exactly how you will secure the workpieces, taking into account the material from which the wall is made (concrete, wood, plastic).
- All wood blanks must be processed with a grinding machine or sandpaper, at least 2 times: first with a coarse grain, and then with a fine grain.