Olga Eremina
The time has come for autumn holidays in kindergartens
.
In the script for our autumn entertainment
“
Golden Autumn
” there are two
birds
for which I needed to make
hat masks
.
I decided to search the Internet for options, but I didn’t find many ideas. The most budget option, of course, is paper. I used whatman paper because it is dense and does not lose strength for a long time. After the holiday, you can use masks
throughout the year for theatrical activities, in the Mummering Corner, for free play activities with elements of theatrical performance.
It is better to use acrylic paints for artistic creativity, because, unlike gouache and watercolors, they do not get dirty and do not fade. When coloring, I tried to rely on realistic photo images of these birds ( brown sparrow
, white cheeks visible, etc.) Only the eyes turned out stylized - bright, expressive.
birds
- were satisfied with the result .
Bird eye options
.
The circumference of a child’s head (by the way, the circumference of a 3-4 year old child on average is 50-51 cm, plus 3-4 cm for gluing.
Beak pattern.
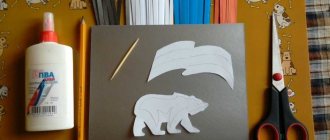
All the necessary patterns.
This is how the blanks turned out after gluing and assembling all the parts.
Ready-made tit mask
.
Finished sparrow mask
.
This is Egor trying on a titmouse mask
.
I'm the host and my little birds
.
Creativity definitely brings joy and a sense of self-satisfaction! Be creative and have fun! I will be glad if this material turns out to be useful for my colleagues and parents.
Publications on the topic:
The last snow has melted. The buds had swelled and the first leaves were even peeking out. The birds have also perked up: sparrows are chirping and frolicking. So many interesting things.
Materials for the master class: colored double-sided paper, colored double-sided cardboard, scissors, bird silhouette template, simple.
How to arouse a child's interest in creativity. You need to make crafts that are simple to perform and original. Here are families of funny owls and...
A mask is a very necessary attribute in kindergarten. Here you have fairy tales, here you have games. What holidays take place without masks? That's what we want today.
Collective composition “Falling Leaves” with children of the second group of early age and younger group. Autumn is a golden and wonderful time. In good weather.
I present to you my master class on making an autumn hedgehog with “live” needles: Step 1. Take woolen socks and fall asleep in them.
How to make masks for the play Fly-Tsokotukha.
You can celebrate your name day by performing the play “Fly-Tsokotukha”. For example, in the style of a skit - do not sew costumes, but identify the heroes by wearing masks and hats.
Let's reread the fairy tale and figure out what heroes we need.
Fly, Spider, Mosquito - the main composition.
Auxiliary: cockroaches, granny bee, fleas, beauty butterfly, grasshopper, horned beetles, ant and ant, as well as fireflies, centipedes, wormbugs, boogers.
What’s so good about this fairy tale is that there are three main characters, the crowd is huge, and everyone present, wearing such a mask-cap, can feel like an actor and play a certain role. I usually make props from isolon (tourist rugs), but cardboard ones also look quite spectacular.
Autumn crafts from potatoes on the Golden Autumn theme
Autumn-themed potato crafts are easy and safe to make. It will take very little time, but this type of craft will help you have fun with your child.
Potatoes can be used to make different cartoon characters thanks to the shape of this vegetable. After several DIY potato crafts, you will be able to notice features in potatoes and learn how to apply them.
DIY potato garden craft
Craft material such as potatoes does not require pre-processing other than washing. But if you plan to use plasticine or paint as an additional material, then wait until the vegetable dries.
You can make a funny family of piglets from potatoes if you choose vegetables of a certain size.
Materials:
- Potatoes: 1 large, 4-5 small
- Pink and black plasticine
- Base – cardboard or plastic
You can use the lid of a plastic bucket or an empty box of chocolates as a base for the stand. Place artificial moss or green paper on the bottom to imitate grass.
Tip: plasticine sticks to potatoes when heated. Remember it well in your hands first.
- To make a snout, roll the ball and flatten it. We draw nostrils with a pencil.
- The piglet's ears will be triangular in shape.
- The pig's tail is curled, so first roll out a thin sausage from pink plasticine and twist it.
- To depict the hooves, we make cylinder-shaped parts from plasticine.
- We make round eyes from black plasticine.
- Attach all the parts to the potato, which will act as the body.
Potato hedgehogs
I myself did not expect that this dish would be so tasty. I wonder if there is a similar recipe on Christina’s blog?
I came up with it myself based on a recipe for ordinary potato pancakes. But she prepared it in her own way.
For potato hedgehogs you will need:
Chicken breast (300 g), potatoes (4 pcs), carrots (3 pcs), herbs, spices, 1 small onion, cheese (50 g), 1 small apple.
Cut the breast into small pieces and fry in oil.
Add to it a little onion (onion or green), and also - the highlight of the recipe - a lot of dill (can be supplemented with parsley, cilantro, celery, wild garlic, raw or frozen) and several finely chopped apple pieces. Mix everything, lightly fry, salt, add spices and a little grated cheese. This is the filling.
Now you need to grate the raw potatoes and carrots on a coarse grater.
Place a spoonful of grated potatoes on the heated oil, add our filling on top, then add potatoes again. Press lightly. Fry on both sides until the potatoes are cooked through (we have the filling already prepared).
The taste is very interesting:
the potatoes are crunchy,
carrots give sweetness,
greens - piquancy and smell,
and the apple makes the meat juicy. All together – very tasty.
contains cheese
contains onions
In Austria, Switzerland or Germany, our well-known and long-loved ones are called rösti. Or röşti. And also resti or reshti. And there are even more options for preparing and serving this dish than there are names for it: pancakes or a large flatbread, with cheese or rosemary, with bacon or cracklings... - every family has its own signature recipe, inherited from the grandmother.
In order to keep up with the Swiss grandmothers, I’ll create, perhaps, my favorite recipe for grated potatoes. What are you going to order to pass on as an inheritance to your grandchildren? Of course my rösti will be vegetarian. With mushrooms and onions...
Autumn crafts from potatoes for children
Potato crafts for kindergarten can be so basic that every child can handle them. Choose different shapes of potatoes so you can get creative when creating different characters.
You can use carrots as additional material, and toothpicks are perfect for fastening.
Kids' imagination is so great that they can make cartoon characters out of potatoes.
Hedgehog made from potatoes and toothpicks: children's craft
How to make a hedgehog from potatoes? Boil the potatoes a little first, as you will have to cut off some of them to make the face.
The hedgehog craft from potatoes and toothpicks is so simple that in half an hour you can create not just one hedgehog, but a whole family.
To do this, after cooking, you need to cut off the edge of the potato, and stick toothpicks into the rest of the unpeeled part.
You can make a hedgehog without boiling the potatoes. Just design the face of a hedgehog.
For decoration, you can take acorns or decorative apples to attach to the hedgehog’s back.
A composition such as a family of hedgehogs can be beautifully decorated and taken to an exhibition of creative works in the garden or at school. Using additional materials, you can make it colorful and unusual
For vegetarian rösti we will need:
- 500 grams of potatoes;
- 150 grams of fresh or frozen mushrooms;
- 100 grams of hard cheese;
- 1 onion;
- 4 tbsp olive oil;
- salt to taste.
And let them be hedgehogs! You won’t surprise anyone with flat potato cakes, but prickly buns with Swiss citizenship are a completely different matter.
We start preparing our rösti with onions. Chop the onion and fry it in a spoon of oil until golden. This operation takes about five minutes.
We put the finished onion aside for a while, but we will need the frying pan very soon. Grate the potatoes for the rösti on a coarse grater. Even better is a Korean carrot grater.
Fill the grated potatoes with water, let sit for ten minutes, then squeeze. Those who are not lazy can even dry it with a towel. Now we put the potatoes in a frying pan, where the olive oil is already boiling and sizzling. Fry the potatoes for ten minutes over high heat until translucent. And then we leave it to cool there, on the side, next to the onion.
While the potatoes are cooling, grate the cheese and cut the mushrooms into small cubes.
And here is a fork in front of us: you go to the right - you mix cheese, mushrooms, potatoes and onions into a single whole; If you go to the left, you will put half of the cheese aside for later and mix the rest. This is good, this is delicious. But in any case, do not forget to salt the potato mixture. Let's get... surprise! surprise!... muffin tins. Silicone or paper ones are best: it is more convenient to remove the finished hedgehogs from them.
We put our mixture into molds, put it in a heap, don’t be greedy - in the process of preparing the hedgehogs, the potatoes “shrink” :) Preheat the oven to 180°C and place a baking sheet with “potato muffins” inside for 10-15 minutes.
Then we pull out the baking sheet and sprinkle each “cupcake” with cheese (in the event that we previously went along the second path and set aside half).
We put the pan back in and let our rösti sit in the cooling oven for another five minutes. Let the cheese melt. Vegetarian rösti is ready! We take them out of the molds and use a spoon to give them more roundness. This is easy, while the hedgehogs are hot, they are very plastic, as soon as they cool down a little, they will hold their shape.
My family was delighted with the hedgehogs. By the way, children will surely like such interesting potato pancakes. Bon appetit!
Craft Cheburashka from potatoes: step-by-step master class
With the onset of the hot autumn season, a cheerful period begins in schools and gardens - the season of creative work. Young children prefer to make those characters with whom they are familiar from childhood. That’s why parents are so often interested in the question of how to make Cheburashka from potatoes with their own hands.
Materials:
- 3-4 potatoes
- 3 matches
- Boiled carrots
- Knife
- Board
Take a medium-sized potato and cut off two circles on the sides to get future legs. To make the body, take a large potato and cut it in half.
Connect the paws to the body using toothpicks, piercing the paws from the bottom.
The middle of the potato that remains after the paws will serve as the head of the Cheburashka. Attach it to the body with a toothpick. We will use a round potato smaller than the body for the head. To do this, cut off two parts on the sides of the potatoes. We take the circles that we get for the ears. We connect all the parts with toothpicks.
We will make the mouth of Cheburashka from a piece of carrot. To do this, cut a circle of carrots and divide it into two parts. Let's give one semicircle the shape of a crescent.
Cheburashka may turn out differently
DIY Potato Horse Craft
Pink potatoes are perfect for creating a potato horse with your own hands.
And this beautiful horse is made from three potatoes. You will also need several toothpicks, a ribbon and threads for the mane.
Ears can be made from matches covered with paper.
Another version of the horse using knitting threads
Depending on the shape and size of the potatoes you find, the type of horse you get may vary
Potato bear: how to make it yourself
To make a potato bear, you will need to prepare several oblong-shaped potatoes. Wash the vegetables and remove soil.
For the head you will need 2 small round potatoes. For the body you will need to choose a longer potato.
For the paws you need to make quarters from potatoes. We make paws from 4 strips.
The edge of one potato needs to be trimmed to make 2 semicircles.
We connect all the elements with toothpicks. To create an interesting composition, you can insert a pot of honey between the bear’s paws. Make it from half a small potato.
The eyes and mouth of the bear's muzzle can be made from plasticine, colored paper or cardboard. They can be attached with glue or plasticine.
Even such an original composition can please the teacher, who will be happy to present it at the class exhibition
Looking at the potato crafts that children and their parents make, you can be amazed at the children’s imagination. After all, potatoes are unremarkable in their essence, but the work turns out to be interesting.
Various potato animals
As practice shows, most of all children like to make domestic and wild animals out of potatoes. Kids make beautiful bears, giraffes, horses, dogs, pigs, and frogs.
A hippopotamus is made quite quickly. You need to find two elongated tubers. The first will be used instead of the body, the second will turn into a huge open mouth of the beast. The teeth will be replaced by pieces of toothpicks or sharpened matches.
The eyes and nose can be made from pieces of plasticine, the tail from twisted knitting threads.
DIY rooster
If you have an idea to prepare a potato camel for an exhibition, you need to take time to find a tuber that will be shaped like the head of the animal. It needs to be fixed on a large round body, and then four legs made from small oblong potatoes must be added. If desired, the legs can be cut out with a knife. It is best to use cut potatoes as humps. Carnation eyes or peppercorns look good on a camel's face. The mouth should be drawn with a black marker.
Since potatoes are mostly round in shape, they are often used to make bears. Everything is simple here. You need to select an oblong body, attach a small rounded head and small paws to it. All elements are cut from potatoes.
Octopus
To make a honey lover look funny, you can give him a cardboard hat or a small bright scarf. If a child agrees to make a cardboard or plasticine pot of honey, that will be great. You can put it near the bear or give it to its paws.
Children can make crafts from potatoes for kindergarten and school all year round, because this vegetable stores well and is cheap at any time of the year. Therefore, if you did not have time to prepare leaves, acorns or chestnuts, do not worry - potatoes will always help you out.
Yellow leaves, mushrooms, berries strung on its needles eloquently indicate that the time has come to stock up on the gifts of nature and prepare for a long, cold winter. It is not surprising that this particular character often becomes an exhibit at exhibitions of children's creativity.
A variety of materials can be taken as the basis for its manufacture, including -.
Any large fruit with a fairly dense structure that can retain its shape for at least a week will do. This could be a small, shaped pumpkin, melon or regular potato - the most affordable, but no less advantageous option.
How to make a hedgehog from potatoes? First, you will need to choose a tuber of a suitable shape - elongated and ideally slightly pointed on one side. Secondly, you will need to figure out what to make the needles and eyes out of.
An original DIY potato hedgehog can be made using regular toothpicks. On each of them plant a hawthorn, rose hip, barberry or any other small oval-shaped fruit.
Make the eyes from two fragrant cloves, and the nose from another berry or an acorn cap.
You will get exactly the same potato hedgehog, the photo of which is now presented to your attention.
But what’s so interesting about children’s games is that the number of improvisations in them is simply unlimited.
For example, instead of toothpicks, you can use pine or fir needles. Such work will require more patience and time, but the result will definitely please you. You can put dried fruits, leaves and flowers on individual needles.
You can use hard dry grass, ears of wheat or rye, straw - anything that resembles the shape of a needle. Even some of them can be used to make a beautiful outfit for a hedgehog. Just imagine how you want your prickly friend to look, collect the necessary material and get to work!
But first, a quick question.
What do you think: how many dishes can you cook and potatoes?
I once had a book called “250 Potato Dishes” on my bookshelf.
And for me this was the limit of fantasy. But it turns out that this is far from an exorbitant figure.
Before I introduce you to my potato recipe, I would like to introduce you to Christina’s blog: “Bread and Salt”
, where she collected 365 potato dishes! But that was just the beginning.
The 500-dish mark has now already been passed. And on the horizon is a new goal - 1000 dishes of their potatoes, neatly collected in one place.
I am amazed at Christina's determination and imagination. I would have been confused a long time ago about which dishes I cooked and published and which ones I didn’t. :)
So on her blog you will find many interesting and delicious recipes.
We cook ourselves
But not quite usual.
All the recipes that I will give here, as a rule, will not contain exact numbers and proportions. What are these recipes, you ask?
The fact is that I myself often cook from inspiration and don’t notice how much I put in (except in cases where proportions are indispensable).
And I offer you not so much ready-made solutions as ideas.
You can prepare your own dish based on my ideas. After all, any housewife is capable of this. It is only necessary.
And now about my dish.
How to make a potato turtle with your own hands
An ordinary potato can be turned into an adorable turtle. This is quite easy to do.
To make a potato turtle, go to the store or to the garden beds to collect the necessary material
Materials:
- Toothpicks
- Potato
- Half a cabbage
- Decor – flower
Cut the potatoes into two halves. We also break the toothpicks in half and insert half a toothpick into each half of the potato.
We insert the second part of the toothpick into the cabbage, having previously positioned the halves of the potatoes so that we get the head and legs of a turtle.
Finally we decorate the turtle with a flower.
Potato cake made from cookies with condensed milk
YouTube channel “COOKING AT HOME”
A simpler and more familiar version of the cake. Perhaps this is the kind of chocolate dessert that many people ate in childhood. And these days, “potatoes” are mostly prepared this way.
Ingredients
For the cakes:
- 500 g shortbread cookies (baked milk is perfect);
- 7 tablespoons cocoa;
- 100 g butter;
- 250 g condensed milk;
- 1-2 tablespoons of cognac, rum or liqueur - optional.
For cream:
- 1 tablespoon butter;
- 1 teaspoon sugar or powdered sugar.
Preparation
Grind the cookies into crumbs with a blender and mix with 5 tablespoons of cocoa. Add softened or melted butter and mix thoroughly.
Add condensed milk in parts, stirring the mixture until smooth. You can add alcohol for flavor. Make oval “potatoes” from the mixture. Sprinkle with remaining cocoa and refrigerate for 10 minutes.
Using a spoon, rub the softened butter with sugar or powder. Place the cream in a pastry bag and decorate the cakes.
