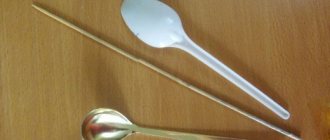
Sets of felt-tip pens have been extremely popular with both children and adults literally from the moment of their invention, namely since the 60s of the twentieth century. Unlike pencils, they do not require constant sharpening, and their color is far superior in brightness and saturation to a pencil “trace.”
Felt pens are one of the most popular products for children's creativity.
Today, there are several types of stationery products on the market, such as:
- The usual sets of felt-tip pens;
- Whiteboard markers;
- Markers for writing on disks, glass, fabrics;
- With washable ink, etc.
All of the above markers have one common and, unfortunately, negative property: they dry out quite quickly, their color becomes pale and inexpressive. Even if you purchase the most expensive products, this will not guarantee that markers or felt-tip pens will not lose their writing properties. The deterioration in writing quality is due to their design: the dye that flows from the reservoir to the felt tip dries out over time as a result of complete consumption of the paint solvent. Thus, a marker that still contains a lot of coloring pigment stops writing and has to be thrown away.
But it turns out that it is not at all necessary to throw away old markers; you can try to “reanimate” them at home, and in a very simple way. So, what can you do to refill them and restore them to their former brightness?
For small children, it is better to buy washable markers
It's better not to refill markers
Many of us remember the popular Soviet-era method of refilling felt-tip pens using any alcohol-containing solution. Mom's French perfume, dad's triple cologne, medical alcohol from the medicine cabinet - everything was used. Today, this method is no longer relevant (to be honest, even in those days, filling with an alcohol solvent “revitalized” felt-tip pens for a very short time) for a simple reason: the sets of felt-tip pens produced in our time have water as a solvent, they are called “water-based felt-tip pens.” basis."
Of course, you can fill water-based ink with an alcohol-containing substance, which will also soak the dye, but, alas, not for long. Don’t forget about such an important aspect as the specific smell that your markers will acquire after filling with alcohol or even perfume.
On thematic forums you can find a recipe for a dressing that will make the marker eternal. According to it, you need to mix 0.5-1.0 ml of alcohol (preferably isoamyl or isobutyl) with an alcohol-soluble dye of the required color (sudan black, brilliant green, auramine, etc.) and use a syringe to inject the solution into the end of the marker. Perhaps this method is indeed effective, but not everyone will be able to find all the ingredients necessary for it.
Confectionery lifehacks: DIY food markers
You can give free rein to your imagination and make your baked goods bright, beautiful and original with the help of food markers. Unfortunately, their cost is high. But there is a way out! You can make these markers yourself using food coloring!
Youtube | All sorts of things
You will need regular stationery markers, and not necessarily new ones, the main thing is that there is a note on the packaging that they are non-toxic and water-based.
Youtube | All sorts of things
You will also need a container of clean water at room temperature, gloves to protect your hands, paper napkins, tweezers for removing the rod, a pipette and food coloring.
Youtube | All sorts of things
First we disassemble the felt-tip pen. To do this, remove the plug and remove the feed rod. Place it in a jar of water.
Youtube | All sorts of things
Using a pipette, pour water into the felt-tip pen and rinse until the writing tip becomes completely white and no longer leaves a trace of paint.
Youtube | All sorts of things
By this time, the feed rod will already be filled with moisture and will be ready for further processing. In a container with water, use squeezing movements to free the porous material from the pigment. Periodically change the water to clean water. We continue the process until the rod becomes completely colorless, leaving no traces of paint.
Youtube | All sorts of things
Let all parts of the felt-tip pen dry.
Youtube | All sorts of things
Now you need to “fill” the felt-tip pen with food coloring. This can be done using a pipette or a drop bottle. If the dye is very thick, it can be diluted with a few drops of vodka.
Youtube | All sorts of things
Without inserting the feed rod into the felt-tip pen, drop a few drops of dye inside to saturate the writing tip.
Youtube | All sorts of things
Now pour the dye drop by drop into the feed rod. In order for the paint to better saturate the porous material, the rod can be compressed periodically.
Youtube | All sorts of things
Using a napkin, remove excess dye from the writing tip, insert the rod inside and secure with a stopper. The pastry marker is ready to use!
Youtube | All sorts of things
Do not throw away these markers when they dry out: by removing the cap, you can easily “refill” them by dropping 1-2 drops of vodka inside.
Youtube | All sorts of things
Happy creativity!
Details of the process of creating food markers are in the video below.
How to refill a set of water-based markers: a miracle product at hand!
Answer to the question: “What to refill water-based markers with?” lies in the question itself. Since water acts as a solvent, it means that dried paint can be “reanimated” with ordinary water. This is done in several ways.
Using water, you can return the ink to its original brightness.
- You can fill the felt rod, which is the dye reservoir, using a regular syringe filled with water. Having removed the cap from the end of the body, you should carefully introduce water into the center of the rod, preferably gradually, 10-15 drops at a time. The main thing is not to overdo it: if there is more water than necessary, it will begin to flow through the tip and wash out the dye. As water is introduced, the felt rod will begin to lighten from the edge where the water is introduced. This is how it should be; this reaction indicates that the paint has begun to dissolve and flow to the tip. After refilling, you should leave the markers in a vertical position (writing end down), and after 3-4 hours, check the effectiveness of the procedure by comparing the color intensity with the control indicator, which must be done before refilling. If necessary, you can add a few more drops of water.
- The second method is simpler in some ways, more difficult in others. To dissolve the paint, remove the entire felt rod from the body and dip one end into water. Water will evenly saturate the entire tube in the optimal amount, after which it must be inserted into place, pressing on it so that the writing rod enters the reservoir. But not everyone can take apart a felt-tip pen without getting dirty or breaking anything in it.
In principle, the methods described above are not refilling markers in the literal sense: rather, they are re-dissolving the dye remaining in the reservoir. To refill water-based markers, it is recommended to use water in combination with water-soluble dyes: ink, paint for cartridges, etc.
PCB Marker
PCB Marker
A PCB marker is a marker with which we can draw printed circuit traces.
Such markers can have different line thicknesses. Below in the photo is my 0.8 mm thick marker.
This marker leaves a very juicy and even mark on foil PCB
PCB marker at work
In order for the printed tracks to turn out very smooth and beautiful, we must sand the textolite with sandpaper of the finest abrasive. In everyday language, such paper is called micron paper; in extreme cases, it can also be called zero paper (slightly larger abrasive).
We take our hero in hand and write something like that. I wrote the name of our site: “Practical Electronics”.
We will etch our scarf with “Practical Electronics” in a solution of ferric chloride. To do this, we need a plastic bath (under no circumstances use metal baths, otherwise ferric chloride will corrode them) and ferric chloride powder itself. Pebbles can also be used, but you need to grind them well and dissolve them.
Pour clean water into the bath so that the scarf is completely hidden there and pour iron chloride powder into it, not forgetting to stir. We also use non-metallic objects for this. In this case, a wooden spatula.
How much iron chloride should be added to water? There is no need to remember any ratios of water to iron chloride. The rule is simple: the stronger the solution, the faster the scarf will etch, and vice versa. If you have nowhere to rush, then, of course, it is better to wait another hour in order to save money. The solution should look dark brown, and if you often etch scarves, you will be able to determine by eye exactly how much powder to pour.
My solution was not very strong. We release our scarf there using plastic tweezers and wait.
The etching process is a common chemical reaction. If you remember from your chemistry course, in order for the reaction to proceed faster, you can increase the temperature, increase the concentration of the solution, and even purely mechanically - interfere with this chemical reaction with something :-). Since I didn’t sprinkle enough, all that remains for me is to pour warm water and mechanical action. To do this, I “drove a wave” in the bath.
From time to time we check our scarf. In! The etching process is in full swing! Just a little more and you can remove the scarf from the bath.
An hour and a penny later, our scarf was etched. Wash off the remaining solution with water. And here is the finished scarf with the inscription!
In order to remove the green trace of the marker, we use acetone and a cotton swab dipped in acetone.
For the sake of beauty, we’ll tinker with this whole thing. To tin, you must first rosin
and now to tin
We wash off the remaining rosin using acetone or other powerful solvents, such as Flux Off. And... voila!
Conclusion
The letters (let them be the tracks of the printed circuit board for us) turned out exactly the same width. If you draw lines using a ruler, then, I think, you can achieve factory quality. The Edding brand marker coped with this task perfectly. But, since the marker is Japanese and of very high quality, the price, of course, is a little bit high, just like for Japanese cars. At the time of writing this article, the price of such a marker in retail stores was 150 rubles, which, of course, is more expensive than simple ordinary markers. But I can say one thing: such a marker will last you a very long time, if you don’t forget to cover it with a cap and don’t color in children’s coloring books.
Ali also has a large selection of markers for printed circuit boards:
You can check them out at this link.