Typically, a barbecue is a metal box with an open top, over which kebabs are fried on skewers. We will tell you how to build an entire street complex made of brick: barbecue + grill + cauldron (for pilaf). It is suitable for cooking kebabs, pilaf, grilled meat, pasties.
It is better and cheaper to build such a brick grill yourself than to pay a tidy sum for it. This is what it looks like:
Advantages of a brick grill
Unlike other materials from which the installation can be made, brickwork is easy to work with even for novice craftsmen.
In addition, such designs have a number of advantages:
- The stationary installation is very stable.
- The brickwork is not subject to deformation.
- It is easy to design a high-quality chimney, stove compartment, and auxiliary functional compartments.
- Minimum financial costs during construction.
In addition, using ready-made drawings and projects, you can create an original canopy over the barbecue, which will allow you to cook even in rainy weather.
Barbecue and safety.
Food poisoning. Wash your hands, buy meat from safe places. This is the best advice to avoid food poisoning in the midst of your picnic at the dacha.
Charred meat. Do you like well-done meat? Don't char the kebab until it turns black! Charred food particles double your risk of cancer. So you can raise a toast to health and to meat with a slight redness inside.
Carbon monoxide poisoning. Everything is good in its place. If you're grilling in bad weather and the crazy thought “why don't I do this in the garage” pops into your head, chase it away with a filthy broom. The concentration of carbon monoxide indoors can be dramatic for you.
Fire. At least 3 m from buildings, wooden fences, sheds, etc. will give you the opportunity to avoid colossal fire damage and serious injury.
Heatstroke. “It’s so hot in here I’m going to have a stroke.” This may not be just a joke. Overheating can cause serious illness for people with cardiovascular disease.
Casual clothes. Do not wear loose clothing with loose sleeves or flaps when working on the grill. A spark that hits it may produce a completely different fireworks display than you had planned.
Deep frying. Working with deep fat is best left to professional chefs. Spattering particles of fat, open fire - it’s better not to overestimate yourself, we are smart enough to understand that “the game is not worth the candle.”
Be careful, wasp. Wasp stings are extremely painful and very dangerous for people with allergic reactions. Therefore, it is better to have anti-allergenic drugs in your first aid kit and wear a long-sleeve shirt.
Coals and fire safety. Wait 48 hours before disposing of the ash from the grill.
Disadvantages of a brick grill
Unfortunately, this design is also not without its drawbacks:
The need to prepare a site for a barbecue. The presence of groundwater can easily erode unprepared soil, destroying the foundation of the structure.
The need to strictly follow the instructions and drawings. Brickwork structures are characterized by a strict functional structure, where every step is required.
Over time, the brick turns black from exposure to smoke and soot, acquiring an unsightly appearance.
Despite the presence of certain disadvantages, today brick barbecues are one of the most popular models.
Features of corrosion protection
Metal grills are susceptible to corrosion, so for a long service life, it is necessary to carry out appropriate treatment to protect it. For such protection, all components can be painted with a special paint that can withstand high temperatures. After this treatment, corrosion and burnout will not be a problem. You can also use bluing. How is it produced?
- It is necessary to degrease all components of a homemade grill.
- A solution of caustic soda is created using 50 grams of this substance per 1 liter of water.
- The metal components are soaked in this solution for 2 hours.
- After this, the metal is heated using a temperature of 140 degrees.
This is one of the bluing methods. It can be alkaline, acidic or thermal. For each of these types, a specific solution is created and the metal is impregnated with it, after which it is subjected to heat using certain temperatures.
After performing such manipulations, a chemical film is formed on top of the parts, which protects them from external influences and preserves the metal. Another easy way to bluing is to use olive oil or machine oil. To do this, use one of 3 methods:
- The metal is heated and dipped in oil.
- It turns out that the metal is exposed to high temperatures until it turns red, after which it is smeared with a swab soaked in oil.
- The component is coated with oil and heated to a temperature of 250 degrees.
You can do several repetitions to achieve better results.
There are many methods and each of them is easy to use, and most importantly, it gives an amazing effect to prevent corrosion.
Step-by-step making of a barbecue
The construction of the structure is represented by a number of successive stages:
- Site preparation.
- Preparation of the drawing.
- Barbecue device.
The construction is completed by laying auxiliary structures: grates for grilling and shish kebab, dampers for the oven, finishing of the woodpile.
Site preparation
Before building any structure on a summer cottage, it is necessary to assess the strength and characteristics of the soil: the presence of groundwater, karst voids, and make sure that there are no cesspools or wastewater nearby.
Considering that brickwork and cement mortar are quite heavy, it is worth considering the thickness of the foundation.
- How to make a ceiling with your own hands - 135 photos and video descriptions of how to make various types of ceilings
- Combined bathroom - stylish design methods and examples of competent interior selection (125 photos)
How to install an interior door frame with your own hands - 130 photos and step-by-step installation video
Step-by-step creation of a site:
- The depth of the pit is calculated based on soil indicators and the estimated weight of the barbecue.
- A sand cushion, a layer of gravel and pouring concrete are required.
When pouring, you can use reinforced inserts to increase the strength of the foundation. The last step is to lay a decorative flat stone or tile on top of the mortar.
How to do
To prevent your barbecue from falling on its side and cracking at the seams, you need to pour a foundation under it. Its dimensions in plan are determined by the dimensions of the future structure, so the project must be drawn in advance or used ready-made.
Advice. Make the length of the walls a multiple of the dimensions of the blocks, taking into account the seams so that you do not have to cut them.
Foundation structure
After marking the perimeter of the grill on the surface, perform the following work:
- Remove the soil to a depth of 30-40 cm;
- Compact the bottom and fill it halfway with gravel. Compact the filling too;
- Place the formwork and secure it well. The top of the formwork must be horizontal and protrude above the ground to the desired height;
- Pour a concrete solution of cement, sand and gravel into the formwork in a ratio of 2:3:4. Lay reinforcing mesh every 5-8 cm of pouring thickness;
Preparation of the drawing
The diagram of the future barbecue must reflect the following parameters:
- Structure height.
- Number of tiers.
- Width and depth of the oven.
- Chimney installation.
It is also necessary to note the location of the barbecue grates and the grill installation (if it is provided in the selected model).
Getting ready for production
Step-by-step making of a barbecue with your own hands should begin with the selection of the necessary materials, tools, and equipment.
The following will be useful at work:
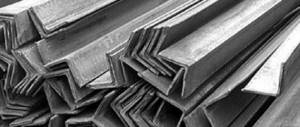
- sheets of steel for the brazier, corners or pipes for the legs;
- grinder, circles for cutting metal;
- electric drill (if the grill is collapsible);
- measuring tape;
- welding machine, electrodes for welding.
If you plan to paint the grill, then you should also get some paint.
Do-it-yourself greenhouse - review of the best options and step-by-step construction instructions (85 photos)DIY site design - a practical guide to landscape design. Basic rules and expert recommendations
- Watering with your own hands: a drip irrigation system made from scrap materials. 90 photos and step-by-step instructions for creating the system
Classic model device
This model is the most famous and widespread. A novice master should use step-by-step instructions for creating a brick grill with your own hands:
- How to make a heated floor with your own hands - 160 photos and video description of how to make a heated floor
Laying tiles in the bathroom with your own hands: 150 photos of how to lay large areas with tiles quickly and easily
Do-it-yourself slopes are the cheapest and most durable slopes. Instructions and advice from experts (video + 125 photos)
The first row of bricks is laid on the prepared base area (on a bed of cement mortar).
Place the bricks in rows in a checkerboard pattern. The seams are processed, and the slope of the walls is measured using a building level.
For the classic model, you will need to fold a box of rectangular bricks.
At a height of approximately 1 meter, metal sides for the iron barbecue box are laid along the inner surface of the walls. The sides for the grill are located slightly higher.
You can weld the metal box yourself, or you can use an old barbecue, first getting rid of the support legs.
It is better to leave the gap between the iron box and the brick installation - it will be easier to replace the metal part of the barbecue if necessary.
What materials will be needed during construction?
Old red brick, cleaned of mortar residues, was used as the main material. Any ceramic brick is suitable for construction. For the firebox you will need 15 fire bricks.
We do the masonry using clay-sand mortar. You can dig up clay yourself or buy construction clay in bags.
There is an opinion that for an outdoor barbecue without protection from rain, the brick should be placed not on clay, but on a sand-cement mortar with the addition of 1 kg of salt per bucket of mortar. Salt will save the solution from cracks due to high temperatures.
So, for construction work you need:
- ceramic bricks for general masonry and fireclay bricks for the firebox,
- clay, cement, sand, gravel,
- refractory mixture for fireclay bricks,
- wooden beams for lining the foundation,
- resin and a couple of sheets of galvanized iron.
Brick oven
You can also make an original brick oven-grill with your own hands, using ready-made drawings and step-by-step instructions for work.
When building the structure, two sections must be created: one for frying shish kebab and the second for installing a cauldron. The first section is built according to the previous scheme.
To make the second section, use the following instructions:
- Next to the main block of the barbecue, a second compartment is being built: the shape is a square box with a compartment for the firebox.
- A chimney must be installed in the rear part. It is better to order a circuit for creating high-quality traction from a specialist in order to prevent smoke during operation.
- As an auxiliary element, a damper for the firebox is made from a durable metal sheet.
- A metal stand is installed on the upper platform of the oven compartment, which will help in the future to better warm up food.
Before first use, it is best to conduct a test heating of the barbecue stove to assess the level of draft and the permeability of the chimney.
Erecting a barbecue from blocks
As already noted, there are plenty of projects for such barbecues.
The key factors here are:
- frequency of use of a charcoal brazier,
- volume of products for cooking.
Based on them, the following projects are quite optimal:
- The simplest. It may not be particularly user-friendly. However, it allows you to cook decent dishes, no worse than in massive, elegant ovens. The project can be completed in a week. The time taken from creating the drawings to preparing the first dish is taken into account.
- Simple with external graces. It is similar in functionality to the first project, but has a rather catchy appearance.
- Project "Candle". Of the presented projects, this is the most reliable and durable option. If built correctly, it will last for many years. The design of brick and foam blocks is thought out down to the smallest nuances. It is optimal for barbecuing, boiling, frying and baking food. Of course, its implementation involves significant expenses. And before starting masonry, you need to improve your skills in the stove craft or entrust the job to a true specialist.
The simplest projects
If a simple box (in format) is enough for your needs, then you can safely start implementing this project. As a rule, no special problems arise here. Design features: three walls, grate, metal coal box. This is the whole set of components.
For masonry, M200 brick is required. For its laying, a clay-sand mixture is used.
In such a barbecue, impressive temperatures do not form. Therefore, cracks should not appear on the masonry.
Strengthening the connection of brick lines and achieving better strength of the entire structure is carried out in a simple way - 1/10 of M400 cement is introduced into the working mixture. A sheet of roofing material or other similar waterproofing is placed under the starting line.
Laying bricks usually goes without any dilemmas. Simple dressing is used here. The spoon method works. This is how the barbecue body is laid out in about a day. An important condition is to maintain the parameters of the seams: each seam should not be thicker than 5 mm. Remember to use a level and plumb line. They will help maintain the evenness of the structure and rows.
On the 6th and 10th lines, the side bricks turn 90 degrees: supporting protrusions are formed. There is a table on the right side of the barbecue. Its folding variation is often used here.
After about 5 days, a grate and a coal box are placed on the barbecue. It is made of steel. A test run is in progress.
Example of working drawings:
Project "Candle"
This design differs significantly from the three-wall version. It is more complex, but also safer.
This project requires a high-quality slab base. Reinforcing elements are placed along the contour of the poured base (it is filled with concrete composition). The mass from the block or brick walls will be based on them.
Below is a working diagram of the brick layout for this project. Here you need a ceramic hollow brick, its format is one-and-a-half. The masonry is used using a purchased ready-made stove composition.
Grill with barbecue installation
Another popular model for a summer cottage. For work you will need ready-made diagrams, tools and a prepared site.
The shape of the barbecue with the installation of a barbecue is in the form of a U-shaped structure, at different levels of which there are barbecue grates and borders for skewers.
For work, you should use step-by-step instructions on how to make a barbecue grill out of brick with your own hands:
The brick box is laid out according to the previously presented scheme, using cement mortar, and for strength - metal rods. The only difference is the absence of one wall, because the structure is U-shaped.
At a level of 1 meter from the bottom of the platform, it is necessary to make the bottom of the grill. To do this, a frame is formed using metal corners and crossbars. A continuous layer of refractory brick is laid on top of the frame.
The construction of the barbecue walls continues for another 50-60 cm.
Next, they begin to form the arch: they use reinforced rods and masonry with cut bricks or decorative stone.
A chimney is laid above the level of the arch (when building a chimney, it is better to use the help of a specialist).
Sides for grates and grill installations are laid along the inner surface of the firebox. Further work depends on the selected modification.
Today there are quite a lot of variations of stoves and barbecues: open type or with an arched design.
Before starting work, it is better for novice craftsmen to familiarize themselves with video tutorials on how to make a barbecue out of brick with your own hands.
Additional barbecue options.
A grill with a spit , which will make it possible to evenly fry a large piece of meat.
A barbecue with a chimney will allow you to collect and remove smoke upward away from the summer kitchen or gazebo next to which the barbecue is installed.
Fireplace with barbecue – do you want to build something grandiose at your dacha? We build a fireplace for a patio or a summerhouse, into the walls of which we build in corners to support the barbecue grill.
Photos of do-it-yourself brick grills
Tell your friends