08.09.2019
After the release of the Harry Potter films, the magic wand became an indispensable attribute of any masquerades or holidays for children, where, in theory, magic should be present. It’s not difficult to make such a wand with your own hands, you will spend at most two hours on a wonderful wand, and you can make a wand for a fairy or a cool wizard, for a little princess or like Potter himself - it all depends on your imagination.
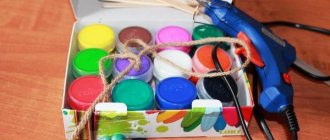
For a magic wand you will need the following: Two sheets of white A4 paper, a sushi stick, a (wide) plastic tube, PVA glue, acrylic paints, a hot-melt gun, a large round bead, a long narrow bead.
A step-by-step master class on making a magic wand with your own hands: 1. Place a wooden wand and a tube on paper to understand the angle of inclination.
2. We put the tube on the stick to the point of expansion.
3. Place the workpiece at the correct angle on the paper, and coat the part of the paper from the stick to the right with PVA glue.
4. We wrap the stick with paper without glue, lightly pushing the paper under the stick. Lubricate the corner of the paper with glue.
5. Fold the paper around the stick and let the stick sit until the glue dries.
6. Cut off the edges of the stick evenly, put balls from a regular napkin inside (this is to reduce the amount of hot-melt glue in the future).
7. From the second sheet, cut off 1/3 of the short side for the handle of the magic wand.
8. Glue this part to one end of the stick, slightly pushing out the edge of the strip (creating volume for the bead).
9. This is what the handle of a magic wand looks like without a bead.
10. Drop a large drop of hot glue into the hole in the handle, where the napkin ball has already been inserted.
11. Immediately place a bead on the glue (it can be of any color, but the diameter of the bead should be slightly larger than the diameter of the handle).
12. Along the edge of the bead we lay a thin “stream” of hot glue - this is the lower edge of the magic wand.
13. Along the edge of the stick handle (where the thickening of the paper ends) we make a circular outline with glue.
14. Then, along the very edge of the magic wand handle, we make a stroke again. We constantly twist the stick in our hands so that the glue does not flow to one side. We make a patterned spiral along the long end of the stick with a very thin strip of glue.
15. At the thin end of the stick we strengthen the long bead in the same way.
16. When the glue is completely dry, we will paint the stick. We use acrylic paints for this.
17. For the handle of the wand we chose dark brown paint. You can paint with a regular soft brush for children's drawing. Let the painted end of the stick dry completely.
18. Paint the thin end of the stick with cream paint and let it dry too. The magic wand is ready. If desired, you can coat it with colorless varnish and make more decorations.
“Don’t move around or swing your legs when you’re sitting at the table,” my mother said sternly and placed a full plate of milk soup in front of Tanya. Seven-year-old Tanya loved milk soup, especially when it contained a little rice and lots and lots of milk. She broke the bun into large pieces and threw it into the soup, and then, when the bun was soaked in milk, she picked it up with a spoon and put it in her mouth, smacking her lips with pleasure. My mother also scolded me for this, pointing out that it was indecent to eat like that, and she was very ashamed that she had such an ill-mannered daughter.
Tanya, have you already decided who you will be at the school New Year's Party? - Mom changed her anger to mercy. “We need to start sewing the costume, the school carnival is in three days, we might not make it in time.” This is your first school Christmas tree.
Mom, I want to be a fairy, a good sorceress, and I want to have a real magic wand. So that when I make a wish, I wave this wand and the wish comes true. Mommy, I just have a huge request for you: make a wand today, I want to try it for magic before the holiday. And in general, I really want to see Santa Claus, I haven’t seen him for a whole year.
Tanya scooped up soup with a spoon from a plate in which large pieces of bread were floating and, looking at her mother, she noticed that her mother was smiling kindly looking at her.
“My daughter is growing up, she’s already studying at school, but she still believes in fairy tales and Santa Claus,” the mother smiled at her girl. “Well, let him believe, he will also have time to be disappointed in fairy tales, and feel evil on himself, and grow up.”
Tanya, like many children, loved it when her parents read her bedtime stories. And that evening she demanded a fairy tale about a fairy with a magic wand. Before mom started reading, the girl bombarded her with questions:
Mom, do such fairies exist in real life? Are there magic wands in our lives? Can these wands grant wishes?
Mom, after thinking a little, answered:
You know, Tanyusha, if you really, really want something, then it will definitely come true, even if not right away. And magic happens in life if you believe in it.
In the morning, Tanya saw on the table in her parents’ room a wonderful magic wand, carefully made by her mother’s hands. This wand was exactly what the girl imagined it to be. Small, about twenty centimeters long, shimmering in different shades in the light of a lamp. Mom wrapped it in shiny paper and glued threads of New Year's rain to the end of the stick.
Tanya waved her wand, the hanging threads flew up beautifully and sparkled. “You need to check the wand for magic, make a wish.” The girl raised her wand. “I want a lot of ice cream and delicious sweets to appear here now.” She waved it, watching the brilliant scattering of scattering rain. She shook her head and, not finding any sweets, sighed sadly. “It’s just that the wish is not real, and the wand is actually magic.”
Tanya waved her wand again and made her deepest wish. “For the New Year, I want Grandfather Frost to put a tablet under the tree for me, the best one, with my favorite cartoons and games.”
Looking around, the girl realized that having made this wish, she now would not be able to make sure whether the wand was a magic wand or not. “I’ll take it with me to school and check it again.” Stealthily from her mother, Tanya put the magic wand in her school bag, carefully wrapping it in a large, clean handkerchief.
Leaving the house, Tanya noticed her old neighbor, Aunt Klava, on a bench at the entrance, and politely greeted her. Mom and Dad also exchanged greetings with their neighbor. While dad was starting and warming up the car, Aunt Klava managed to tell mom about how often the weather changes and complain that it makes her back and legs really hurt.
Having settled down in the back seat of her father’s car, Tanya quietly pulled out her magic wand from her briefcase and quietly waved it. “I want Aunt Klava’s back and legs to not hurt. Aunt Klava is kind and often treats me to sweets.”
At school, Tanya’s neighbor Alyonka was already impatiently waiting for her. She shared the sad news with tears in her eyes. Yesterday, the family's favorite dachshund named Linda got lost. Sobbing, the friend told about how she went for a walk with Linda and got distracted, looking at the festive windows sparkling with New Year's garlands. And when I remembered my dog, it was no longer there. Crying, Alyonka returned home. The whole family began to look for the lost thing.
They ran around the yards, calling Linda loudly, but they never found her. In the morning, the older sister posted printed notices about the missing dog in nearby yards.
Tanya did not tell her friend that she had a magic wand. She didn’t remember where or from whom she heard that she didn’t need to tell anyone about her desires, then they would definitely come true. Choosing a moment when no one was around, she again took out her wand, waved it lightly and whispered: “I want Linda to return home today, and Alyonka to become cheerful again.”
In the evening, mom discovered the magic wand was missing and told Tanya to return it. As soon as Tanya put it on the table, her mother immediately put it in the closet, where the unfinished beautiful fairy dress lay.
The next day at school Tanyushka was met by a smiling Alyonka and told how yesterday, in the afternoon, they called at their apartment, and when Alyonka’s dad opened the door, everyone saw Linda wagging her tail in greeting. Everything turned out to be magically simple: a young man who met a whining dachshund in the yard sheltered it in his apartment for the night. And in the morning, when I went to classes at the institute, I read an advertisement on a post that Alyonka’s sister had posted. In the afternoon he returned from class and took the dog to the address indicated in the advertisement. Alyonka constantly smiled, laughed and simply glowed with happiness.
“It came true! My wish came true! The magic wand works!” - Tanya thought joyfully. She was tempted to tell her friend about her magic wand, but she remained steadfastly silent. She understood that Alyonka might not believe it, and she was even more afraid that the magic wand would lose its magical power if its secrets were spilled.
The next day, while walking in the yard after school, Tanya accidentally overheard the conversation of her neighbors sitting on a bench at the entrance. Aunt Klava told them that her granddaughter had brought some kind of healing ointment from China, and after smearing it on the sore spots, Aunt Klava slept soundly at night for the first time in a long time, not feeling any pain in her legs and back. And she didn’t feel any pain for the entire day. Tanya rejoiced, “My fairy’s magic wand is working!”
The day of the school carnival has arrived. Tanya, in a beautiful dress, with small transparent wings on her back, with a magic wand in her hand, looked like a real fairy from a fairy tale. In the center of the school hall stood a large, beautifully decorated Christmas tree sparkling with lights. There were many children in the hall, but a group of children stood out that Tanya had never met at school before. In the corridor, Tanya accidentally overheard a conversation between two teachers about how children from an orphanage located not far from their school had been invited to the New Year’s party.
The teachers shared with each other their impressions that they felt very sorry for the orphanage children, that all these children had very sad eyes. Tanya carefully examined these children, they did not seem sad to her, on the contrary, they were cheerful, and how all the children rejoiced at the holiday. During the holiday, Tanyushka found herself next to one of the girls from the orphanage and met her. The girl's name was Lisa, she was also in first grade. Tanya quietly asked Lisa about her deepest desire, and Lisa, lowering her eyes, quietly said: “I want me to have a dad and mom!” Our fairy, seizing the moment, jumped out into the corridor, and, taking advantage of the fact that no one was there, waved her magic wand. “Let good people find Lisa and become her mom and dad!”
And the New Year holiday was gaining momentum, children danced in circles and recited poems to Santa Claus. Everyone had fun.
Does your little one truly believe in magic? Then she just needs a magic wand. This is not only a beautiful little thing for games, but also a wonderful addition to a fairy or snowflake.
Making a magic wand for a child with your own hands is quite simple at home; you only need a little time and a minimum of materials.
To work we will need:
- sushi sticks;
- purchased snowflake for the Christmas tree (2 types);
- glue gun;
- silver ribbon;
- scissors;
- white satin bias tape;
- white threads with a needle;
- small nail and hammer;
List of required materials
So, are you full of enthusiasm and determination? Then let's get started!
To create a small miracle you will need:
- Glue gun (can easily be replaced with regular superglue in mini tubes).
- Scissors.
- Paper.
- Thick fabric in three colors.
- Pencil (preferably cylindrical).
- Colored satin ribbons in three colors.
And now our master class will be happy to reveal the veil of secrecy for you and show you how to make a magic wand at home on your own.
Decoration
In order for your wand to turn into exactly the same one as Harry Potter’s, you need to give it the appropriate appearance. Using glue from a gun, you need to decorate the thing with rings, lines, zigzags, spirals, stars. Try to do this work neatly and beautifully. You should start applying glue to decorate your craft from the handle side. When it is dry, it can be painted. Describing how to make a magic wand, the instructions recommend using several tones to decorate it. First the base color is applied. It can imitate wood. The second, darker one, is suitable for highlighting the handle. The artifact, which was owned by the evil sorcerer Voldemort from the Harry Potter books, on the contrary, has white wood, and the tip of the wand is decorated with a Phoenix feather. You can paint this stick with white acrylic paint. After it dries, to add gloss it is enough to cover it with a layer of transparent paint. Its handle can be made “under the bone”. Polymer clay will play its role.
How to make a real magic wand
To make a magic wand you need to find a magic pencil. Everyone has one, we assure you, listen to your inner voice, it will tell you which pencil you need to take. We take a magic pencil and paste it with tape, colored paper, foil or other decorative decorations. At the top of the stick we decorate it, for example, with a star cut out of paper.
In order for the wand to truly work and fulfill all your cherished desires, you need to charge the magic wand with magical energy. Take the wand in your hands, close your eyes and clearly say the following spell:
“Oh, great wizards! I ask you to give magical power to my magic wand and accept powerful magicians into your ranks. I promise to use the magic wand only for good, to help people and fight evil. I undertake to never tell the secrets of wizards to anyone and am ready to be punished if I break this spell.”
This spell must be spoken from the bottom of your heart and with all your soul. Then the wizards will hear you and will help you in every possible way. They will always be nearby, but you will not see them.
You need to use the magic wand as follows:
- You need to move the stick smoothly without sudden movements;
- There is no need to shake or tug the wand;
- What you wish for, the words should be clear and intelligible, you should not speak loudly.
The most important thing is not to doubt your magic wand and believe in its powers, then you will succeed. Remember, the wand will fulfill wishes as much as you put effort into it when creating it. But powerful wizards will somehow prevent you from using your magic wand for other purposes.
Unfortunately, she won’t be able to do your homework for you, won’t brush your teeth, or learn your homework. These are the things you need to do yourself.
How to make a stick from scrap material
In order to make a magic wand with your own hands the first time, it is not at all necessary to wander through the forests or use torn paper.
This item can be made using available materials as a base. These can be sushi sticks or simple pencils. Making a magic wand from such material will not take much time, and the result will be no worse.
To make a magic wand from a sushi stick, you need to perform the following sequence of actions:
- On the stick, mark the place where the handle of the stick ends. The approximate size of the handle is a third of the base, but it is recommended to focus on the width of the young wizard’s palm.
- Apply a pattern to the surface of the stick using hot glue and a gun.
- If desired, decorate the handle with small objects (threads, beads, beads, etc.).
- For the top, apply a thicker layer of glue closer to the base. To apply the glue evenly, you need to constantly turn the stick in your hands.
- Wait about a minute for the glue to cool slightly.
- Until the glue has hardened, but no longer sticks to your hands, form the desired top.
- Allow several hours for the glue to cool completely and dry.
- Using paints, give the stick the desired base color. You can paint not only the surface of the base, but also the glue areas.
- After the main color has dried, paint the decorative details.
After the paints have completely dried, open with varnish. It is advisable to do this outdoors.
Making a magic wand that will help a young wizard cast magic in the name of good from a pencil is no less simple. Using sandpaper or sandpaper, you need to remove the colored coating and excess corners from the pencil. Afterwards, you can modify the surface of the pencil, giving it the desired shape according to the plan. At the end, all that remains is to paint the finished surface, apply decor and varnish. The product can be safely used.
How to make a magic wand with your own hands video
Examples of what kind of magic wands you can make with your own hands:
We suggest you look:
How to make your own cotton candy at home How to make a sheep with your own hands How to make homemade tea with your own hands. Herbal and spicy tea - recipes
How there are few miracles in life! And sometimes you just need a magic wand to turn a stone into a luxury car, a sick person into a healthy one, and an unhappy person into a happy and loved one. But we ourselves can bring a fairy tale into our lives. Let's start by learning how to make a magic wand out of paper.
Magic is all around us
There are more skeptics and realists in our lives than dreamers and optimists. In a world of total misunderstanding and inequality, I really want at least a drop of miracles. A DIY magic wand may not solve your problems, but you will definitely have a wonderful time and unleash your creative potential.
And if you believe in magic, then a magic wand can work. It’s not for nothing that psychologists claim that our thoughts are material. First, magic and magic will exist on paper, and then around us.
Now you will learn how to make a real paper magic wand. This idea will appeal to younger members of the household who love watching science fiction films.
Required tools:
- thick A4 paper, preferably cardboard;
- glue gun;
- silicone;
- silicone gun;
- acrylic paints in golden and brown colors;
- brushes;
- stapler;
- staples;
- scissors;
- newspaper.
- We will prepare all the necessary materials and tools for the work.
- It is better to take a sheet of thick A4 cardboard. If you want to make not a small wand, but a real magician’s wand, use larger paper.
- Lubricate the entire sheet with PVA glue on the inside.
- For convenience, we will use a brush.
- Now, starting from one corner, we will wrap the tube diagonally. It should be shaped like a cone.
- Leave the rolled cone like this for a while. The glue should dry, but not dry completely.
- To prevent the tube from unfolding, its edges can be secured with clothespins or paper clips.
- Then you need to cut off the paper on the stick a little on both sides. You can squeeze it slightly.
- We take a pistol with silicone in our hands and, through the thin end of the paper, begin to fill the cavity of the magic wand with it.
- Turn the stick over to the other side and fill the cavity with silicone through the wide hole.
- We fill the void with crumpled pieces of newspaper.
- After filling the stick with silicone, leave it until completely dry and only then proceed to decorating.
- The stick has already hardened; we apply silicone in a circle using a gun. We give free rein to our imagination, draw curls and spirals.
- After the silicone has dried, we need to paint the stick. You can use acrylic or spray paint.
- We completely paint the stick with brown color, and the curls with golden paint.
- This is the kind of magic wand we have, you can safely create miracles.
Methods for making paper
You can make a toy magic wand from various materials. Plain paper is suitable for this purpose.
For work it is assumed to use:
- A thick sheet of paper in landscape format.
- PVA glue or similar.
- Carpentry or other construction glue and a gun for applying it - this can be purchased at the appropriate retail outlet.
- Scissors.
- Acrylic paints and brushes.
- Gilding or similar paint for the final decoration of the product.
The procedure is as follows:
- PVA glue is applied to the surface of the paper sheet.
- The paper is rolled into a tube, starting from the corner, so that the workpiece takes on a slightly conical shape.
- After the glue has dried, the product is carefully cut with scissors on both sides.
- The ends are sealed using silicone. On the larger diameter side, partial insertion of paper inserts is allowed, but this method will make the accessory too lightweight.
- When the workpiece dries, fancy silicone patterns are applied to the outer surface. You can use plasticine.
- After the stick dries, it turns brown.
- To create an aging effect, black marks are applied in random order.
- The product is treated with golden paint and finally dried.
The fairy tale is a lie, but there is a hint in it...
We know about the magic wand from good children's fairy tales. No wonder they say that a fairy tale is a lie, but there is a hint in it. Maybe the story of how to make a magic wand at home will really help us bring at least a little magic into our lives?
Of course, this is fiction, but many people believe that a magic wand can be cast with a spell. Words must be sincere and come from the heart. The option for making paper sticks is simple. It's even easier to make it from a regular pencil.
Required tools:
- a simple unsharpened pencil;
- pieces of multi-colored felt;
- ribbons;
- glue;
- decorative paper.
Step-by-step description of the creative process:
- Let's make star patterns on the computer. We will need three templates of different sizes.
- Cut out the template and transfer the stars to felt. Trace with a pencil or chalk and cut out.
- It is best to use pieces of multi-colored felt, since we will be gluing the stars together.
- Connect the three stars with glue. Set them aside for now until completely dry.
- To make the stick symmetrical, we will make two star blanks.
- Take a pencil. We don't need a sharpened one, but one that simply resembles a stick.
- We decorate the pencil diagonally with colored paper, ribbon, and braid. We fix everything with heavy-duty glue.
- Cut out several pieces of tape of the same size.
- Once the glue has completely dried and the decor is firmly attached to the pencil, we can continue working on creating a magic wand.
- Glue ribbons to the top base. First one, then crosswise apply the second.
- We do this 5-6 times. The more multi-colored ribbons there are, the more colorful and beautiful the magic wand will be.
- Now we will glue the pre-prepared stars on one side.
- We will do the same with the second workpiece. It is better to attach the stars to the side of the pencil symmetrically.
Our world is amazing in itself, but sometimes you want to bring a little more magic and enchantment into it! Few people know that you can make a real magic wand yourself!!! So how? Do you want to know how to make a magic wand, following all the magical rules and secrets, how to handle and store it? Follow our instructions exactly, and you will have a personal magic wand that will certainly lift your spirits, serve a wonderful purpose and help you feel like Harry Potter or an excellent student, Hermione.
A real magic wand must be exclusive and individual! Because she herself chooses her, so to speak, owner and copyright holder. She acts as a conductor of the energy of magic and miracle.
Selection of materials
There are few rules, but they exist. Mr. Ollivander confirms!
Firstly, the stick must be natural, i.e. made of wood. It should be chosen in the forest because city trees are weak when it comes to the vitality of the tree. Such trees have a broken connection with the elements.
You need to go to the forest or park to pick up a twig with a positive attitude and complete harmony in your soul. At this moment you should have a desire to merge with nature. Also time your trip and making a magic wand with the waxing phase of the moon.
In addition, the tree itself must give you the twig. To do this, you must mentally sincerely make a request to the tree.
Then you should take a twig in your hand and feel exactly your wand. Close your eyes and listen to your feelings: has the twig become an extension of your hand...
Don't forget to thank the tree and give it some of your positive energy. This way the wand will maintain its connection with the forest and will generate its energy.
Since ancient times, it was believed that elderberries and nuts were endowed with magical qualities.
We cut off the branch carefully and quickly with a sharp knife. The size of the stick should be equal to the length from your middle finger to your elbow. It is better to hide the selected twig from prying eyes and bring it home. In the house it should be saturated with your energy.
Manufacturing technology
Making a wand is a whole sacrament, so it should be hidden from prying eyes.
Clear the branch of your choice from bark and twigs. Sand gently to make your stick smooth. At the same time, you need to pronounce the magic words to yourself:
“I conjure you, O all-powerful branch (of oak, maple, etc.) with the forces of the four elements - Earth, Air, Water and Fire! Take in their strength and power. Be my faithful assistant!
Next, you need to make a hole at the base of the branch. It can be done using a screwdriver, screw, nail or drill. Do it especially carefully so that the stick does not crack. It is necessary to place a magic core in the hole made. But what kind of core it will be, you need to determine yourself.
If you want the energy of AIR
, then you can put
a feather of a bird
, but not a black raven or a rooster.
Crystal
or
a pebble
will give your wand
the energy of the EARTH
. Perhaps you will choose a stone that has certain properties or suits your horoscope.
You can also use field
herbs
. For example, rosemary symbolizes long memory, sage wisdom, lavender devotion, laurel glory.
Attention! Under no circumstances should curry powder be used to create a stick.
Little ember
will fill the wand
with FIRE energy
.
WATER
the most complex element, it is unchanging in its variability, so it can be symbolized by
a wire
,
a spring
amber
washed ashore or a small sealed
flask with water
from a source of your choice.
After you have placed the core in the stick, you need to seal the hole in the stick. The stick must be sealed in consecrated water. On the seal, draw the initial letter of the selected element. Different schools of occultism have different spellings of the four great elements, choose the one that is closest to you.
Decoration
Some magicians coat the wand with varnish. This is not prohibited, but it is not encouraged either. It is better to cover it with natural, pleasantly smelling oil, wrap it in a scarf and leave it like that until the next full moon.
However, everything depends on the magician, so you can decorate the wand with beads, stones, or give it the desired shape using hot glue and paint it. This is more clearly presented in the master class by igrateshka
for beginner wizards:
You can also decorate the wand with feathers.
Wrap with magic twine and add a magic crystal.
Acorns, elements of marine fauna - all this can be useful in decorating your wand.
Copper wire will also help with this.
If you are skilled in art, then perhaps you can create a magical masterpiece.
Rite of passage
This is the final stage of creating a wand, one might say, bringing its magic to life. It is recommended to dedicate the wand on Beltane or Walpurgis Night (May 1) or Saiman (October 31). To do this, at midnight the magic wand is placed on a clean white cloth. Place a lit candle nearby.
At the same time, it is necessary to say the following words: “Become a guide, assistant and guardian!” Next, the candle must be extinguished in water and buried in the ground. The ritual must be done completely.
At the same time, the owner of a magic wand must remember:
By wishing and doing evil, the wizard will lose his power. This will happen suddenly and irrevocably!
Don't damage anyone with your wand. Better wish prosperity, health, prosperity and joy to your loved ones and friends!
Don't throw it anywhere and don't point it at anyone! These are important rules when using it!
Magic wand for a little fairy
Little fairies also need a real magic wand. There is no need to do it according to all the rules, because children have the power to change the world with the help of fantasies, so the wand should only help you feel like a fairy fairy!
Take a piece of ribbon or fabric and cut it into narrow strips. It will look more interesting if the stripes are of different colors. The more there are, the more magnificent the magic wand, or rather its top, will be. Gather the cut strips into a fluffy pompom. It can be complemented with beads and satin or silk ribbons. We wrap the stick itself with ribbon or paint it in the desired color. Let's assemble our wand by attaching our pompom to it! The wand is ready, even a child can make this!
TullnieShtuchki's master class
how to make a gorgeous magic wand:
In the same way you can make an astrologer's wand:
To accompany the stick you can make a small or, with or.
Lace is also relevant in a magical theme!
Beads, rhinestones and feathers will also come in handy.
Don't forget that the wand may belong to the flower fairy.
We turn a simple pencil into a real magic wand!
This is the easiest way to make a stick from improvised materials at home. Firstly, there is no need to look for a twig on a tree. Secondly, it is easy and simple, and a pencil can be found in every home.
We take a pencil, it is better to choose one with a hardness index of “T” or “T2” and sharpen it, and then decorate the stick with a satin ribbon or other dense fabric.
You can combine ribbons of different colors. Carefully secure the ends of the ribbons with glue.
We cut out stars from felt or felt paper that match the color of our stick.
We attach all this to our stick.
The wand is ready, you can go cast some magic!
The simplest magic wand is made of paper
A magic wand can also be made from a simple sheet of A4 paper. In addition, you will need: PVA glue, glue gun, scissors, acrylic paints, brush and glitter.
We take an A4 landscape sheet, coat about 2/3 of it with PVA glue and begin to carefully roll it diagonally into a tube. In this case, the tube should acquire a cone-shaped shape, tapering towards the bottom. Let our future stick dry and cut off the excess edges with scissors.
We take a glue gun and fill the void of the stick from the wider edge. Instead of glue, you can fill it with cotton wool or paper, whichever is more convenient for you to work with.
After the glue has hardened, you can begin decorating the stick. To do this, use a glue gun to make monograms and intricate patterns on a stick. We wait until the pattern dries.
Many children asked their parents the question of how to make a magic wand, because it is quite normal for a child to believe in miracles and magic. Unfortunately, this goes away with age, and people stop feeling joy from simple things. But children very often not only believe in wizards and fairies, but also want to become such characters themselves. Interest in magic is fueled by various cartoons and fairy tales. Just look at the Harry Potter saga, which has a huge number of fans dreaming of their own magic wand.
It is worth noting that making this magical attribute is available to everyone, but for this you need to have one virtue: faith in what you are doing
It is worth noting that making this magical attribute is available to everyone, but for this you need to have one virtue: faith in what you are doing. Magic wands can be anything. These may be harsh magical attributes, like those of Hogwarts students, but someone will be more interested in playing with a bright and shiny wand, like a fairy from a cartoon. If you use your imagination and add a little patience to it, you can make a real magic wand, like a magician’s, it will really fly, and the master will be able to control it as he pleases.
Other ideas for a matinee
For children, you can make other options for additions to the carnival costume if a different character is used.
These ideas can just as easily be realized from the rain. It's easy to make equipment at home.
In addition to snowflakes, other universal characters are also used for the matinee. In this case, the set of materials and tools may be the same for all options. Often the basics are the same.
The most popular options for making sticks:
- Butterfly. The figure of a butterfly is fixed on a pencil. Additionally decorate with brocade and ribbons.
- Superstar. A star is formed, which is finished with shiny and bright decorative elements and materials.
- Magician's wand. The focus can have any design. More often than not, these are ordinary black paraphernalia with a bright accent on top.
- Attributes to complement the image in the style of an alien guest. It is worth using interesting interpretations of everyday shapes and colors.
To make the product design more attractive and practical, it is worth watching training videos. In photos in magazines and on the Internet, it is easy to choose the appropriate design for an interesting product.
Useful video
In order for your wishes to come true, you need a magic wand. If you are thinking about the question: where to buy it, in which magic store? - the answer can be found on this page. A master class with step-by-step photographs is suitable even for young sorceresses... oh, craftswomen!
Now you will see how to make a magic wand with your own hands and become a real fairy for a while. It's very easy, you just need to imagine what you want it to be like.
Walking through the park, we find a dry, even branch about forty centimeters long. You definitely need to take a dry branch. Firstly, because it is a pity to break a living tree; secondly, this reduces the time needed to make a magic wand; there is no need to wait for the branch to dry in the apartment.
Before you start decorating an ordinary branch and turning it into a magical one, you need to change its color. Having previously sanded the surface, paint it in several layers with silver paint.
Now we take organza of a bright light green color. We cut a piece about ten centimeters wide from it, glue one edge of the fabric for fixation and wrap it tightly around the branch. We also fix the second edge at the end. It is advisable to use transparent Dragon glue.
We take several petals from artificial flowers and paint the veins a little with silver glitter. Let the glitter dry until the sparkles appear.
We attach the decor to the resulting light green stick. We retreat ten centimeters from the bottom edge of the stick (to make it comfortable to hold with your hand), and begin to glue the silver confetti.
Then we add shiny butterflies. We paste everything randomly, creating the impression that the butterflies are rising upward in a spiral.
At the end of the stick we glue a fabric orchid flower with several ribbons (also light green).
So the magic wand is ready. All you have to do is make a wish and wave it, and it will immediately come true.
This magic wand can also be used as an addition to a children's New Year's fairy costume. It is advisable that the child for whom the costume is being prepared does not know in advance that you have made him such a necessary accessory for the fairy outfit. Then this magic wand will be a real gift for him.
A magic wand, as an additional attribute to a fairy or sorceress costume, may be needed by many parents of girls. Therefore, today we will show you a very simple way to make a magic wand at home using improvised materials.
Magic wand from a fairy tale
If you look at cartoons and films about magic, it turns out that almost all the characters who performed miracles had special attributes. Most often it is a stick. It can be made of any material, but a real magical accessory with magic must be made of wood. Therefore, the first stage of work will be to find suitable material.
To do this, you can go to the forest or park. There will be a huge number of trees and sticks of suitable size. Don't take the first one you come across. First you need to select several options, and then choose the most beautiful blank. It should be fairly even and neat. It is important to make sure that no one lives in the wood, otherwise such a stick will very quickly become unusable, and the beetles will eventually move onto home furniture, which parents are unlikely to be happy about.
Attention!
Experts in the field of magic wands say that choosing your own blank is very simple. It should fit well in the hand and be comfortable. If this is exactly what was found, you can go home for further work.
Breaking branches from living trees would not be the best idea. But, if there is no other option, you can carefully take a twig, but not more than one, from the tree, so as not to harm it. If you choose between young and old trees, then the first option is better for further finishing, since the stick will be quite soft. An old tree branch will last longer, but it will be more difficult to break off, although much depends on the type of wood. Sticks made from oak and pine are considered very strong. Some craftsmen also use tree species that are exotic to our area, such as bamboo.
At home, careful work will be carried out on the future wand. The branch must be cleared of all excess twigs, shoots and buds, if any. Bark is also not needed. If the branch is thick enough, you can carve something on it, for example, your own symbol, which will make the wand even more magical.
The length of the magic accessory is selected individually. The master must ensure that the wand is comfortable to carry and hold in his hand. It should not be too long or short.
The cleaned and sized stick should dry out. This usually takes about 10 days. Periodically you need to check the workpiece and turn it over so that it does not show signs of rotting. Dried wood will be very convenient to sand. This is a responsible process on which the beauty of the future product depends. After each sanding, for which you can use sandpaper or pumice, you should leave the stick to dry further, otherwise its surface will become covered with cracks. Finally, you need to make a hole in one end of the stick and thread a string through it so that the accessory can be carried on your wrist at any time.
In general, it should take a month to make a magic wand with your own hands. But this is quite a bit for a real wizard who is clearly moving towards his goal.
Making a stick from wood
A manufacturing option that has become a classic. There is an opinion that you need to go to the forest or park to get a twig for a magical assistant.
It is worth considering that you cannot cut or break living branches from a tree, otherwise the magical properties of such a wand will not manifest themselves. You can make magic wands only from those branches that lie on the ground.
There is also a belief that a novice sorcerer should feel that it is his wand that is in his hands. At the initial stage, this is expressed in the fact that the wizard likes the found base even in its original form, in color, shape and other parameters.
The process of choosing the basis for a future magic wand ends with a mental or spoken gratitude to the forest or tree. It is also worth assuring that no evil deeds will be done with the help of this wand.
Upon returning home, you can begin processing the base and designing the magic wand. First, the branch chosen for the future wand must be properly prepared.
The preparation process includes the following steps:
- Fill a container of suitable size with water.
- Add 5-10 tablespoons of salt to the water, depending on the volume of liquid poured.
- Place the stick in the water and press it with a stone. Leave it in this position for a day.
- Remove the stick from the water and leave it in an open place for a day to dry.
While the wand is being prepared, you need to think about the final appearance of the magic wand. You can give it any shape, leave the surface rough or make it perfectly smooth - the number of ideas is limited only by your imagination.
Processing is carried out according to the following algorithm:
- The surface of the stick is sanded using sandpaper.
- If necessary, the shape of the magical instrument changes.
- Polish the surface of the magic wand.
If necessary, a novice wizard's wand can be coated with paint and varnish. You can also put additional decorations on the stick if the idea involves the presence of such decor.
Flying magic wand
Unlike the previous version, where magic depends on the imagination of the master, here everyone can see the magic. With such a wand, any child will be the center of attention and will be able to act as a wizard or magician. If you don’t immediately know what’s going on here, you can mistake this trick for real magic. This trick is very often used in the circus. But even at home you can make a real magic wand. In this case, the entire work will take no more than half an hour and the simplest materials.
The essence of the trick is that the master controls a wand, which obediently flies under his hand at a distance of about 15 cm. This becomes possible through the use of an invisible thread that is tied to the wand. Thus, there is no difficulty here, so anyone, even a school-age child, can make a flying wand with their own hands.
To work, you will need thick paper or light cardboard, about a meter of invisible thread, which can be replaced with fishing line, a metal ball or nut. You can use colored foil for decoration. Cardboard or paper needs to be cut into strips and twisted into a long thin tube. It should narrow in one part and widen slightly towards the top. The thickness of the tube at its widest point should not exceed 3 cm.
The tube must be carefully secured so that it does not fold or unfold even from an impact. You should not use regular glue, as it quickly deforms. It is better to take a strip of foil and apply it in a spiral to the paper joints. Everything is wrapped with tape on top. But you shouldn’t get carried away with adhesive tape in order to strengthen the stick as much as possible: this will make the workpiece very heavy and it will be impossible to twist it normally. Light sticks are easier to control. Therefore, some craftsmen take not paper and cardboard to make them, but old exposed photographic film. It is very convenient to twist a tube from it, which does not lose its shape or deform for a long time. The main thing is to secure everything well so that the stick does not fold.
You should not make a very long tube for children, otherwise it will be difficult to control. In order for the stick to fly and behave quite obediently, its length should be about 80 cm. If it is light enough, inertia will not interfere with its normal movement.
A thread or fishing line should be secured a little away from the center. It is best if it is transparent so that no one can guess the secret of the trick. In addition, you should pay attention to the fact that the lower part of the stick should not turn over. If it turns out to be too light, you can attach a small weight to it.
At the end of the fishing line you should make a ring that fits on your finger. It should be invisible. After this, the master will only have to practice to hone his skills and control the magic flying wand, real with magic, naturally and easily. If the thread is left long enough, the tube can not only fly under your hand, but also perform other tricks, for example, do somersaults. But this is already a task for a real master. It will be quite difficult for an inexperienced wizard to control his wand; he may get tangled in a long fishing line.
Idea!
For greater effect, the finished product can be decorated with various scraps of foil, rain and tinsel. This will make the illusion of a flying stick more vibrant and impressive.