How does a call with a button work?
The classic doorbell works like any normally open button without locking. There are 2 wires going to it. Through them the signal goes to the sound card.
If you press the bell button, these wires will close. Voltage will be supplied to the sound card with the speaker. Then a signal will sound indicating that guests have arrived. The sound card is located in the apartment so that residents can hear it clearly.
Doorbell connection diagram
If you release the button, the circuit opens. The voltage will stop flowing to the bell board and the melody will stop. The call is in this quiet state most of the time.
Important! There are models in which the sound is produced not by an electronic board, but by an electromagnet. When voltage is applied to the electromagnet coil, it retracts the core. He hits small metal bars. In such a system, the sound is more natural.
Simple doorbell
There are situations when there is a need for a simple doorbell that has sufficient volume and contains a minimum of details. The doorbell circuit shown in the figure consists of a transformerless power supply with a damping capacitor C1 and a simple audio frequency generator assembled on transistors VT1 and VT2.
Resistor R2 serves to limit the peak current through the diodes of bridge VD1. VD4. To start a call, press the SB1 button. A device correctly assembled from serviceable parts does not require adjustment. Capacitor C1 is used type MBGCH, K42-19, K73-17, K78-4. Instead of the transistors VT1 and VT2 indicated in the diagram, you can use transistors such as MP40 , MP41 , MP42 and MP36 , MP38 , respectively. The dynamic head BA1 should have a power of 1-3 W, type 1GD36 , 1GD40 , 2GDSH9 , ZGDSH1 .
From the site https://radiopill.net
Wireless doorbells
The classic wired calls from the times of the USSR have been replaced by wireless ones. These devices also make and break a circuit. But they do it from a distance.
There is a button at the entrance. It contains a compact radio transmitter. The system requires 1-2 AAA batteries to operate.
Call wireless Era Bionic
When you press a button, it transmits a radio signal over the air over a distance of 10-15 m. Therefore, such calls do not require laying additional wires, drilling walls or other dusty electrical work. However, they require periodic battery replacement, which is an inconvenience for some people.
Criterias of choice
All doorbells perform the same function. However, they are quite varied in characteristics. Therefore, below are the main criteria that you should pay attention to when choosing these devices.
Radius of action
Range is taken into account when choosing wireless models. The radius refers to the distance at which the wireless call receiver (speaker) is able to detect the signal from the transmitter (button).
Wireless portable digital doorbell with 150m range
In cheap models, the button-bell pair operates at distances of up to 10-15 m. More expensive models interact at distances of up to 150 m of open space.
Power supply
Wired models operate from the apartment electrical network. They are able to make a sound when there is light in the house. Wireless battery-powered models are self-contained. They sound until the battery is discharged. There are hybrid options. In them, the access button is powered by a battery, and the main unit is powered by the apartment electrical network.
Equipment
When purchasing a wireless call, you should be careful. The box must contain the sound source itself, which is hung in the apartment, and a wireless button located in the entrance.
Wired calls are sold as a separate device without a button. In both cases, the call is supplemented with operating instructions. And if the bell manufacturer cares about customers, then the box will also contain a pair of mounting screws.
Jett 203 with two waterproof buttons
Mounting methods
To install the sound unit, it will need to be disassembled. The work requires screws and a minimum set of tools. Typically, bells are attached to mounting holes. You can find them under the decorative cover.
You can make it simpler - glue the bell with double-sided tape. Before doing this, it is advisable to degrease the plastic surface of the bell with alcohol. This fastening method is not reliable. There is no guarantee that one day the sound unit will not fall off.
Job guarantees
Before purchasing, you should try the bell in a store. If the test is passed normally, then it will work in an apartment for at least 5 years. However, it is better to discuss the issue of warranty and return with the seller. To do this, you will need to keep the receipt and packaging of the device.
Call selection
A bell on a gate or wicket notifies the owners of the house about arriving guests.
Bell installed on the gate post
In order for the product to perform its intended functions efficiently, it should be selected taking into account the circumstances in which it will be used.
For example, bells for the front door of an apartment or a gate cannot be interchangeable, since they are used under different conditions. Modern wireless calls operate on radio frequencies. Such devices are not always relevant for doors in apartment buildings, where the proximity of several radio devices interferes with the operation of each of them.
However, for a dacha or a private home, a bell operating from removable batteries is the most relevant, reliable and convenient option.
Radio calls can operate not only on batteries, but also on a stationary receiver. The average distance between the bell button on the gate and the signal source is about 130 m. The stationary (base) part of the device is fixed in the house, for example, on the surface of the wall.
The principle of operation of a wicket radio bell
The receiving unit operates from a standard 220 volt outlet or on batteries. When purchasing a device, you should pay attention to some nuances:
- No annoying melodies;
- Product design suitable for the fence;
- Availability of a backlight next to the button;
- The sound level must be at least 80 dB;
- Availability of additional fasteners (except Velcro);
- The weight of the button, which should be small (up to 50 g);
- Declared operating temperature range;
- Availability of protection from intense radiation;
- Degree of protection from frost and precipitation.
Before you buy the model you like, you need to make sure that the range indicated in the annotation is convenient for use. So, for example, if the distance from the bell button to the receiver is about 65 m, there is no point in purchasing a bell that works within a radius of 60 m.
Internal structure of a wireless call
Also, if one part of the device is located 20 m from another part, it is irrelevant to use a powerful device operating within a range of 150 m. A wireless call is often equipped with a mute function.
This may be necessary if the owners are not inclined to welcome uninvited guests. When choosing a device for a gate, you should remember that the button must be protected from rain and moisture by a good sealed housing. In calls specially designed to operate at low temperatures, the batteries do not freeze even in cold weather. On the street, the most popular use of devices is the temperature range of which is calculated as follows:
- Outdoor button - from -20° to +35°;
- Receiver - −0° to +35°.
Return to contents
Removing an old doorbell
Before disconnecting the old device, you must turn off the power supply. This is a mandatory rule for any electrical dismantling. During execution, you need to follow these steps:
- Turn off the voltage. Check its absence with a multimeter.
- Remove the decorative cover of the old bell. If it goes into ejection, then there is no need to be careful.
- Disconnect the wires entering the sound unit. There are 2 options here - either bite it off with wire cutters, or carefully unscrew the wires from the terminals of the device.
- Remove the sound unit from the screws. If you plan to install a new bell in this place, then try not to damage the wires protruding from the wall and leave them as long as possible.
Features of models and installation
All issued calls are divided into wired and wireless. It is impossible to say which option is better. The final choice depends on the installation conditions and the wishes of the apartment residents.
Features of wireless calls
Wireless devices are needed when a guest notification system needs to be set up in the shortest possible time or when there is no fixed cable for the bell circuits.
Features of wireless models:
- operate without an external power source;
- do not require laying wires, installing boxes, automatic machines, etc.;
- use safe low voltage batteries;
- may sound false when your neighbors' bell button is pressed;
- sensitive to obstacles to radio waves.
Wireless call to the dacha with intercom
Features of wired models
Wired models are difficult to install. They are suitable for installation in personal fixed housing or where there is an appropriate cable for connecting a bell.
Features of wired models:
- do not require battery replacement, which saves money;
- increased reliability, because radio transmitting electronics are not used;
- wired calls are unable to intercept a false signal from neighbors’ buttons;
- designed for 220 V.
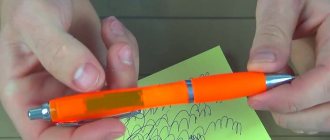
DIY radio button
Today I will tell you how to make a radio button with your own hands.
I didn’t check the range, but it catches confidently throughout the apartment. With its help, you can control various loads. In my case, I chose a table lamp for the experiment.
For work we will need: 1) Soldering iron 2) Lamp 3) some radio parts 4) RF modules
To transmit the radio button signal, cheap and common RF modules are used: receiver and transmitter, photo below
I took this diagram as a basis:
TRANSMITTER
RECEIVER
The radio button is built on common microcontrollers PIC12F675 or (629).
For the button to work, these microcontrollers will need to be flashed. The firmware files are posted at the end of the article.
The transmitter and receiver circuits have been slightly modified, since these circuits are designed to control 4 commands. But as a trial version, I only used one command. The rest I simply didn’t connect.
Transmitter.
Receiver.
Next, we make boards according to the diagram. Unfortunately, the board files were not saved, so it is not possible to post them.
So that you don’t worry about how to connect RF modules, here is their pinout.
TRANSMITTER.
RECEIVER.
I found such a relay on the Internet; it is the one that will turn the lamp on and off.
When connecting a relay, be very careful and attentive, ring the relay before connecting or ask those who know. For example, on my relay, on one side there are 3 outputs, and on the other 2. So where there are 3 outputs, the signal from the transmitter is supplied to the 2 outermost ones, and the load is connected to the middle and 2 on the other side.
Next, solder everything into place.
I made two conclusions in the wire. It is these pins that will be connected to the relay. Just connect everything before plugging the lamp into the outlet.
Now about the operation of the device itself. As you saw in the last photo, and on the receiver circuit itself, there is a K1 toggle switch. Its role is that when it is turned off, when you press the button on the transmitter, the relay on the receiver will turn on our lamp. And as soon as you release the button, the relay will also immediately turn off the lamp. Now if you turn on the toggle switch on the receiver, it goes into command hold mode. That is, if you press the button and release it, the relay will work and the light will remain on all the time until you press the button again.
The diagram shows that there are still three free terminals left, to which you can connect more different loads.
Below: firmware files (TX transmitter, RX receiver), as well as a video of the device working
FIRMWARE Knopka_proshivka.rar [1.01 Kb] (downloads: 928)
VIDEO OF WORK
RF modules can be purchased here: Transmitter and receiver - from 35 to 45 rubles.
Author of the circuit and firmware 4uvak
Become the author of the site, publish your own articles, descriptions of homemade products and pay for the text. Read more here.
Checking the functionality of the call and the causes of malfunctions
To check, just press the button at the entrance. If the main module makes a sound, then the system is working normally. If not, then you need to check the following points:
- Battery charge. To check, replace them with new store-bought ones.
- Check for mains voltage. Is there power supply to the bell circuit?
- Make sure the wires are intact. Visually check for breaks. Better yet, test the cable with a multimeter.
- Check if the button is working properly. When pressed, the resistance between the contacts should be no more than a couple of ohms.
- Test the sound module. Remove it from the wall and plug it into an outlet. It is advisable to perform this operation by those who have experience working with electricity.
Installing a wireless doorbell
For installation you will need screws, screwdrivers and wire cutters. You may need a puncher or double-sided tape. The operating procedure is as follows:
- Install a bell button at the entrance. Preferably at a height of 1.5-2 m from the floor. To do this you need a couple of self-tapping screws. The smallest ones will do.
- Fix a unit with a speaker in the apartment. It should be placed above the door.
- Connect the speaker according to the connection diagram in the instructions. An audio device, unless it is battery-powered, consumes minimal current. Therefore, the thinnest wires will do.
Important! If you have small children, please note that they must be tall enough to reach the button. If there are no children, the button can be installed higher so that little ones who like to ring the doorbell and run away cannot reach it.
Scheme of a touch doorbell on a microcircuit
Transformer T1 is the output transformer from a small transistor radio. Dynamic head BA1 with a power of 0.05-0.5 W with a voice coil with a resistance of 4-50 Ohms.
The power source is a Krona, Corundum battery or two 3336 batteries connected in series. The sensor element can be made from foil PCB. The distance between the contact pads should be 1.5. 2 mm, and the gap between them is protected from dirt and moisture with varnish or paint. The shape of the contacts of the sensor element can be any.
Setting up a call comes down to selecting capacitor C1 to obtain the required tone of the sound signal for a specific design of the sensor element.
Rice. 1. Scheme of a touch-sensitive doorbell (a) and its circuit board (b)
I.A. Nechaev. Mass Radio Library, Issue No. 1172, 1992.
Installing a wired call
Installing a wired bell is a more common case. It is worth examining it in more detail. Before starting work, it is advisable to gather the necessary tools on hand. This way further installation will take less time.
Tools and materials for installation
Below is an indicative list of tools. Each master uses what is convenient for him. However, when setting up a call, you cannot do without the following:
- a pair of screwdrivers;
- wire cutters, side cutters or a knife for stripping insulation;
- multimeter, test light to check for lack of voltage;
- electrical tape, heat shrink for insulating connections;
- hammer drill for drilling walls.
Main unit with speaker
The speaker is located in the apartment. For installation you will need dowel nails. First, markings are made. The speaker without a decorative cover is pressed against the wall. Marks are placed in the location of the mounting holes with a pencil. At these points, holes are drilled with a hammer drill for dowel-nails.
You can also secure the speaker with double-sided tape. If you need to do it faster, you can at least tie it to a wire. But the most reliable fastening is obtained using dowels.
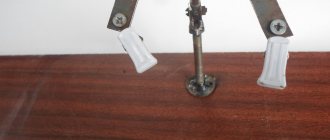
Button attachment
The button is attached with self-tapping screws. A minimum of 2 screws must be used. You can screw the screws into a wooden door with a screwdriver without much effort. If the door is iron, you will need to drill holes for the screws. You can tighten the screws into an iron door by hand, but it is much easier with a screwdriver.
With an iron door, you will have to take care of reliable insulation of the wiring. This is necessary to prevent phase voltage from reaching the metal parts of the door.
Connecting wires to the button
First you need to turn off the voltage. Wires protruding from the wall (door) are stripped to the required length. If the button is connected to screw terminals, then 5-7 mm of bare wire is sufficient.
Tighten screws with wires should be done without too much enthusiasm. In most cases the button is made of cheap plastic. If you use too much force, it can easily break. Minimum currents will flow through the button. Therefore, it is enough that the wire simply does not dangle.
Masking wiring
There is a little trick. The bell and speaker should be installed where the wires come out of the wall. As a result, the housings of these devices will cover the nondescript cable. To implement this installation method, soft, thin wiring is needed. It is difficult to bend a thick one and give it compact dimensions.
To hide the cable, you can use a hole in the wall. This method is dusty and labor-intensive. A cable channel will also work. However, not everyone likes its appearance. And the last option is a baseboard with a channel. If there is one in the vestibule.
Power connection
The connection is made with voltage relief. Most calls operate on 220 V. There are models that just need to be plugged into an outlet. For others it is necessary to pull separate wires. Regardless of the connection method, the bell must be powered through a circuit breaker. This device will protect the line from short circuits.
Electric bells powered through a transformer are separately noted. It is a compact power adapter that plugs into a power outlet. From the transformer comes a pair of thin wires with low voltage. This connection increases the security of the call.
Model with power adapter
Call verification
When the installation work is completed, voltage can be applied and tests can be carried out. After turning it on, you need to check whether smoke comes out of the speaker unit. This is possible in the case of a defective device.
The last step is testing the button. You need to go out into the entrance and press the bell button. In response, you will hear a melody from the apartment.
Note! Some models of electronic calls allow you to customize the sound. That is, make it quieter or louder, or choose one of several melodies. There are usually up to 10 of them. To select a melody, you will need to open the lid and rearrange the jumpers.
Before connecting a doorbell, you need to select its type - wired or wireless. Wired models do not require periodic battery replacement. You only need to connect them once and use them for years. But to install wired calls, you need to lay a new cable.
Wireless models are easier to install. However, the battery will have to be changed every few months. It's more uncomfortable than it sounds. There will be times when guests will not be able to ring the doorbell. But if the main criterion is ease of installation, then it is better to choose a wireless option.
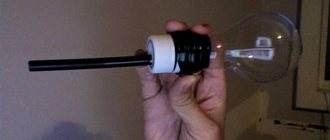
Doorbell from an old mobile phone
Share link:
Old push-button mobile phones are long outdated and almost out of use. However, there are many ways to give such a phone a second “life” rather than sending it to scrap or a landfill. Today we will consider one of these ways to put this miracle of the 90s into action. Recently they brought me a whole package of old and broken phones. For parts. In this pile there were also modern smartphones with dead batteries, drowned and broken, and there were also completely working push-button phones, which they decided to get rid of only because of their unpresentable appearance today. And just at almost the same time, my doorbell, which I had assembled with my own hands and served flawlessly for many years, “cracked up.” This circumstance prompted me to think; why not repurpose an old work phone to replace your front doorbell. And then - there are more advantages from such a call than from a regular one: in addition to the pleasure of assembling and then using something made with your own hands, you can put sounds and melodies on the signal as you wish, the volume can be adjusted, and so on... By choosing a push-button telephone with a music player and powerful speakers, I got to work.
Would need
- Push-button telephone with mp3 player.
- Soldering iron (with flux and solder).
- Copper wires.
- Screwdrivers (flat and Phillips).
- Secondary glue.
- Insulation (insulating tape or thermal tubes).
- Stationery knife.
- Scissors.
Making a doorbell from an old mobile phone So, let's disassemble the phone. We take out the battery, unscrew the screws (if any), and use a flat-head screwdriver to remove all the parts fastened with latches.
Now we find the “play/pause” button in the place where the player control panel was, and disassemble the button so that it does not interfere with the future soldering of thin wires to its contacts.
Solder to the wiring contacts.
It is necessary to immediately grab them with a second glue to the base (to the microcircuit) so that they do not fall off in the future, because the contacts are small and, accordingly, the soldering area is too. The work is quite intricate and painstaking, but that makes it all the more interesting! By the way; If your phone did not have separate player buttons, you can use the “OK” button. If everything went well, we put everything back together. We install all the components and the housing in place, not forgetting to bring out the soldered wires.
Now turn on the phone. We load any sound you need onto the signal (for example, I put a bird). Select the player from the menu.
Don’t forget to turn off the melody repeat (if you had it turned on), otherwise when you press the call button, it will play it until the battery runs out, or someone turns it off.
Next, you need to find some kind of contactor (button) for the wires brought out from the player.
You will also need a double wire of the required length - from the button, which will be outside, to the telephone located at home. My problem with the button resolved itself: I just used the old one from an old broken bell.
So, we pull the wire from the call button to the phone, connect it to the contacts of the player protruding from the phone, and isolate it.
You may like:
- THEY BOUGHT A SEMI-DIOLLYED HOUSE IN THE VILLAGE AND...
- Ideas for pillows made from old sweaters... I would never...
- Crocheted rugs: interesting patterns, patterns and…
- Crocheted rugs: interesting patterns, patterns and…
- I sewed curtains for the kitchen, and now I can’t stop...
- What can be done from old denim items - a sea of ideas
- Beautiful and original New Year's crafts 2018
- Remaking old chairs... We disassemble the chair for parts...
- MY KNITTED COZY...
- Highly efficient DIY solar collector
- DIY backpack made from jeans, the best master classes
- 21093 or Russian machines on death guard.