It is also important to know 3 nuances before starting work
- First you need to decide on the number of elements in the battery.
It is best to use 4 elements, since three will only give 12.6 Volts. - 18650
battery you need to pay attention to the capacity and discharge current.
When the battery is running, the current consumed is in the range of 5 or 10 amperes, but if you sharply press the power button, it can jump to 25. This suggests that the maximum discharge current value should be approximately 30 amperes on an 18650 battery. - You should also pay attention to the controller. Its characteristics must be equal to the rated voltage and current
. For a 14.4 V battery, the controller is the optimal voltage. The operating current should be several times less than the maximum permissible.
Chargers for 18650 batteries
For battery
18650 will have to use the correct charger. At the output it will produce 5 Volts and a current from 0.5 to 1 of the rated capacity of the battery itself. If lithium cells support 2600 mAh, then a current of 1.3-2.6 amperes should be used to charge it.
Lithium battery
The battery is charged in several stages:
- First, a voltage of 0.2-1A is applied to the battery
. - Then charging
takes place at a constant voltage.
If the charger has a pulse
mode, this will significantly speed up the charging time.
If the battery contains graphite,
then the voltage should not exceed 4.3 Volts per element. If you exceed this figure, the energy density will increase and the oxidation process will begin.
There are lithium batteries
charging in less than an hour. They do not provide for the second stage - the current is immediately supplied to 80% and after that it is put into operation. This is normal for a lithium battery.
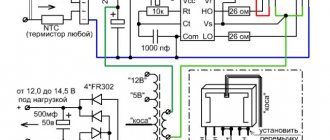
An old lantern of Chinese origin came across the repair table. “Dead” when turned on, but not yet shabby in appearance. Let's see what's inside. The light reflector contains five white parallel-connected bright LEDs L1-L5. They must be supplied with DC voltage from the battery through a switch and quenching resistor R3. Wires from the charging unit and from the “6 volt” terminals are also suitable for the battery.
The charging unit consists of a ballast capacitor C with resistor R1, a diode bridge d1-d4 and an indicator LED with an additional resistor R2.
Voltage from the network is supplied through a capacitor to the diode bridge, which is loaded by the battery. This creates a large voltage drop across the capacitor, which provides the necessary voltage (7 volts) and current to charge the battery. If we exclude the battery from the circuit, we will see that the diode bridge increases the output voltage to 300 volts.
Attention! Be careful! Do not plug the flashlight into the network disassembled, unless necessary! The charger is not isolated from the electrical network; the voltage on the circuit elements is dangerous to life!
Let's look at the battery.
It consists of two cans (separate batteries) connected by a jumper inside the case. We do not observe voltage at the battery terminals during measurements. We open the battery covers and check the presence of electrolyte and its level in the banks. In this case there was no electrolyte. Let's take distilled water (filtered rainwater, or from clean melted snow), pour it into jars. For small batteries, liquid is poured into the control holes using a syringe or bulb. The battery must be placed so that accidentally spilled electrolyte and splashes during boiling do not fall on you or surrounding objects. After filling, we measure again - the voltage has increased to 3.5 volts. This suggests that all is not lost. To measure the current, we disconnect one wire from the battery, turn on the device in the open circuit, setting the switch, first, to the ammeter. If the current is not large, then we will switch to a milliammeter. (Working with a multimeter) As a result of the connection, the steady-state current is 60 mA. After some time, boiling is observed. We clarify the chemical composition of the electrolyte in batteries. Taking a drop of electrolyte with a syringe or bulb, lower it into baking soda. If a chemical neutralization reaction (foaming) begins, then the electrolyte is acidic, and most likely nothing will be needed to add to the jars except distilled water. It is not recommended to shake or overturn acid batteries. When the destruction of the plates begins, the products of this destruction settle to the bottom of the cans, and if they get between the plates, a short circuit will occur, which will lead to the final failure of the battery. If during chemical analysis, the same reaction of the electrolyte with some acid (boric, acetic, citric) will occur, then the electrolyte will be alkaline. Maintenance of alkaline batteries involves washing the batteries and filling them with new electrolyte. So, our battery is acidic, which means the charging current should be equal to one tenth of its capacity. A current of 60 mA suits us, since the size of the battery is very suitable for a battery capacity of 600 mA/hour (0.6A/H). We charge for the first time, about ten hours, monitor the temperature (no more than 45), the electrolyte level and the charging current. If the temperature increases or the current changes significantly, in one direction or another, you should stop charging and turn on the flashlight for discharge, then repeat the charge again. Sometimes, acting in this way can achieve positive results. There are no guarantees of subsequent battery operation. It all depends on the degree of destruction of the chemical elements inside the battery. Often there are malfunctions of other elements of the circuit, but more on that next time. For analysis and troubleshooting of electrical circuit elements, see here .
Answers to 5 frequently asked questions about choosing an e-cigarette battery
Battery
Look at the picture of the battery
18650 for an electronic cigarette.
It is quite difficult to choose the right battery for an electronic cigarette, since there are many varieties with different degrees of power. For example, they work for a long time,
but they cannot be turned on at full power. Others won't get hot even at 40 amps, but they require frequent charging. When selecting a battery for an electric cigarette, people wonder about the criteria.
There are five main criteria: High energy intensity,
rated current indicator, voltage when used, temperature when used, cost.
There is no point in paying attention to other nuances, like the color of a cigarette. All this is secondary. To choose a good unit, you should study all the criteria in detail. As a result, the buyer will receive all the necessary information for a good purchase. Energy intensity
Electronic cigarette
Energy intensity
expressed in milliamps per hour. Accordingly, the higher this indicator, the better the model will be. Safety depends on the rated current. The conclusion suggests itself that it is advisable to buy batteries with the highest current supply. For example, the LG hb6 battery has 30 A, which means it is suitable for 40 A. But having made such a purchase, a person will prefer high voltage and sacrifice energy intensity. The energy capacity of the above battery is only 1500 mAh. Therefore, it will hold less charge than options with 3000 mAh.
It is necessary to select the rated current indicators ,
which will not overheat the device, but do not sacrifice battery life. It is better to purchase the LG HD2 model, which has a rating of 25 A and microamps per hour. This will be the average. As for the voltage, you should not rely on this nuance when choosing - if the cigarette has two previous indicators that are good, then the voltage will be sufficient.
Which battery is better for a led flashlight? flashlight charging tests.
You also need to select devices
having a low degree of heating.
Overheating an electric cigarette will soon damage the entire mechanism. That is why you need to take a battery that will work at the lowest temperatures. The cost of cigarettes
is approximately the same and this is not the most important criterion. It is advisable to start from the indicators first.
Top 3 best battery chargers
Nightcore digicharger D4
Charger _
Can power four batteries. This is an already proven brand, loved by many owners of lithium batteries.
Device
It is equipped with a convenient display - you can study various data, including charging speed and time, voltage on each element. It is very convenient to monitor the battery status on this display.
This is a universal charger,
Designed not only for the 18650 model. D4 should be used by people who have a large number of mobile devices that fit several types of batteries.
Beginners will quickly master the work, since charging occurs automatically .
Efest luc Blu6 oled Bluetooth intelligent Charger
This is also a very good charger model ,
designed for 6 batteries. To safely charge, the device is equipped with special protection against high current, voltage, and so on.
The user gets the opportunity to connect his mobile phone to charging via Bluetooth
- You can remotely monitor the battery charge level. The only drawback of charging is the high price.
Nightcore i2 intellicharger
Charger
went on sale recently. This is a modern type of device, equipped with interesting features and improved design.
Users don't need to worry about charging speed and time,
since the device detects everything automatically. The person only needs to install the battery in its proper place.
The device only has room for two batteries, but the charger is very compact and can be taken with you when traveling.
Li-ion battery 18650 for flashlight
- Lithium-ion batteries
operate in the range of 4.35 - 4.2 Volts. They are often used to make LED lights work. - You need to ensure that the battery
does not discharge below the set level - 2 volts.
In order not to constantly monitor the required voltage, you need to use a battery
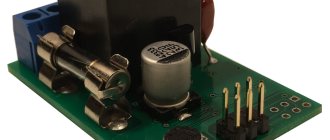
for the flashlight with protection. They store elements from overcharging or deep vacuum.
Companies
Samsung, Panasonic, LG and Sony do not produce such equipment. For this purpose, it is better to purchase a Chinese KEEPPOWER device.
Converting a lamp lantern to LED
How to convert a lead-acid battery to an LED flashlight with a lithium-ion battery? It is this question that we will consider in this article with the help of a DIY master from Canada. Tools and materials: -Hand-held rechargeable flashlight; -Lithium-ion batteries Samsung INR18650; -LED driver; -Cree XHP 70.2 LED; -Radiator; -Fan; -Reflector; -Heat shrink tubes; -Multimeter; -Sheet metal; -Wires; -BMS- module; -Nickel plate; -Connectors; - Fasteners; -Copper sheet; -Dremel; -Knife; -Screwdriver; -Soldering accessories; -Charger; -Drill; - Belt sander; -Glue gun;
The master disassembles the flashlight body and dismantles the battery, light bulb, and electronics.
Step two: power As a power source, the master uses a 3S2P lithium-ion battery made from 6 18650 batteries. SAMSUNG INR18650-25R 2500 mAh 3.6V batteries. Discharge current max., A 20. Charge current max., A 4. When connected according to the 3S2P scheme, this gives 5000 mAh, which should provide light at maximum power for 45 - 50 minutes.
In the circuit, the master uses a BMS to control charge/discharge and a connector for the charger.
The driver has 5 modes: low, medium, high (100%), SOS mode and strobe mode. Since the reflector for the LED and the incandescent lamp are different, the reflector had to be modified. An LED and an incandescent bulb emit light differently. A light bulb scatters light almost 360 degrees, while an LED emits light at an angle of about 120 to 130 degrees from the center. LEDs are typically located at the back of the reflector, while incandescent bulbs are located at the base of the reflector to better collect and focus light.
The craftsman cuts off the middle part of the reflector. Cuts out a metal ring and polishes it. Attach it so that the LED is in the center of the ring. A reflector is installed on top of the ring.
The technician drilled 4 holes in the top of the radiator. Two for the LED wires going through the driver and two for the mounting screws. Between the copper LED board and the heatsink, for better thermal conductivity, I applied thermal paste. To install the driver, the master made fasteners from a copper plate. It is attached to the radiator with four screws.
Become the author of the site, publish your own articles, descriptions of homemade products and pay for the text. Read more here.
The best 18650 batteries on AliExpress according to reviews
- Rechargeable Battery
- Samsung icr18650
- Rechargeable flat Top Battery
Ideal conditions for the battery
– temperature +10 – +25 degrees.
The idea of how to convert a headlamp into a battery-powered one arose a long time ago, this is especially true for fishing and when. Since it is not profitable to constantly buy batteries in our age of mobile phones. So, after thinking about it and ordering the necessary spare parts, which I will describe below, I began to modify the headlamp for batteries with my own hands, using a Chinese circuit with charging. This makes it possible to charge the battery both in the car and from a regular micro USB of a modern phone. I usually order from Aliexpress, although it is possible to find it in stores, but it’s 2 times more expensive.
A very bright and functional headlamp, for such a price, but for some reason I haven’t found one on sale now. I tried to remake this model, it’s a little inconvenient with the button installation and the diode plate gets hot, I had to isolate it from the battery with a piece of plastic. But in the end the flashlight works properly
The flashlight was delivered to the post office in 20 days, which made me happy :) .
The idea is very simple and anyone can do it; all you need is a small battery from an old cell phone, it contains a Li-Ion battery with protection. The voltage parameters are ideal, the LED flashlight has a voltage range from 4.5 - 2V, and the 3.7V battery in a charged state of 4.2V has a decent capacity, which can be increased by adding another battery in parallel. You just need to correctly identify the contacts (most have plus and minus indicated), all that remains is to carefully solder the contacts so as not to melt and avoid a short circuit. The problem with charging via a regular micro USB can be easily solved by ordering a small board costing about 20 rubles. Micro USB plays a very important role in controlling the charging and turning off the ice lamp when the battery is low.
The board has LED indicators that indicate in color when the converted LED flashlight is charging. Thus, the modification of the Chinese headlamp comes down to soldering the wires to the terminals. Using this board, converting any flashlight to lithium is quite simple, it is only important to know how many volts the battery produces.
Charging board, purchased in an online store with free delivery
Perhaps I ordered 10 pieces for myself at once because it is universal and can be used in children's toys.
Battery connection diagram
Redesign of the Trophy TG9 LED flashlight
Redesign of the Trophy TG9 LED flashlight.
The flashlight itself is very convenient.
Pros: two brightness settings, lightweight, can be mounted on the head, long discharge.
Of the minuses: it has charging from 220 volts, which is not entirely safe. Has a specific charging connector.
Technical characteristics of TROPHY TG9 LED C0045557
| Supply voltage, V4 | Head type |
| Housing material ABS plastic | Black color |
| Light source LED | Power battery |
| Capacity, Ah 0.9 | No moisture protection |
| Impact protection available |
I went fishing, took out my Trophy TG9 flashlight, it doesn’t work (((I opened it at home and watched the oil painting. The battery was swollen and it stopped showing signs of life.
The search for a donor did not take long. The old phone was disassembled and the US454261 A8T battery was removed from it.
Manufacturer specifications: Li-polymer, 1600mAh, 3.7V
Funny people)) but on the battery itself it says 1530mAh, 3.7V, not so important. The capacity of the original battery is A*h 0.9. that it will be less than what I will bet.
The charging voltage is suitable, the charging currents are suitable.
For the experiment, I solder a “new” battery instead of the old one, check the charging and operation of the Trophy TG9 flashlight itself on the new battery.
30 minutes of charging, the flashlight works. It is advisable not to leave it like that . Li The battery is a capricious thing.
For stable and proper charging of the battery, I recommend installing a charge stabilizer.
We order a Charger from our Chinese friends. Translation from ALI!!!
TP4056 1A Lipo Battery Charger Board Module Lithium Battery DIY Mini USB Port+
They cost 60 rubles for 5 pieces.
You can find one at a time. This is a 5 volt battery charger with charge and discharge control based on the TP4056 chip.
As soon as the boards arrive, I’ll throw out everything except the power button and brightness switch, battery, and flashlight LEDs. I will connect the charging and discharging diodes to the flashlight body. As a result, we get the Trophy TG9 Flashlight with the ability to charge from a regular 5-volt phone power supply. I'm waiting for the delivery of the boards and will continue the article.
Came from China TP4056.
We connect it to our battery.
Everything is working. As charging progresses, the blue LED lights up.
We throw out the old guts of the Trophy TG9 flashlight and insert the TP4056 board. We place the LEDs on the body.
We collect our work.
Red diode is charging, green charging is complete.
The TP4056 board itself produces about 4 volts to the battery. I didn't measure the current.
Result: The flashlight has become 4 times lighter. It holds a charge on all 9 diodes for 3 days of continuous operation. It takes 5 hours to charge.
This completes the modification of the Trophy TG9 LED flashlight, enjoy the modification everyone.
Board parameters
- Input voltage from Micro USB: 5V
- Charging cut-off voltage: 4.2V ± 1%
- Maximum charging current: 1000mA
- Battery over-discharge overvoltage protection: 2.5V
- Installed overcurrent protection current: 3A
- Board size: 2.6*1.7CM
In fact, this is a separate board that is used in a power bank, and if you buy an additional USB output, you can charge your phone
Let's start remaking
Disassembled view of the flashlight and the first stage of assembly
Now, about the conversion of the flashlight itself to use a battery instead of batteries, most flashlights use 3 AA 1.5 V in size, comparable to a mobile battery, and fits quite well in the main body, you just have to expand the seat. After simple manipulations, having unscrewed or cut out all the excess, we mount all the parts in place using hot-melt adhesive.
Scheme for converting an LED flashlight Solder all the parts in place using a heat gun If necessary, you can increase the capacity by connecting 2 batteries We get a modernized headlamp with a mini USB input
In conclusion: the LED flashlight worked actively for 3 nights on old telephone batteries without recharging. Perhaps it would have been enough for more, I didn’t test it before the cutoff. Lithium batteries do not like to be completely discharged. Overall, very pleased at the cost of 140 rubles. The only thing is that it is very bright, which is not always necessary. I was pleased with the presence of charge indicators on the board. When charging via USB, it glows red when the battery is charged blue.
Almost any flashlight can be converted in this way, the only question is the size of the battery. For example, iPhone batteries are not very practical, and if you tear off the contacts from the connection board carelessly, they will not be soldered.
Do not use lithium batteries if they are swollen - it is unsafe!
It happens that the protection on the board is triggered, and you need to revive it, in this case, apply voltage from the power supply or power bank. If the phone batteries are very old, then the protection of the headlamp will naturally work faster and it will go out. Although batteries from an old Nokia (more than 4 years old) work properly.
Save money when purchasing and, accordingly, buy cheaper (this is when % from the purchase accumulates). So you just install a browser extension and the money gradually accumulates on its own.
Powerful 12V/70W camping lantern
Greetings to all tinkerers, today we will look in detail at how to make a powerful flashlight for camping, fishing or hunting.
The homemade product shines with a very bright white light; the author used a 12V/70W LED panel as a light source. The author assembled the power source for his spotlight himself, from old laptop batteries. To protect the battery, the author used a 3S 11.1v BMS controller for 18650 cells. Everything is compact in an aluminum case. If you are interested in the project, I suggest you study it in more detail! Materials and tools used by the author: List of materials:
— LED panel 12v/70w COB; — BMS 3S 11.1v 18650; - housing from an old charger or power supply; - old laptop batteries; - thermal paste; - reinforcing tape or similar; - wires.
- voltmeter; — spot welding machine; - soldering iron; - pliers; - drill; - drill. Homemade manufacturing process:
Step one. Assembling the battery
The author made the power source himself, using old laptop batteries as the material. These batteries contain 18650 batteries, when some of them fail, the entire battery stops working. We break the housings and remove the cells. We check each cell with a voltmeter for the presence of voltage. If the voltage across the cells is less than 2.4V, then it is better not to use such a cell; it is most likely already damaged or has a small capacity. The higher the voltage, the livelier the cell.
As a result, the author got a battery that produces 12.5V; of course, the voltage will drop as it discharges to the lower threshold. If the cell voltage drops to less than 2.4V, the battery is already losing a lot of capacity. To prevent this, BMS controllers are used.
Step two. LED panel installation
As a case, the author adapted the case from an old charger; it is made of aluminum and fits in size. The panel is installed directly on the wall of the case, as a result the case acts as a radiator. To ensure good thermal conductivity, be sure to use thermal paste. We fasten the panel itself to the body with screws.
Step three.
Assembly and testing We install the battery inside the case, glue it with double-sided tape, and also additionally wrap it with reinforcing tape and fix the battery with a plate. Since the battery is heavy, it can fly off the case if dropped, so everything needs to be secured securely. It is also important to take care of good contact insulation.
Become the author of the site, publish your own articles, descriptions of homemade products and pay for the text. Read more here.
