Mini exercise machines
(from work experience)
Target:
Formation of skills and cultivation of the habit of independently engaging in physical exercises through the use of mini-simulators made in the process of collective creative activity of children, teachers and parents
Tasks:
- Organize rest during the day in order to improve performance; increasing interest in doing exercises.
- Promote the hardening of the body and physical development.
- To promote the formation of interest in physical exercise, the skills of independent exercise in health-improving exercises, conscious discipline, and a creative approach to sports.
According to the Ministry of Health of the Republic of Kazakhstan, already in preschool age, a significant proportion of children (68%) develop multiple disorders of the functional state of health, 27% of children have chronic diseases, and only one child out of three remains healthy. According to the Institute of Developmental Physiology of the Russian Federation, about 20% of children who come to school have psychological health disorders (borderline), but by the end of the first grade the number of these children exceeds 70%.
The main role of physical education and health work in kindergartens and schools is to promote the normal physical development of the body, instill and improve various motor skills in order to improve health and promote the mass participation of children in physical education, not only in physical education classes, but also in everyday life.
It has been established that children have different levels of performance. During classes, children's performance decreases. The balance between the processes of excitation and inhibition is disrupted, excitability increases, and attention is distracted. If you do not take a break during this period, do not allow the body to rest, fatigue moves into the next phase, accompanied by a weakening of excitation processes.
The greatest positive effect is exerted by active rest, which includes performing a set of physical exercises in the form of physical education minutes or physical education breaks during and outside of classes.
The proposed mini-simulators are used by me as part of a set of recreational exercises for preschoolers. The production of such sports equipment did not require any special material costs, promotes cooperation between the teacher, children and parents, creates interest in physical education, increases the amount of knowledge about human health, and develops creative initiative.
Brief description of mini-simulators.
Mini-simulator “Breeze in a Bottle”
Manufacturing:
plastic bottle with holes. Pour finely chopped paper, confetti, and foil inside the bottle. A breathing tube (cocktail tube) is inserted into the hole in the lid.
Usage:
blow into the tube so that everything poured inside moves strongly.
Development
: correct breathing through the nose is deep, even, rhythmic, and exhalation through the mouth.
Waste material goes to work
Many, many different useful crafts can be made from so-called waste material. It’s also easy to get useful things for your garden plot and vegetable garden by applying your imagination and skillful hands to seemingly unnecessary things. Many different options for bird and mole repellers can be seen in various sources, some of them are quite complex, and some are primitive. It’s worth starting to create with the simplest designs. Plastic bottles, scraps of polyethylene pipes, a broken handle from a house mop, a used welding electrode, gift ribbons from already unwrapped gifts, toy bells or drink cans - anything can be used.
Design Basics
It is no coincidence that a device for scaring away birds or moles from a site has a very specific name “windmill”. The main force that makes the structure perform its function is the wind. The wind is blowing - the windmill is working. In order for such a repeller to work, it needs to catch air currents, which means it needs blades. If you set a goal, then making a windmill from plastic bottles with your own hands is quite simple. The most important part - the blades - is cut out of plastic. Moreover, the blades from the bottle will not need to be attached, because they are cut in place and simply bent. The remaining design elements will depend on the purpose of the windmill. Tools you will need for work:
- stationery knife;
- scissors;
- universal glue;
- hard wire;
- beads with a hole for wire;
- self-adhesive film or colored electrical tape.
Features of a weather vane with a propeller
This device can be of different shapes, most often the weather vane has the shape of a domestic or wild animal, an angel, a fairy-tale hero, or an airplane.
A weather vane is not only a functional device, but also a decoration for the roof of a house.
Selecting material for making a weather vane
The main criterion when choosing material for a weather vane should be the ultimate purpose of its manufacture. But despite this, it is recommended to choose the material that will make the structure a decoration of your home for a long time. A weather vane can be made from almost any material, but each of them requires different tools and equipment.
For more information about what you can make your own weather vane from, read our article - Where the wind blows from: how to make a weather vane with your own hands.
Wood weather vane
A fairly light and easy-to-work building material that does not require specific tools and skills. High quality raw materials are suitable for a weather vane. Before use, it is recommended to impregnate the wood with mixtures to protect it from dampness and harmful insects. However, such a product will not last long.
How to scare away birds
A windmill made from a plastic bottle must be movable to scare away birds. The simplest and most budget option is a turntable. It does not require additional costly motors and batteries, because it runs on air movement. But it needs blades to catch the wind. You can make several options for such garden helpers. For example, like this.
Cut an ordinary plastic bottle in the center into four sections that can be bent without separating the parts from the whole.
Then, bending the blades so that they catch the wind, pieces of foil are glued onto them. You can use self-adhesive mirror film. It is also necessary to cut a hole in the bottom that is suitable in diameter. The finished windmill bottle is placed on the remainder of the plastic pipe or the handle of a mop. The bottle should rotate freely when the wind blows, but not dangle too much, otherwise rotation will not work. The remainder of the pipe should be long enough for the birds to see the pinwheel.
You can make a windmill from a plastic bottle with your own hands in this version - cut long blades from the base of the bottle, bend them at an angle of 45 0. The turntable diagram is shown below.
Such a windmill is mounted on a rigid base at right angles to the ground. You can secure it in any way - using a nut, if the base is threaded, using a large smooth bead, making a loop on the wire with pliers. There are many options; the master decides which one is more convenient to use. The most important thing is that the turntable rotates freely. Some craftsmen attach several of these devices to one base, decorating them with colored film or painting them with acrylic paints. The result is not only functionally useful, but also a beautiful thing for a personal plot.
Vane. Watching the direction of the wind
The weather vane was invented more than 2 thousand years ago. The man noticed patterns in the behavior of air masses and subsequent weather changes. And that, knowing the direction of the wind, you can predict the weather and be prepared for upcoming downpours, cold snaps or drought.
The weather vane on our weather vane is made in the form of a scarlet cockerel on an arrow. In English-speaking countries, a weather vane is called a “weather cock,” which literally means “weather rooster.” The rooster has traditionally been considered a symbol of vigilance. With its crow, the rooster not only announced the coming of a new day, but also, according to popular beliefs, prevented diseases and fires, scared thieves away from the house and served as a talisman against evil spirits.
The weather vane consists of:
- fixed vertical support,
- rotating part - weather vane,
- rhumbs - pins that are located below the weather vane, with the letters “S”, “Y”, “Z” and “B” for orienting directions to the cardinal points.
When installing a weather vane, its orientation is performed using a compass. If the weather vane is installed correctly, then the direction of the wind is very easy to determine: where the arrow “looks”, the wind is blowing from there . For example, if the cockerel on our weather vane faces east, then the wind blows from east to west and is called “east.”
Interesting! One of the oldest and most famous weather vanes was installed on the 120-meter Alexandria Lighthouse in Alexandria, Egypt (243 BC). And on the bell tower of the Peter and Paul Cathedral in St. Petersburg (built in 1732) there is a huge weather vane-angel. Its height is 3.2 m and its wingspan is 3.8 m!
What are moles afraid of?
A windmill made from a plastic bottle to repel moles is a very useful thing, because moles are also pests. They eat earthworms that loosen the soil and spoil the roots and tubers of plants. Sometimes a lot of such underground inhabitants appear on the site. You should get rid of uninvited guests - moles. Moles are practically blind; you can’t scare them with some kind of flicker. But moles have good hearing. It is on this feature that the principle of scaring these animals away from the garden is based. Making a windmill from a plastic bottle with your own hands means saving the harvest, leaving underground inhabitants alive, and not flooding your garden with chemical poison.
How to scare away moles
Moles are afraid of noise, and if you place something on the site that will make noise underground, the moles will leave it, going in search of a quieter habitat. A windmill made from a plastic bottle to repel moles, the diagram of which is proposed below, works just for this outcome. In order for sound to travel well in the ground, it must be amplified using resonance. This can be achieved using a hollow pipe dug into the ground. It will amplify the sound and transmit it across the earth.
The base of the windmill can be taken from the design proposed above - blades are cut out on the body of the bottle, and the windmill itself is placed on a metal base, for example, a used electrode. Sound will be transmitted better through metal than through plastic. Then the electrode, a metal rod, must be placed in the buried pipe so that the sound from the rotation of the windmill is amplified. A do-it-yourself windmill made from a plastic bottle to preserve the harvest is a very simple design.
Assembling and installing a weather vane
You need to decide on the installation location. It is believed that the weather vane should not spoil the symmetry of the roof structure of the house. Therefore, if there are pipes on the roof, then it is best to attach them to them. If there are none, then the best option is the roof ridge. To install on a ridge, you only need two fastening elements (strips), which will be located exactly at the angle of the roof slopes.
How to assemble a weather vane at the installation site.
- First, the main part, made of pipe, is attached to the roof of the house. It is attached to the ridge with long self-tapping screws. It is important that the fastening is carried out not to the roofing material, but to the roof sheathing.
- A bearing is installed inside the pipe.
- An axle is inserted on top, onto which a protective cap is first placed.
- At the bottom of the pipe, the bearing is secured with a nut and washer.
By the way, the inner diameter of the pipe is matched to the outer diameter of the bearing. And one more very important point. All parts and components of the weather vane must be made with a large margin of safety. This is especially true for fastenings. It must withstand fairly large wind loads. And the snow will be a big test for him.
Do not forget that the weather vane with the propeller is located in the open air. So the rain will wash it constantly. Therefore, it is recommended to lubricate the metal structure with grease. And this is after painting it. In addition, you will have to periodically tighten the threaded units, tint the device, lubricate the bearing, and so on. That is, a weather vane is not just a beautiful element of the external design of a house, it is a mechanical toy that must be constantly taken care of with your own hands.
Pinwheel beauty
Many of those who maintain a garden or vegetable garden try to decorate the area using available materials, the same plastic bottles, for example. What craftsmen can come up with from this waste material. For example, by placing a windmill made of plastic bottles above a flowerbed, you can make it much more interesting. The classic turntable is made of 4 blades according to this scheme.
The blades can be cut out from colorful bottles, then assembled in the center using a bolt and nut or a stapler. You can decorate transparent plastic with self-adhesive film or paint it with acrylic. You can make more than 4 blades. In any case, such a classic windmill made from a plastic bottle, made by yourself, will be an interesting addition to the flower garden.
There are very simple designs of pendant windmills. You can make an interesting decoration from a small plastic bottle - cut the bottle lengthwise in the middle into thin strips 1 centimeter wide. Then connect the upper and lower parts to form a “flashlight”: press the blades in the middle, folding them in half, but at the edges they should be bent at an angle of 45 0. Make a hole in the cork using a hot nail and insert a looped paper clip into it. You can hang a bell or shiny beads on it. The windmill pendant is ready and can be placed on a tree branch.
It’s not difficult to make a windmill from a plastic bottle with your own hands, but it will provide a lot of benefits and beauty.
Why do you need a low-power wind generator
?
The answer is to provide yourself with a certain amount of energy: for lighting in autonomous conditions (on a hike, on a picnic, on an expedition, in the country), for powering and charging portable electronics (phone, tablet, navigator, flashlights, radio, etc.) , even the US Army uses a portable mobile wind generator
.
Such a homemade portable windmill
will also be useful as a backup power source in a populated area, for example, if it is installed on a balcony, roof or pole, or even a tree, it can also power sensors and other low-voltage devices without mains voltage, and also serve as an advertising sign. structures (kinematic sculpture). It is also possible to check the wind capacity of installing a powerful wind generator (if a small wind turbine does not work, then there is nothing to talk about a large one).
You can make a carousel windmill from several ordinary 1-1.5-2 liter PET bottles. Many affordable and simple options were searched, and a wind generator made from plastic bottles turned out to be the most affordable, simple and reliable option: the bottles are light and durable, have a round shape, there are many of them and they are practically free. The development is based on the author’s patent UA No. 59312 “Wind generator (wind turbine), Moseychuk hydrogenerator.”
There is wind almost always and everywhere (especially at altitude or in the spaces between buildings or hills), and complete calm occurs only about 20 days a year, in contrast to sunny days, for example. In addition, we will make a universal wind generator that can work both as a damless minihydroelectric power station (minihydroelectric power station) and even in manual mode in the absence of wind (for this, our windmill has a manual dynamo generator mode)! Attractive? Read on.
Materials we will need
Thin-walled steel (wall thickness 0.8-1.1 mm) pipe with an outer diameter of 25 mm: 2 pieces of 0.5 meters (for the axis of the windmill and the base of the console), 2 pieces of 0.4-0.5 m each (for connecting axles and bases of the console above and below), one piece of 0.15 cm for attaching the generator to the lower console, in general you need about 3.0 meters of pipe (they are sold at 3 meters each). For the prototype, I used a thin-walled chrome-plated pipe with a wall thickness of 1.0-1.1 mm; it is quite strong enough for a household windmill and looks beautiful;
16 PET plastic bottles 1.25-1.5 liters, preferably cylindrical in shape, without concavities for the hands (interestingly, recycling one plastic bottle saves the energy of a 60-watt light bulb that works for three hours and up to 2 million are thrown away in the world every day plastic bottles).
16 caps from PET plastic bottles;
2 bearings No. 205 (GOST 180205, 6205-2RS);
2 clamps 6\4″ for pipes with rubber for fastening axle bearings with 8 mm studs;
2 clamps 3\4″ for pipes with rubber for attaching the wind generator to a pole, tree, wall, mast; to ensure fastening, you can simply wrap the windmill console along the entire length to the support with a rope or wire;
1 clamp 3 1\2″ for mounting a dynamo lantern or stepper motor;
9 M4*35 screws, preferably with a press head;
16 enlarged M5 washers (precisely M5, not M4 to increase the area) for attaching the plug caps to the axle;
A rubber tube 10 cm long and an internal diameter of 25 mm for attaching the dynamo generator handle and axle, or a sleeve in a 25 mm pipe with an 8-10 mm hole for attaching a stepper motor.
Tools we will need
Electric drill;
Pipe cutter or hacksaw for metal;
Metal drills 4.0; 8.0 mm
Phillips screwdriver;
Preferably a 7mm wrench for tightening M4 nuts.
The basis of the entire wind generator design is a rectangular console made of steel pipes. The console consists of a vertical axis rotating on bearings, two crossbars on top and bottom, and a base. The axis is fixed in the jumpers with bearings. A generator is located at the bottom of the axis.
The difficulty in making the axle is that you need to drill holes to attach the bottles along two parallel helices, like in a DNA molecule. Since the holes on the pipe are small in diameter, we first mark the drilling location with a marker and then core it.
Let's start with one of the most difficult procedures. We step back 10 cm from the top of the axle and begin to drill through holes 4 mm in a spiral with a horizontal shift to the left of 2.5 mm and a vertical shift of 82 mm. Then we drill holes in the second spiral 90 degrees from the first.
To attach the bearing safety bolt, move 10 cm from the bottom of the axle and drill a 4 mm through hole.
To attach the bottles, you first need to attach the caps. First, we drill (burn) 4 mm holes in the plugs. To fasten the plugs in pairs to the axle, take a 4 mm screw, put a wide washer on it, insert this structure into the plug from the inside, and push everything through the pipe. From the other side of the pipe we place the plug on top of the pipe, put on the washer and tighten the nut inside the plug. And we repeat this 8 times.
We screw a bottle-blade tightly into each plug on the axis.
Blades
Windmill blade made from plastic bottles
and is a PET bottle with an elliptical cutout in half on the side. We get a wind turbine blade like this. We do not touch the bottom - it is needed for strength. To start cutting, it is advisable to burn the initial hole on the seam of the bottle with a hot nail or file, and then cut a semicircle from it with scissors.
Generator
As a wind turbine generator
you need to use something low-speed. This could be a 1, 2, 5-10 watt stepper motor, a bicycle hub dynamo, or a torch dynamo. I chose the last option - it fits very well: it has a cylindrical shape with a diameter of 6 cm, convenient for clamping with a clamp and unfolds, it is waterproof, has a built-in controller and a 380 milliampere*hour battery, can light in two modes for 1.5 or 5.5 hours , in a stable wind or in manual mode, it can recharge external devices through a Nokia-type output (wide, 2.5 mm) or a Nokia cord with a USB-male, on which you can attach a USB-female-USB-female adapter.
We insert the dynamo lantern handle into the bottom of the rubber tube at the bottom of the axle. We center and secure the generator in a clamp, which in turn is attached in a cantilever to the lower pipe of the large console.
With the onset of summer, owners of summer cottages and gardens approach their beds, berry bushes, and fruit trees with hope, assessing the future harvest. The children eagerly await when grandma's first berry ripens. When the side of a strawberry or cherry is almost glowing, the bird deftly picks up the berry, eating the prey as it goes.
It will not be possible to take back what was stolen. You need to think about protection from pests in advance, before the onset of the berry season. To prevent this tasty treat from flying away with the starlings and thrushes, you need to know how to make a bird repeller from plastic bottles with your own hands.
The device is universal, inexpensive, humane. Let the advice help those who grew the crop to enjoy the berries. And the birds will remain alive. After harvesting, they will again fly to the gardens to feed on harmful insects.
From childhood we are taught that birds are protectors of gardens. They destroy harmful bark beetles, leaf-eating caterpillars, aphids and other insects that harm vegetable crops, fruits, and trees. However, for some reason no one remembers that beneficial birds turn out to be dangerous pests, destroying the grown crops if a bird repeller made from a plastic bottle is not installed in the garden.
And this is not the only harmful act committed by birds:
- Nimble gray sparrows quickly notice when fresh lawns are seeded. They immediately appear on the plot as a friendly family and quickly peck the seeds.
- Flocks of birds trampling on the grass damage young, immature lawns.
- Jackdaws love to eat vegetable seeds. They dig up freshly dug beds and look for prey.
- Crows, starlings, and pigeons are not at all afraid of human proximity. Given the opportunity, they are not averse to flying onto the balcony, into a gazebo in the country, stealing something edible or crap on the table or other garden furniture.
- Sometimes birds like to land on film greenhouses to rest. Flying up, they tear the film with their claws.
Making a bird repeller from a plastic bottle with your own hands
For many years, homemade scarecrows have been used in gardens to scare away birds, shiny disks have been hung, and magnetic film from cassettes has been stretched.
Modern “Kulibins” have figured out how to make a bird repeller from a plastic bottle.
The simplest and most successful example was demonstrated by the hosts of the program “While Everyone is Home.” Timur Kizyakov and his engineer friend Andrei Bakhmetyev in a matter of minutes made a device that conquered the world and saved crops. Their experience is worthy of study.
Sequence of actions step by step
Before you learn how to make a bird repeller from a bottle, you need to prepare materials and tools.
To work you will need:
- plastic bottle;
- pieces of foil;
- scotch;
- knife-cutter;
- small washer;
- glue or liquid nails;
- felt-tip pen;
- a piece of thick wire;
- stick holder.
We begin to assemble a bird repeller with our own hands from plastic bottles according to the instructions:
- Drill a hole in the lid and bottom, placing them opposite each other. The diameter must be such that the prepared wire or electrode can pass freely.
- Make markings for future blades with a felt-tip pen. Divide the surface vertically into four parts, draw straight lines. Add two horizontal lines to each vertical line to make four “C” letters.
- Make slits along the marked stripes with a knife. The result is 4 blade doors that open outward.
- Glue a washer onto the wire at a distance of 1 cm from the end.
- Place the wire in the bottle, directing it into the hole made in the bottom. The washer holds the bottle, spins, and does not fall down.
- Screw the lid on, passing the second end of the wire into the hole.
- To frighten birds, you can glue pieces of shiny foil to the blades.
- If the length of the wire is at least 1 m, then the repeller can be mounted on it. If you don’t have a long steel wire at home, it is recommended to attach the finished product to a stick.
It's time to take the device out into the garden and test it in practice. Even a small breeze will spin it, which means the task is completed.
You may be interested in this product:
Conclusion
A do-it-yourself bird repeller made from plastic liter or one and a half liter bottles is the simplest means of helping to preserve the harvest and drive away uninvited guests from the site.
It is installed for times when protection is required. In autumn, rooks, sparrows, tits and pigeons will return to the gardens, sing songs, and destroy real pests.
Windmills in the garden, made from plastic bottles, decorate almost every plot. This modern representative of architecture looks pretty good. Especially in this weather when there is a slight breeze. Slowly swaying windmills relax your attention. There is nothing difficult in making such toys. Available source material (plastic bottle), scissors, a little desire - that’s what you need to create a plastic windmill. Surprisingly, this fun brings more than just visual interest. Summer residents have learned to make windmills that scare away all kinds of birds and, importantly, moles. How to make a windmill from a plastic bottle? This and other questions should be answered below.
Games with non-standard equipment for physical education and health work with children
Evgenia Bulycheva
Games with non-standard equipment for physical education and health work with children
The use of exercise equipment increases muscle tone, improves blood circulation, and activates redox processes in muscles, joints, and tissues.
Massagers can be used in the process of performing general developmental exercises, during gymnastics after sleep, exercise machines - during physical education events and free activities of children, both in a group and on a walk.
"Snake".
Old ties are stuffed with cotton wool or padding polyester, and eyes are sewn on from buttons.
Use: for various types of walking, running, jumping.
Goal: development of dexterity, coordination of movement, balance.
"Walkers"
Holes are drilled on the sides of 2 small plastic buckets, and a tape or rope is inserted at the level of the child’s outstretched arm.
Use: children stand with their feet on inverted buckets, holding the ribbons with their hands, and walk on them as if on stilts.
Goal: development of agility, endurance, balance.
Massage mats "Kaleidoscope".
Plastic caps from plastic bottles and used felt-tip pens of different colors are attached to the fabric with the inner surface facing up.
Use: foot massage.
Goal: prevention of flat feet.
"Air football" or "doubleball".
A football field is made from a shallow box (for example, a candy box). The halves of the “Kinder Surprise” act as gates. A soccer ball is a bead or a pea.
Usage: two players play, blowing on the “ball” through a thin tube, thereby trying to score a goal against the opponent’s goal.
Goal: developing proper breathing skills.
"Light feathers."
The box contains feathers of different sizes.
Usage: blow on the feather so that it stays in the air as long as possible.
Goal: developing proper breathing skills.
"Breeze in a bottle."
Holes are made in a plastic bottle. Confetti, finely chopped polystyrene foam, foil, and paper are poured inside. A breathing tube is inserted into the hole in the plug.
Usage: breathing exercise - blow into a tube inserted into a cork.
Goal: development of the respiratory system.
"Nimble fingers."
The boxes contain sea pebbles, small cones or beans.
Use: Pick up spilled material on the floor with your toes as quickly as possible.
Goal: prevention of flat feet.
Massager "Bottle".
A plastic bottle is tightly filled with balls rolled from candy wrappers.
Use: tapping the back, shoulders.
Purpose: massage of the back and upper shoulder girdle.
"Color mosaic".
Option 1. The box contains multi-colored buttons.
Use: collect buttons scattered on the floor using your feet, lay out a pattern, figure, ornament from the buttons.
Option 2. Used felt-tip pens, pencils, sticks of different colors and lengths.
Usage: Use the sticks to create the desired pattern with your toes.
Goal: prevention of flat feet.
"Bracelets."
Bracelets of different colors are made from beads and old felt-tip pens.
Usage: 1) for quickly dividing children into subgroups according to the color of the bracelets,
2) for exercises with cross coordination (bracelets are worn, for example, on the right hand and left leg).
Massager "Nuts".
It consists of “Kinder surprise” capsules tightly strung on a fishing line, with two handles (used felt-tip pens) on the sides.
Use: Convenient for massaging the neck, head, upper shoulder girdle, back, chest, legs.
Massager "Roller".
It is made from multi-colored plastic corks and rings, taken from the neck of a plastic bottle and turned with the spines outward. The corks are glued together and spiky rings are put on them. The handle is attached in such a way that the roller is movable.
Use: The spines on the roller are intended for massaging the neck, back, and legs.
Exercise machine "Bilboke".
Made from the top of a plastic bottle. A fishing line (1-3 pcs.) from 20 to 40 cm long is attached to the bottle with a cap, at the end there is a Kinder Surprise capsule or a bottle cap.
Use: To hit the target.
Goal: Development of dexterity, attention, eye, reaction speed, ability to regulate and coordinate movements, formation of self-control skills.
“Get into the hoop” simulator.
A braid (about 2 m) with a Kinder Surprise ball or capsule is sewn to the ring.
Usage:
Option 1. Hold the ring with one or two hands. Twist the cord into the ring as quickly as possible, each time throwing the capsule into the middle of the ring.
Option 2. A plastic ring is attached to the doorway at a distance of about 1.5 m from the ground. Hit the ball into the ring. There can be two players, they are located on different sides of the ring. In this case, the task becomes more complicated: the players must not only throw, but also catch the ball.
Goal: Development of dexterity, accuracy, coordination of movements.
"Rackets."
Made from halves of plastic bottles.
Use: for playing table tennis.
Goal: development of dexterity, eye, coordination of movements.
"Sticky ball"
Kitchen mittens, Velcro, soft or tennis ball with Velcro glued to the sides.
Usage: Each player wears a mitten on his hand, with Velcro sewn in the middle. Game in pairs - throwing the ball to each other and catching it with a mitten.
Goal: Development of coordination of movements, eye, dexterity, ability to play in a team.
"Chips."
Usage: chips of different colors are offered according to the number of children. Participants can choose one of them if they wish. The training place (or equipment) is indicated by the same chip. Children independently find their projectile or the location of the team. On the back of the chips, numbers may be written indicating the serial number of the team players.
Goal: to help children quickly divide into teams, determine the order or place of task completion, increase the motor density of physical education and recreation activities, and promote the formation of interest and need for physical activity.
Game "Rising Balls".
A cord 5m long, threaded through a ring attached to the ceiling. A plastic ball is attached to one end of the cord, and a stick for winding the cord is attached to the other.
Usage: The child wraps a cord around a stick, the ball rises to the ceiling. Who is faster?
Goal: development of dexterity, fine motor skills of the hands.
"Butterflies".
Made from corrugated paper and cardboard. Attached to a cord with a ring.
Option 1
Target. Teach proper breathing.
Take the butterfly by the ring and lift it to the level of your face or secure all the butterflies on one long cord in a horizontal position. Inhale through your nose, and exhale for a long time through your mouth towards the butterfly. (Repeat 3-4 times.)
Option 2
Target. Learn to respond quickly to a signal; practice ease and smoothness of movements; develop spatial orientation.
Children hold butterflies by the ring and move around the hall to the music. At the signal “Butterflies, to the flowers!” children plant butterflies on outdoor flowers. You can complicate the task somewhat by setting it to a specific color of butterflies or flowers.
"Ribbons".
Multi-colored ribbons are cut and processed from nylon fabric.
Usage:
1) for outdoor switchgear,
2) to develop proper breathing skills.
"Flippers".
A plastic grate (for a kitchen sink) is attached with a wide rubber band.
Use: Sliding, jumping during sports games, relay races.
Goal: development of dexterity, coordination of movements.
"Sultans".
Multi-colored New Year's rain cut into strips is attached to the stick.
Usage:
1) for outdoor switchgear or rhythmic gymnastics,
2) to develop proper breathing skills.
"Windmills".
They are made of thick colored paper and are attached to sticks so that they can rotate freely.
Goal: development of proper breathing skills.
"Christmas tree."
It is made from green plastic bottles, which are cut and strung on a long stick.
Usage: As guides, for decoration, etc.
Varieties of "turntables"
There are many ways to make a windmill. Large, small, oblong, short - all the types cannot even be listed at once. Who cares? Yes, in general, none. The only difference is the type of shape. The operating principle and manufacturing are almost the same. So, the first windmill made from a plastic bottle. You can make a small pinwheel with your own hands.
It will consist of the bottom of the bottle. The second windmill will resemble the sun: large flat blades, bright colors. The third decoration is especially for gardeners. The remedy against moles and all kinds of birds is simply irreplaceable. Windmill-fighter - this is how you can call a windmill capable of driving away unwanted living creatures.
Making from bottles
If you don’t want to spend money on an expensive metal windmill, you can make it yourself from scrap materials, for example, from plastic bottles, of which a lot accumulates in a country house. You can turn this activity into a fun workshop for kids or enjoy the creative process yourself. To make a weather vane in the shape of an airplane with a propeller, you will need 2 large bottles with caps, a wooden block, a long nail, wire, cardboard, a marker and a sharp utility knife. The work is performed in the following order:
Ready-made version of a windmill in the form of an airplane
- Both bottles need to be thoroughly washed and labels removed. To do this, you can soak them overnight in a soapy solution, and then remove the remaining paper with a stiff brush.
- Use cardboard to make a pattern for the wings and propeller of the future aircraft. Place the wing pattern on the side of the bottle and trace it with a marker. Cut the propeller from the bottom.
- Using a nail or drill, make a hole in the lid equally in the middle. Make such a hole in the propeller. Connect the cover and propeller using a nail. It is necessary to check that the screw rotates freely around its axis.
- Cut out the wing blank, and then use a sharp utility knife to make slits in the bottle, which will soon become a weather vane. The length of the slot must correspond to the size of the wings, since they need to be inserted there.
- Using a hot nail, make a hole in the neck of the bottle that goes right through. Next, you need to prepare a block, and use a nail to attach the fuselage of the weather vane to the body and screw on the lid. Making holes for mounting the propeller
- You can glue bright stickers in the form of a number or stars onto the aircraft body, and also paint it with acrylic paints.
Important! When making a weather vane, make sure that all materials used are light and moisture-resistant. A heavy windmill will spin poorly in light winds, and a cardboard craft will quickly get wet in the rain. If you want the weather vane to accurately show the direction of the wind, it must be fixed at a height of at least 4-5 meters.
Scheme for making a windmill with rotors from a bottle
Finished windmill with rotors from a bottle
Windmill from a plastic bottle - you can make something beautiful with your own hands
There is not even a drop of doubt that the above accessory decorates any area. Gray vegetable gardens take on completely new colors. The view immediately changes, naturally, for the better. So first, a little theory. It starts with selecting a plastic bottle. For this type you will need a container with a flat bottom. It is the bottom that will become the basis of the windmill.
The practice begins by cutting the bottle in half. The part where the neck is located can be thrown away. She's not needed. Carefully trim the remaining cut so that it is even. The most painstaking part is cutting the blades. The cylinder should be cut lengthwise. This way you will get something like a circle with rays. The distance between the blades should not exceed one and a half centimeters, but they should not be placed too close either. The “rays” themselves should be about a centimeter wide. So, the small preparation is almost ready. There's just a little bit left to do. The blades must be bent at an angle of forty-five degrees. Thus, they will look not inward, but to the side, positioned behind each other. The blades are ready.
Final version
This is how the windmill made from a plastic bottle is almost finished. It’s not difficult to make something good with your own hands, right? But something is missing in this design. Souls. “Naked” plastic does not attract attention at all and does not decorate the garden. On the contrary, it evokes feelings of emptiness. What to do? We need to get down to design. Yes, only originality can turn a plastic windmill into a beautiful accessory. It's probably worth starting with painting the blades.
Bright colors, sparkles, beads - all this will give the windmill freshness. You can draw patterns, straight and curved lines on the blades so that when they rotate, some kind of silhouette will be formed. Also, don't forget about the foundation. A simple stick? Too boring. A magic staff, a small tree, a liana - you can come up with anything you want. The main thing is to move away from the template.
Wind turbine rocket
“Turntables” can be located anywhere, and the playground is no exception to the rule. Children love everything festive and unusual, so “gray” windmills will not attract attention. What design and shape should you come up with for children? Everyone in their youth wanted to become an astronaut. It's interesting and funny. The thing that attracts the most attention in this topic is rockets. Here's the idea. Pinwheel rocket. Yes, the idea is not bad. Here's how to make such a windmill out of plastic. Because it's much nicer to see on the site. After all, the soul is invested in them. The wind turbine-rocket will be located non-standardly: horizontally. For production you will need one plastic bottle. The blades will be located at the rear. How? The bottom of the bottle has an unusual shape. Namely four petals. If you use ingenuity, you can cut out small rounded blades from them. The nose should be ceremoniously painted in a bright color. There you go. All that remains is to put the rocket on the axis, and it is ready to rotate and conquer space.
Country prototype
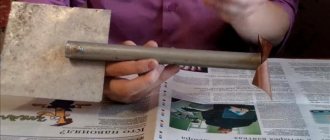
What else can a windmill made from a plastic bottle be? You can make a pest repeller with your own hands. More precisely, summer residents have long learned to make a windmill from plastic anti-mole bottles. The design is simple: blades are cut out on the sides and the bottle is placed on a metal pin. This is what makes the sound that scares away the moles.
Why do you even need a windmill on your site? Naturally, this is not a mechanical wind generator, which allows you to convert wind energy into mechanical energy.
Our goal is to create a beautiful “accessory” for decorating a summer cottage, the main task of which is to transform wind energy into “spiritual” energy.
If you want to make a pool out of a tire at your summer cottage, see step-by-step manufacturing instructions.
Alternative methods of getting rid of moles
In addition to homemade devices for expelling pests, there are also industrial options. For example, an ultrasonic repeller. The device looks like an ordinary stick with batteries inside. The device generates ultrasonic waves that are not perceived by the human auditory analyzer, but are annoying to pests.
One of the most successful solutions will be the Tornado-OZV 02 repeller
On the picture
The underground inhabitants begin to panic due to constant mechanical and ultrasonic vibrations.
- The sound source itself is located at a depth of 20 cm, which eliminates the noise effect above the ground.
- Soil is a denser medium, so sound waves propagate better in it and reach a radius of 2 km.
- The device is made of impact-resistant materials that are resistant to dust and moisture. The device operates for 3 months on one set of batteries.
- The price of the Tornado repeller is 1200 rubles.
— Moles took a fancy to our site last summer. The fighting season ended in favor of the miniature animal. A plastic bottle against moles did not help. The onset of spring was met fully armed. We bought a Tornado repeller on the recommendation of a friend who himself suffered from uninvited guests. For a plot of 12 acres we bought 3 pieces. They created the Bermuda Triangle. After 3 days, the vital activity of the animals ceased. But, judging by the reviews, Tornado does not help everyone. Maybe it's the properties of the soil. We were satisfied and advised everyone who found themselves in our situation to buy it.
Svetlana Mikhailovna, 57 years old
Manufacturing instructions
The assembly process is not difficult at all. So let's get started.
Cut the bottle into two parts with a knife
Depending on the size of the windmill you want to build, the displacement of the bottles that will be needed during the manufacturing process will depend. Our mill will be small in size; for this we take two plastic bottles with a flat bottom, 2 liters each.
We take a stationery or painting knife and cut the bottles. The closer to the neck you cut, the larger the blades of your future mill will be. But don’t get carried away, because if you cut too close (almost close), the blades will turn out useless.
So, you should be left with parts of the flat bottom bottles. We don't need other parts.
The remaining parts should be cylindrical. We begin to cut strips in a circle with scissors, but do not cut to the base. When choosing the width of the strip, you need to decide how many blades you want the windmill to have. We do the same with the two remaining parts of the bottles.
After we cut them, we bend each strip at the base at an angle of 45 degrees. The end result should be something like the sun with rays.
It is best to paint the blades from a spray can, so you can make them multi-colored
Afterwards we begin finishing work. The wing blanks and caps can be painted either with a spray can or with paint; in any case, it will take time for everything to dry before continuing work.
Glue the cap to the middle of the wings on each side.
We put the bead on the wire
And now the final part of the work. For this we need four corks, two cap blanks and three beads.
The sequence of actions is as follows: we insert a wire through the bead (be sure to check whether the wire passes freely), then bend the tip of the wire so that the bead cannot fly off.