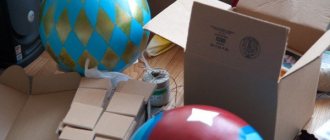
Another creative meeting took place at Alena Kulikova’s Studio before the New Year - a master class “New Year’s Basket”.
Agree, this is a very nice gift, so many people want to learn how to create custom New Year's baskets to please their loved ones or colleagues before the New Year.
How to make paper candy with your own hands
Even as a child during labor lessons
we were taught to make various crafts from paper and more. Remembering these lessons, everyone understands that no one taught us candy origami, but it’s never too late to learn how to do something. Below you will find options and patterns of candy origami that will decorate your home and give good emotions.
Option #1
I would like to start with instructions for making a surprise candy, in which you can put sweets or a small gift. This craft is quite easy to make, and you don’t need a lot of material. Prepare in advance:
- A toilet paper cardboard.
- Wrapping paper approximately 30 x 30 in size.
- Scissors, tape, tape.
You need to put a piece of cardboard in the middle, closer to the edge, and secure it with tape.
Wrap the cardboard with wrapping paper
, and close the seam with tape.
Tie one side with a ribbon and leave the other side untied. Pour some sweets, candy bars there, or put a small gift, for example, a chocolate bunny. After this, carefully tie the other side with ribbon.
This candy is shaped like a box. Such gifts can be given to children at school for the holidays: it’s economical, and you can put together an assortment of candies yourself, taking into account the children’s tastes.
Option No. 2
This option is also easy to implement, but the result will please you. For these sweets you will need:
- Corrugated paper (choose the color at your discretion, but it’s best to take several).
- Scissors, silicone and regular glue, thread (to match the color of the paper), toothpicks.
- Balls of the same size (1.5–2 cm).
You need to cut out a rectangle measuring 10 by 8 cm from paper. Place a ball greased with regular glue in the middle, closer to the edge. Wrap the ball in this paper.
After this, you need to take the threads and tie the edges of the paper close to the ball. If the ends are very long, you can trim them a little.
The caramel is ready. Some people also coat the edge of the toothpick with silicone glue and stick it to the caramel, but this is not necessary. These crafts can be used
as a decoration, for example, by pouring them into a candy bowl.
Option #3
This time the caramel will be made according to the scheme. Prepare colored cardboard, scissors, glue, pencil, ribbons and small candies (edible).
Stepping back from the opposite edges by about 1.5 cm, you need to cut out three diamonds. There are two edges left, on which we also cut out diamonds, but this time there are two. It looks like this.
Then you will need to fold the template along the lines drawn on it so that you get the following.
To make the caramels seem more realistic, you can stick some stickers on them or cut out some parts from the candy wrappers. You need to tie the edge of the candy with ribbon, pour the treats inside and tie the second edge.
You will get a very beautiful do-it-yourself candy wrapper or gift wrapping that is not inferior to store-bought options.
Option No. 4
For this craft you will need paper, scissors, tape, pencil, glue and a little perseverance. Transfer this diagram to paper
You need to carefully cut out the diamonds as shown in the picture above. It is best, of course, to use a stationery knife for this; with it this process will be more accurate. This blank needs to be bent along the fold line, in the end you will get something similar to a cylinder. The edges must be glued together with glue, and the ends must be tied with ribbon or thread. The product will resemble a homemade candy wrapper, which may well fit a small candy bar, since the craft is voluminous and there is room.
Option #5
Origami from paper according to the scheme. You won't need anything other than paper. So, take a square-shaped sheet and fold it as shown in Figure 1. After that, fold the paper into three more parts (Figure 2). Find the middle of this blank and then make two folds (Figure 3). Mark the future fold lines (4), you need to fold along the lines inward (5). That's all, the beautiful origami in the form of a candy is ready! If desired, you can somehow decorate or paint it.
Option #6
- Cardboard.
- Silk (small piece).
- Braid, ribbons and sequins.
Take cardboard and divide it into 7 equal parts. Bend the cardboard along the drawn lines. You should get a hexagon; the cardboard needs to be fastened with glue or a stapler. Wrap this blank in fabric and pull it off one side. After placing the gift inside, tie the other side as well. After this, we proceed to “designing” the box. Glue braid or ribbon onto it and decorate with sequins.
Make a big candy with your own hands
.
It is not necessary to make candies in the shape of squares or rectangles. Just look at the folds of a candy of a different shape and transfer them to paper, only ten times larger. Just imagine how many emotions the children will have when they receive such a surprise candy as a gift. It's amazing that you can make paper candy so easily and simply. Some craftsmen manage to weave this sweet from rubber bands.
Attention, TODAY only!
In this article you will learn how to make decorative candies to decorate your home during the holidays.
Let's get creative
How to make a New Year's composition? Watch these photo master classes!
Let's start with a fruity, aromatic and tasty option.
Vitamin New Year's bouquet is ready!
Floral composition in the shape of a star
- Corrugated cardboard;
- Twigs of spruce, pine, fir, etc.;
- Natural flowers;
- Fir or pine cones;
- Glue/hot gun;
- Floral organza;
- Crepe paper;
- Decorative ribbon or rope;
- Any decorative elements at your discretion.
Using breadboard knives or scissors, you need to cut a star out of cardboard.
Now you should wrap it with organza and carefully fix it with a glue gun.
How to make a New Year's candy out of paper: template, photo
You can decorate your Christmas tree or home for the holidays with the help of a “Christmas candy.” It is very simple to make, by folding two sheets of colored paper - red and white.
Depending on what size lollipop you require, you can prepare a large or small sheet of construction paper. Roll and fold the paper step by step, following the diagram:
- Take two sheets of colored paper
- Paper colors should be on the outside
- Fold two sheets into a triangle (2 pcs.)
- The triangle is superimposed on the triangle (not exactly, but with a slight shift down)
- Start twisting the stick from the wide side
- For ease of twisting, you can put a long wooden kebab skewer or knitting needle inside.
- Continue twisting until you get a nice tube
- Crochet the top of the resulting tube
IMPORTANT: For ease of twisting and bending the candy, you must work with paper napkins (red and white).
New Year's volumetric origami candy large from whatman paper: diagram, A4 sheet template: diagram, stencil
A large candy made from whatman paper (white or colored) is suitable for decorating a street Christmas tree. In addition, it can be hung as home decoration on the wall or furniture.
What you will need for work:
- Whatman paper - 1 pc. (for one candy)
- Pencil
- Scissors
- Scotch
- Ribbon or serpentine
- The sheet must be folded crosswise 6 times
- Then make markings on both sides of the rolled paper (using a pencil).
- Cut out the outline of the candy
- Unwind Whatman paper
- Roll up the candy
- Tie the “tails” of the candy with ribbons at both ends
What you need to create a flying cup
Every home has a cup and saucer that you wouldn’t mind using for decoration. In principle, there is nothing special to regret - after all, what you create as a result is no less valuable than just dishes for drinking tea. Such decor can decorate a home for a very long time, and it will be good as a gift to friends. It is not necessary to look for a “cup + saucer” set; these can be separate objects; anyway, the saucer or small plate will be hidden under the decorative elements of the composition.
Wire or light fork.
Glue - one of the most powerful and fast (such as super glue). You can use a hot gun if you have one - hot glue will securely secure the elements of the composition.
For decoration - small New Year's toys and figurines, twigs, ribbons, pine cones, sparkles, rain, etc. It is advisable to choose light but voluminous decor. You can place Santa Claus , a Christmas gnome, etc.
How to make small candies - toys for the Christmas tree?
Bright and colorful paper candies on the Christmas tree look very bright, elegant and fun. You can have fun with your children, creating such candies from colored or craft paper, decorating them with sparkles, and confetti to taste.
What is required for work:
- Colored, corrugated or wrapping paper
- Scissors
- Ribbons
- Serpentine
- Sequins, rhinestones, confetti and other improvised decorative materials.
How to make candies from corrugated paper:
- As a base, you can use a foam ball, real candy, or a wad of newspaper (twisted into a ball).
- Place the candy base on the edge of a cut out square piece of corrugated paper.
- Start rolling the candy
- Decorate the tails of each candy with serpentine or ribbon bows.
Other patterns for rolling decorative paper candies:
Rolling candies using the origami technique
Samples of sweet bouquets: video
We bring to your attention a video with samples of New Year's sweet bouquets and other crafts.
Ideas for creating holiday masterpieces with your own hands can be gleaned from the Internet. All the samples presented above are very simple to make and do not require large financial outlays. Sweet bouquets can be made from chocolates or caramel.
Photo 16 – Bouquet of fruits Photo 17 – Bouquet of pine cones
How to make surprise candy?
This candy can be used as a decoration for the New Year tree or instead of a gift for any holiday. You will need to use a sleeve as the base for the candy. A sleeve is a cardboard base in the form of a cylinder for kitchen towels, cling film or foil, and toilet paper.
IMPORTANT: It is the sleeve that is filled with various surprises and gifts (sweets, small toys, lollipops, jewelry, notes, even money).
How to do:
- Prepare all the materials for work: you will need a sleeve, decorative paper, a piece of tape, streamer and the “filler” itself (i.e. a gift).
- Spread a sheet of paper on your desktop
- The sleeve must be filled with a surprise
- To prevent your gifts from spilling out of the sleeve while working, cover the ends of the “tube” with something (for example, soft toys-keychains, handkerchiefs, gloves or mittens).
- Start rolling the candy and secure the paper with tape at the end.
- Tie the tails (tips) of the candy beautifully with a serpentine and fluff it up.
What to put in the New Year's basket?
You can fill a gift basket with completely different items. A New Year's composition in a basket can only serve as a background for one valuable gift, for example, jewelry, a book, a toy or a gadget. The most popular gift for strangers and business partners is the New Year's food basket. It may consist of:
- seasonal and exotic fruits that a person rarely buys in everyday life;
- alcohol, the cost of which is limited by the donor’s budget;
- sweets, which can be either expensive chocolate bars or popular candies;
- preserves and jams in beautiful packaging;
- a set of good varieties of tea or coffee;
- tea set or quality Turkish tea;
- cheese slices;
- caviar and red fish of various salting;
- sausage delicacies;
- nuts;
- dried fruits;
- colors.
New Year's fruit basket
A fruit basket for the New Year will be a budget-friendly and at the same time spectacular gift. You can put a variety of sweet fruits in it that will please the recipient after a hearty holiday feast. You just have to choose dense and slightly green fruits so that they do not spoil before the moment of donation. Professional florists say that New Year's fruit baskets filled with:
- pineapple;
- bananas, with mini-sized fruits being more advantageous;
- oranges;
- kiwi;
- grenades;
- apples;
- tangerines;
- lemons;
- pears;
- avocado;
- mango;
- grapes
New Year's baskets with champagne and sweets
A more traditional option is New Year's baskets containing champagne and sweets. The cost of such gifts is calculated from the price of the filling itself. You can put regular Soviet sparkling wine and delicious sweets, for example, truffles, Raffaello or Ferrero Rocher. Then the basket will become a pleasant gift for colleagues. New Year's luxury gift baskets include real champagne produced in the Champagne region, the cost of a bottle of which reaches several hundred dollars, and elite Swiss chocolate.
New Year's baskets with tea
Lovers of tea ceremonies and coffee lovers can be given a New Year's set of their favorite drink in a basket. Tea leaves can be packed in paper bags, glass or tin jars with a New Year's print, or hidden in a pop-up Christmas ball. You can put a set of tea bags with different flavors. An excellent gift addition would be a pair of tea with a spoon or a coffee pot. Unusual sweets will add originality to the basket:
- figured marmalade;
- paste;
- sherbet;
- Turkish Delight;
- marshmallow.
New Year's flower baskets
A flower basket for the New Year will be a pleasant surprise for a woman. This gift will be appreciated by many representatives of the fair sex. Flowers can be placed on the New Year's table, then the whole room will be filled with a unique aroma during the celebration. Winter decorative elements will add a zest to the basket: fir branches and cones, candles, beautiful New Year's figurines of stars and angels.
Video: “New Year’s candy garland”
New Year is a time of tangerines, miracles and sweet gifts. These are the associations this holiday evokes. Everyone is in a hurry to decorate their home for the holiday to create a festive atmosphere in it. To decorate the Christmas tree, special toys are usually used, which can be bought in any store on the eve of the holiday. What to do if you want to create jewelry with your own hands? You shouldn’t deny yourself this pleasure, especially since it’s not difficult at all. Let's look at how to make a candy for a Christmas tree with your own hands from paper.
This fake can be used not only to decorate a Christmas tree, but also to decorate the whole house. If you want to go further, put some small gifts or competition tasks inside.
This idea is very simple, therefore, you can implement it yourself or with the support of your child. It will be a fun and productive time together.
You will need to prepare some materials; most likely, you already have them in your home:
- Colored paper, an interesting decoration will be made of corrugated paper.
- A simple pencil and scissors, maybe a stationery knife.
- Regular thread.
Step-by-step instruction
- Take a colored sheet of A4 paper and fold it along the long side (across) 6 times.
REFERENCE. From a sheet of A4 paper you will get a candy 12.5 cm long (this does not take into account the tails), and from an A5 sheet you will get a candy measuring 9.5 cm.
- Markings must be made on both sides. Then cut along its contour and unfold the workpiece.
- Now you should bend the workpiece upward at both ends of the workpiece, in the narrowest place. Next, do the same in the opposite direction, but only at the widest point.
- Now you need to roll the workpiece so that you get a paper candy. You can put the contents inside and tie the ponytails.
In front of you lies a beautiful and neat candy that you made with your own efforts. You can show your child the algorithm for creating such a decoration once, and then he will be able to do it on his own. In this simple way, you can make the required amount of paper candies so that there is enough to decorate the Christmas tree and for guests.
It has long been the custom in Rus' to decorate New Year trees with real gingerbread cookies and candies. And the candy wrappers are shiny, and you can eat them between games and dancing. All you need to do is tie a loop of thread to the tasty treat.
Today we will try to fit three children's pleasures into one craft: a toy, a sweet treat and a New Year's gift. All this is contained in a large paper candy, made with your own hands and placed under a Christmas tree sparkling with lights.
What to give for the New Year
The holiday brings a lot of trouble, but it’s a pleasant trouble:
- we run around the shops looking for gifts for family and friends;
- decorate the Christmas tree;
- creating a holiday menu;
- We select a wardrobe that must correspond to the symbolism of the coming year;
- We come up with a festive, entertaining program;
- decorate the rooms.
IMPORTANT! The most important tradition that has been going on since ancient times is making souvenirs with your own hands.
In this article we decided to talk about homemade New Year's bouquets. Pay attention to the following photo.
Photo 3 – Options for bouquets for winter home decoration
Agree, such a composition will not leave any girl indifferent and, certainly, will have a greater effect than a banal box of chocolates.
Photo 4 – Design idea: a bouquet of dried flowers is a practical decoration for the home all year round
Sweets for such a gift should be selected very carefully. Of course, it is advisable to know the taste preferences of the person to whom they are addressed, but if this is impossible to find out, then just buy good candies.
Photo 5 – Variant of composition from dried flowers
Any craft always brings more pleasure than just a purchased item. You can pack a souvenir beautifully with a little effort and imagination, and your loved ones will definitely appreciate your efforts.
Photo 6 – Bouquet of lavender Photo 7 – Using cotton in a winter bouquet Photo 8 – Bouquet made from natural materials
Candy for a surprise
- Gather some wrapping paper, tape, a toilet paper roll, clear tape, and scissors.
- Cut a piece of wrapping paper approximately 30cm by 30cm
- Place the sleeve in the middle of the edge of a piece of wrapping paper, stepping back a couple of centimeters, and secure the sleeve with tape as shown in the photo.
- Wrap the sleeve in wrapping paper and secure the seam with tape.
- Tie the edges of the wrapping paper near the sleeve on both sides with pieces of tape at least 40 cm long.
- With the other side of the scissors, curl the ends of the ribbon on both sides.
Now you have a wonderful candy!
Ideas:
- To decorate the Christmas tree, make a loop on one side of the ribbon.
- You can use this candy as a small gift wrapper.
- You can also make several of these candies, put souvenirs in them and play them among guests.
It does not have to be made from a sheet of cardboard measuring 21x38 cm. Enlarge the drawing by 1.5-2 times and you can put any gifts, a doll or a car inside.
Such New Year's paper candies can be hung on the Christmas tree like any other crafts, toys and garlands.
- To make this craft, take a rectangular piece of colored paper or cardboard and, with your own hands, draw it lengthwise into 7 identical stripes. Step back from the edge and mark 4 lines B and two A. Try to keep the patterns symmetrical.
- Cut out 12 diamonds and scallops along the edges of the craft. Bend the workpiece lengthwise along 6 axes and crosswise along lines B and A.
- Roll up a hexagonal candy, tie it with a beautiful thread and hang it on the Christmas tree.
Today we are making delicious New Year's crafts that can be hung on the Christmas tree.
Gifts don't just need to be invented, made or bought. As experience and research by psychologists show, recipients experience 30% of positive emotions from interesting holiday packaging even before opening it. Wise people have long assured us that the path to the goal is more important than the goal itself.
This means that if your gifts, crafts, candies or anything else placed under the Christmas tree are packaged beautifully and originally, the effect will increase by a third. It's not hard to check. Let's make this huge candy.
You will need:
- cardboard;
- a piece of silk;
- satin ribbon or braid;
- sequins.
Work order
- Draw the cardboard into equal 7 stripes and bend the cardboard along them.
- Make a hexagon by securing the cardboard with a stapler or glue.
- Tie it with fabric, pulling it on one side.
- Place your gift inside the tube and tie the candy with ribbon on the other side.
- Now you can decorate it. Glue satin ribbon or braid, attach sequins.
- Place a huge candy under the Christmas tree.
You can make gift wrapping in the form of candy of a different shape. To do this, just take a regular “Bylina” or “Alyonushka” candy, unfold it and transfer all the fold lines onto a sheet of cardboard, but increasing all the dimensions by 10 times. The storage of such huge candies under the Christmas tree in itself will cause a storm of positive emotions among the children.
Useful tips
Almost all people love sweets, even if for some reason they have to give it up.
And yet an unexpected surprise in the form of sweets in a beautiful box
, which looks like one big candy, will please anyone.
Standard packaging is boring, but do-it-yourself
unique.
To create this paper candy
, you won't need much time.
Here are just a few options for making beautiful candy-shaped packaging.
Cup assembly process
The process of creating a floating mug is not at all complicated, but there are several important nuances that need to be taken into account when creating it.
The main secret in creating a flying bowl is to choose the right tea pair. The cup and saucer should not be too heavy. If you take this condition into account, it will be easier to create a flying bowl!
We construct the base of the floating cup; this is the element that connects the saucer to the cup. To do this, take a wire of the required length. It is important to note that the distance between the bowl and saucer should be approximately two cups. With these parameters, the flying cup will look most balanced.
Inside the bowl we form a loop from the wire, the diameter of which should be 2-4 cm. This will help to achieve better fixation of the wire in the cup. We twist the second end of the wire into a flat spiral in two or three turns. This way we will get a kind of stand, which we will fix in the saucer.
The tilt radius of the resulting structure should not exceed 45 degrees, otherwise the structure will be unstable!
Next we work with the resulting wire structure.
Polymorphus is the best material when making a flying cup.
Take a piece of polymorphus and immerse it in hot water for 20 seconds. During this time, the material is converted into soft plastic.
We stick the resulting plastic, like plasticine, around the base, giving it the desired shape. If the plastic hardens before you finish the job, simply dip it back into hot water. The prepared base will completely harden within 15 minutes.
If you don’t have this material on hand, you can use modeling compound. An alternative to these two materials is masking tape, which is simply wrapped around the wire base. Or you can wrap the wire with felt or other fabric, after coating it with glue.
An important aspect is to constantly try on the base on a saucer with a cup in order to spot any flaws in time!
You should pay special attention to the edge of your cup in the place where the structure will be attached!
In this place it is necessary to make a kind of step in the form of a support. This way the structure will hold much more securely.
Corrugated paper candies
This origami candy can be used to decorate gifts, cards, home or Christmas tree.
It's very easy to do.
You will need:
Corrugated paper
Decorations
1. Prepare a sheet of corrugated paper and fold it in half vertically.
2. By eye, divide the paper into 3 equal parts. Horizontally bend the 2 extreme parts towards the middle.
3. Now turn the workpiece over and create 2 folds on each side towards the center.
4. Turn the workpiece over. Fold its edges into triangles (see image).
5. Pull the ends of the candy.
6. You can decorate the paper candy with ribbons (with which you can hang it on a Christmas tree, for example) or draw various patterns with felt-tip pens.
Flying cup - creation step by step
You will be amazed at how easy it is to assemble this fantastic New Year's composition.
First you need to secure the cup in “flight”. If you use a wire, wrap it with colored cardboard/paper or fabric to, firstly, hide the wires, and secondly, increase the surface on which the elements of the composition will be glued.
We do the same thing with the fork - we increase the area on which the decorative things will be glued. The fork seems like a more convenient part, and it actually is. However, the wired structure has its advantages - the structure can be made longer (or rather, higher), and therefore more decorative.
Glue one part of the plug/wires to the saucer, the second to the cup. We fasten it firmly so that the cup, together with the element on which it rests, does not come off.
We begin to secure decorative details. Since we are making a New Year's flying cup, we first attach a pine or spruce branch. In principle, it is not necessary to glue it; you can also tie it to a fork or wire base. Fluffy needles will hide them underneath.
We attach New Year's figures and toys, tinsel, ribbons, etc. We place the heavy decor on a saucer.
Our New Year's surprise cup is a real beauty. We can admire our work, decorate our home with it, or give it to someone we especially love.


