Our dear readers and authors, we want to ask for your forgiveness... On New Year’s Eve we always organized master class competitions with prizes and diplomas, but last year we interrupted this tradition. And that’s how offended the Mouse was with us! What confusion and confusion it brought into the life of the entire planet. So now all hope is that the Ox, stubborn and economical, will fix everything and fix it. The main thing is to show him the right direction :).
Therefore, you can send your works for the New Year now. We will send diplomas immediately, and the author of the best New Year's master class at the end of December will receive the traditional prize in the amount of 2021 rubles. We will write more about the competition in September.
Here we will post your photos and master classes on making gifts for the new year 2021 - bulls, calves, cows... you can even have bison :). You can send your works to the competition using the form at the bottom of this page or here.
How to make champagne clothes from fabric
Sewing real champagne clothes using fabric with your own hands is an easy task that an inexperienced craftswoman can handle. To do this, you should select scraps of fabric and decorative items that you like. The color of the groom's suit can be not only black, but also burgundy, dark blue, and purple. It is better to dress the bride in traditional colors: white, pale pink, sky blue, gold and other pastel colors.
Necessary materials
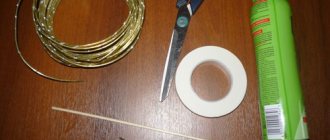
To make your own champagne clothes for a wedding, you will need the following materials:
- 0.5 m of satin and tulle for the bride;
- beads, beads;
- satin ribbon 2.5 cm wide, 1 m long;
- scissors, threads, pins, needles;
- candle;
- ruler;
- iron;
- A4 sheet;
- black satin 29x20 cm;
- black satin ribbon 2.5 cm wide and 0.5 m long;
- burgundy ribbon 1.2 cm wide, 0.5 m long;
- two white ribbons: one 5 cm wide, 0.3 m long, the other 1.2 cm wide, 0.3 m long.
Stages of creation
- First, let's take on the champagne clothing, symbolizing the bride. We cut out a piece of A4 size satin fabric with our own hands and singe the edges with a candle.
- We measure the circumference of the bottle, measure it on the satin rectangle, draw a line. Fold the fabric in half and sew it together.
- We put champagne in the resulting case, mark the side seams with pins where the bottle narrows, stitch it, cut off the excess, singe the edges.
- We fold the top edge and trim it with beads or seed beads.
- Draw a semicircle for the skirt, the length of the hem is 16 cm, and the inner semicircle is 26 cm, cut out the pattern.
- We attach the image of the contours of the skirt to the fabric, trace it, giving allowances.
- We cut out the skirt and singe the edges with a candle. Sew on the inner circle.
- For the train, cut out the pattern on paper with the dimensions shown in the photo.
- We cut out the train template on the fabric, giving seam allowances, and singe the edges with a candle. We attach the train to the dress and make a fold.
- We cut out a rectangle from the fabric that is 2 A4 sheets long and 4 cm wider than the sheet.
- We connect the train and the cut out rectangle of fabric from the wrong side with a seam.
- We distribute the rectangle along the length and width of the train, stitch it, leaving a small area to turn the fabric inside out.
- We gather the upper part to the size of the train, forming folds, and stitch it.
- For the petticoat, cut out 3 rectangles 7 cm wide and 40 cm long. The first rectangle will serve as the top: connect its edges to the bottle so that it fits tightly. We sew the remaining rectangles and make ruffles from the resulting strip. We attach it to the top part and iron it.
- We connect the petticoat to the base of the dress.
- We put on a train and a skirt on top and connect it with a seam.
- We make a belt and a bow from the braid.
- We cut out a square with a side of 50 cm from tulle, fold it as shown in the photo and fix it.
- We sew the tulle to the elastic band and decorate it with beads and flowers. We put the veil on the bottle's head.
- To create clothes for champagne, symbolizing the groom, we make a cover measuring 29x29 cm with our own hands.
- For a shirt, we wrap a wide white braid around the neck and stitch it at the bottom.
- We take off the resulting shirt, turn it inside out, apply a narrower braid, and sew it on.
- Turn it right side out and iron the resulting collar.
- We put the burgundy braid on the neck of the champagne like a tie.
- We put a black cover on top, step back 0.5 cm from the edge up, and repeat the contour with soap along the entire length.
- We cut off the excess and singe the edges. Sew the collar on the wrong side with black braid and iron it.
- We put on the jacket and sew it to the shirt under the collar.
- We sew beads to the jacket instead of buttons.
Made from plasticine
Goby
2021 will pass under the auspices of the bull. In this master class from Anna we will make a funny bull from light plasticine.
For sculpting you will need:
- Lightweight plasticine in black, white, beige and yellow;
- Stacks.
We tear off a piece of black plasticine and knead it. Roll into a block to smooth out all the cracks. Then we narrow one end and flatten the other.
This is a blank for the head. Now we will make the muzzle. Roll out an oval from beige or pink plasticine and cut it in half.
We attach this part to the head part. And we make the nostrils in a stack.
Now roll out a small thin sausage from plasticine of the same color. It is needed for the horns. Now we attach the middle of the sausage to the head, and lift the edges up.
Now let's hide the horns with bangs. We roll up very small and thin parts and stick them one by one from the back of the head forward through the horns.
Now you need white plasticine. Roll 2 small circles and flatten them so they are flat. We attach them to the place of the eyes. And on top we will attach very tiny black details instead of pupils. Roll out 2 small and thin strips from white plasticine and attach them to the place of the eyebrows.
All that remains is to make the body and legs. For the body, tear off the black plasticine and roll up the part. From the side of the head we make it a little narrower.
The paws will all be simple and identical. Roll into small pieces.
In place of the ponytail, we will attach a small, thin strip, which we will flatten a little at the end to form a tassel.
We attach the paws in place, moving them slightly to the side from each other.
Attach the head to the body using a toothpick.
The plasticine bull is ready! All that remains is to make a nose ring. We mold a thin, short strip from yellow plasticine and place one end in one hole of the nose, and the other in the other.
Bull made of plasticine
In this lesson you will learn how to make a bull from plasticine. This is a children's craft that will complement a homemade toy farm. The domestic cattle looks warlike, and its size and horns are especially impressive. A small copy will not be intimidating, and sculpting will be interesting.
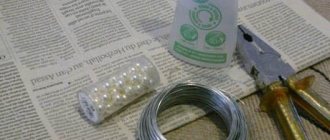
To create a plasticine bull you will need:
- several bars of plasticine (black, brown and beige colors are suitable);
- plastic spatula;
- matches.
How to blind a bull step by step
- Since you need to make a large toy - a copy of a bull, you will need quite a lot of plasticine. You can mix brown and black bars to create more mass. It is better to make some parts and horns beige.
- Mix the bars piece by piece until the color is completely uniform or leave stains, because this color of the animal is also suitable. At this stage, it is more important to knead the mass well rather than mix the color.
- Turn most of the prepared lump into a massive body. Sculpt a piece that expands on one side. Smooth the surface.
- Make a ball. Turn it into a head. Use your fingertips to press the holes for the eyes. Glue a beige nose to the front. Press the nostrils with a match.
- Glue on the eyes themselves. Also prepare long horns, ears - small diamond shapes, hair if you want to give the bull a hairstyle.
- Assemble all prepared parts. You will get the head of a bull with horns and ears. This is a separate part of the craft.
- Now you need to fasten the head to the body. A match will help you do this reliably.
- The remaining plasticine is needed to make four legs and a tail. Compared to the body, their size will be small. Fashion a thin thread and glue a tassel to the tip. Also make the legs in the form of small sausages. If the plasticine is too soft, then you need to mask the matches inside the legs.
- Glue the limbs and tail on the bottom. Smooth out the craft, hide all transitions. The plasticine bull is ready. This craft is easy to repeat with children. You can turn the figurine into a cow by shortening the horns and attaching the udder to the belly.
Calf made of plasticine. Modeling lesson
You will learn how to make a small bull from plasticine from this lesson by Elena Nikolaeva. A modeling master class will help kids create an animal figurine. As you know, the goby is a cloven-hoofed animal. For modeling, brown plasticine is suitable, as shown in this case, or any other. First, decide on the main parts that you will need. To copy the planned figure, you need to show the horns, wide muzzle, long legs with hooves and tail. Let's move on to the visual sculpting process.
To complete the figure you will need:
- plasticine: brown, beige, orange, black, white, blue;
- a tool in the form of a toothpick or thin spatula.
How to make a bull from plasticine step by step
- Take a block of plasticine for work, for example, brown.
- Start by thoroughly softening the prepared mass. Hold the block in your hands, warming it, then gradually knead it.
- For convenience, immediately divide the prepared piece into parts that will be necessary to create the figure. Remember that a bull must have a head, a torso, 4 legs and a tail. If one block of plasticine seems not enough, then mix black or lighter beige into it, kneading the mass and obtaining other shades.
- Turn the piece intended for the body into an almond-shaped piece. Glue a bump on top and scratch it with a spatula, showing the furry back.
- Make the head oval and attach a rather large beige cake to the front of it. Use a tool to make the nostrils.
- Glue on the eyes - white cakes with blue pupils and eyebrows - black lines.
- Also glue ears and horns to the head.
- Modify the remaining pieces of plasticine. Sculpt 4 legs and a tail with a tassel at the end.
- Glue the prepared parts to the body and smear the plasticine with your fingers at the attachment points.
- Add black cakes to the feet to create hooves. Cut each of them into a stack. Attach the head to the body.
- The plasticine figurine of a small bull is ready.
"Spotted symbol of the year." Miloslav's Swan.
Multi-colored plasticine, decorative element (eyes). Symbolizes the volatility of the next year and unpredictability.
Recommendations for decorating bottles with ribbons
Decorating wedding champagne is easy to do with your own hands. The main thing is to know some nuances and strictly follow the step-by-step master classes. The design should be festive and bright - satin ribbons are best suited for this.
General rules for decorating champagne for a wedding with your own ribbons:
- Any such decoration begins with the ribbon being attached to the surface of the bottle using bias tape. You should start from the neck or just below its level.
- There is no need to immediately cut a certain number of pieces, since their length will vary depending on the bends of the bottle shape.
- The bottom edge of the last glued tape is hidden under the edge of the previous tape. Thus, the decoration is built over the entire surface, to the very bottom.
- The decorative element does not have to be located at an angle. You can wrap the bottle crosswise and hide the imperfections with thin lace.
- The neck can be left open, or you can wrap it completely.
- Only transparent glue is used. You should coat it carefully so that after drying you do not find unsightly stains.
If the decor with ribbons will only partially cover the bottle, then you need to remove the labels in advance. To do this carefully, the bottles need to be briefly immersed in warm water - the glue and paper will soften and be easily removed.
Photo of decorating champagne for a wedding with your own hands using ribbons
Original wedding decor on bottles with satin ribbons
How to decorate wedding glasses yourself
Glasses for the bride and groom should be decorated in the same style as the bottles using similar decor and materials. The lower part of the leg and the middle of the bowl are decorated. The top of the glass remains empty. It is also advisable to leave the stem itself undecorated so that the glass is comfortable to hold in your hands. The design uses a more laconic design with an emphasis on the key elements of bottle decor. For example, it could be a small composition of flowers that dominate the champagne or elegant bows. Also, glasses can, in miniature, replicate the clothing of the bride and groom’s bottles.
Video - decorating champagne bottles for a wedding:
Of course, to save time, you can order decor from professionals. But the creative process itself, putting your soul and positivity into a future product will bring pleasant emotions and pleasure from contemplating the beauty created with your own hands.
“Bulls” for a wedding with your own hands: preparing traditional decor.
Young people of the 21st century use various tricks and tricks, looking for new ideas for holding a wedding. Styles, decorations, decor, etc. - people try to do all this in their own way, different from others. And often young people prefer to make many decorative items with their own hands. However, in the pursuit of originality, newlyweds often forget about a nice tradition - wedding “bulls”. Moreover, it is incredibly easy to make “bulls” for a wedding with your own hands.
So what are these bulls? These are bottles of the bride and groom’s favorite alcohol, beautifully and festively decorated using various materials. “Bulls” usually stand on the newlyweds’ table, symbolizing a strong union. These bottles are not opened at the celebration itself; their purpose is to celebrate the first wedding anniversary, as well as the birth of the first child.
Bull bottles can be either made by the newlyweds themselves or given to them by guests.
Types of decor for wedding bottles
This lovely holiday accessory can be made using any craft technique. The most commonly used materials are satin ribbons, artificial flowers, fabric, lace and stained glass paints. Based on the materials used, decor is divided into the following types:
- decoupage;
- engraving;
- glass painting;
- decoration with bows, feathers, beads;
- decoration with natural flowers and leaves;
- making flowers from metal plates, polymer clay and textiles;
- making wedding or national costumes.
The main requirement for decor is that it must correspond to the level of solemnity, be in harmony with the dishes, the decoration of the hall, and the outfits of the newlyweds. Pompous gold engraving is inappropriate for a wedding in Provence style. Intricate roses, pendants, and lace will fit perfectly into a sophisticated ceremony in aristocratic decoration.
Real masterpieces are obtained by using allusions to a profession or hobby during marriage. A bottle entwined with rope, miniature anchors and steering wheels will suit a sailor groom, and the bride’s passion for travel can be emphasized with tiny images of famous landmarks.
Let's start the lesson
Making “bulls” yourself is not difficult. The main thing is not to forget about the style of the wedding. After all, elegant bottles will occupy an honorable central place on the newlyweds’ table all evening, and they will receive a lot of attention from the guests.
The bull bottles will remain in the newlyweds’ homes for a whole year, also occupying a prominent place. So at the stage of thinking through the details, this is worth taking into account.
You can decorate bottles in different ways. It can be ribbons, fabric, jute, stained glass paints, and decoupage. There are a lot of options; on the Internet you can find many step-by-step master classes, thanks to which you can easily make something interesting and original. We invite you to try making the “bulls” of the bride and groom using ribbons with us.
- satin ribbons (we remind you that colors should be selected depending on the color scheme of the wedding);
- scissors;
- glue gun;
- guipure;
- decorative elements (rhinestones, beads, etc.);
- two bottles.
Progress
- Let's start working step by step by making the groom bottle.
First of all, measure the required length of the white tape and fold it in half. One edge should be lower than the other.
Iron the strip and collar of the shirt and glue it to the bottle.
Now we will glue the white tape, covering the lower part of the collar with it.
Next we move on to dark satin. Let's make a tie.
Time to make a jacket from dark ribbons. Measure the length and glue the tape.
Thus, we seal the area with tapes up to the flat part of the bottle, making a “side” so that we can further seal the tapes not obliquely, but horizontally.
Next, we twist the tape around the bottle, not forgetting to lubricate it with glue first.
Now we will glue the remaining ribbon-side, and white beads on it.
Glue a white narrow ribbon to the bottle at a 45-degree angle and decorate the corset with white ribbon.
We will cover the remaining empty lower part in a circle with a wide white ribbon, and glue guipure on top of it.
You can also cut flowers, leaves or other decorative elements from it.
Add rhinestones and beads to the bride's dress.
- Let's make a bow connecting the newlyweds.
First we will make two bows, one of which will be larger than the other, as shown in the photo. Let's sew them together and decorate them with dark ribbon and rhinestones.
Now we will make a headband holder. To do this, glue a thin white one to the dark tape, which will be longer in length than the dark one by 5-10 cm on each side. Let's tie a knot and glue the bow onto it.
And finally, the final stage of our work - we put a bow on both bottles, tying the newlyweds with family ties.
Your DIY wedding gift or decoration is ready!
Decorating a bottle for a wedding with your own hands using polymer clay flowers: instructions with photos
You can make an elegant bottle of champagne for your wedding using polymer clay flowers. They are sold in craft stores.
To work you need to prepare:
- a bottle of champagne previously removed from the label;
- a can of white paint;
- tube of glass contour;
- ready-made polymer clay flowers;
- white beads;
- glue.
- Blow the bottle white with a spray can and let it dry completely.
- Using a contour on the glass, mark the location of the half-hearts on the bottles, draw decorative stripes, curls, etc.
- Glue flowers and beads along the outline of the heart.
- Decorate the top of the bottle with a satin ribbon bow and the beautiful champagne bottles are ready.
Heroes of the occasion
One of the most common design options is champagne, symbolizing the bride and groom. For this purpose, bottles are dressed up in a tailcoat and a wedding dress. Not real, of course, but symbolic.
The dress and tailcoat can be sewn separately and stretched over champagne bottles
It is important here that they do not bunch up and cover the entire surface of the glass. Materials can be any fabric from organza to felt
A veil looks especially symbolic, and the bottle-groom can be given a top hat.
An outfit made from ribbons is neat and beautiful. In this case, the costumes will definitely be on time and, if necessary, you can add a couple of ribbons to cover the entire surface. To make a groom bottle, you need to make a collar from ribbons:
A tie will also come in handy:
Next, glue several overlapping ribbons to make a shirt:
Then make a tailcoat from ribbons. Colors as desired. The second half of the bottle can be glued not diagonally, but wrapped with wide tape. Complete the decoration with rhinestones imitating buttons, as well as a symbolic scarf or boutonniere.
The bride's outfit is done in a similar way. The top is glued from short ribbons, but it is not necessary to make a collar. The bottom can be covered with a wide ribbon and lace, or you can also use a narrow ribbon to reach the bottom of the bottle.
It is advisable to make a full skirt, for example, from organza. Decorate it as desired.
Well, veil:
Beautiful decoration with ribbons:
Origins of the tradition
The word “bulls” for the beautiful bottles on the table, of course, is not the most beautiful one chosen. But it takes its roots from the Don Cossacks. In their villages, it was customary to give a wedding gift of a cow and a bull, tied by the horns with beautiful ribbons. They were given by parents so that a young family could feed itself in the first year, and a year later give relatives fresh milk. This was considered a sign of a strong family, a sign that the young were coping with family life.
Of course, now it would be strange for city residents to receive livestock as a gift. But the tradition, although modified, remained firmly in our heads. And the current “bulls” look much more beautiful. The alcohol used is usually champagne or wine, but you can also take different types of alcohol: one bottle is the bride’s favorite drink, the other is the groom’s.
Also, wedding traditions, along with “bulls”, include a wedding loaf, “shishki” - small buns that are distributed to guests in order “not to cause problems in family life”, bonbonnieres - gifts or compliments to guests (as a rule, these are small candies or chocolates with notes of gratitude), drinking glasses, and so on.
How to easily decorate champagne in the style of “Bride and Groom”
The most common style of champagne decoration is Bride and Groom. This is very easy to organize.
We will show here the technique of decorating with satin ribbons, and you can see other options in the video below.
- You need to wrap the bottle with tape. It's easier to do this in small sections. To do this, you need to measure the length of such segments starting from the narrowest point of the bottle (look at the photo).
- Next you need to glue all these tapes. Apply glue to the entire bottle and stick the tapes so that one edge overlaps slightly with the other edge of the tape. It will be beautiful to glue the tapes in such a way that a triangle is formed at the junction.
- The joints of the tape are sealed with a strip.
- The “Bride” bottle is usually covered with white ribbons, but in some cases red or pink ones can be used.
- For the groom bottle, you can use a black, blue, light blue or lilac ribbon.
- To ensure that the clothing completely copies the groom's suit, 1-2 strips of white tape are glued to the top, which represents the collar of the shirt.
- Decoration for bottle clothing can be supplemented with flowers, bows, rhinestones, beads and other decorative elements. The photo shows different options for decorating bottles with ribbons.
Champagne decoration
Making wedding champagne for the bride and groom with your own hands is not at all difficult. You just need to use your imagination and apply a little diligence. But how impressive will a masterpiece made by yourself look? Decor options and simple recommendations for decorating will be outlined step by step below in the article.
In the meantime, watch an interesting video - master class “do-it-yourself wedding champagne for the bride and groom”:
Why decorate champagne bottles? Firstly, they look very solemn on the table, emphasizing the festive event and the heroes of the occasion, in contrast to the custom of simply placing champagne in a basket. Secondly, the newlyweds will take these bottles with them at the end of the ceremony to open on their wedding anniversary and during the first addition to the family. All this time they will be present in the interior and remind you of the exciting wedding moments.
Photo of DIY wedding bull decorations
But how to decorate bottles for a wedding with your own hands?
In this case, handicraft elements come to the rescue and help you create a unique bottle design.
The newlyweds can come up with all sorts of interesting things - small crafts, origami, ribbon design, and anything else that comes to mind. Such bottles turn out to be very beautiful and aesthetically pleasing and will fit into any interior.
Decorating with ribbons is a hand-made item that requires special attention when decorating. You need to do everything exactly according to the instructions, since you can ruin a lot of material and still not do anything meaningful.
You will need to watch master classes and read the step-by-step instructions.
The easiest way to make a decoration with your own hands is to “dress” the bottle in fabric elements that will decorate it beautifully and easily. This is less popular, but very interesting and practical, and most importantly, original.
You can choose any fabrics, colors, make different designs. This method is one of the most interesting today, which you will probably like too.
Take part in a competition
We invite you to take part in our competition:
In order not to forget the page address and share with friends, add to your social network:
More interesting:
See also:
Soft toy “Bull” (knitting and crocheting)
Knitted bulls and calves are symbols of 2021. Work for our “Dolls and Toys” competition. And the first to the new...
Gifts for the year of the ox: mug warmers, teapot and potholder
Knitted gifts for the year 2021. We offer you new master classes from Anna on how to knit…
Tags: 2021 year of the ox
How to sew holiday covers
Velvet wedding champagne vestments look especially expensive. Any container decorated in this way will turn into a center of attention. The simplicity of the pattern, along with the availability of materials and tools, are among the advantages of this decoration.
Required:
- two pieces of velvet white and black;
- threads to match the fabric;
- cardboard or pattern paper;
- pencil, scissors;
- beads, lace, organza.
Stages of sewing covers:
- Place the paper on the bottle and take measurements with a pencil;
- Draw the pattern on paper, cut it out with seam allowances;
- Along the contour, the pattern is applied to the fabric. The case for the “bride’s” bottle is cut out on white velvet, and for the “groom’s” champagne - on black.
- The material is cut out according to patterns, sewn along the contour from the wrong side, and turned inside out.
- They put the prepared outfits on the bottles.
- Champagne for the “bride” is decorated with an organza veil and lace and beads are attached with a glue gun.
- The “groom’s” bottle is decorated with beads and ribbons.
Velvet can be used to decorate newlyweds' glasses, money chests and bouquets of flowers. Velvet covers are then used repeatedly; they will come in handy at other important events.
DIY champagne decoration for a wedding with satin ribbons
Decorating a bottle with ribbons is the simplest and most affordable way that does not require special skills or high costs. Despite this simplicity of the decor, the result will be spectacular and bright if you carefully follow all the steps in the master class for decorating a champagne bottle with satin ribbons.
What you will need for work:
- ribbon: blue and golden brocade;
- heat gun;
- a bottle of champagne;
- scissors;
- additional decor: beads, lace.
Step by step execution:
- Try the blue satin ribbon on the neck of the bottle and cut it to the desired length. Apply glue and attach around the throat, placing the right end of the decorative item over the left.
- The second tape will be longer, as the bottle begins to expand towards the bottom. Cut the required length and glue it in the same way, slightly covering the edge of the first tape. Attach 2 more ribbons in the same way.
- The fifth and sixth row will be made of brocade ribbon. The technique is absolutely the same.
- Glue a layer of brocade ribbon to the very bottom of the bottle, wrapping the champagne crosswise. Cover the remaining space between the top and bottom of the bottle with a blue piece of paper - its ends should connect to the back of the champagne.
- The joint is unlikely to be neat, so you need to cut off the blue tape (about 10 cm). Coat the edge with glue and push it under the very bottom layer, press. Then stretch it upward and glue it, covering the joints.
- Add additional decorations to the front of the bottle, arranging them in a random pattern.
The wedding champagne made from ribbons is ready - you need to wait until the glue has completely dried and you can bring the “bull” to the holiday.
Champagne in blue and gold with peacock feather