Home smoking of products is very popular among gourmets and food lovers. Smoked meats can be prepared at home using a homemade or factory (professional) smokehouse. The electric version of the installation copes with the task perfectly. Many people want to save money and make an electrical smoking device themselves.
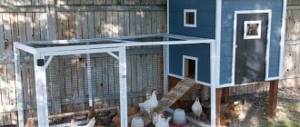
An example of a professional electric smokehouse. Compact factory models are in great demand.
Benefits of cold smoking
This method of cooking takes longer than hot smoking. The aroma and taste are preserved better, and the products will not spoil for a long time . Setting up a smokehouse in your garden is not that difficult. You don’t have to build a complex oven; scrap materials are suitable for manufacturing.
Cold smoking is mainly used for fatty fish and meats. As a result of processing, food loses up to thirty percent of its liquid and acquires a characteristic aroma; the surface dries out slightly and becomes a little greasy. Before smoking, the products are salted. Small fish are smoked for about two days, and large fish - up to seven . Cold smoked products are always tastier than regular ones.
Advice. To ensure that the product has a uniform color, during cooking, ensure that the smoke flows evenly into the chamber. Maintain the desired temperature, regularly moisten the burlap that serves as a filter with water.
DIY smokehouse with an electric smoke generator after modernization
A smokehouse made from an old electrical panel with dimensions of 1200 x 600 x 250 mm (with legs) worked for me for several years. But it was a little too hot for lard and meat, especially in the summer. To lower the smoking temperature, I decided to increase the height and, therefore, the internal volume of the cabinet.
The improvements included welding the smoke generator compartment at the bottom, installing a padlock on the bottom door, and strengthening the support legs.
The finished cabinet with dimensions 1490 x 600 x 250 mm (with legs) was returned to its permanent place in the corner of the yard.
The smoke generator has also been improved. The heating elements were lowered to the bottom of the trough so that the fragrant lumps would not hang on the heating elements.
The heater is easy to make.
1. A trough is bent from a rectangular piece of sheet metal (S = 1 mm). Its length must correspond to the air heating elements.
- Two cheeks-legs are cut out of sheet metal (S=1 mm) and welded to the trough.
- Two pairs of holes are drilled in the cheeks and through grooves are cut for installing heating elements.
- A copper serial connection jumper and a cable through copper radiator plates are attached to the heating elements.
- Protective boxes for the tails of the heating elements are made and attached with screws and nuts to the cheeks of the heater body.
- The heating element fixation plates are bent and crimped.
The positive qualities of series-connected air heating elements are their heating, which is optimal for smoldering raw wood, the impossibility of dense lining and excellent convection.
The power must correspond to the size of the smokehouse and the capabilities of the home electrical network. In my case, the optimal power is 2 x 1.5 kW.
The third part of the structure is a drip tray consisting of three catch trays. which prevent melted fat from falling onto the hot heater. And the welded inclined ribs easily allow smoke to pass through and even mix it.
Making a drip is also easy.
- Three identical trays slightly longer than the width of the cabinet are bent from rectangular sheet steel blanks (S = 1 mm).
- Four connecting ribs are cut from the same steel.
- By welding, everything is welded to strong points so that the upper tray overlaps the edges of the lower ones, and the smoke mixing ribs are inclined towards draining the fat.
After upgrading the unit, a testing period begins. I hung 10 kg of salted and soaked roe deer meat in two rows on reinforcing bars at the top of the cabinet. I placed sawn raw plum flasks into the smoke generator trough, covered them with plum sawdust and placed them in the lower compartment of the smoking cabinet. I turned on the heater.
After four hours, the heater was turned off, and the smoldering-smoking process continued by inertia for another four hours. I left the meat until the morning.
A hunter I knew took samples. He approves of the taste properties of smoked wild meat!
© Author: Anatoly Matveychuk. Photo by the author
TOOLS FOR CRAFTSMAN AND CRAFTSMAN, AND HOUSEHOLD GOODS VERY CHEAP. FREE SHIPPING. THERE ARE REVIEWS.
Below are other entries on the topic “How to do it yourself - for a homeowner!”
- DIY chair made from cans Chair made from cans for the terrace I saw…
- Shelf for charging gadgets with your own hands And charging at hand I bought an outlet...
- Do-it-yourself shoe drying shelf: PHOTO + DRAWING HOW TO MAKE A SHELF DRYING RAIL FOR…
- DIY punt boat (photo and drawing) How to make a boat with your own hands...
- Do-it-yourself mini doll set - master class Set for a flower tea party with your own...
- Do-it-yourself mobile workbench - PHOTO PORTABLE WORKBENCH WITH YOUR OWN VICE...
- DIY cane from a mop with your own hands HOW TO MAKE A CANE FROM AN OLD...
Subscribe to updates in our groups and share.
Let's be friends!
With your own hands > Stoves, fireplaces, barbecues > Do-it-yourself electric smokehouse based on heating elements (Drawings + photos)
The simplest film smokehouse
Place a metal container for coals on a flat surface. At a height of about two meters above the coals, slats are placed on which the film will be held . Fasteners with hooks are hung from the crossbars, on which fish or meat will be smoked. After the fish are hung and the process of smoldering coals begins, the entire structure is wrapped in film. It is necessary that it does not come into contact with the firewood container, and at the same time the smoke does not come out. A film smokehouse is inexpensive, and you can build it within an hour.
How to smoke if you don’t have a summer house?
If you don’t have a summer cottage and enough space to accommodate a barrel smokehouse, you can do without them. You will need: an unnecessary 20-40 liter pan, a frying pan with a slightly smaller diameter, 1-2 m of wire. Tools: drill with a thin drill bit, metal saw.
The work is performed in the following order:
- you need to drill holes in the bottom of the future smokehouse;
- We repeat the same with the walls;
- pour sawdust into the frying pan, place the pan on it, then the entire structure on the gas stove;
- load the future smoked meats and close the lid tightly.
The process of assembling a smokehouse for lard from a pan
Since the process will take place in an apartment, it is desirable that smoke loss be minimal. To do this, a heat-resistant massive weight is placed on the lid to ensure tight pressure. For example, 2 glass jars of water, each with a volume of 2-3 liters. The drill is taken with a diameter close to that of the wire. After all, its tight fit to the edges of the holes will increase the tightness of the home smokehouse.
How to build a smokehouse from a metal barrel
Hot and cold smoked smokehouses are similar in structure. The design consists of two parts - a firebox and a cooking chamber. They are connected to each other by a chimney. The longer it is, the lower the smoke temperature. The difference between hot and cold smoking devices is the length of the chimney. There are many known designs, but they all have a common design. To build from scrap materials you will need:
- bricks
- mortar for stove masonry
- metal barrel
- pipe
- hanging hooks
First, they dig a hole about 50x50 centimeters, half a meter to a meter deep. They line the hole with bricks and firewood will burn inside. The pit is connected to the barrel by a chimney that is at least two meters long. It can be made from a metal pipe (cast iron is ideal) or you can dig a trench 25x25 centimeters and line it with brick. The top of the trench is covered with fireproof material and filled with soil.
Advice. If you have a small area and cannot install a pipe of the appropriate length, make it curved.
The barrel is placed on a brick or log stand. If you do not prepare the base before installation, the soil will become soggy during preparation due to the condensation that forms . There should be a grate at the bottom on which you place a wet cloth and moisten it during the cooking process so that the ashes do not fly.
A lid for the barrel is required. Under the influence of temperatures, the sheet used for shelter may become deformed. It is advisable to place a heavy object on the lid. If the barrel is not closed tightly, smoking will not proceed properly. It is advisable to mount a thermometer on the wall of the smoking chamber.
One of the key points when building a smokehouse for cold smoking is the distance between the firebox where the wood is burned and the smoking chamber should be at least two and no more than seven meters. The firebox is located below the smoking chamber, otherwise there will not be good draft. Often the smoking chamber is located on a hill or on a steep bank.
Chimney installation. When a hole for the firebox is dug, an iron sheet is placed at the bottom for more even combustion.
You need to connect the chimney to the barrel so that the entry is about twenty centimeters. The connection between the smoking chamber and the chimney is sealed with clay mortar.
How to make a barbecue in the garage?
To make a structure with your own hands, you will need the following components:
- Firebox with internal wall lining using refractory bricks,
- Cast iron or steel grill grate, which will need to be secured to the corner ledges,
- Monolithic concrete base within 8-10 cm, placed on compacted crushed stone,
- Bricks for building the walls of a barbecue in the garage with your own hands,
- An ash pan made of sheet metal for storing fuel.
Stages of building a smokehouse as a free-standing building
First, the site for the construction of the structure is cleared. When smoking, a stable temperature regime is important. The amount of firewood used should be no more than 25 percent of the total mass, the rest being sawdust and wood chips. Cooked products retain their dense texture and elasticity and can be stored for a long time.
Another way to make your own cold smoked smokehouse that will decorate your area. You need to dig a small hole in the soil with a diameter of about 70 centimeters. Place a steel sheet underneath, never galvanized. Next, bricks are placed in a circle, as in the construction of a round oven, and secured with cement mortar. The top can be covered with natural stone if this is combined with the design of the garden plot. A hole is left for the chimney, which is a trench dug in the ground, up to three meters long, which is preferably lined with brick. The trench is covered from above with sheets of fire-resistant material, such as slate, and then covered with soil for thermal insulation. At the other end of the trench, on a raised platform, a small smokehouse is built from stone or bricks. Hooks and holders for smoking products are equipped here. A grate is installed below the exit from the chimney in the smokehouse, on which moistened burlap must be placed during the manufacturing process. You also need holders for pallets so that there is somewhere for grease to drain from the pallets. The smokehouse is built in the form of a small house made of wood or brick. Think about the style of this building in advance so that it looks elegant and matches the style of other buildings and landscape design.
Rules for safe use
To protect yourself and family members from burns and other troubles, you should follow the following precautions:
- use oven mitts or gloves to avoid burns, as the structure heats up during cooking;
- keep installations away from children;
- check electrical appliances for serviceability if an electric heater is used;
- When placing a smokehouse with lard on an open fire, install the structure in an open area to prevent accidental fire.
By following simple rules, you can make the process of preparing smoked lard quick, easy and safe.
How to smoke lard correctly
To get the ideal taste, aroma and color, it is important to choose the right lard for smoking, prepare it, marinate it and follow the cooking technology. The final result is influenced by the duration of smoking, the choice of wood chips, and cooking conditions.
Pickling recipes
There are several methods for salting lard before placing it in the smoker.
Salting in marinade
Marinade for lard is prepared according to different recipes. Classic technology includes:
- water;
- salt;
- garlic;
- Bay leaf;
- black peppercorns;
- mustard seeds.
Proportions depend on the amount of product. The duration of marinating is 48 hours.
Quick Ambassador
You can salt lard 12 hours before smoking. You will need to rub the prepared pieces with the mixture:
- garlic;
- salt;
- ground pepper.
It is possible to add seasonings to taste. The lard is laid in layers, sprinkled with salt and sent to the refrigerator under pressure.
Dry salting
Dry salting is similar in technology to quick salting. Use salt and other spices as desired.
The pieces are rolled into them and placed under pressure in a cold place. The duration of marinating varies. Dry salting lasts a week.
Features of smoking technology
When preparing delicacies, follow a few important rules:
- smoke in dry, windless weather
- Check the smoke temperature regularly
- prepare food in the evening and start the process the next day
- add cherries and junipers to the firewood, which give a unique aroma
- use a tray to catch the evaporated fat
Traditionally, fish is smoked, especially those caught in nearby bodies of water. But you can also cook store-bought products: chicken, ham, breast, pork belly, lard, beef. The main point when smoking chicken is marinating. The chicken needs to be washed and cleaned of excess fat, and then make a cut and place cloves of garlic there, rub with spices and salt and leave to marinate for a day.
Preparation of lard. Cut into pieces no larger than 6 centimeters. Rub with a mixture of salt, dill, bay leaf and pepper. Place the strips in a marinating bowl, placing garlic cloves between them . Cover the top and press down with a weight. After three days, remove salt and dry on hooks . The chicken can then be subjected to the smoking process. Approximate cold cooking time is 36 hours.
Advice. If you want to speed up the smoking process, experts recommend pre-boiling meat and lard with spices or salt.
An excellent dish is homemade sausages. They can be pre-boiled or smoked immediately after filling. Don't forget to add enough spices and cook with sufficiently fatty meat. To prepare smoked pork, make a brine from water, salt, black pepper and bay leaf. The meat is placed in a cold marinade and kept for three to five days, depending on the temperature. Then it is stuffed with garlic and tied with spinach. During smoking, it is necessary to swap the pieces several times so that they acquire a uniform shade.
LiveInternetLiveInternet
Source https://vkysno.kiev.ua/d-recept-action-detail-rid-4523.html
Ingredients:
Half a turkey breast (1 kg), Salt, Sugar, Vegetable oil, Ground black pepper.
Method of preparation:
Place the brisket in a solution: 1.5 liters of cold water, 2 tbsp. spoons of salt and one tbsp. spoon of sugar for two hours. I dried the brisket with a napkin and pulled the mesh over it. Coated with vegetable oil (olive) and sprinkled with ground black pepper. Covered and left to marinate overnight. I poured sawdust into the pressure cooker. Installed the stand. I placed a plate on the stand to collect liquid. On a plate - on a wire rack. I placed the prepared brisket on the grill. Cover the pressure cooker with a lid and cook for 5 minutes. keep on high heat, and then another 15 on medium. After that, I turned off the stove and left it until it cooled completely. I opened the pressure cooker and had the pleasure of seeing the result. You can see that everything that dripped from the meat is in the plate. I removed the mesh from the meat. Wrapped in parchment. I put it in a cellophane bag and put it in the refrigerator for several hours.
Source https://forum.say7.info/topic61618.html
Smoking in a pressure cooker, without smoke and “dust” - and it’s possible!!!
ATTENTION!!!!!! If you decide to use your pressure cooker for smoking, remember that the smell of smoking, even after the first time, eats into it firmly. But at the same time, no soot or soot is observed inside the pressure cooker. By running your fingers along the inside walls of a pressure cooker that has just been smoked, your fingers remain absolutely clean. And I personally don’t know whether or not such a pressure cooker can then be used for its intended purpose, that is, to cook fruits, vegetables, meat, poultry, etc. in it. whether they will be smoked or not Therefore, to avoid any offense against me in the future, be sure to read this warning and weigh the pros and cons before using your pressure cooker for smoking. PS: In general, my opinion is that for the sake of such pleasure, it’s even worth buying a separate pressure cooker and using it directly for smoking. But in any case, it’s up to YOU to decide and take responsibility. _____________________________________________________________________ Hurray ___ Sensation!!!! Smoking right in the kitchen - and it's possible!!!!!!!! I experienced approximately these feelings when everything worked out for me. I have been hatching the idea of smoking in a pressure cooker or similar vessel, or rather in an apartment, for a long time. About 20 years ago, I designed a sealed stainless steel smokehouse, equipping it with a pipe directed into the hood, but due to ignorance at that time, I used birch firewood with bark and as a result, the smoked products were beautiful in appearance, but very sour in taste. Then, out of disappointment and the conviction that it was impossible to smoke at home, I had to convert that smokehouse into a country washbasin. And now, years later, namely last year, I saw on the Internet how one guy named Sasha smokes food directly in a pressure cooker, I ran to the flea market and bought there a used, working Silit pressure cooker of only 2.5 liters, which -for 50 cents or 1 euro... I made an antediluvian design for it and tried to smoke the leg, but not really knowing, as it seemed to me then that the problem was precisely in this temperature regime and cooking time, the end result was this leg very sour. Therefore, I gave up this idea again and got excited about it only a year later, that is, recently. Again, without getting tired and reluctantly, I smoked and smoked... then chicken legs, then fish, then sausages... but they were still sour. And now, in despair, I thought, why don’t I smoke it one last time using my fruit cherry firewood stored in the basement. I smoked the leg and lo and behold, it didn’t sour! What was my mistake? Whether 20 years ago or now, I smoked with not quite the right wood. Last time, as I said, I smoked with birch bark, birch bark has resins, and this time I smoked it over and over again with beech sawdust, purchased on the Internet. What’s interesting is that they are ideal for smoking in my large smokehouse; the products do not end up souring, but they are not suitable for a hermetically sealed pressure cooker... apparently they are still impregnated with something, which in the end the pressure cooker revealed a flaw. Therefore, when smoking food in a pressure cooker, you need to learn the first rule: you only need purely wild firewood, preferably from fruit trees. I myself am still at the stage of learning about this type of smoking and therefore, opening this topic, I hope that many will pick it up and together we will all master the technology and recipes for smoking in a PRESSURE COOKER. When I realized that smoking was possible, I again ran to the flea market and bought there, believe it or not... a 7-liter pressure cooker, again from Silit, for only 2 euros + I literally bought various grates, stands, etc. there for pennies. , since a plan was already born in my head on how to equip this pressure cooker for smoking. To begin with, I would like to show what my first experimental design for a 2.5 liter pressure cooker was, made quickly. Then I connected both grids
As one of the trial options for smoking small fish. The fish is gutted, but such small fish may not be gutted, but under no circumstances should the scales be cleaned. The fish is then washed, salted, peppered, + different spices to taste, then covered with film and in the refrigerator for a couple of hours, then washed once, blotted with a paper towel and smoked in a pressure cooker for 15 to 25 minutes over medium heat 3. I trimmed the fish heads and tails because the whole thing did not fit into the small pressure cooker. And there is no need to do this at all. That's how golden it is, and that's why it turns out right. Black or dark brown from soot is not right to eat, but harmful to eat.
___________________________________________________________________ ___________________________________________________________________ And here’s what I did for the newly purchased 7-liter pressure cooker. The tray for collecting fat is a regular lid for a stainless steel pan with a boiled 5 bolt to hold this lid. Made of stainless steel sheet 08 mm. I made this simple stand for this lid with screwed plates and hooks on it, thanks to which I can put food in the pressure cooker in 2 or 3 rows, depending on the food itself. I can also either lay them lying down or hang them up. I also made various stands for the convenience of smoking with them and in them both different poultry and meat, pork ham or brisket, or fish. As you understand, first firewood or sawdust is poured onto the bottom of the pressure cooker, a stand is placed on them, and a grate is placed on the stand. The first chicken we tested was both beautiful and incredibly tasty, but its skin was dry and tough. Then, for the sake of testing, I smoked a chicken, but this time I tied two pieces of brisket under the top grill with sausage string, as I call it. As a result, during smoking, the fat from the brisket dripped onto the chicken and in the end it was all beautiful, both meat and skin. The brisket was also incredible. Wet brining for poultry and meat I believe that this brining is the best and most reliable. With it, the products are salted evenly and in moderation, and as a result they become juicy and soft. For example, even white chicken meat is very juicy and tasty. This is my personal, many times tested brine for meat and poultry, followed by smoking. I measure all the ingredients, salt + sugar + spices, mix them together, and then just add them to boiling water. For 1 liter of boiling water you need 3 tbsp. spoons (full with a slide) salt, 1 tbsp. spoon (full with a slide) of sugar, spices: Spices can be added selectively, whatever you have. I add: whole black peppercorns and ground, a couple of allspice, bay leaves, whole coriander grains, dry or crushed fresh garlic, you can do both. a couple of clove stars, and preferably 7-10 dry juniper berries. So you need to measure out the water (I usually take exactly 2 liters of water, this is enough for 1 chicken and 1 kg of brisket)…. boil it, add salt, sugar and spices, stir and immediately turn off the stove, be sure to cover the pan with a lid until the brine cools completely. When the brine has cooled, either strain it, since it has steeped and the spices have already more than given up their aromas, or leave it as is, without straining. As you wish. Immerse the meat or poultry in the chilled brine, be sure to put a light pressure on it, in the form of a plate + weight, if there are not enough plates ((((this is done so that the product is necessarily immersed in the brine, close the pan with a lid and keep it in the refrigerator without less than 2 days ... up to 1 month I defrost the chicken, rinse it under running cold water, dip it in paper towels, place it on a stand or hang it on a hook to drain,
And this is in 3 days
I leave the chicken to drain and dry for a couple of hours.
Either that.
We throw a little firewood at the bottom of the pressure cooker, just a couple of pieces. This is quite enough.
I place the chicken in a structure on the grill. The smoked product must not come into contact with the bottom of the container to allow fat to drain off.
I close the pressure cooker and turn on the electric stove to medium heat, this is number 3 for me, out of 9 possible. This is how the chicken is smoked until fully cooked for 1.5 hours.
After the time has elapsed, it is better to leave the pressure cooker to cool for a while, but you can open it right away if you are impatient. There is no pressure there, so it’s not scary to do it. The downside is that the smoke in the pressure cooker will still be active and you risk releasing it into the apartment unnecessarily. So if you want to open it right away, it is advisable to do it on the balcony.
Here it is, smoked chicken in a pressure cooker from all angles. I smoked the brisket and chicken for 2 hours and 10 minutes at number 3.
I smoked the fish. I set it to 4 and left it for 30 minutes. But it was necessary to put it on 3.
This is how much wood burns to cook one 1,200 kg chicken. Notice how clean and dry the pressure cooker is after smoking, absolutely free of soot and grease
Preparing firewood for smoking This is how I prepare firewood for smoking. To do this, you need to take a walk in the nearest park, away from highways, and find fruit trees there, in my case these are cherries and apple trees; there are always small branches lying under them, so there is no need to break or saw trees. After a strong storm, there are usually a lot of them lying around. And if you are lucky and run into spring and autumn tree trimmers, then you are completely lucky. So what do I do. I screw a small vice to the table, clamp a twig in it and saw with a nail file into 2-3 cm pieces. Then I take a knife and a hammer and chop it into pieces of firewood 5-8 mm thick. That's all the arithmetic is. Then I identify the firewood using paper food bags and dry it for some time on a hot radiator. Firewood for this type of smoking should only be used dry, otherwise excess soot will stain the pressure cooker and the product. Moreover, there is enough moisture in it during smoking, thanks to the product.
As is clear, I am still improving the convenience of smoking and therefore I found a suitable wooden box + a small knife on the farm and now chop firewood directly in it. They hardly ever pop out of the box.
And now about the main thing. Everyone is probably interested in two main questions: 1. Where can I get a pressure cooker for smoking and is it possible to combine smoking and cooking other products in it? 2. Are there smoke and odors in the apartment with this kind of smoking? I’ll answer the first question this way: As you can see, I can buy a ball pressure cooker for pennies, which is what I did. When smoking in a pressure cooker, its cleanliness from the inside is guaranteed, no soot or soot, BUT, after the first smoking, the pressure cooker is completely saturated with the smell of smoking, which may be an obstacle to cooking other products in it. Or maybe not, I haven’t experienced it. I have other pressure cookers for cooking other foods. Therefore, to avoid any excesses with you in the future, I will place a warning in the header of this topic. As for the second question, I will say this: as the stove heats up and the sawdust smolders, after 45 minutes a slight pleasant smell begins to be smelled in the apartment, a smell, BUT NOT SMOKE! bonfire, summer, forest, picnic, fireplace, more like feng shui incense. In a word, this smell creates the illusion of warmth, summer, a burning live fireplace... beauty and blunder in a word, no fear or inconvenience. As a result, after smoking, this smell soon disappears. As for the taste of smoked products in a pressure cooker, they are amazing, I admit that even better than those that I smoke on the street. But in terms of shelf life they are less durable. It is advisable not to smoke a lot of them at one time if you cannot eat them in 1, maximum 2 days. Or you can freeze the excess immediately. That's all for now. So I'm waiting for questions, and most importantly, recipes. As you understand, I am not able to experiment with all the products myself, so I am waiting for your participation. Together, it is more convenient and more fun to master SMOKING in a PRESSURE COOKER. [/td]
More links - https://www.povarenok.ru/recipes/show/58667/ -chicken
https://www.povarenok.ru/recipes/show/58624/ - fish
Fuel selection
It is extremely important to use the exact tree species that produce aromatic smoke. Cooking fuel is mixed with cherry leaves and juniper branches. Using several types of wood, you can give the dish an original flavor . Wet wood is used to produce the best smoke.
Advice. Never use softwood for smoking. They are saturated with resins, which when burned give food a bitter taste.
Your smoker is working properly if you can see the smoke product through the smoke. Do not fan the fire in the smokehouse. Firewood should smolder, but not burn. To do this, sawdust is poured on top of the logs.
After smoking, it is advisable to leave the fish to hang for two to three days without smoke. It will wilt and become even more appetizing. If ash gets on the fish, wipe the product with a cloth soaked in olive oil. This will give it a bronze tint. It depends only on preferences what kind of fish to smoke. Whatever you prefer - tench, sabrefish or crucian carp from the nearest pond, the result will meet all your expectations. The food will be saturated with smoke, maintaining its density. The prepared dish will not fall apart when cut.
Electric smokehouse test
I hung the salted lard on hooks (photo 4), placed sawn maple logs on the box with heating elements, covered it with sawdust and turned on the heater. After about 30 min. there was smoke. After 4 hours, the heater was turned off and waited the same amount of time. I checked the finished product - it turned out to be a very tasty and fragrant dish, which means the smokehouse is working. Bon appetit, gentlemen!
Link on topic: Do-it-yourself electric smokehouse - drawings, photo manufacturing instructions.