Dip in dye and water
One of the easiest ways to dye a different color is to dip the plant in dye and water. To do this we need the following:
- chrysanthemums;
- food coloring;
- plastic spoon;
- glass beaker;
- sharp knife or garden shears;
- warm filtered water.
It is best to use liquid dye, but keep in mind that these are not always available in stores.
Now let's proceed directly to coloring:
- Fill glass glasses about 2/3 full with warm filtered water.
- Then pour food coloring into them and mix thoroughly until completely dissolved using a plastic spoon.
- Next, you need to prepare the flowers by removing absolutely all the leaves from their stems. This must be done so that the leaves do not absorb excess moisture along with the dye. If this is not done, the coloring result will not be bright enough or will be absent altogether.
- Take a sharp knife or good scissors and carefully trim the stems at the bottom at a 45-degree angle. It is at this angle that water will be constantly supplied to the stem, which, in turn, will significantly shorten the dyeing period.
- Place the plants in the glass with the dye. Please note that if you plan to paint flowers of different types, they must be placed in separate containers, since each type of plant consumes water at different rates.
- As a rule, coloring flowers lasts from 20 to 24 hours. Experienced flower growers know how, under the right conditions and with special dyes, to achieve coloring results in a few hours, but this experience cannot be repeated at home.
- After the allotted time, carefully remove the flowers from the glasses and rinse them under running water.
If you need to speed up the dyeing process as much as possible, make the stems as short as possible.
Also, using dye and glasses, you can color chrysanthemums in several shades at once. This method is very simple. First, instead of just one glass of dye, you will need to prepare several. For example, four glasses with blue, pink, green and yellow colors. Secondly, it will be necessary to prepare the stems differently.
To achieve multi-colored coloring, you will need to split the stem at the bottom into several equal parts. For example, use 4 colors. To do this, the stem must be split into 4 parts. Then each part should be placed in a separate glass with its own color of dye and the flower should be left for 20-24 hours. This simple method will help you get an amazing color in the form of a gradient or even a “seven-colored flower.”
How to make a chrysanthemum from corrugated paper
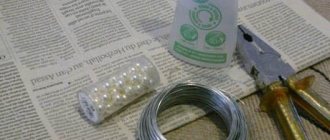
It is easier to make chrysanthemums using crepe paper, and needle chrysanthemums are best suited for this process. Before creating a beautiful flower, you need to prepare all the necessary tools, such as paper of different colors, scissors and glue. Threads or wire are suitable for attaching the petals.
So, first you need to prepare a piece of paper measuring 5 by 11 or 7 by 13 cm in order to make stamens with it. The leaf needs to be bent in half twice, cuts must be made with scissors, not reaching the end of the leaf 2-3 cm. The stamen blank must be glued to the wire using a glue gun, and this way you will get a fluffy tip on the wire.
The next step is to create leaves (and they are needle-shaped), for this you will need paper of a different color, the width of the strip should be at least 6 cm. Not reaching 2 cm from the end of the paper, you need to make cuts with scissors along the entire perimeter of the paper to get needle-shaped leaves. The width of each cut should be about 0.5 cm.
To make one flower with needle-like leaves, you will need three such strips, the cuts of which must be the same size.
In order for each needle-shaped leaf to keep its shape, you first need to twist all the smallest leaves, and then do the same with all the other chrysanthemum leaves. The needle blanks should be several millimeters (3-4) longer than the yellow bud, and when three strips are cut, you can begin to create a flower. Needle-shaped leaves are glued onto the yellow bud and wrapped around the wire until the entire tape is glued. And you need to do this with all the strips of paper.
Ink injection
Another way to color flowers is through dye injections. Even experts resort to this method quite rarely, because it is extremely destructive for plants. But if you need to change the color of chrysanthemum petals in the shortest possible time, then this method is most suitable.
To carry out staining you will need:
- chrysanthemums;
- syringe;
- food coloring;
- warm filtered water.
Dyeing fresh flowers by injection causes irreparable harm and is absolutely not suitable for indoor or garden plants. This happens as follows:
- First you need to prepare the chrysanthemums. The introduced dye will spread not only to the petals, but also to the stems and leaves. To make the color of the petals more saturated, the leaves must be completely cut off.
- Food coloring should be poured into warm filtered water and stirred thoroughly until completely dissolved. Then you need to draw the dye into the syringe.
- Carefully insert the needle into the stem at the base of the peduncle and squeeze the contents of the syringe into the flower.
- After 4-6 hours, the plant will begin to acquire the shade you have chosen. First of all, the thick veins will change color, and after another couple of hours you will receive a chrysanthemum with a new bright color.
With this method you can also experiment with introducing several shades into the stem. The result can be an unusually beautiful flower with a beautiful and vibrant gradient.
DIY kanzashi flowers: beautiful chrysanthemum
It’s incredibly nice to give a gift to yourself or your loved ones with your own hands: it will keep your hands warm and bring a lot of positive emotions.
Kanzashi jewelry made from satin ribbons is becoming increasingly popular. This kanzashi master class will help you create a spectacular chrysanthemum with your own hands in just one day.
For chrysanthemum we need:
- Satin ribbon 5 cm wide (any 5 shades, mine - from creamy pink to dark red)
- A little tape 1 cm wide
- Felt
- Hair tie
- Needle and thread
- Strazinka
- Scissors
- Tweezers (optional)
- Glue (hot glue or Moment Crystal will do)
- Candle or lighter
- We cut the ribbons into squares: 6 squares from cream-pink ribbon, 18 squares from dark pink ribbon and 12 squares from ribbons of the remaining three colors. Now everything is ready to make double sharp kanzashi petals - the whole flower will consist of them.
- Fold the ribbon square in half diagonally.
- Fold it in half again.
- Take another square - light pink. Bend it in half diagonally.
- We bend it again.
- Fold both pieces so that the light pink one is on top.
7. Bend in half.
8. Cut off the corner of the petal.
9. Now the petal needs to be melted at the cut point, thereby fastening all the layers of tape.
When making kanzashi petals with your own hands, it is better to use a candle to fix them: striking with a lighter will tire your hands more.
10. Now we cut off the petal a little “from below”, giving it a flatter shape.
11. Melt the cut edge over the candle.
12. Double sharp petal is ready! We will need 5 more exactly the same petals.
13. And also 6 of these (light pink ribbon on the outside, hot pink on the inside).
14. Plus 6 of these (hot pink on the outside, dark pink on the inside).
15. And 12 of these (dark pink on the outside, red on the inside).
16. As you noticed, from the light center the colors smoothly move to the rich dark edge.
17. Take a needle and thread and alternately string 2 types of light petals (there should be 12 of them on the thread). Tie the thread tightly into a knot and cut off the free edge of the thread, leaving approximately 5 mm.
18. This is what kanzashi flowers should look like from the inside out.
19. Now we lift those petals that are lighter, and press those that are darker down. It turns out that the flower consists of two levels.
20. Take even darker petals and glue them between the petals of the lower level.
21. The next row consists of the darkest petals - we glue them in pairs between the petals of the previous row.
22. Glue the rhinestone into the middle and the chrysanthemum is ready. All that remains is to prepare the basis for it.
23. To do this, cut out a circle from white felt, smaller in diameter than the resulting flower. In the center of this circle we make a cut (about 1 cm).
24. We thread a piece of measuring tape into this hole.
25. Place an elastic band under the ribbon.
26. Wrap the free edge of the ribbon around the elastic and thread it into the hole in the felt.
27. Glue both edges of the tape to the felt.
28. Generously grease the felt base with glue and apply the finished flower. It is important to carefully ensure that the petals are positioned evenly relative to the base and each other.
29. Gorgeous kanzashi chrysanthemum is ready!
If you have not seen kanzashi flowers before, a master class on making chrysanthemums opened up to you the fascinating and vibrant world of Japanese jewelry.
You will be interested in: “How to make kanzashi flowers from a narrow ribbon: 2 master classes!”
SHARE! "Cross" will not give bad advice! 
Suitable materials
Almost any flowers can be dried. But each type of plant requires certain conditions. Some dry well in air, others require sand, and others can only be preserved under pressure. One thing remains unchanged: only fresh flowers can be dried. If the bouquet has been standing in water for several days, then nothing will work. The buds will simply fade, losing their attractiveness.
You need to collect flowers for drying in dry weather. It is better to do this after 11 o’clock in the afternoon, when the dew has completely dried and the buds have time to open. For future dry bouquets, it is necessary to choose plants without defects, such as dry tips, spots on the petals and leaves. Flowers should be open and not fading.
Read also: Play areas design in the garden
If you want to save a bouquet purchased in a flower pavilion, then you should begin this process immediately after purchase. After all, these flowers have already traveled quite a long way from the nursery where they were grown to the buyer.
Paper chrysanthemums
You probably know that the unofficial coat of arms of Japan is the chrysanthemum, but few have heard that this flower is depicted on the imperial seal, that the Order of the Chrysanthemum is the most prestigious, highest state award in this country and that the Chrysanthemum Throne is the name of the Japanese throne, which is used by European rulers . A paper chrysanthemum is probably unlikely to look like something imperial, but it will be an excellent element for a postcard or gift wrapping.
How to make a chrysanthemum from paper - master class from Abbikirstencollections
Corrugation of petals
All petals are corrugated with one tool - a double knife
.
Take petal “a” by the sharp tip with the feathers facing you. Using a motion from the edge to the center, move the tool along each petal. These petals should curl as steeply as possible. Therefore, when corrugating, slightly pull the pattern by the tip.
Petals “b” and “c” are processed in the same way, namely: on the front side, first corrugate 1, 3, and 5 feathers moving from the edge to the center. Turn the pattern over to the wrong side and also pleat 2 and 4 feathers.
Process the petals “g” in the same way as the previous ones, with the only difference being that the movement of the tool must be done from the edge to the center and back, slightly pulling at the tip. All feathers of the petals “g” should have an elongated shape with a curved end. With this treatment, the chrysanthemum will have a flatter appearance and will look good on a suit.
If you want to make a flower in a vase, treat all petals “b”, “c” and “d” the same way. The chrysanthemum will turn out like a natural one - in the form of a ball. When corrugating the petals, arrange them strictly according to size so that there are no difficulties with assembly.
Model making
Any thin fabric is suitable for making chrysanthemums. The middle of the flower should be shaded.
To make a flower you will need:
(template for petals)
10 petals “a” 10 petals “b” 15 petals “c” 15 petals “d” 2-3 leaves.
Cut out the required number of petals from thin white gelatinized fabric. Dilute pink paint in the first saucer. Pour some of the paint into a second saucer and dilute with water 1:2. Pour some of the paint from the second saucer and dilute it in the same way in a ratio of 1:2. As a result, you will get three shades of pink of different intensities.
Dip petals “a” in a dark pink tone, petals “b” and half of the petals “c” in a tone of medium intensity, paint the remaining petals “c” and all petals “d” in a pale pink tone. Dry them on a soft paper napkin. Make a hole in each piece with an awl.